

Due to popular demand, today I am bringing you a comprehensive EVE guide, including EVE software sharing, EVE installation configuration, etc.
- What is EVE-NG
- Download EVE-NG
- Install EVE-NG
- 1. Import EVE-NG System
- 2. Configure EVE-NG Resources
- 3. Initialize EVE-NG
- 4. Web Login EVE-NG
- 5. Basic Operations in EVE-NG
- Dynamips Import Process
- EVE-NG Associated with SecureCRT, VNC, Wireshark
- Add a Virtual Physical Network Card to EVE-NG (Regardless of the type of NIC, methods are similar)
What is EVE-NG: Emulated Virtual Environment?
EVE-NG (full name Emulated Virtual Environment - NextGeneration), the new version 2.0 following Unetlab 1.0, changed its name from UnifiedNetworking Lab. The author believes this name change is very appropriate, as this emulator not only simulates network devices but can also run virtual machines. Theoretically, as long as a virtual machine’s virtual disk format can be converted to qcow2, it can run on EVE-NG. Therefore, EVE-NG can be considered as an emulated virtual environment.
EVE-NG was developed by international experts, integrating dynamips, IOL, KVM. It is a deeply customized Ubuntu operating system that can be directly installed on x86 architecture physical hosts. It also has an OVA version that can be imported into VMware and other virtual machine software to run.
EVE-NG has an advantage in interaction mode, which is completely different from GNS3. GNS3 is more like user-oriented software that only supports specific OS, whereas EVE-NG is more like a CS model where EVE-NG serves as the server, and any OS that supports http/https can be the client.
Official website: www.eve-ng.net, the latest version of EVE-NG is 71.4
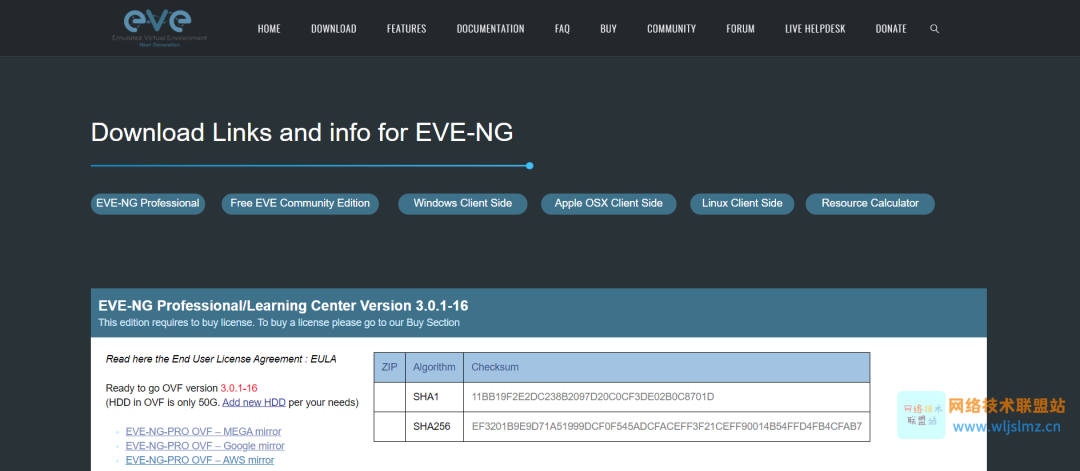
Download Emulated Virtual Environment (EVE-NG)
The official website provides a download link:
https://www.eve-ng.net/index.php/download/
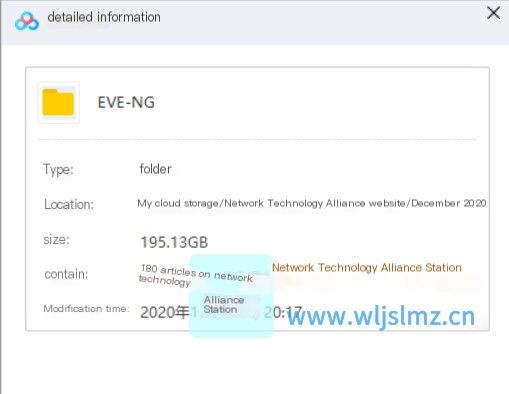
It seems that downloading from the official website is very slow, and Rui has also provided a complete, even more comprehensive set than the official one:
The download method is at the end of the article!!!
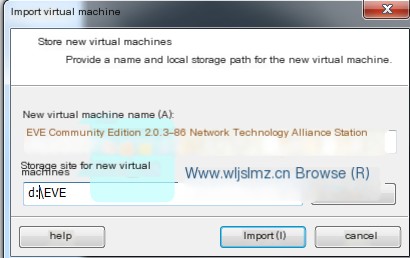
Install Emulated Virtual Environment (EVE-NG)
1. Import Emulated Virtual Environment System
2. Configure Resources in the Emulated Virtual Environment (EVE-NG)
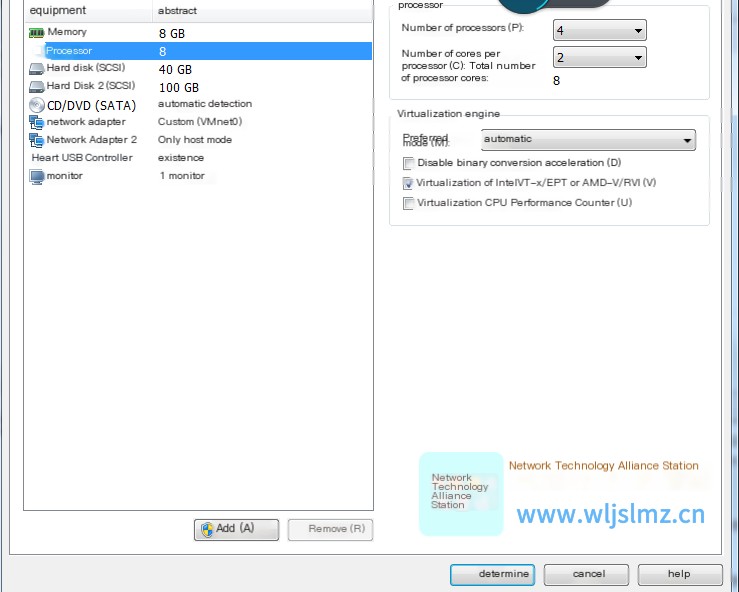
After importing, the default resources of the virtual machine are as follows:
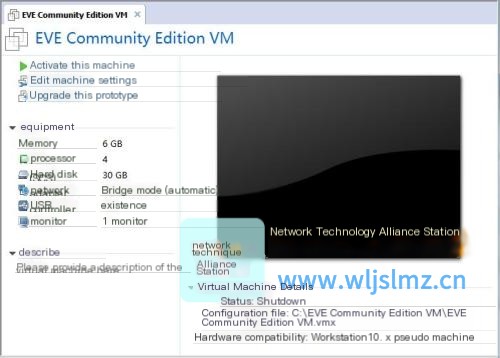
Of course, if your machine has enough resources, you can increase memory, CPU, hard disk, etc.
- Memory
- CPU
- KVM allows CPU overcommitment, meaning the total number of virtual CPUs can exceed the total number of physical CPUs, e.g., with 4 CPUs, you can create 8, or even 16 KVM vCPUs. The specific limit ratio of physical CPU to vCPU depends on the single-thread performance of the physical CPU. If single-thread performance is too weak, it will be limited.
- Hard Disk The size of the hard disk determines how many KVM virtual machine images can be stored
- Network Adapter
Enable CPU virtualization, similar to enabling it in BIOS
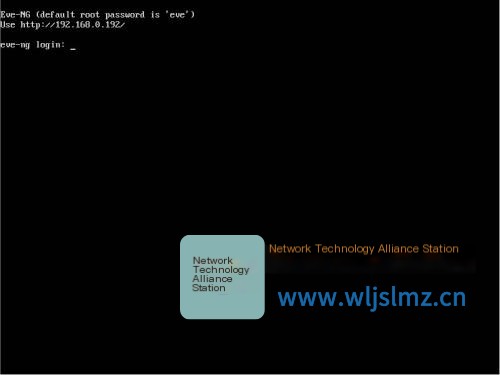
3. Initialize EVE-NG
Start the virtual machine, boot screen
Default user: username: root password: eve
4. Web Login EVE-NG
Enter username and password: default account (Web login account)
Username: admin
Password: eve
First choose html5 console to log in, this method does not require installing VNC, Putty, etc., for now, to familiarize with the system, keep it simple.
5. Basic Operations in EVE-NG
Return to the Main menu, create a new Folder, create a new lab case
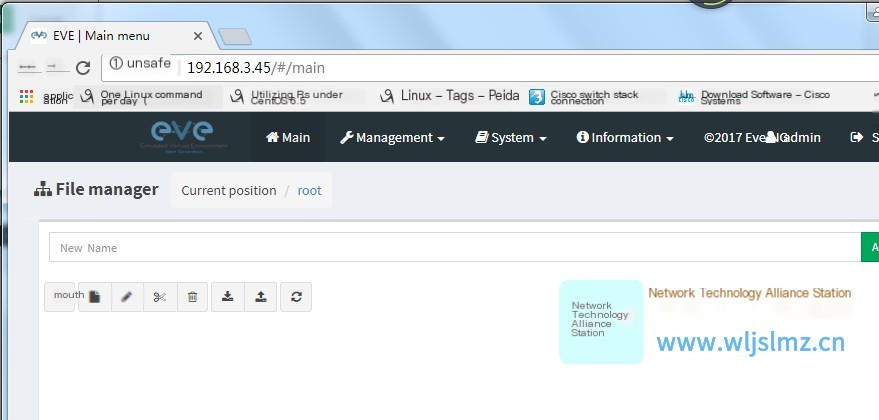
Open the CCNA folder and create a CCNA01 lab case
Dynamips Import Process
Image storage directory:
/opt/unetlab/addons
- /dynamips Dynamips image storage directory
- /iol IOL image storage directory (images running IOU)
- /qemu QEMU images (images running ASAv, ISE, F5, etc.)
The image download link is already packaged in the materials shared by Rui.
Then, after completing the download and extracting, use tftp and other file transfer tools to transfer to the /opt/unetlab/addons/dynamips directory.
Log into EVE via SSH and run the following command:
/opt/unetlab/wrappers/unl_wrapper -a fixpermissions
Import IOL Images
The image download link is already packaged in the materials shared by Rui.
Then, after completing the download and extracting, transfer via tftp to the /opt/unetlab/addons/iol directory.
Log into EVE via SSH and run the following command:
/opt/unetlab/wrappers/unl_wrapper -a fixpermissions
Generate and write license
First Method: Command Auto Generation
root@eve-ng:/opt/unetlab/addons/iol/bin# python CiscoIOUKeygen.py |grep -A 1 'license' >iourc
root@eve-ng:/opt/unetlab/addons/iol/bin# cat iourc
[license]
eve-ng = 972f30267ef51616;
Install VIM (Ensure EVE is Networked)
apt-get update

apt-get install vim
Import QEMU Images
The image download link is already packaged in the materials shared by Rui.
The storage location for QEMU images is /opt/unetlab/addons/qemu/
Log into EVE via SSH and run the following command:
/opt/unetlab/wrappers/unl_wrapper -a fixpermissions
EVE-NG Associated with SecureCRT, VNC, Wireshark
Install the EVE-NG-Win-Client_Pack.exe package
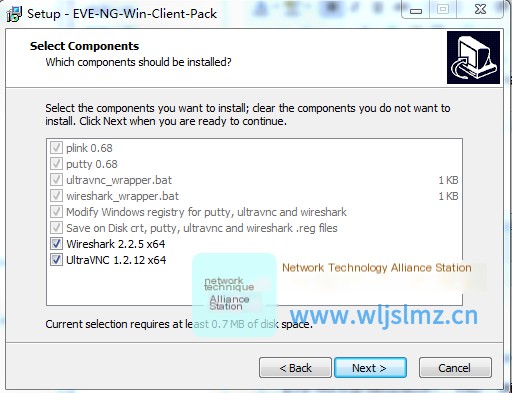
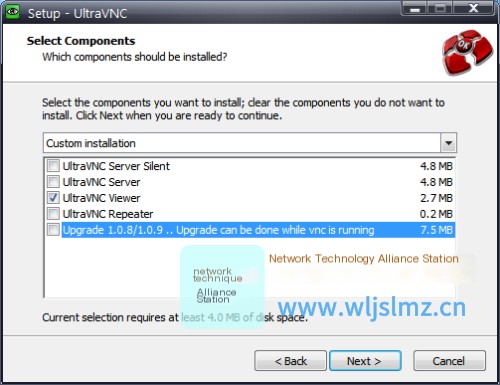
For VNC, installing only the viewer is sufficient
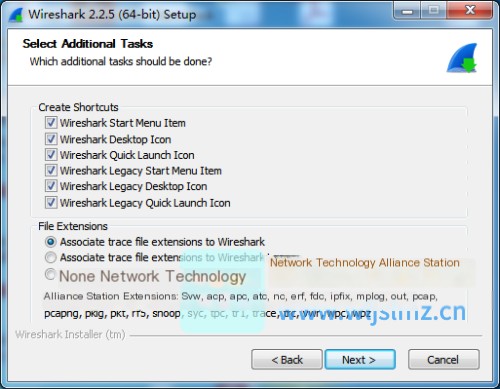
For Wireshark installation, it’s recommended to select all options, as this software will not only be used in EVE-NG but also during work and study, so I selected all. The default installation is also possible!
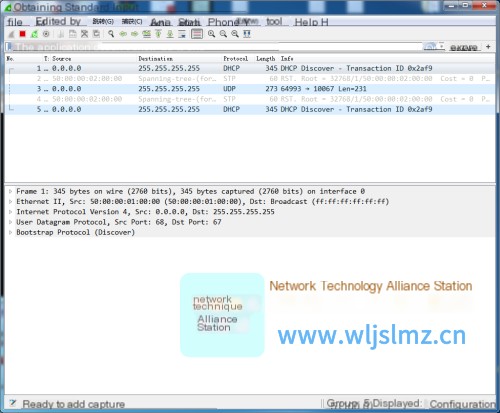
Wireshark packet capture
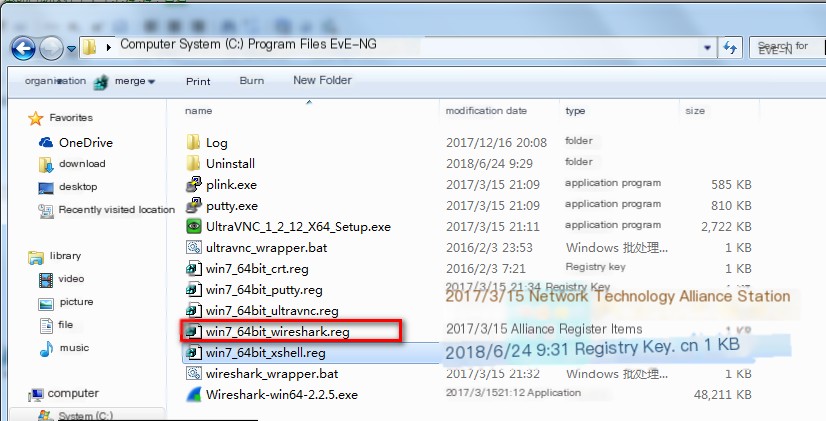
Double-click to import win7_64bit_wireshark.reg
Right-click on the device, move to Capture, then move to Interface, and click the appropriate interface (click whichever you want to capture)
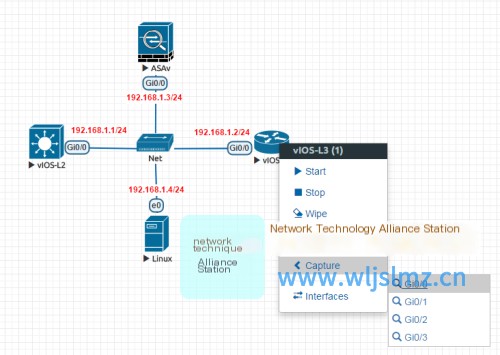
At this point, Wireshark will start, and a cmd window will pop up, input y and press enter
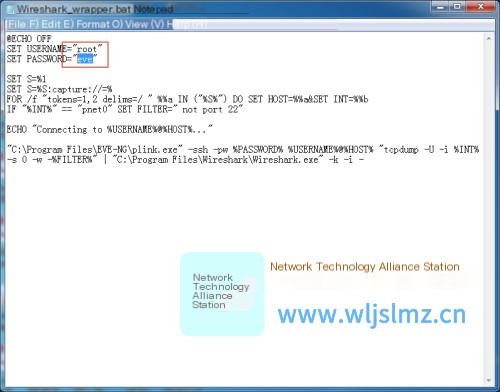
If during EVE-NG installation, you changed the password from ‘eve’, an ‘access denied’ prompt will appear, indicating improper account configuration.
Right-click and edit the C:\Program Files\EVE-NG\wireshark_wrapper.bat file, altering your username and password
Close all previously opened Wireshark windows and cmd windows. Try opening the interface capture again to see the data packets
Note: Do not close the cmd window, closing it will stop capturing packets
Change the default tool for telnet to xshell
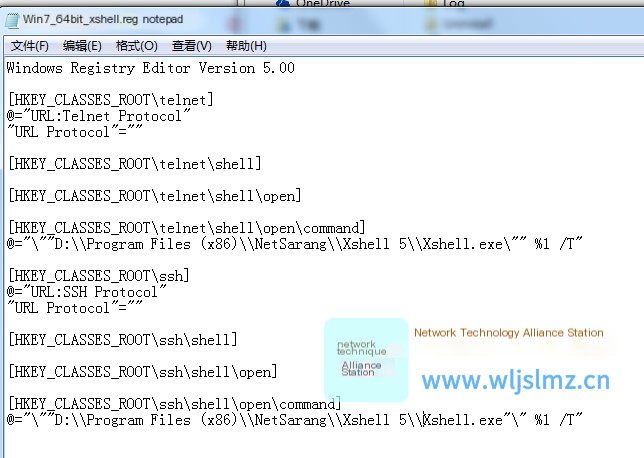
Select “Yes” to import the registry
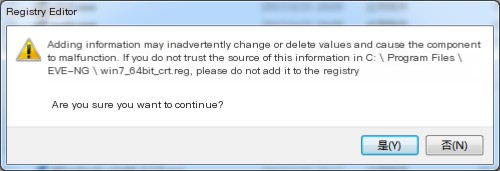
If it still cannot be used, manually modify the registry as follows
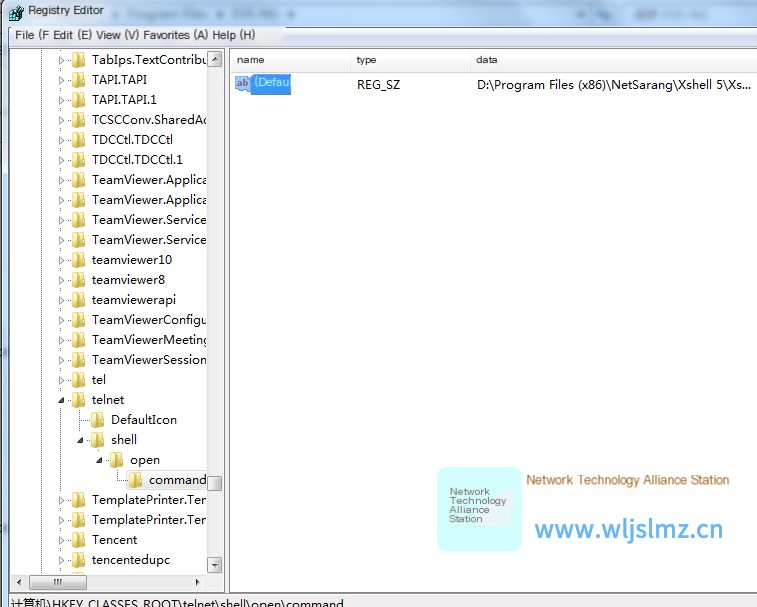
Then test again by double-clicking the icon; the following should pop up
