Deployment Process
Once all the required environment packages are downloaded, you can begin the setup process.
Environment package download link: https://download.csdn.net/download/weixin_42431775/19826391?spm=1001.2014.3001.5503
I. Installing and Configuring Snort
1. Installing Snort
This guide uses Snort version 2.8.6. The installation process is straightforward—simply click “Next” throughout the setup without any special configurations.
2. Replacing Snort Rules
Copy the doc, rules, and so_rules folders from the rule package corresponding to your Snort version into the Snort installation directory, and overwrite all files.
3. Opening the Configuration File
Navigate to the etc folder in the Snort installation directory and open snort.conf using a text editor (Notepad++ or similar is recommended, as plain text editors may not display the code properly).
4. Modifying the Configuration File
1. Locate the line containing the keyword var RULE_PATH and modify it as follows: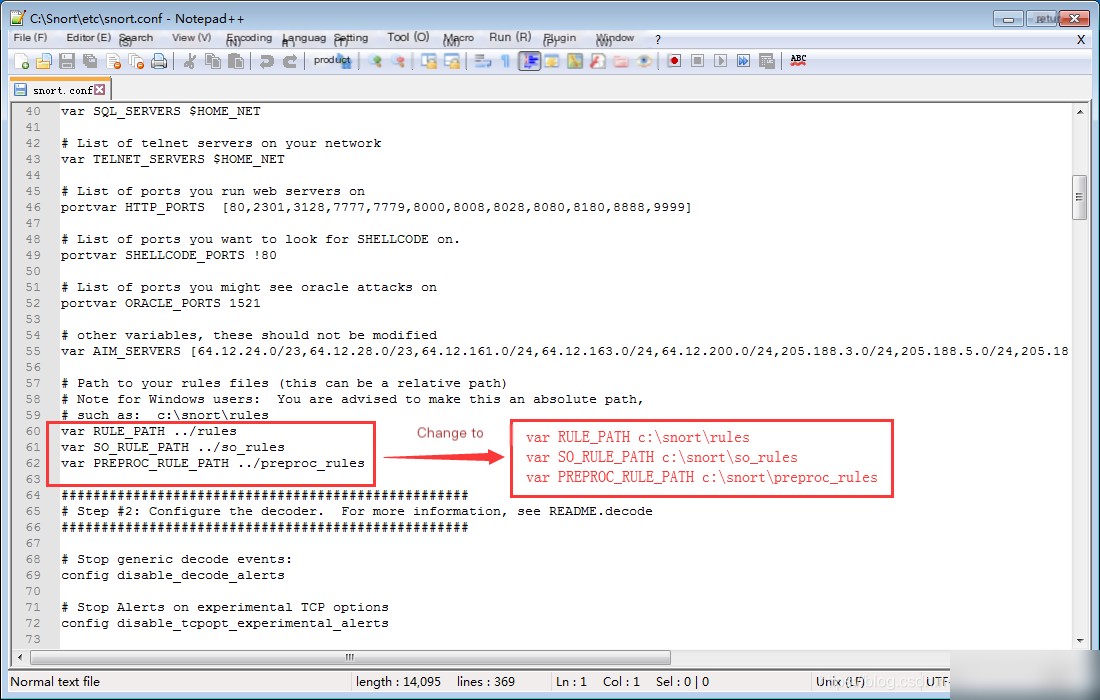
// Copy and overwrite directly
var RULE_PATH c:\snort\rules
var SO_RULE_PATH c:\snort\so_rules
var PREPROC_RULE_PATH c:\snort\preproc_rules
2. Locate the line containing the keyword # path to dynamic preprocessor and modify it as follows: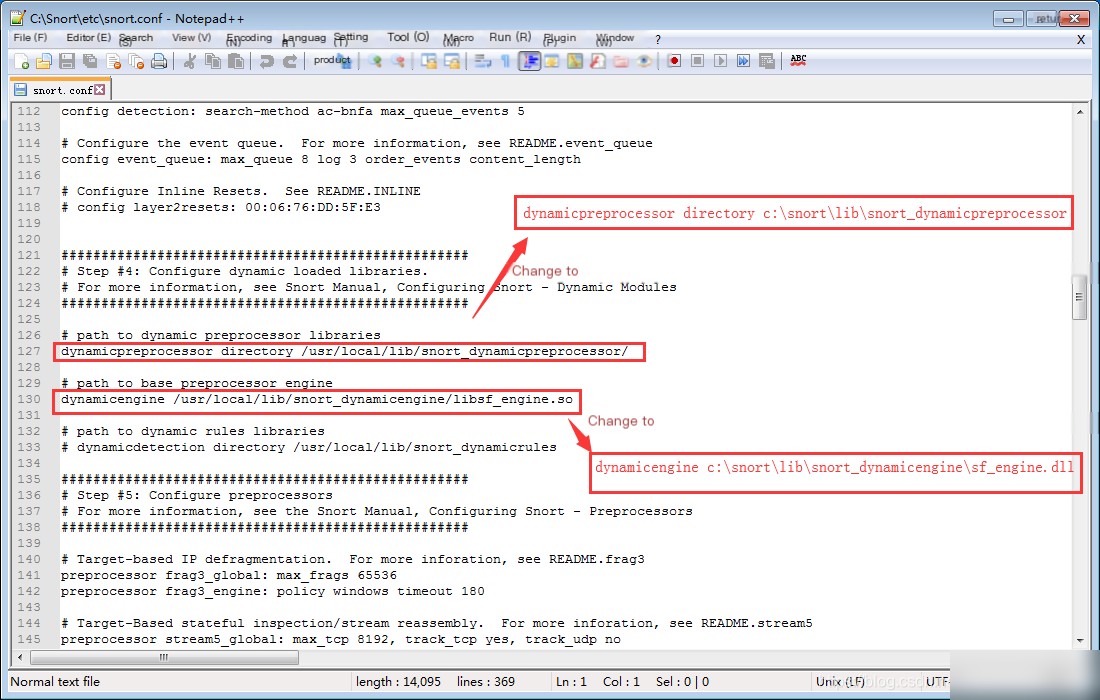
// Copy and overwrite directly
# path to dynamic preprocessor libraries
dynamicpreprocessor directory c:\snort\lib\snort_dynamicpreprocessor

# path to base preprocessor engine
dynamicengine c:\snort\lib\snort_dynamicengine\sf_engine.dll
3. Locate the line containing the keyword preprocessor http_inspect and modify it as follows: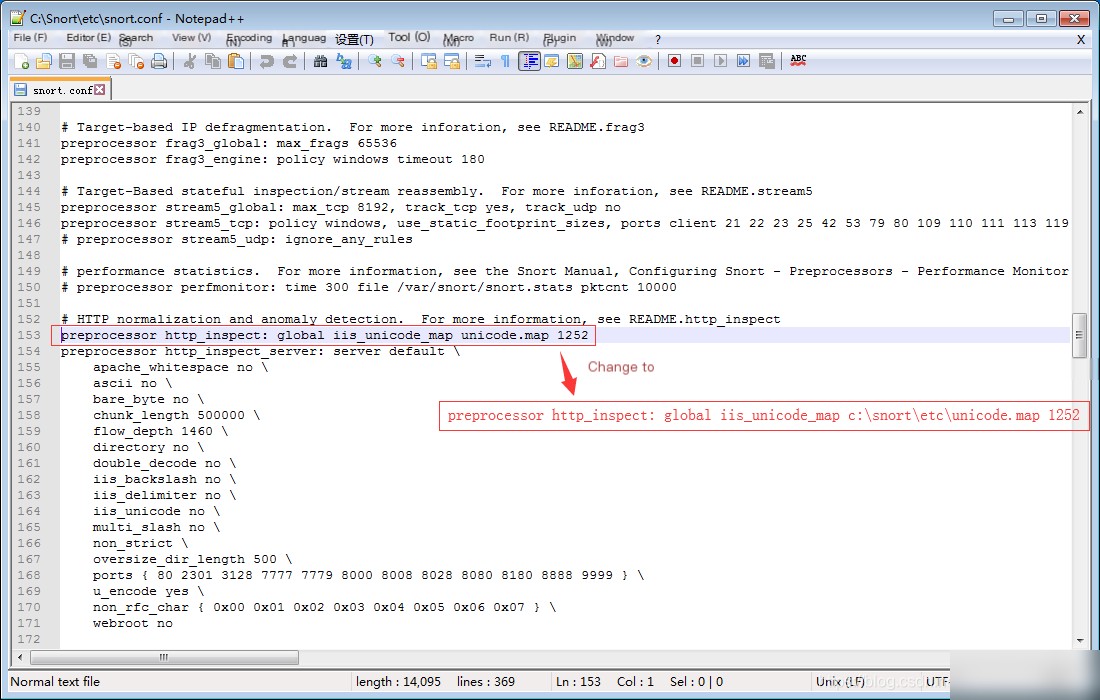
// Copy and overwrite directly
preprocessor http_inspect: global iis_unicode_map c:\snort\etc\unicode.map 1252
4. Locate the line containing the keyword output database and modify it as follows:
// Copy and overwrite directly
output database: alert, mysql, user=snort password=snort dbname=snortdb host=localhost
5. Locate the line containing the keyword # decoder and preprocessor event rules and modify the relevant lines as follows: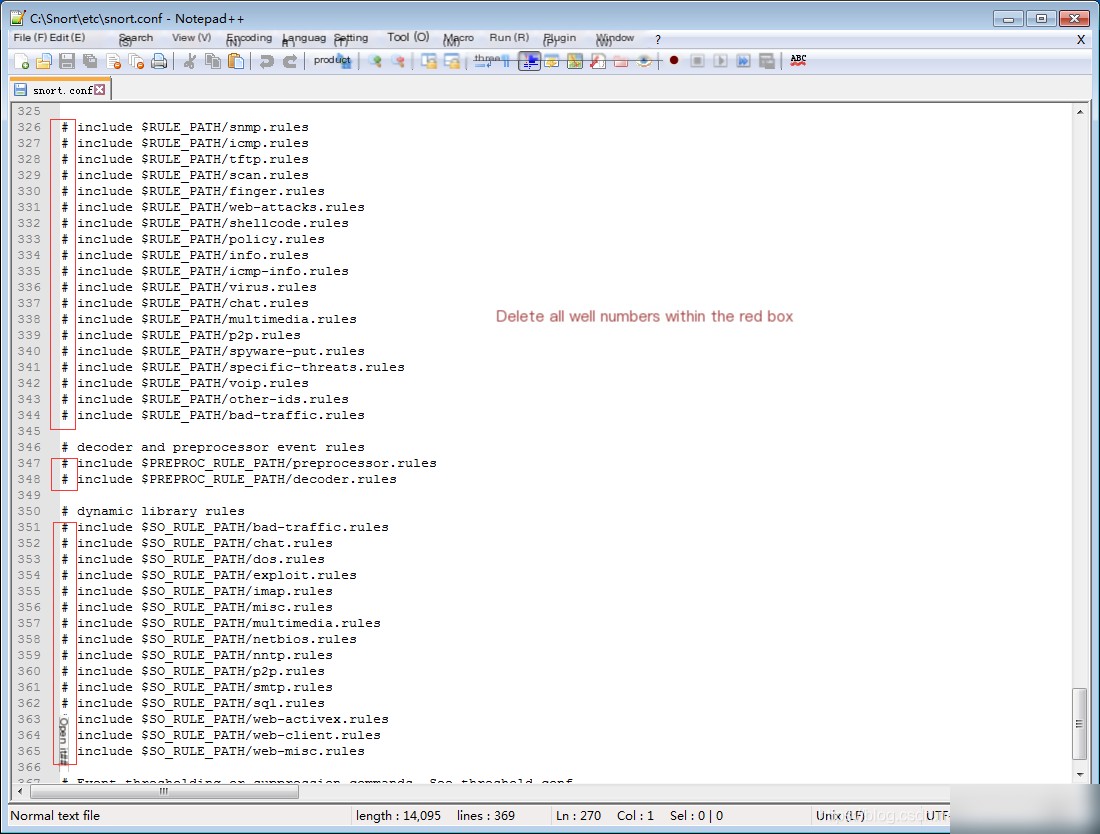
// Copy and overwrite directly. Pay attention to the range of lines being replaced!
include $RULE_PATH/snmp.rules
include $RULE_PATH/icmp.rules
include $RULE_PATH/tftp.rules
include $RULE_PATH/scan.rules
include $RULE_PATH/finger.rules
include $RULE_PATH/web-attacks.rules
include $RULE_PATH/shellcode.rules
include $RULE_PATH/policy.rules
include $RULE_PATH/info.rules
include $RULE_PATH/icmp-info.rules
include $RULE_PATH/virus.rules
include $RULE_PATH/chat.rules
include $RULE_PATH/multimedia.rules
include $RULE_PATH/p2p.rules
include $RULE_PATH/spyware-put.rules
include $RULE_PATH/specific-threats.rules
include $RULE_PATH/voip.rules
include $RULE_PATH/other-ids.rules
include $RULE_PATH/bad-traffic.rules

# decoder and preprocessor event rules
include $PREPROC_RULE_PATH/preprocessor.rules
include $PREPROC_RULE_PATH/decoder.rules

# dynamic library rules
include $SO_RULE_PATH/bad-traffic.rules
include $SO_RULE_PATH/chat.rules
include $SO_RULE_PATH/dos.rules
include $SO_RULE_PATH/exploit.rules
include $SO_RULE_PATH/imap.rules
include $SO_RULE_PATH/misc.rules
include $SO_RULE_PATH/multimedia.rules
include $SO_RULE_PATH/netbios.rules
include $SO_RULE_PATH/nntp.rules
include $SO_RULE_PATH/p2p.rules
include $SO_RULE_PATH/smtp.rules
include $SO_RULE_PATH/sql.rules
include $SO_RULE_PATH/web-activex.rules
include $SO_RULE_PATH/web-client.rules
include $SO_RULE_PATH/web-misc.rules
II. Installing and Configuring AppServ
1. Installing AppServ
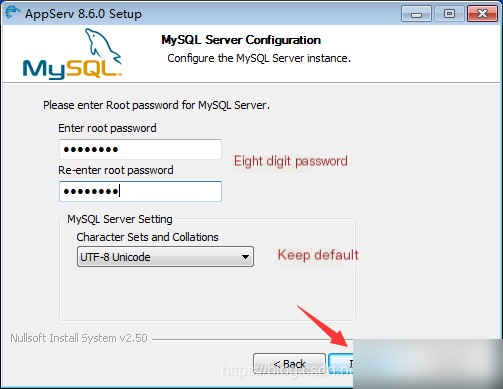
AppServ is an integrated software package that includes Apache and MySQL. Proceed with the installation by clicking “Next” throughout, as shown below: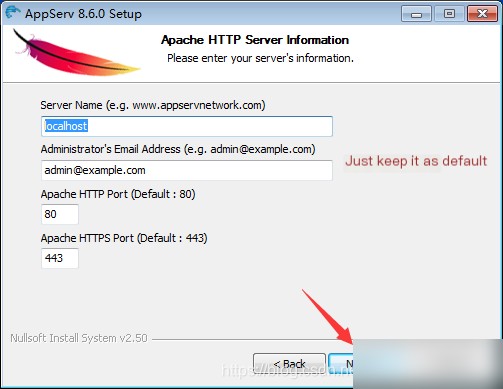
2. Verifying Apache Installation
Open a browser and enter localhost or 127.0.0.1 to verify that Apache is installed correctly. If it fails to load, check whether port 80 is occupied by IIS or whether the Apache service is running.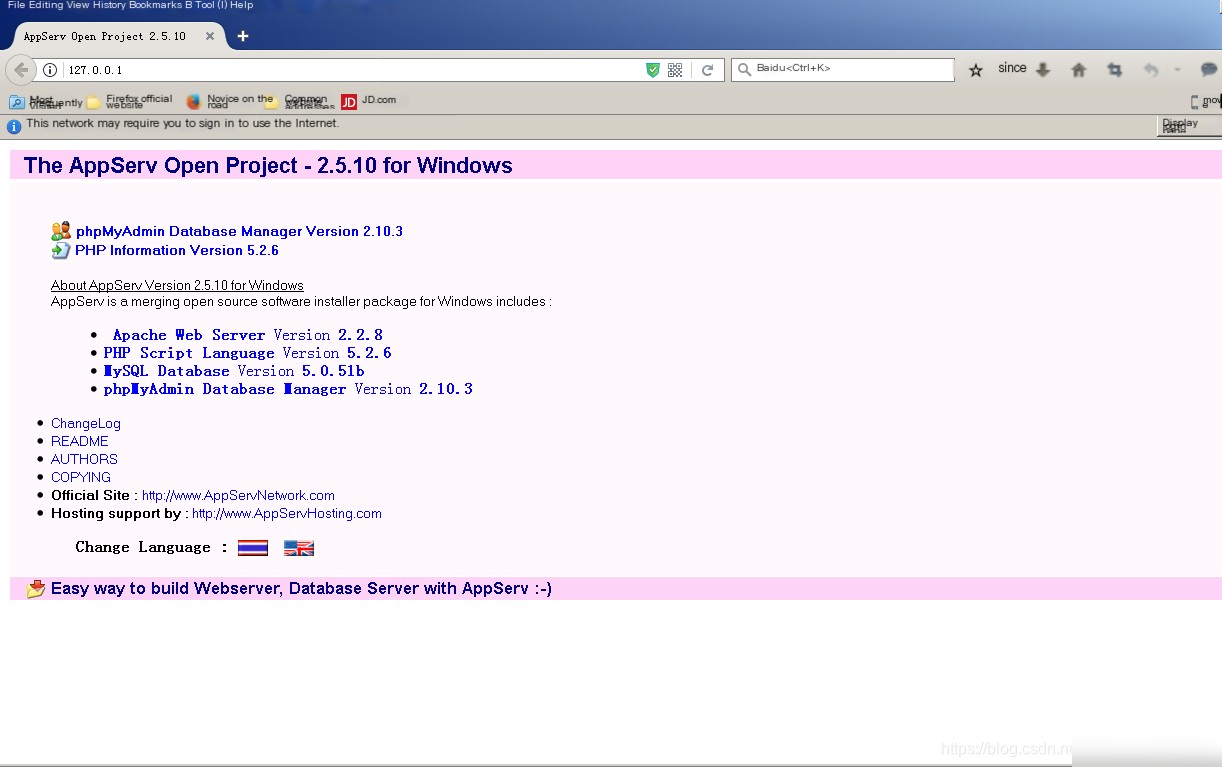
3. Creating a MySQL Database and Tables
// Copy and paste directly. Note that some lines require a semicolon at the end, while others do not!
mysql> create database snortdb;
mysql>
sql
create database snortarc;
mysql> use snortdb;
mysql> source c:\snort\schemas\create_mysql
mysql> use snortarc;
mysql> source c:\snort\schemas\create_mysql
mysql> grant usage on *.* to “snort”@”localhost” identified by “snort”;
mysql> grant select,insert,update,delete,create,alter on snortdb.* to “snort”@”localhost”;
mysql> grant select,insert,update,delete,create,alter on snortarc.* to “snort”@”localhost”;
mysql> set password for “snort”@”localhost” = password(‘snort’);
3. Configure BASE
You can use either the command line or a visual window; the visual window is recommended.
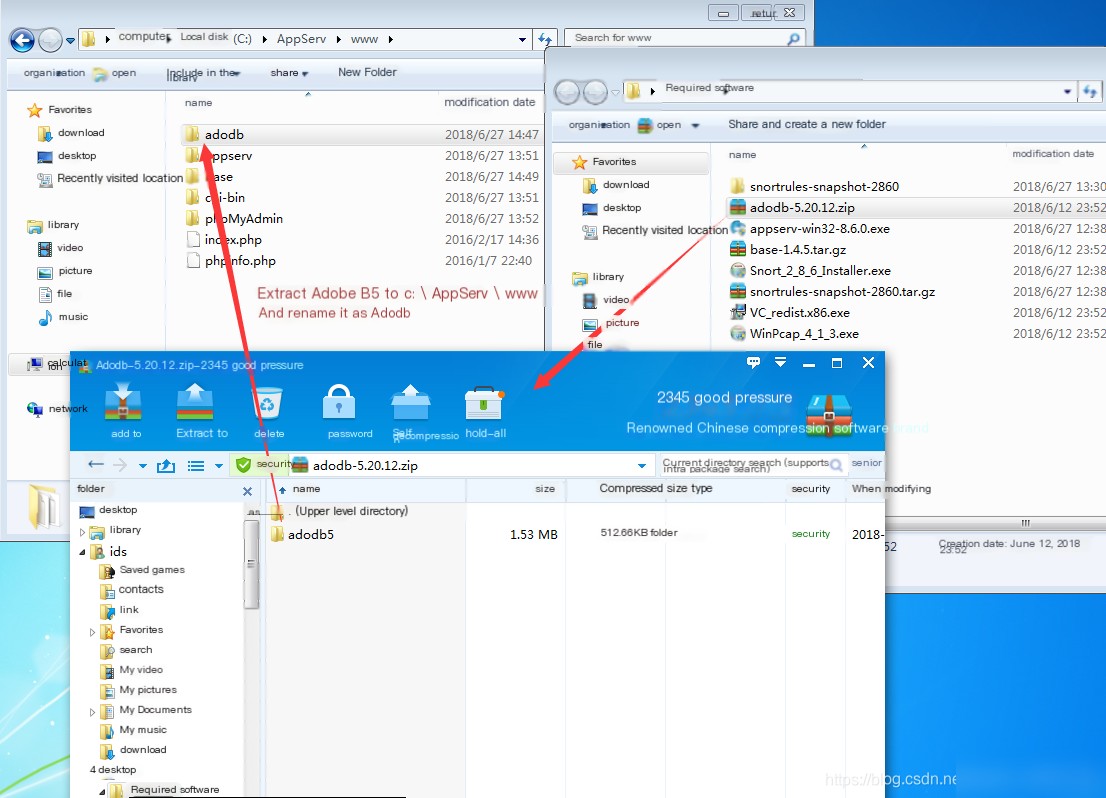
1. Copy the base and adodb folders to the AppServ\www directory
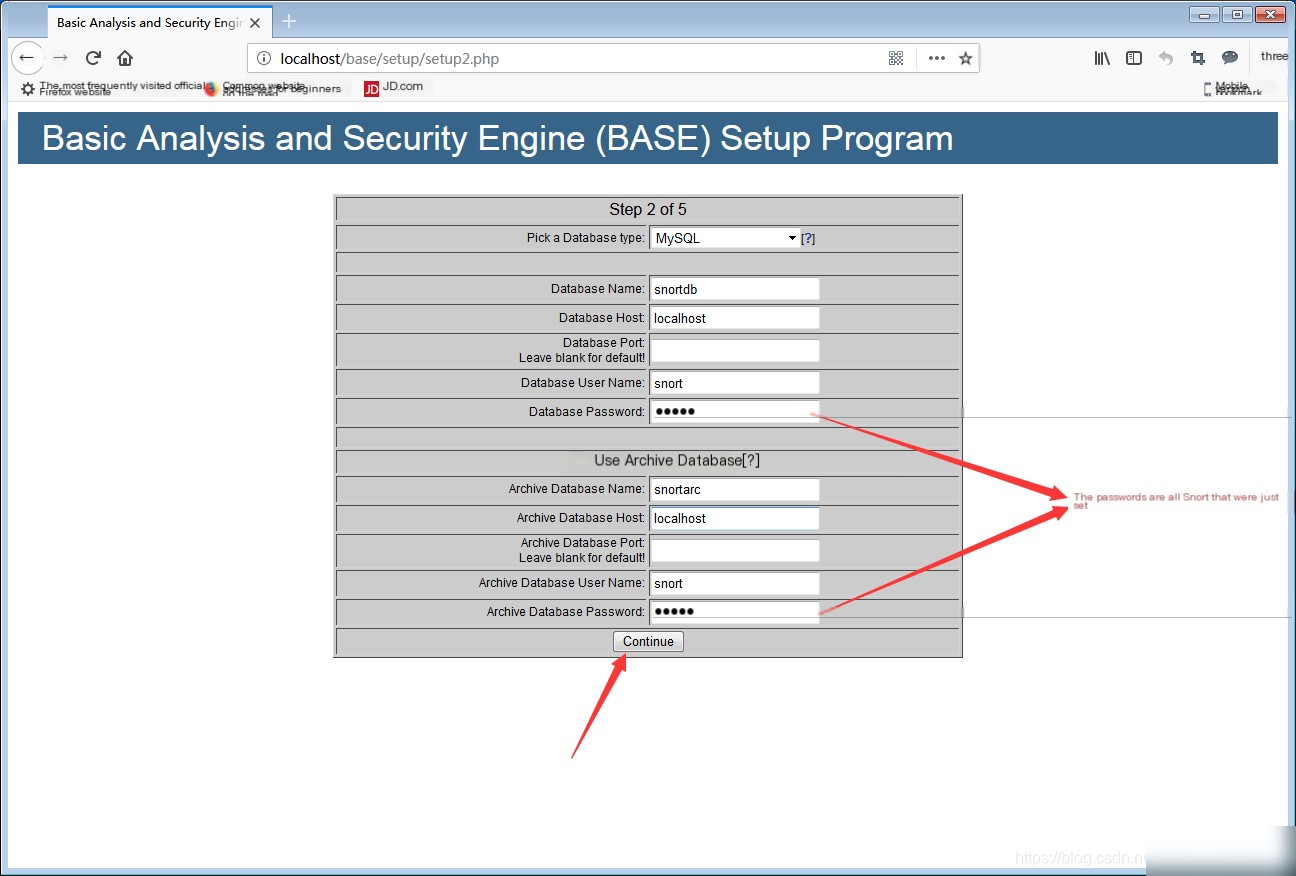
2. Perform operations in the visual window
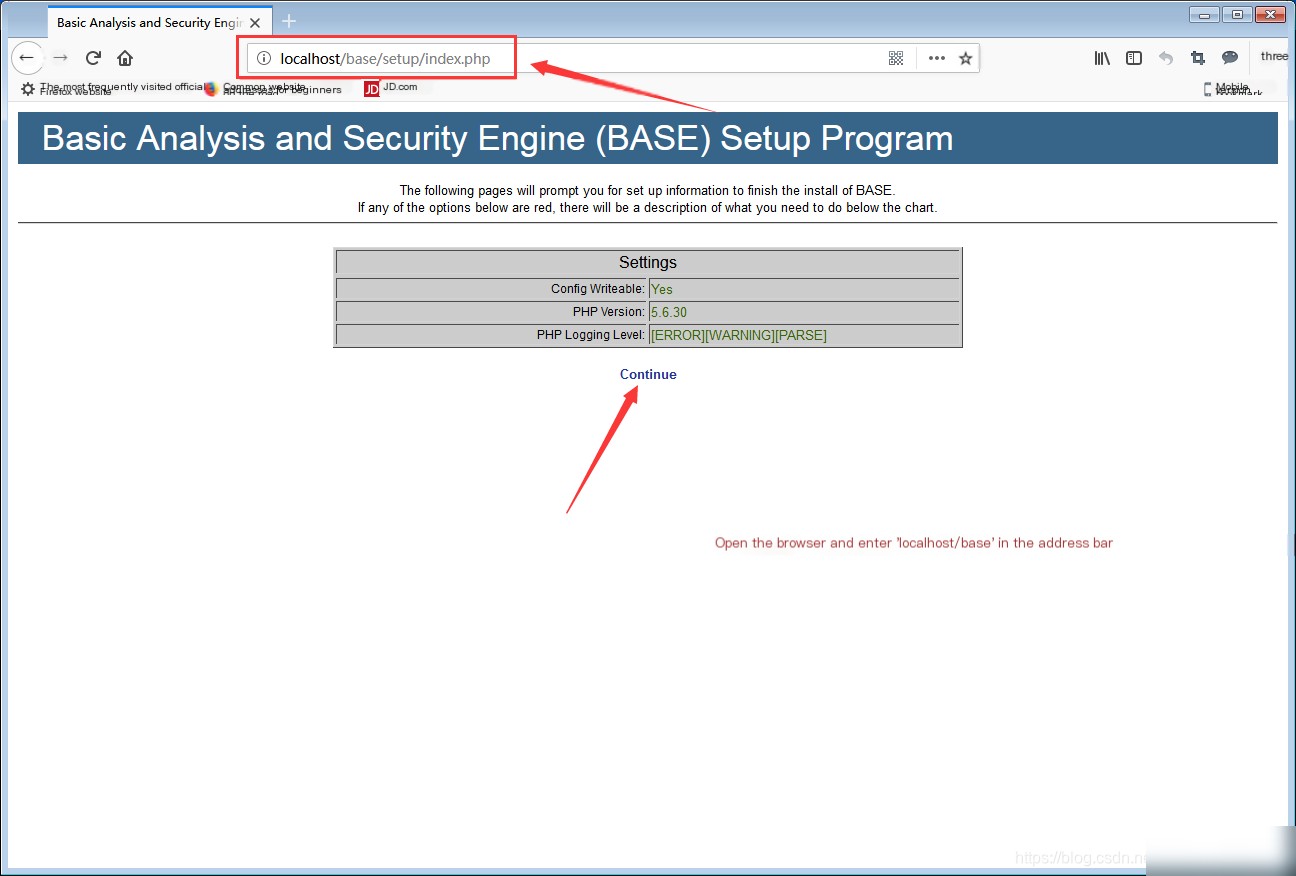

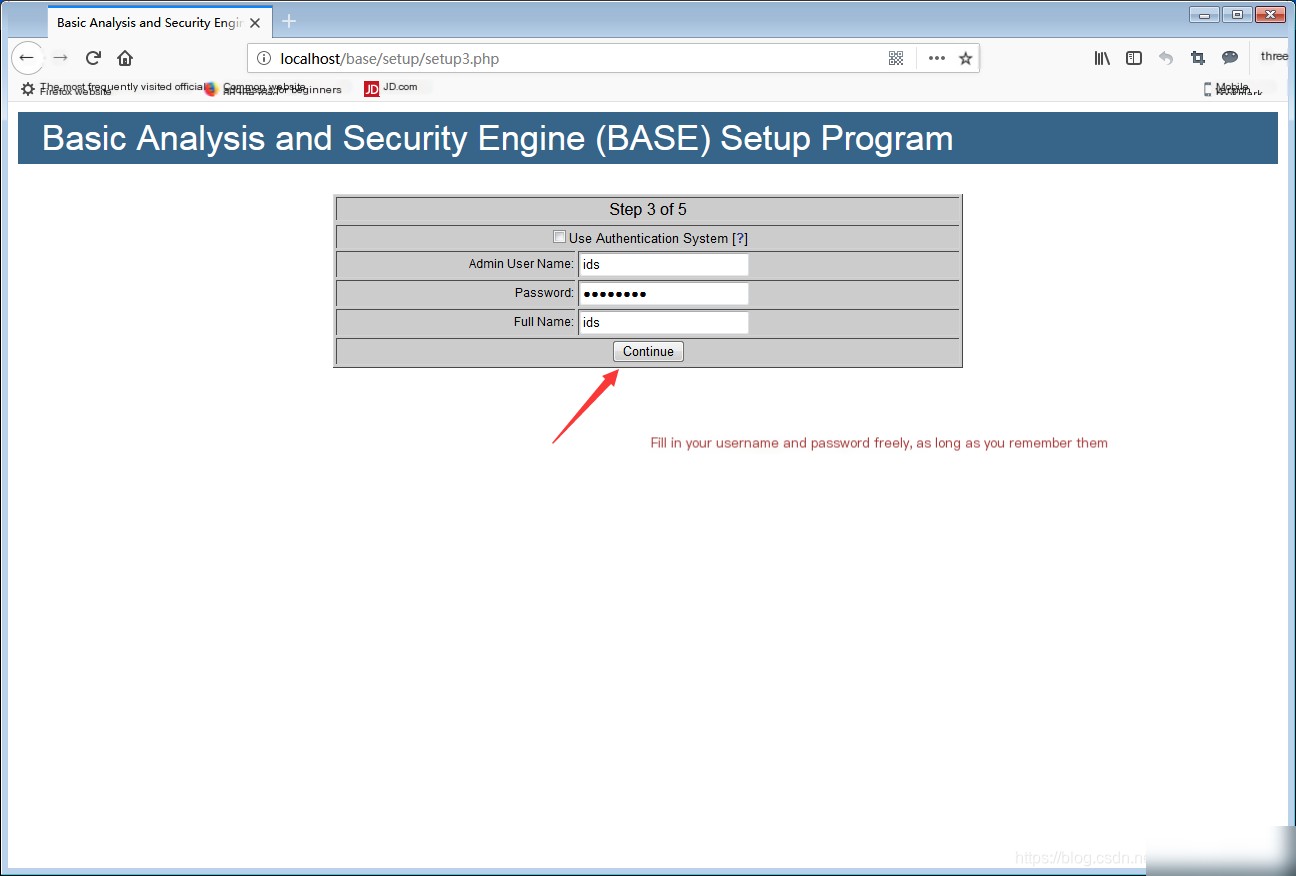

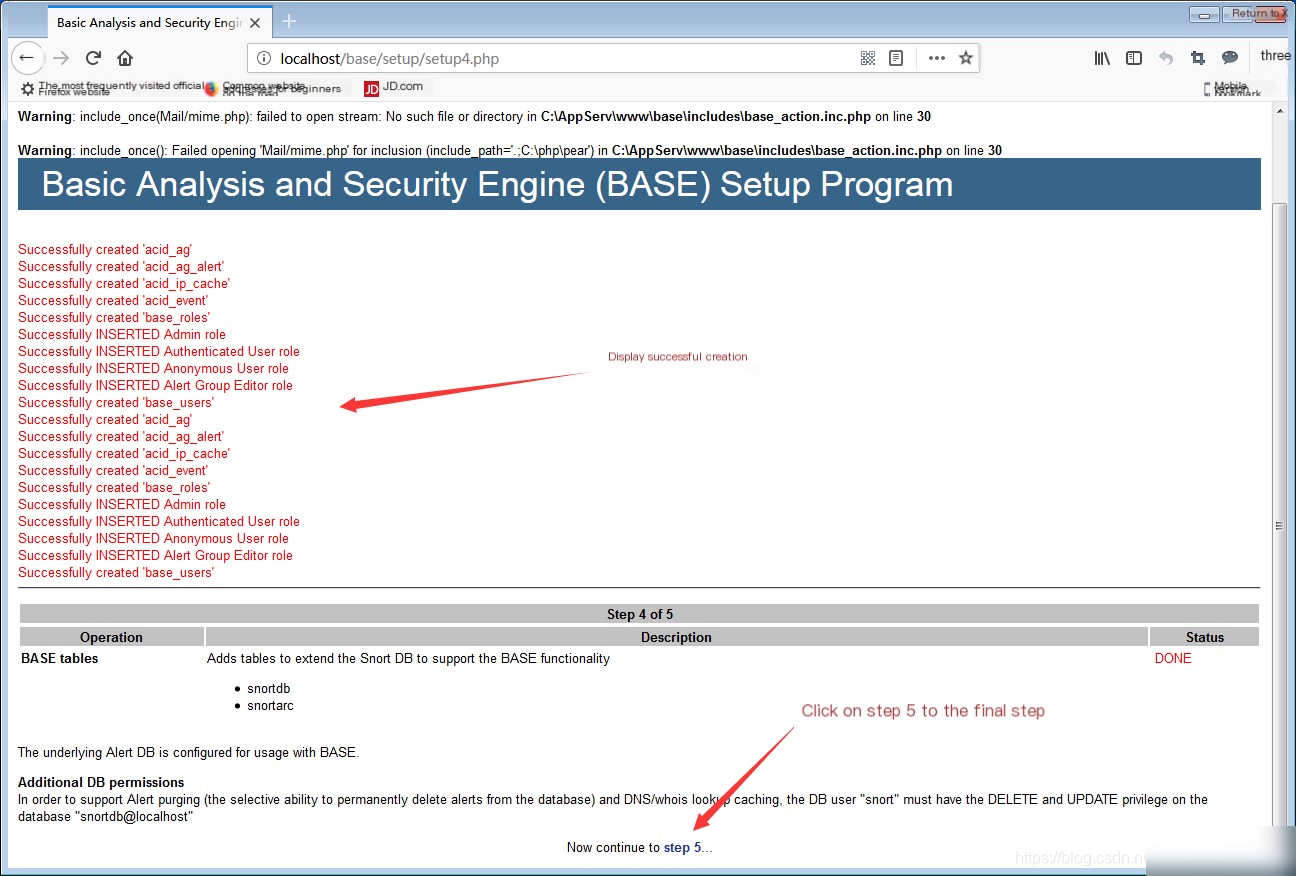
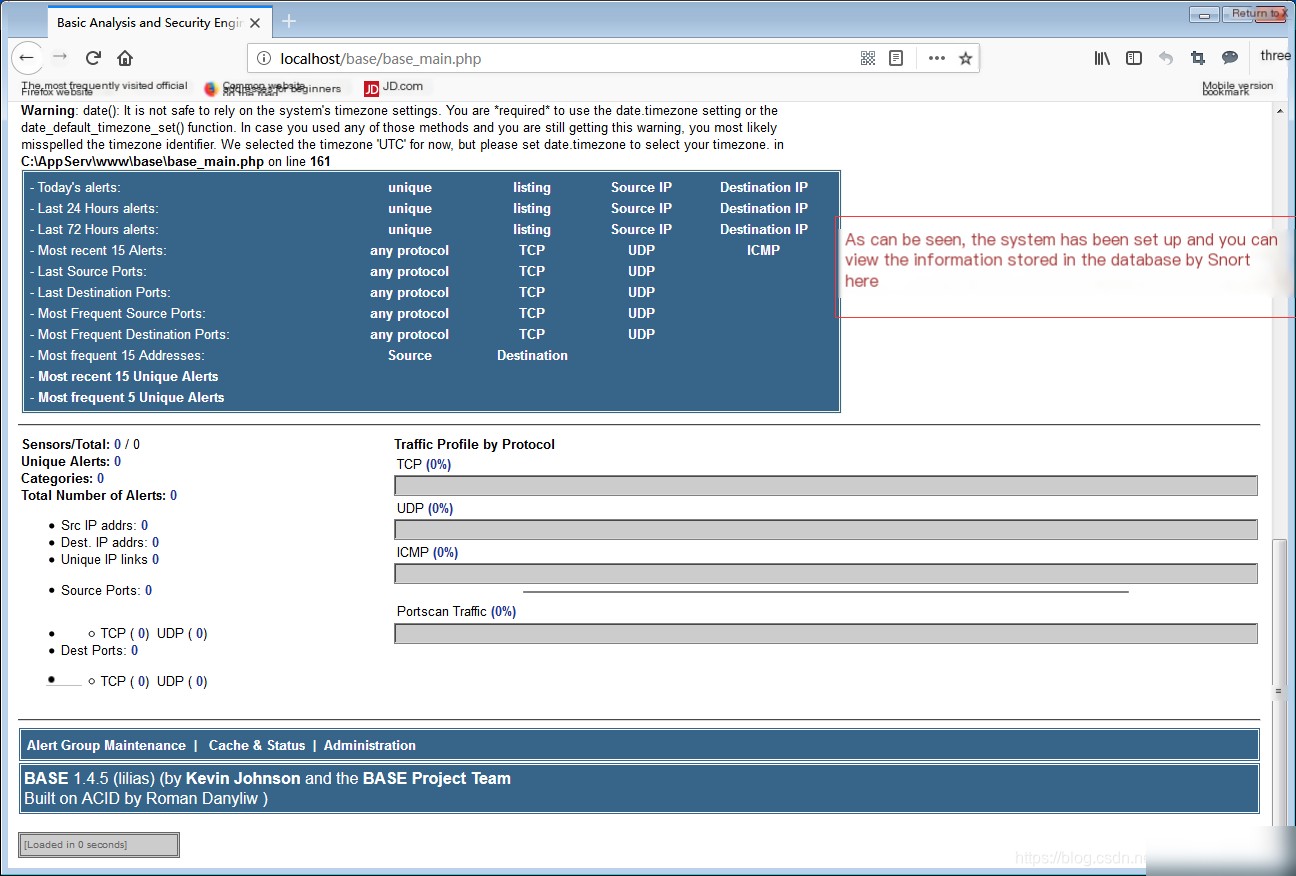
In your browser, enter: `localhost\base\base_main.php` or `127.0.0.1\base\base_main.php` to access the BASE visual interface.
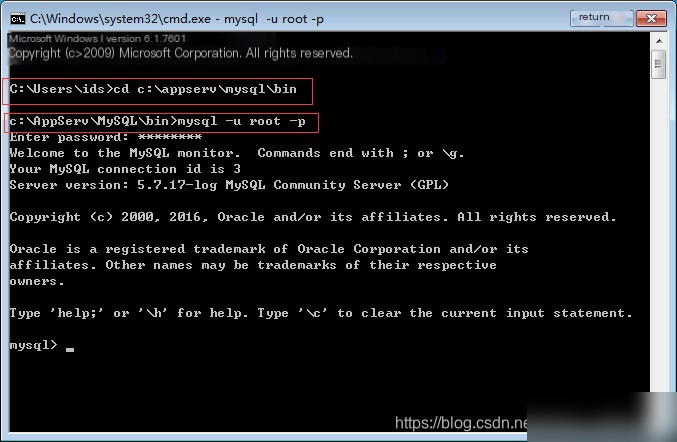
4. Start Snort
1. Navigate to the snort\bin directory
bash
cd /Snort/bin
2. Run Snort in network monitoring mode
bash
snort -c c:\snort\etc\snort.conf -l c:\snort\logs -d -e -v
3. Observe the statistics
Use another machine to scan this host with nmap, and you can see the statistics in the BASE interface (you need to manually refresh to see the new statistics).
bash
c:\snort\bin\snort -i1 -dev -c c:\snort\etc\snort.conf -l c:\snort\log
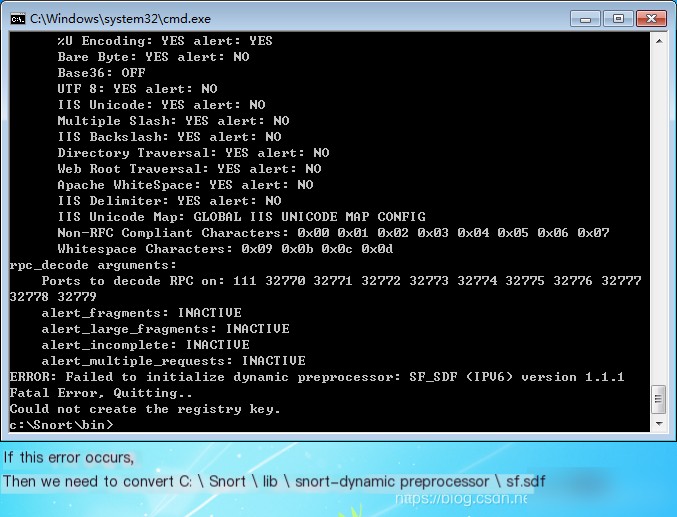
4. If Snort fails to start (fails to run in network monitoring mode) and displays an error, as shown below: