
1. Experiment Title
Installation and Configuration of Snort and its Basic Environment: libpcap installation
1. Install libpcap: Before installing Snort, ensure that the `libpcap` library is installed on your system. You can usually do this using your package manager. For example, on Ubuntu, run `sudo
2. Experiment Purpose
Become familiar with setting up the basic environment and installing and configuring Snort
3. Experiment Principle
Snort can capture and analyze data packets on the network, but unlike other sniffers, it can respond and process based on defined rules. Snort analyzes the captured data packets against various rules, and based on the rule chains, it can adopt five response mechanisms: Activation (alert and trigger another dynamic rule chain), Dynamic (called by other rule packages), Alert (alert), Pass (ignore), and Log (don’t alert but record network traffic). Snort has multiple functions, including packet sniffing, packet analysis, packet detection, and response processing, with each module implementing different functions. Each module is integrated with Snort using plugins, making functionality extension easy. For example, the function of preprocessing plugins is to run before rule-matching misuse detection to complete functions such as TIP fragment reassembly, HTTP decoding, and telnet decoding. Processing plugins are used for inspecting protocol fields, closing connections, and attack responses. Output plugins export the processed situations as logs or alerts.
4. Experiment Content and Steps (Partial Screenshots)
1. Install Snort + Barnyard2
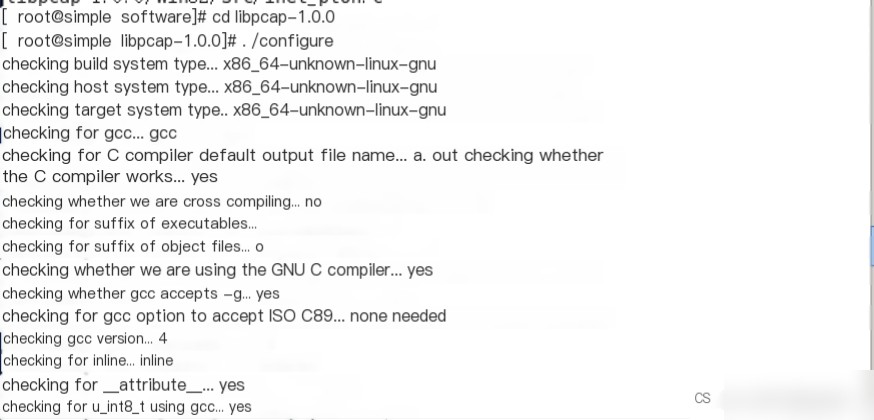
1.1 Enter the /home/software directory and extract libpcap-1.0.0.tar.gz.

1.2 Go into the libpcap-1.0.0 directory and run the “./configure” command for configuration.
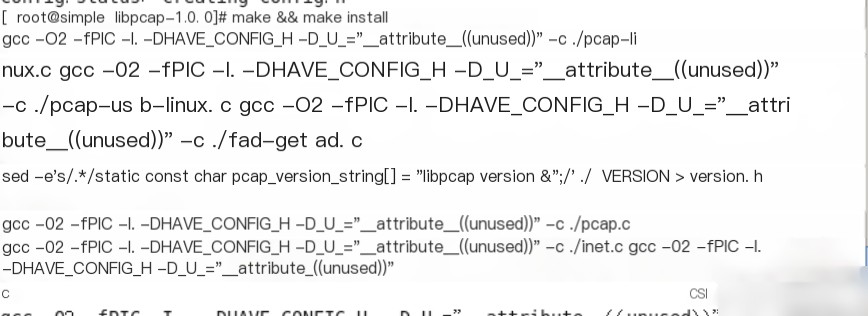
1.3 Run the command “make && make install” to compile and install libpcap.
1.4 Enter the directory “/home/software”, view the files with ls, and execute the command “tar zxvf daq-2.0.4.tar.gz” to extract daq-2.0.4.tar.gz.

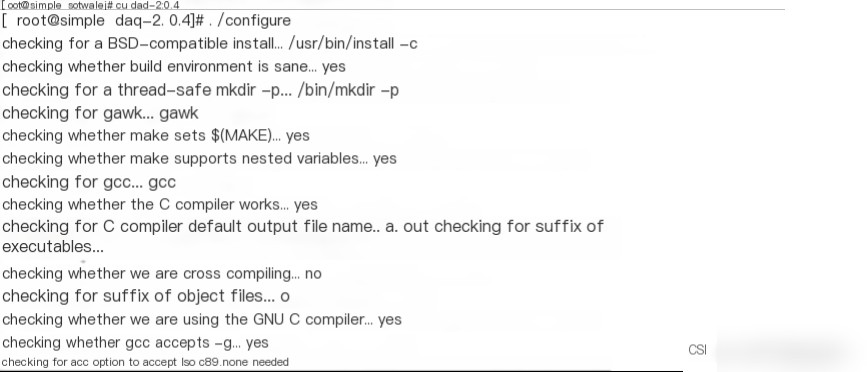
1.5 Use the cd command to switch to the daq-2.0.4 directory.
1.6 Execute the command “./configure” to configure daq-2.0.4.
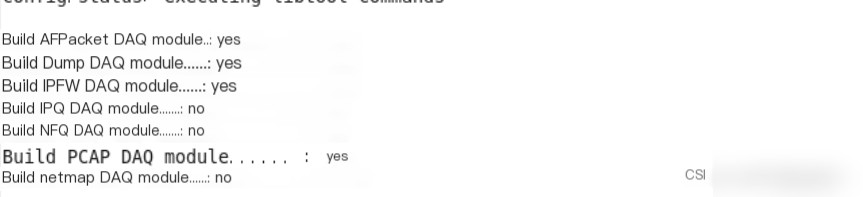
1.7 The following feedback indicates that the correct installation can proceed.
1.8 Execute the command “make && install” to install.
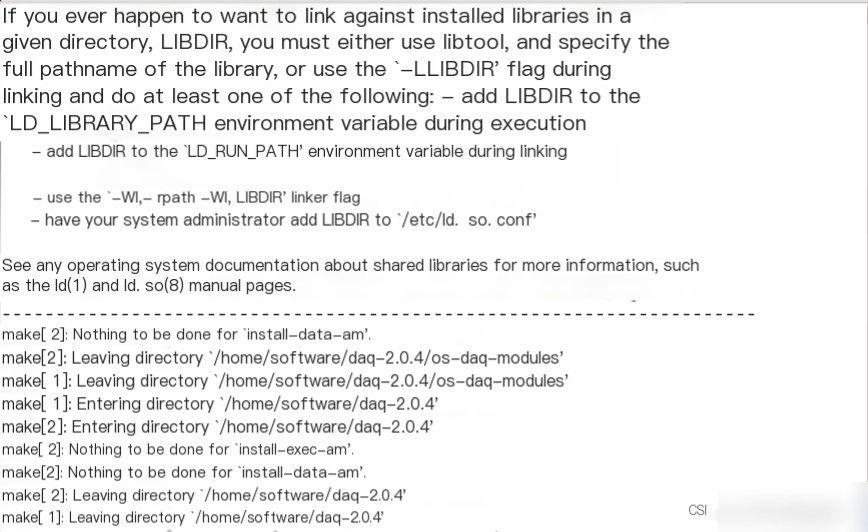
1.9 The following information indicates a successful installation.
1.10 Return to the upper-level directory and extract snort-2.9.7.0.

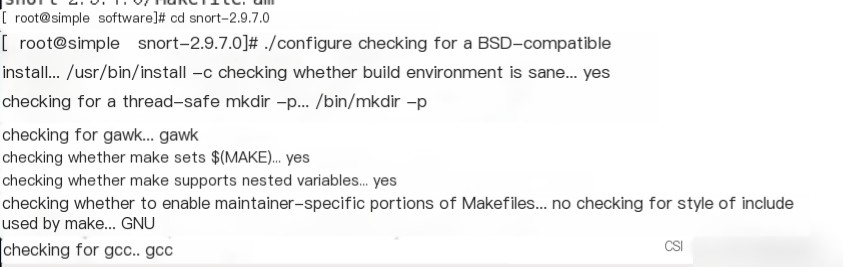
1.11 Use the command “cd snort-2.9.7.0” to enter the Snort directory and execute the command “./configure” to configure snort-2.9.7.0.
1.12 Enter snort-2.9.7.0. Execute the command “make && make install.”
1.13 Installation completed.
2. Configure Snort and Barnyard2 with libpcap installation
2.1 Execute the following commands in sequence.
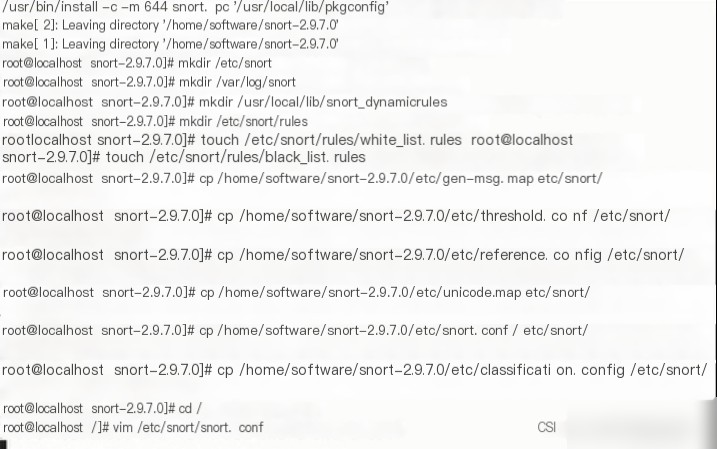
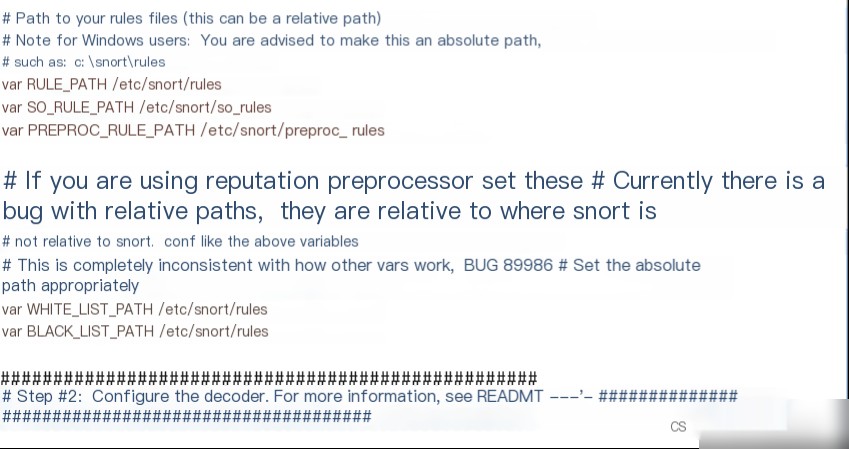
2.2 Edit the Snort configuration file by executing the command “vim /etc/snort/snort.conf” and modify the path variables.
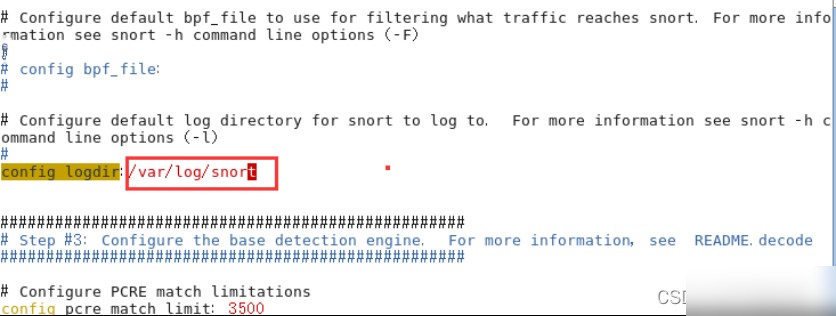
2.3 Set the log directory by executing the command “vim /etc/snort/snort.conf.”
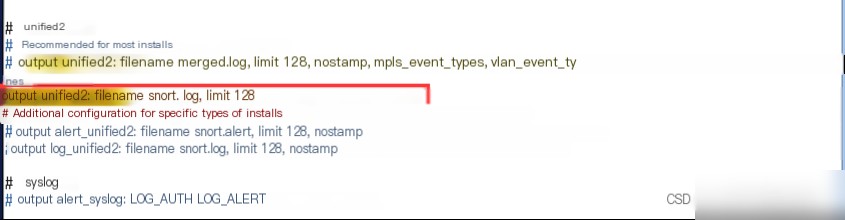
2.4 Configure output plugins.
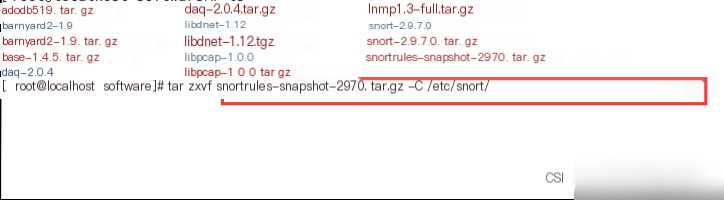
2.5 Extract the rules file under /home/software.
2.6 After extraction, copy the file sid-msg.map to the /etc/snort directory.

2.7 Enter the command “snort -T -i eth0 -c /etc/snort/snort.conf” for testing.
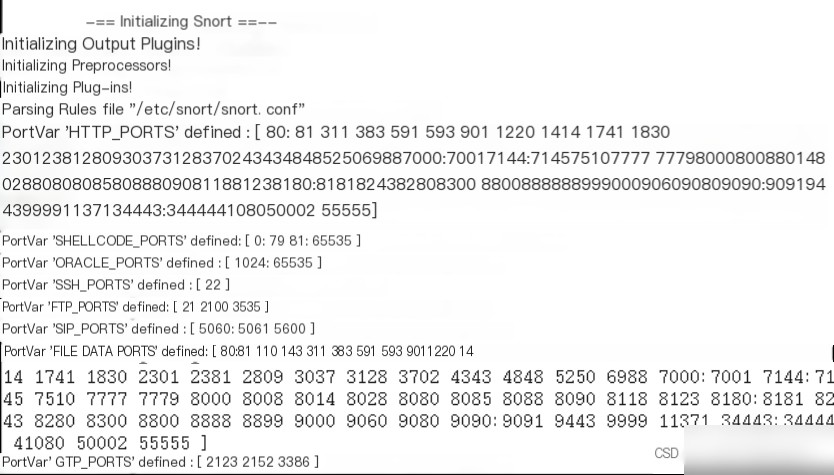
2.8 Obtaining the word “successful” indicates successful installation.
