
The installation of Snort involves creating directories and installing necessary components. Here’s how you do it:
Installing Snort
Create a Folder to Store the Required Tar Packages for Installing Snort
mkdir ~/snort_src
cd ~/snort_src
ls
Installing Snort: Essential Components Installation
sudo apt-get install -y build-essential libpcap-dev libpcre3-dev libdumbnet-dev bison flex zlib1g-dev liblzma-dev openssl libssl-dev
Understanding the Components of Installing Snort
build-essential: Provides building tools for compiling software (like GCC).
bison, flex: Parsers needed by DAQ (DAQ will be installed below).
libpcap-dev: Network traffic capture library required by Snort.
libpcre3-dev: Library of functions supporting regular expressions needed by Snort.
libdumbnet-dev: The libdnet library provides a simplified, portable interface to several low-level networking routines. Many guides to installing Snort do so by installing this library from source, although it is not required.
zlib1g-dev: Compression library needed by Snort.
liblzma-dev: Provides decompression for swf files (Adobe Flash).
openssl and libssl-dev: Provides SHA and MD5 file signatures.
Installing Snort: Install the Last Required Nghttp2 Development Library
sudo apt-get install -y libnghttp2-dev
Download the data acquisition library (DAQ) from the Snort official website to abstract calls to packet capture libraries
wget https://www.snort.org/downloads/snort/daq-2.0.7.tar.gz
ls
tar -xvzf daq-2.0.7.tar.gz
cd daq-2.0.7
./configure
make
sudo make install
Installing Snort: How to Install Snort from Source
cd ~/snort_src
wget https://www.snort.org/downloads/snort/snort-2.9.20.tar.gz
tar -xvzf snort-2.9.20.tar.gz
cd snort-2.9.20
./configure –enable-sourcefire –disable-open-appid
make
sudo make install
sudo ldconfig
Installing Snort: The Snort installation places the Snort binary in /usr/local/bin/snort. Therefore, create a symbolic link to /usr/sbin/snort.
sudo ln -s /usr/local/bin/snort /usr/sbin/snort
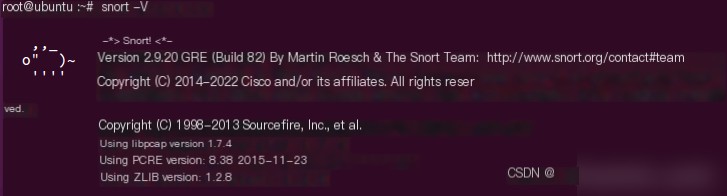
Verify the installation by entering `snort -V` to see the following content: Installing Snort.
Installing Snort: Configuring it as a Network Intrusion Detection System (NIDS)
Installing Snort: Basic Configuration for Security – Run Snort as a Non-Privileged User by Creating a ‘snort’ User and Group
sudo groupadd snort
sudo useradd snort -r -s /sbin/nologin -c SNORT_IDS -g snort
Create the files and directories Snort needs (create Snort directory)
mkdir /etc/snort
mkdir /etc/snort/rules
mkdir /etc/snort/rules/iplists
mkdir /etc/snort/preproc_rules
mkdir /usr/local/lib/snort_dynamicrules
mkdir /etc/snort/so_rules
Installing Snort: Create Files for Storing Rules and IP Lists
sudo touch /etc/snort/rules/iplists/black_list.rules
sudo touch /etc/snort/rules/iplists/white_list.rules
sudo touch /etc/snort/rules/local.rules
sudo touch /etc/snort/sid-msg.map
Installing Snort: Create Log Files
#sudo mkdir /var/log/snort
#sudo mkdir /var/log/snort/archived_logs
Adjust permissions
#sudo chmod -R 5775 /etc/snort
#sudo chmod -R 5775 /var/log/snort
#sudo chmod -R 5775 /var/log/snort/archived_logs
#sudo chmod -R 5775 /etc/snort/so_rules
#sudo chmod -R 5775 /usr/local/lib/snort_dynamicrules
Change ownership of directories
#sudo chown -R snort:snort /etc/snort
#sudo chown -R snort:snort /var/log/snort
#sudo chown -R snort:snort /usr/local/lib/snort_dynamicrules
Copy files from the extracted Snort into the newly created directories
#cd ~/snort_src/snort-2.9.20/etc/
#sudo cp *.conf* /etc/snort
#sudo cp *.map /etc/snort
#sudo cp *.dtd /etc/snort
#cd ~/snort_src/snort-2.9.20/src/dynamic-preprocessors/build/usr/local/lib/snort_dynamicpreprocessor/
#sudo cp * /usr/local/lib/snort_dynamicpreprocessor/
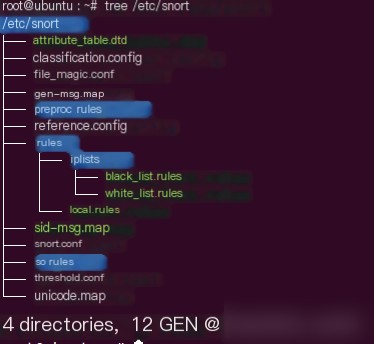
Install tree
Update package list: sudo apt update
Install tree: sudo apt install tree
The basic structure is as follows
Edit Snort Configuration File
Comment out the line for Snort importing the default rule file set
sudo sed -i ‘s/include \$RULE\_PATH/#include \$RULE\_PATH/’ /etc/snort/snort.conf
Edit the snort.conf file (using the gedit editor)
Install gedit: sudo apt install gedit
#sudo gedit /etc/snort/snort.conf
Modify as follows
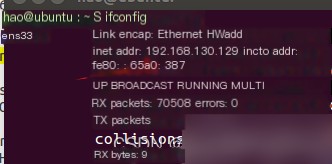
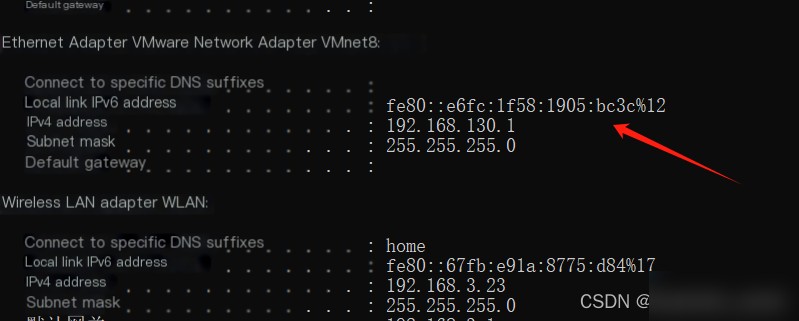
Find your IP using ifconfig
#Configure network information
ipvar HOME_NET 192.168.0.0/16

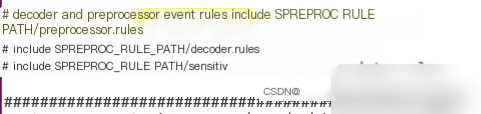
We need to tell Snort the locations of all the directories we created earlier. These settings are also part of the snort.conf file
var RULE_PATH /etc/snort/rules # Around line 104
var SO_RULE_PATH /etc/snort/so_rules # Around line 105
var PREPROC_RULE_PATH /etc/snort/preproc_rules # Around line 106
var WHITE_LIST_PATH /etc/snort/rules/iplists # Around line 113
var BLACK_LIST_PATH /etc/snort/rules/iplists # Around line 114
Enable rule file
include $RULE_PATH/local.rules # Uncomment, around line 545
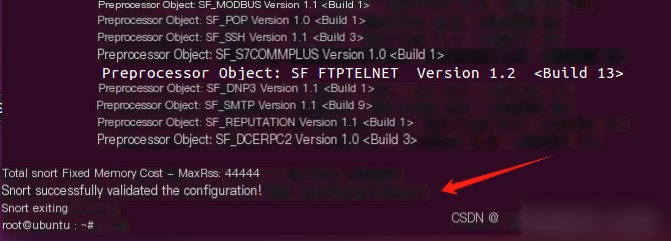
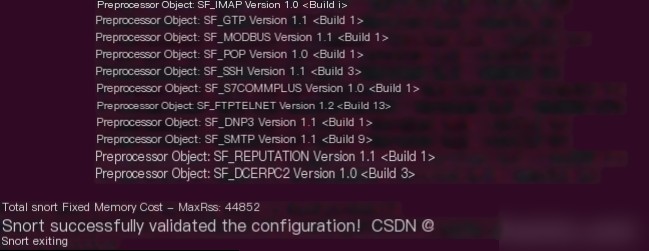
Test Snort
sudo snort -T -c /etc/snort/snort.conf -i ens33 # ens33 is the network card, can be viewed with ifconfig
Configuration Success Screenshot
Edit Rule File, Write Two Basic Rules
sudo gedit /etc/snort/rules/local.rules
alert icmp any any -> $HOME_NET any (msg:”ICMP Test NOW!!!”; classtype:not-suspicious; sid:1000001; rev:1;)
alert tcp any any -> $HOME_NET 80 (msg:”HTTP Test Now!!!”; classtype:not-suspicious; sid:1000002; rev:1;)
Start Testing
sudo snort -T -c /etc/snort/snort.conf -i ens33
Results Screenshot
Start verification by pinging the Snort host from another machine
sudo /usr/local/bin/snort -A console -q -u snort -g snort -c /etc/snort/snort.conf -i ens33
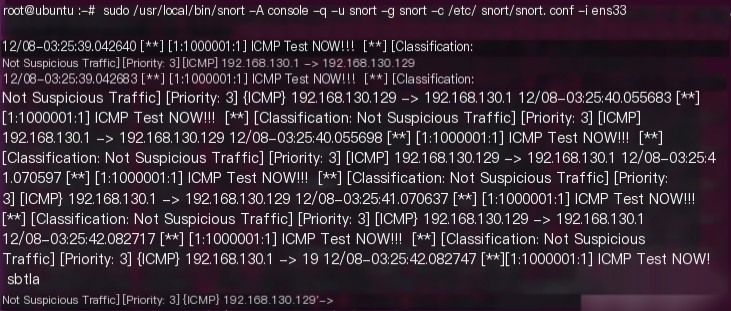
With this, the basic test rules are completed.
There are no ARP spoofing detection rules defined in these rules, but Snort’s built-in module can detect it.
The specific configurations are as follows
Configure in the snort.conf file
With this, the basic test rules are completed.
There are no ARP spoofing detection rules defined in these rules, but Snort’s built-in module can detect it.
The specific configurations are as follows
Configure in the snort.conf file
sudo gedit /etc/snort/snort.conf
View gateway address and MAC address: arp -a

Bind the gateway’s IP and MAC address in both directions

This guide provides a thorough walkthrough of Snort installation and basic configuration as a Network Intrusion Detection System (NIDS). You follow these steps and modify configurations according to your network specifics.