

Introduction
This article primarily introduces how to quickly deploy the open-source large language model tool Ollama on Windows systems and install Open WebUI in conjunction with the cpolar network tunneling software, allowing you to access the large language model running environment you set up on your local network even from a public network environment.
In recent years, with the rise of ChatGPT, large language models (LLM) have become a hot topic in the field of AI. Many major companies have launched their own large language models, and some have even partially open-sourced them. Today, I will share a tool for running local LLM that’s currently very popular and relatively easy for beginners to deploy locally — Ollama.
Running a large language model locally offers several benefits:
For example, you can protect privacy, avoid costs, ignore network issues, and try various open-source models, among others.
Ollama supports major current open-source models, like llama2, qwen, mistral, etc., and can be deployed on Windows, Linux, and macOS systems. Both its stability and convenience are quite commendable. Below, I will share its installation and application on Windows systems.
 1712892863233
1. Running Ollama
The installation environment for this article is: Windows 10 Professional Edition
Download: Ollama download link: https://ollama.com/download
On the download page, click Windows, then click the download button.
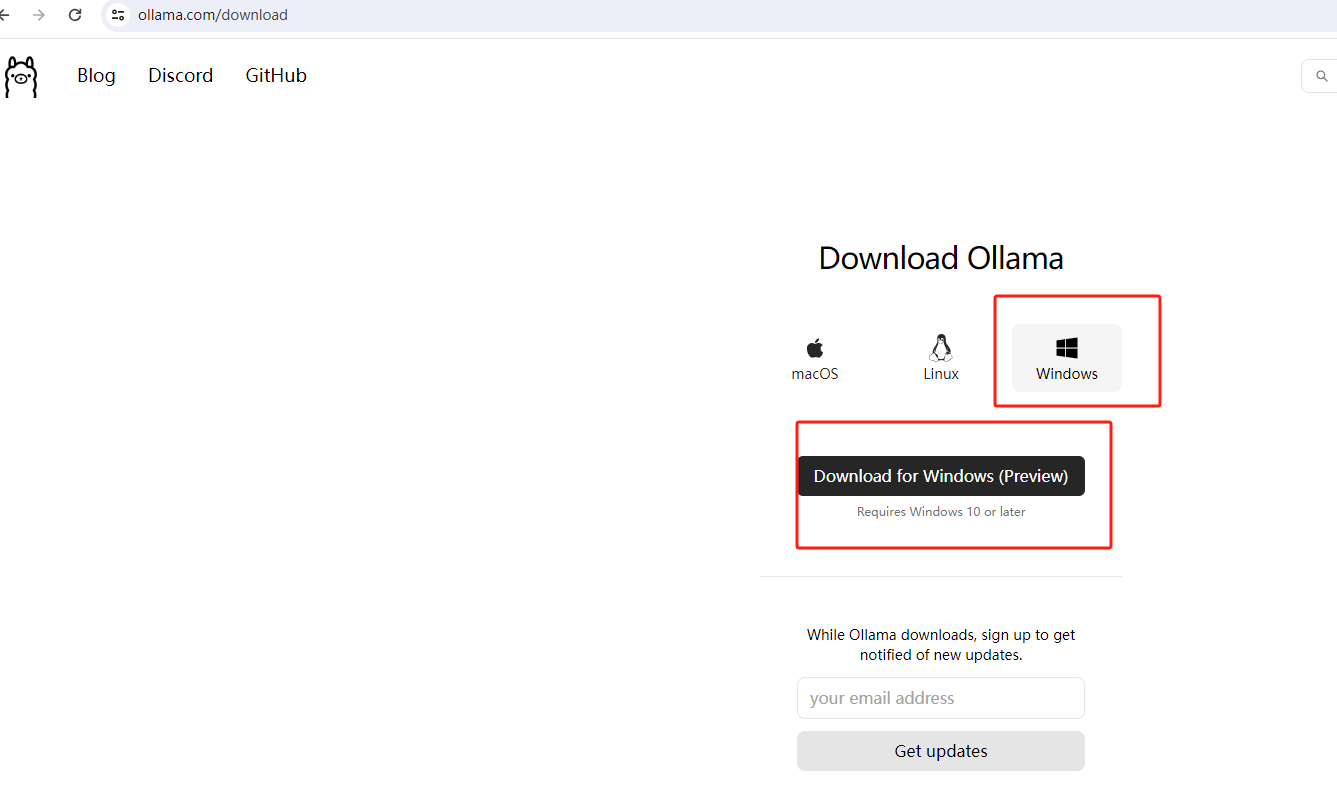 image-20240412112815418
Install: After downloading, double-click the downloaded installer.
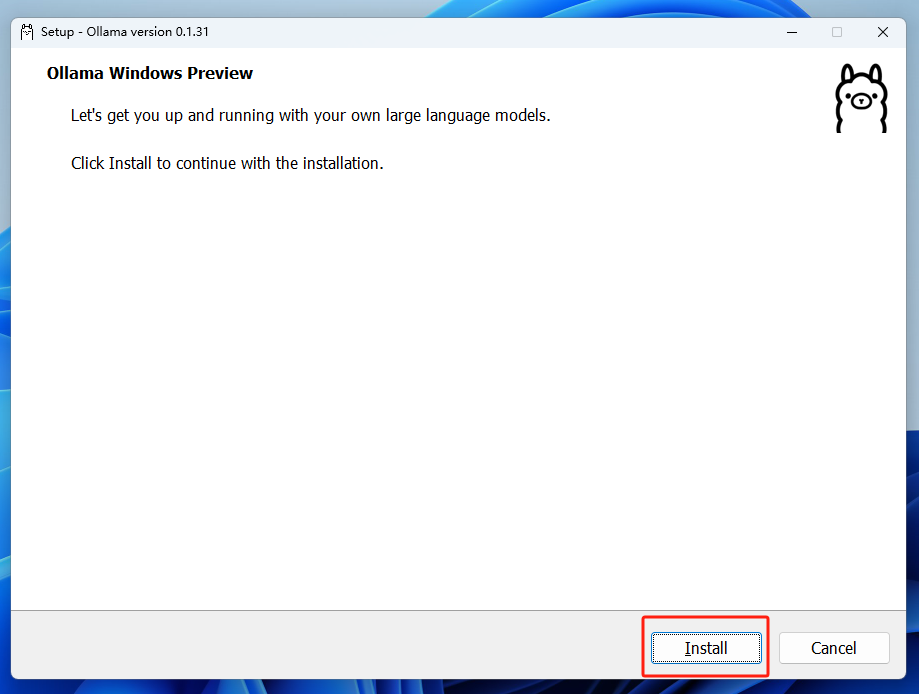 image-20240412113651226
Click Install to proceed with the installation.
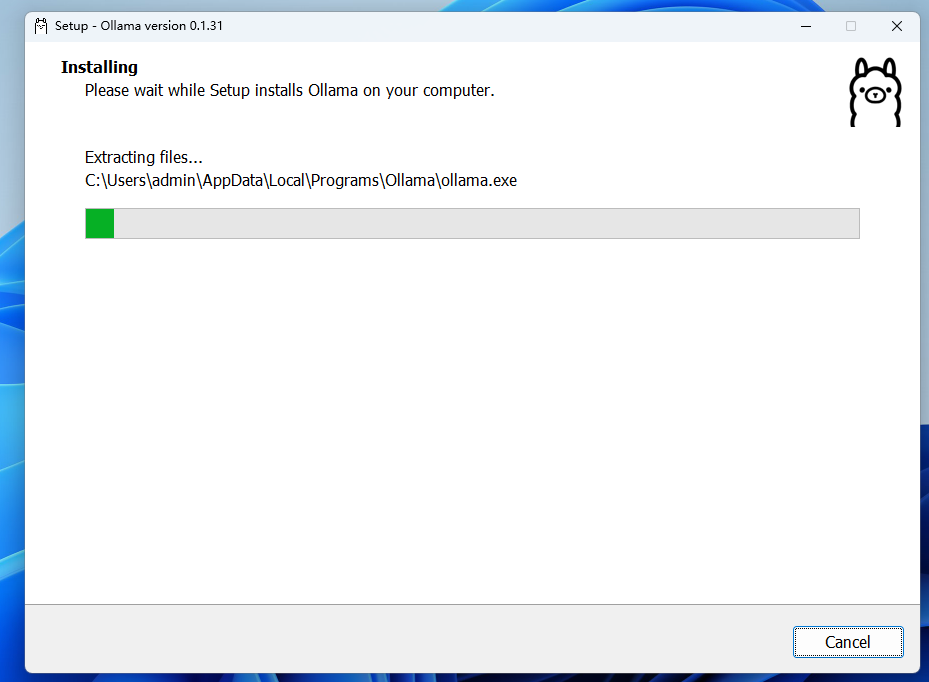 image-20240412113757729
There is no prompt upon installation completion. We open a terminal, using Windows PowerShell as an example here, but you may choose others:
Now that Ollama is installed, we need to input the following command in the terminal to run a large language model for testing. We will use qwen, which has relatively better performance in Chinese, as an example, but other models can also be used.
ollama run qwen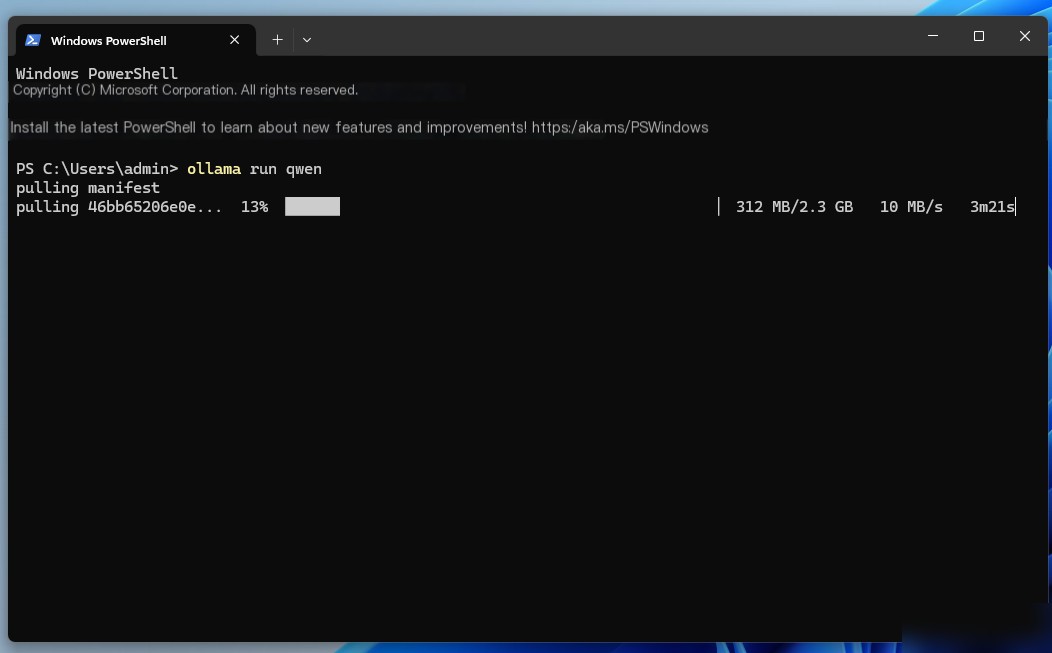 image-20240412114551493
You can see the system is downloading the qwen model (saved on the C drive, at C:\Users.ollama\models. If you want to change the default path, modify it by setting the OLLAMA_MODELS and then restarting the terminal, and restarting the Ollama service.)
setx OLLAMA_MODELS "D:\ollama_model"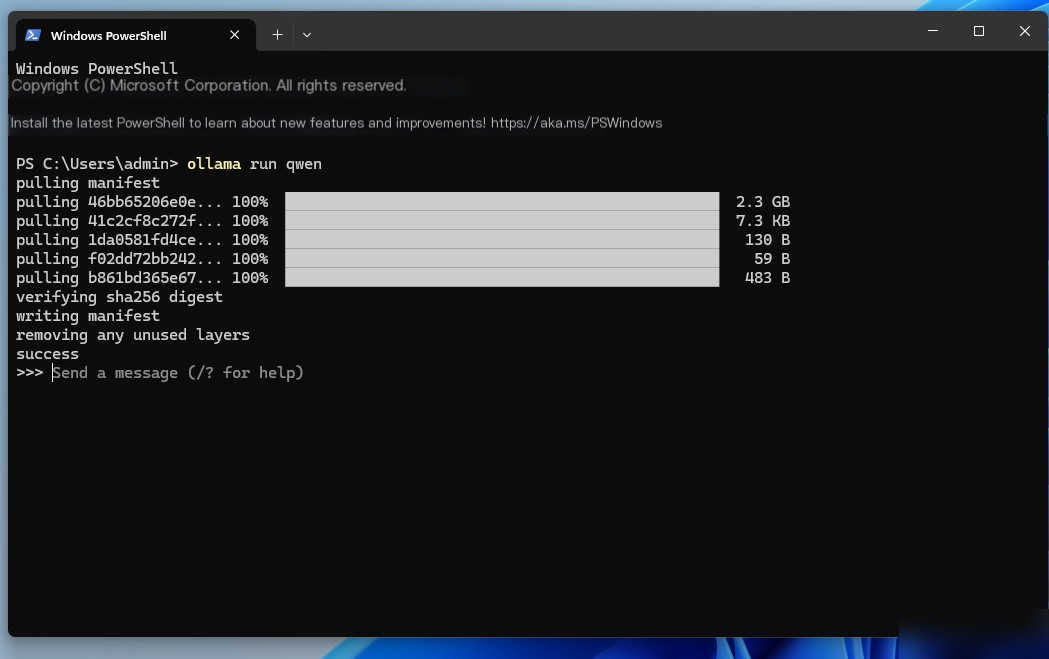 image-20240412115240118
After the model download is complete, you can input questions in the terminal to use it:
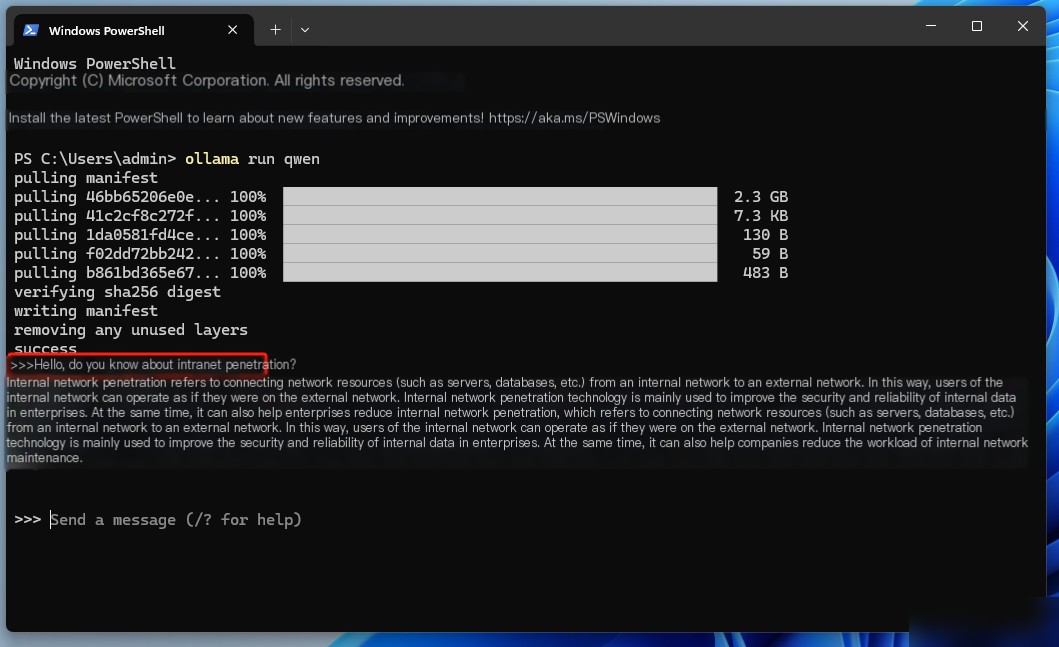 image-20240412115431766
At this point, Ollama has been successfully deployed locally on Windows and the qwen large language model is running. It’s extremely user-friendly for beginners to experience large language models with a single click.
2. Installing Open WebUI
However, currently, we can only use it in the terminal. The interface might not be as visually appealing as ChatGPT. If web page interaction were possible, the user experience would be better, and we could retain previous chat logs for review and query.
For this situation, we can deploy the Open WebUI project on Windows to achieve an interaction interface similar to ChatGPT.
This tutorial uses the Open WebUI project as an example. Previously known as Formerly Ollama WebUI, it’s specifically adapted for Ollama. Its interface is more familiar to those accustomed to ChatGPT. Of course, you can also choose other WebUIs, which can be shared with you when there’s an opportunity.
How to install Open WebUI on Windows systems:
2.1 Installing Docker on Windows
First, if you haven’t installed Docker before, you need to perform the following three steps to install it:
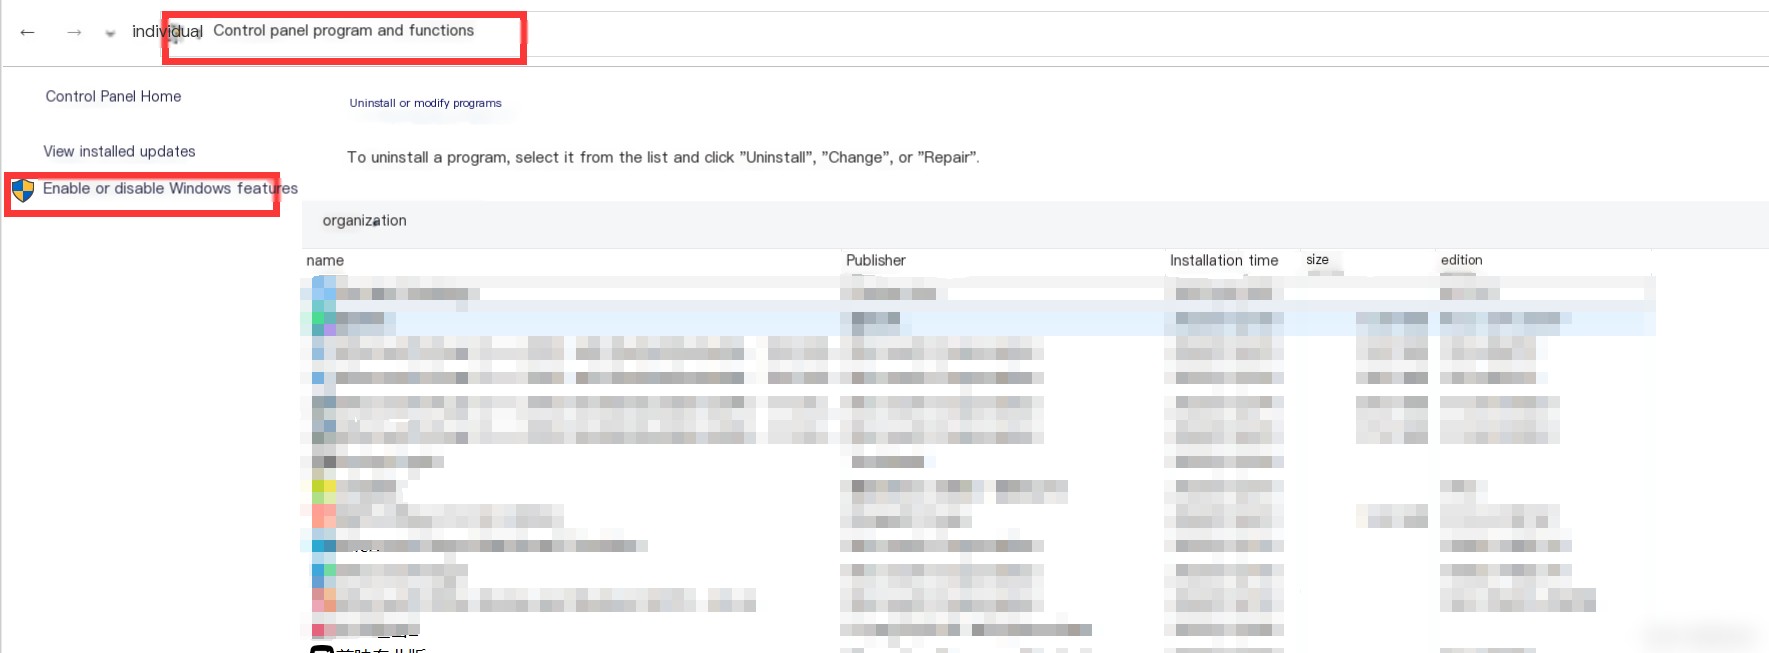
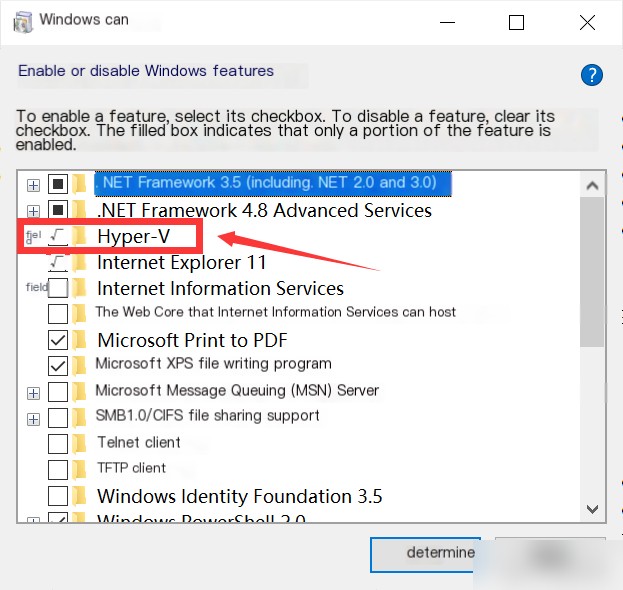
First Step: Enable Hyper-V
Open Control Panel and select Turn Windows features on or off in the Programs and Features section
 55b168adb3b2487ebef5a56f9b5bfe16.png
Check Hyper-V, Virtual Machine Platform, and Windows Subsystem for Linux, then click OK
 fcc551d53f2a4d8a9261519deaae49ea.png
Then, restart your computer.
Second Step: Install WSL
Open PowerShell, launch the command window as an administrator, and input
wsl --updateInstall
wsl --install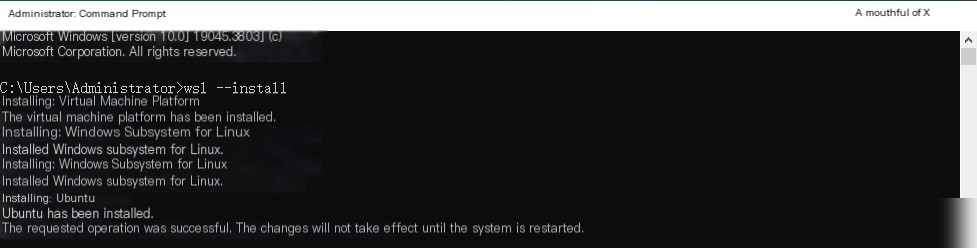 7803831a6fef8563132920692cf5bb5
Then restart the computer again.
Third Step: Visit the Docker website to download
Click the download link: https://docs.docker.com/desktop/install/windows-install/
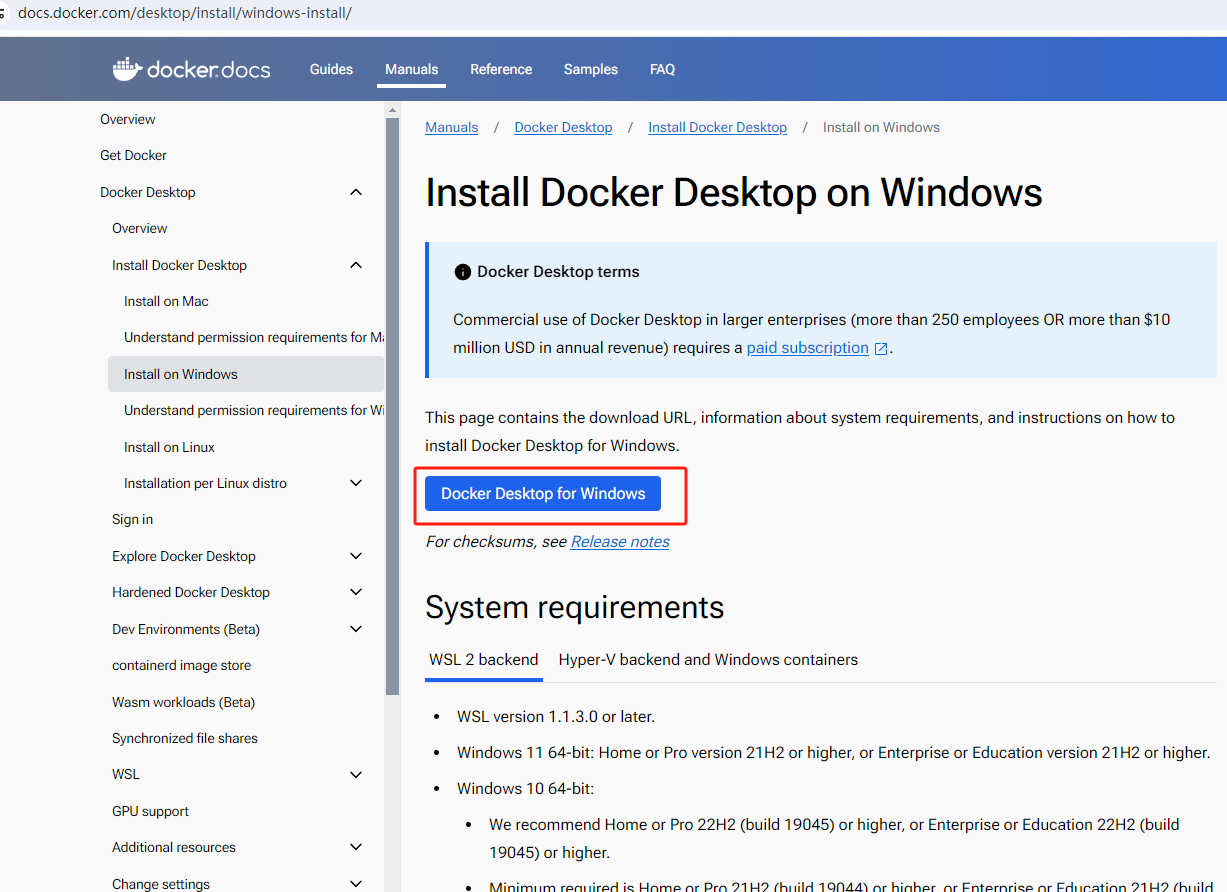 image-20240412134453950
Select the latest version for Windows:
 29e8d9fd062d765b10f64c27dd14097
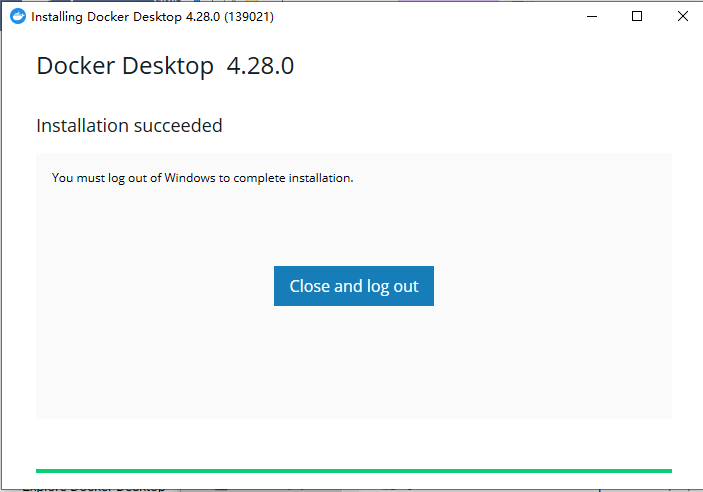
After downloading, double-click the installer to proceed with the installation. If this is your first time installing, you will be prompted to restart your computer after installation. After restarting, click the Docker Desktop icon on your desktop: choose skip registration and log in directly.
 image-20240412135009554
After opening Docker Desktop, if the bottom left corner shows a green ‘running’ status, we have succeeded:
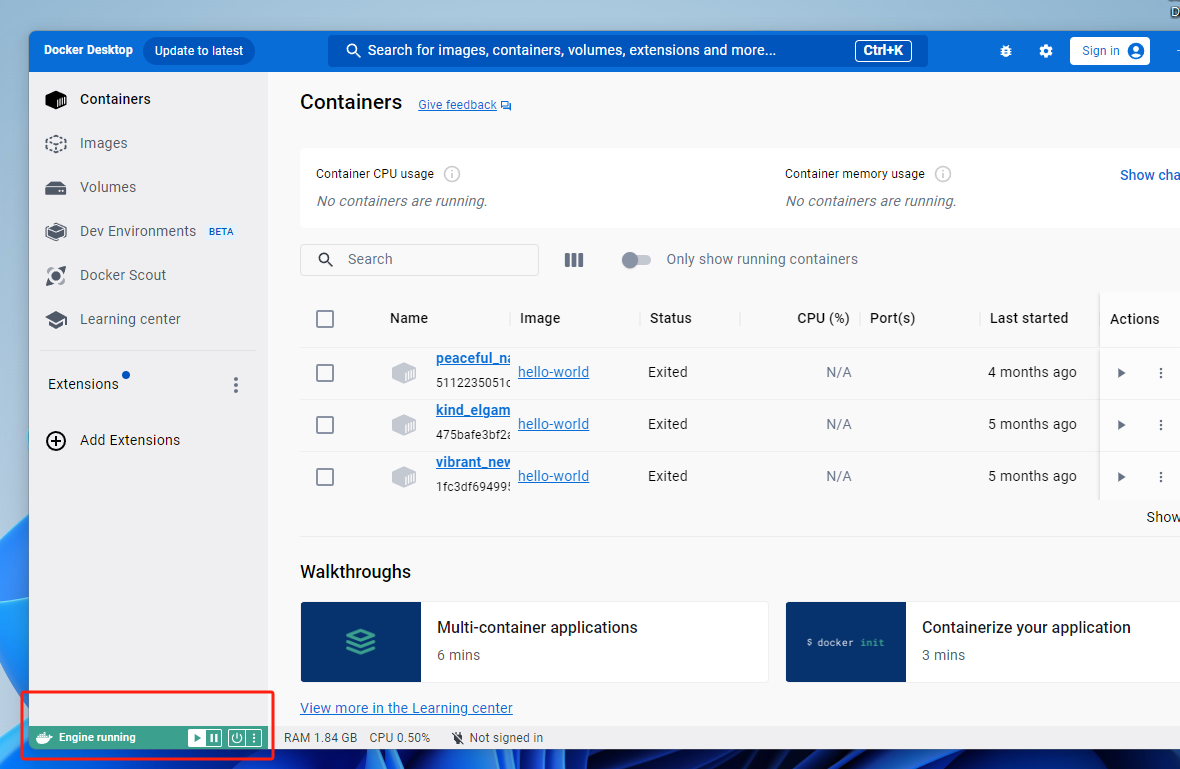 image-20240412135830591
Video installation tutorial:
[Docker Tutorial] How to install Docker on Windows
2.2 Deploying Open WebUI with Docker
On Open WebUI’s GitHub page, https://github.com/open-webui/open-webui, if Ollama and Open WebUI are on the same host, you can quickly deploy them locally using the command shown below:
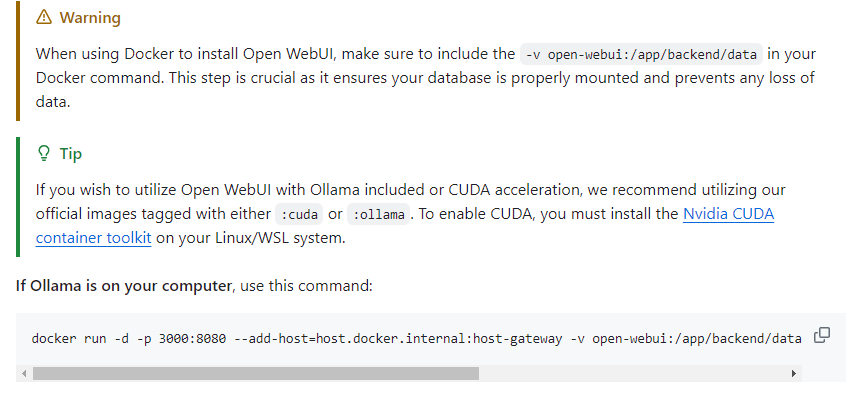 image-20240412140749937
docker run -d -p 3000:8080 --add-host=host.docker.internal:host-gateway -v open-webui:/app/backend/data --name open-webui --restart always ghcr.io/open-webui/open-webui:mainNow open the terminal, like PowerShell, and type docker, then press Enter
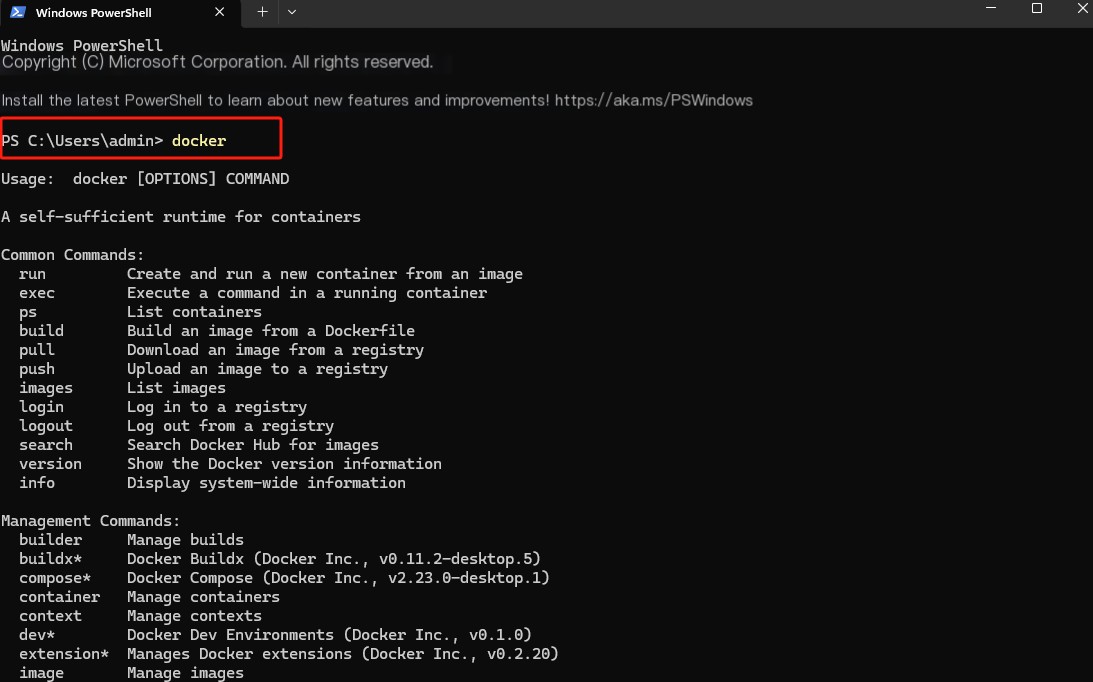 image-20240412143329625
Once you see the command running successfully, it means Docker is installed correctly.
Then copy and paste the Open WebUI deployment command in Docker into the terminal and press Enter.
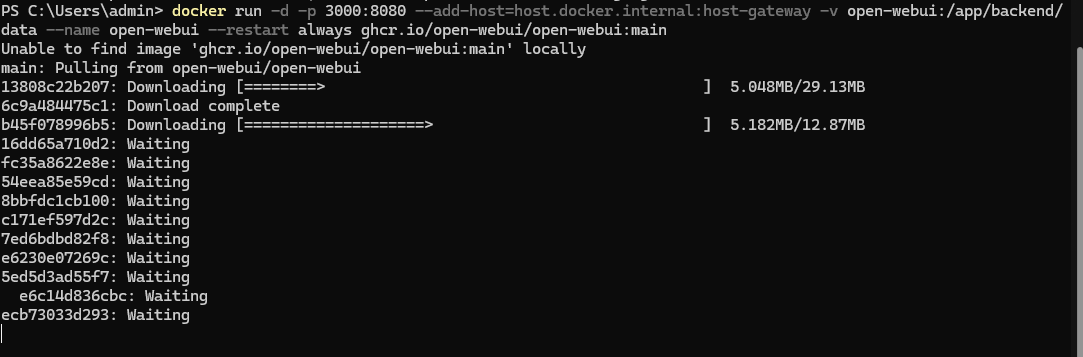 image-20240412143603992
Wait for the installation to complete as shown below:
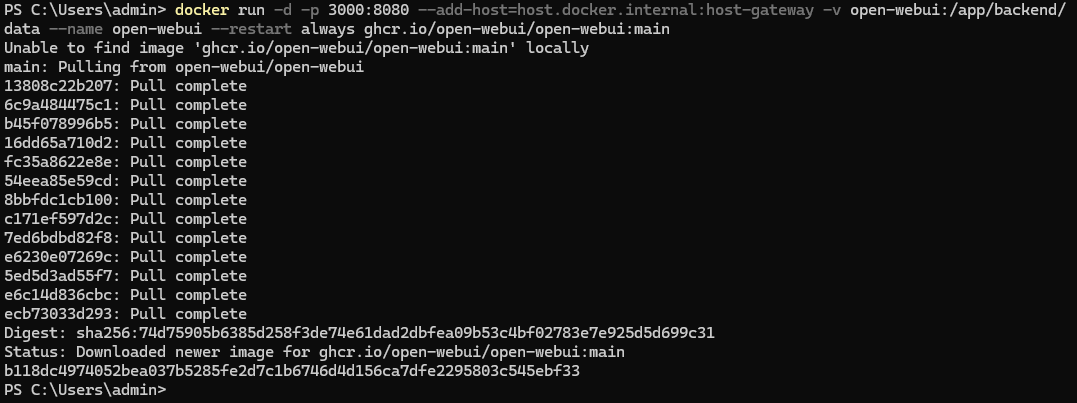 image-20240412144132799
Once installed, Open WebUI’s web interface address is: https://localhost:3000 can be seen in Docker Desktop
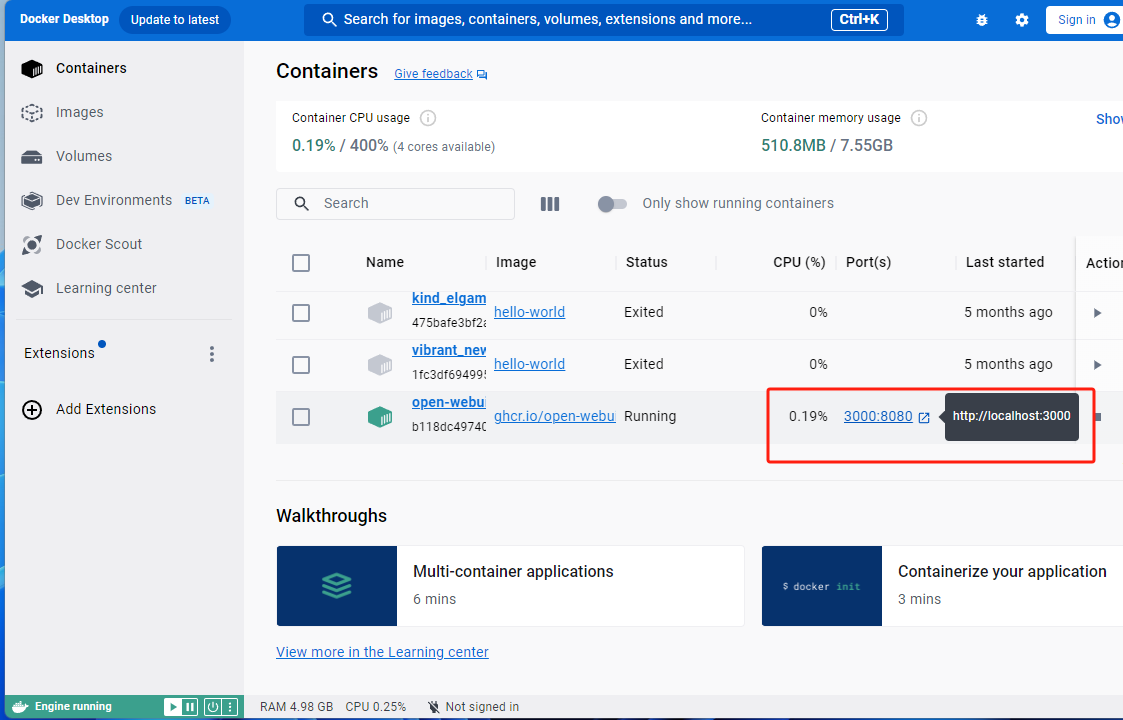 image-20240412144401182
Clicking it opens the login interface in the browser:
 image-20240412144744192
Click sign up to register, remember your account, email, and password as you’ll need them for email and password login next time:
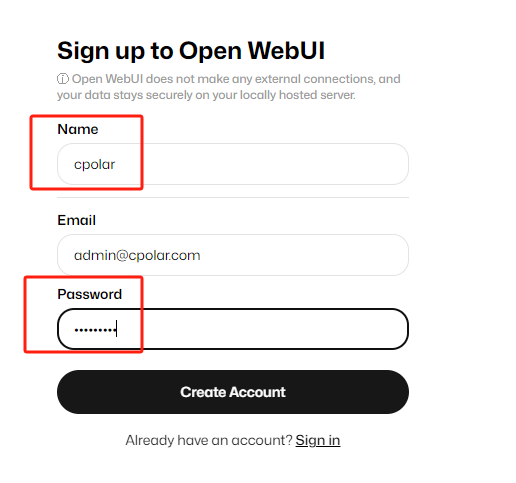 image-20240412144927140
Click create account to create an account, and you will then be able to use Open WebUI with a ChatGPT-like interface in the browser!
 image-20240412145046113
Click on settings in the top right corner to change the current interface language to simplified Chinese, then click save.
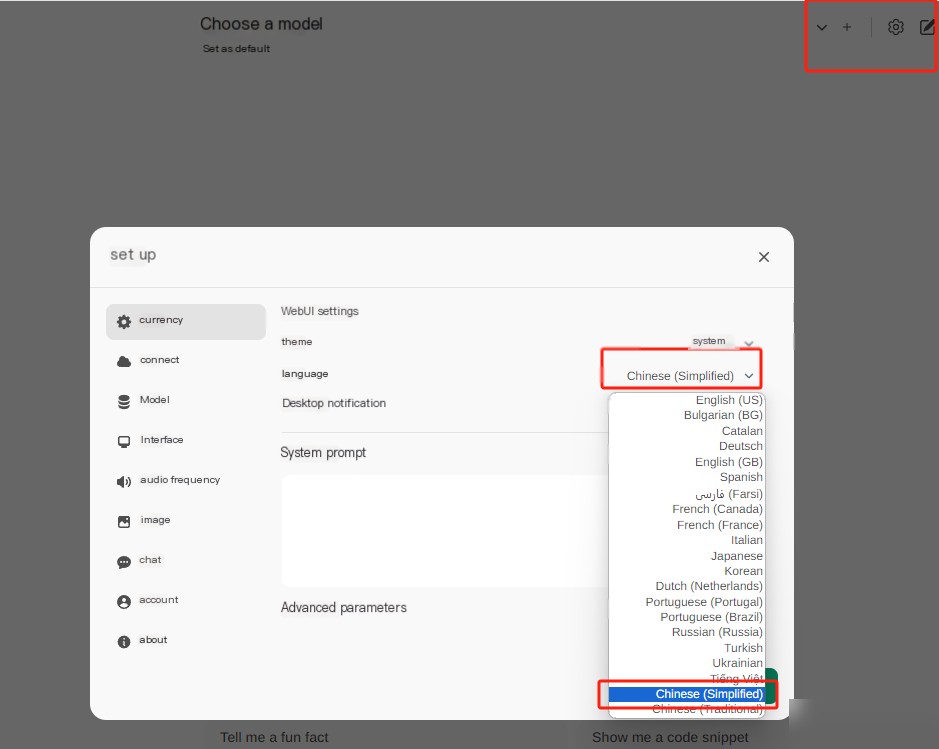 image-20240412145306289
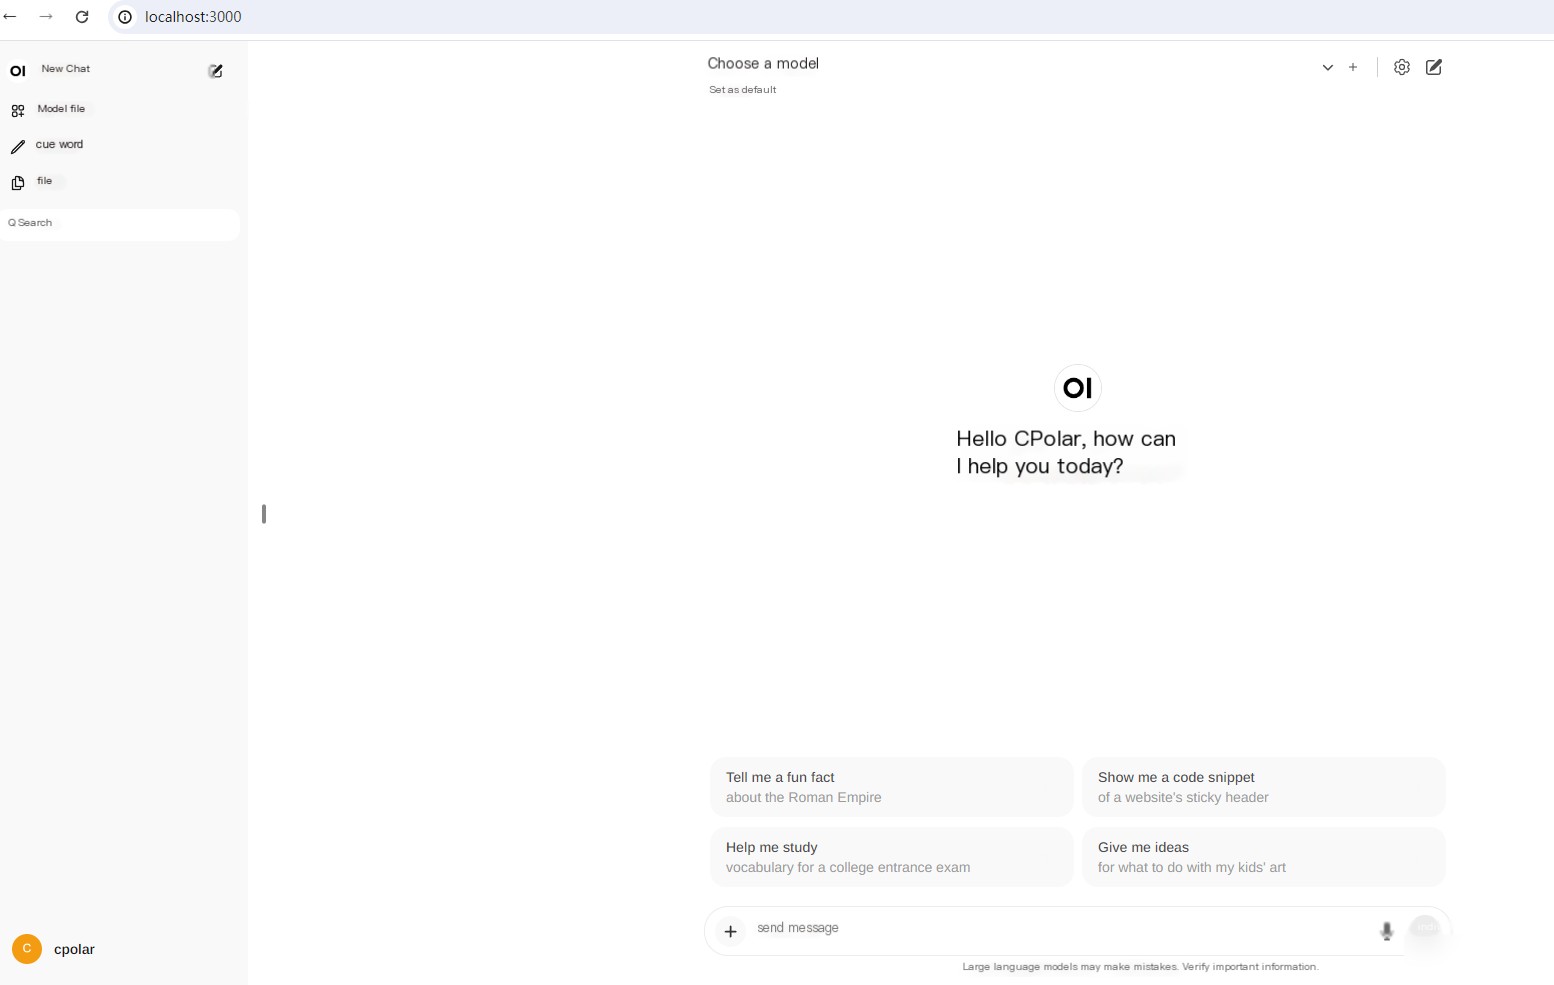 image-20240412145337352
Click the plus sign + next to Select a model above to add a large model, and use the dropdown menu to select which installed model you want to use, and then you can enjoy chatting with AI!
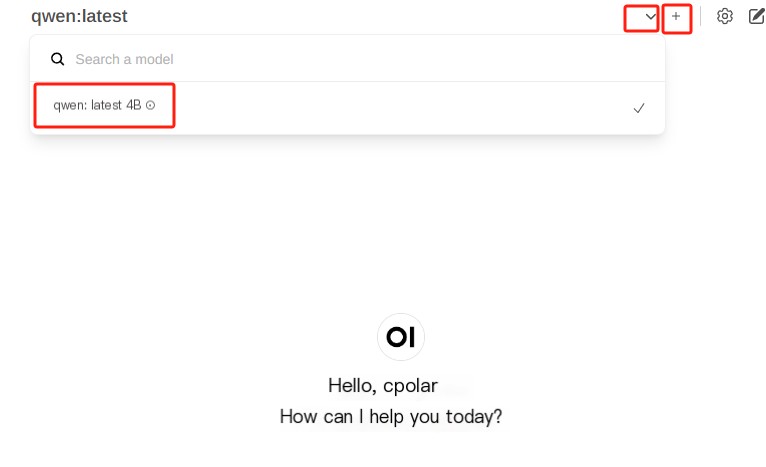 image-20240412145604350
3. Installing a Local Network Tunnel Tool
At this point, we have successfully completed the interaction using the Open WebUI deployed with Docker and the Ollama large model tool on a local Windows system! However, if you want to use Ollama Open WebUI while traveling, you will need the assistance of the cpolar local network tunneling tool to achieve public network access! Next, I’ll introduce how to install cpolar and realize public network access!
The following outlines the steps to install cpolar:
cpolar official website: https://www.cpolar.com
Click to enter the cpolar official website, click try it for free to register an account, and download the latest version of cpolar
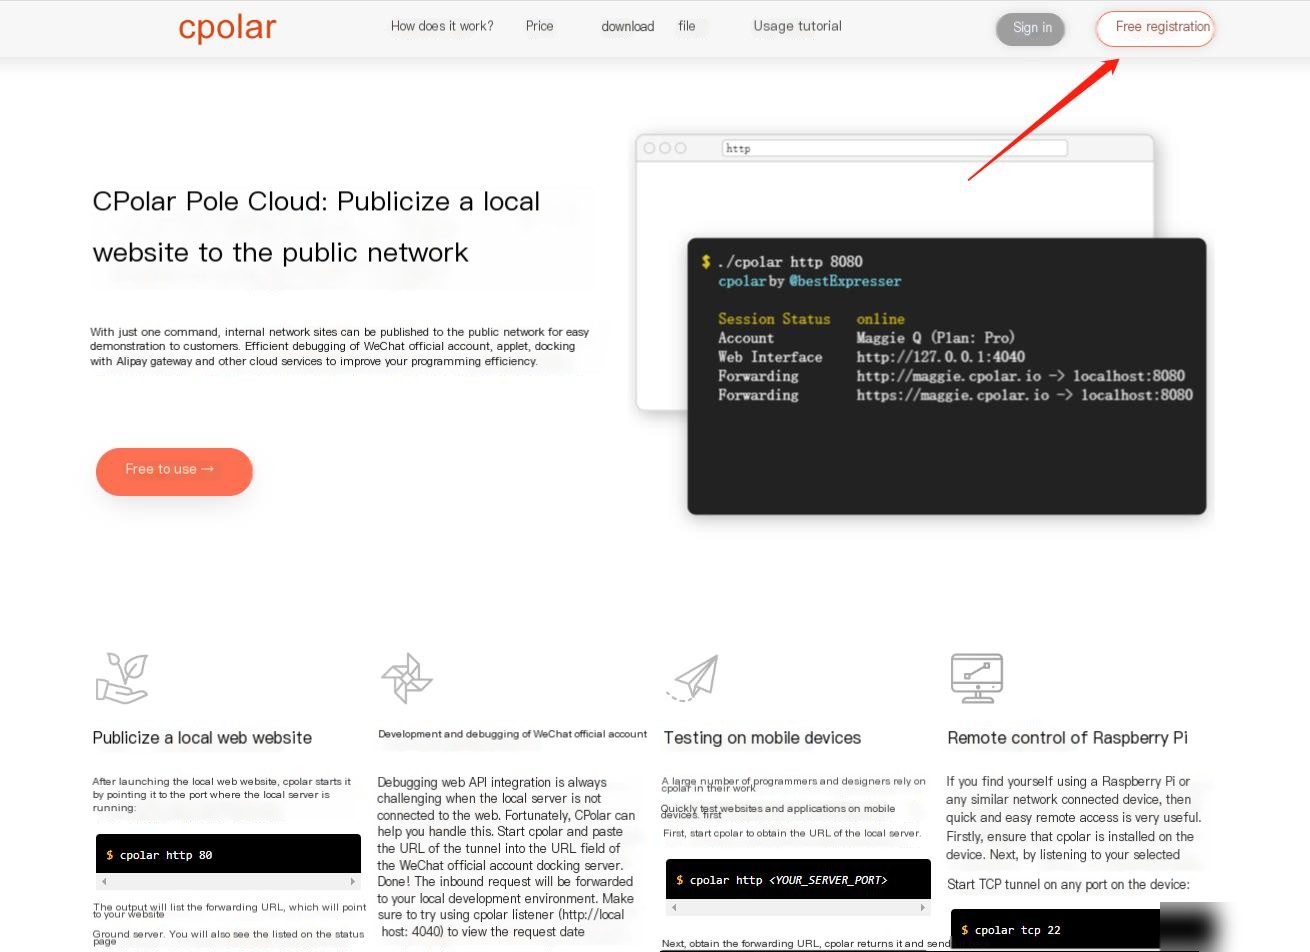 img
img
After successfully logging in, download cpolar to your local drive and install it (just proceed with the default installation), this tutorial chooses to download the Windows version.
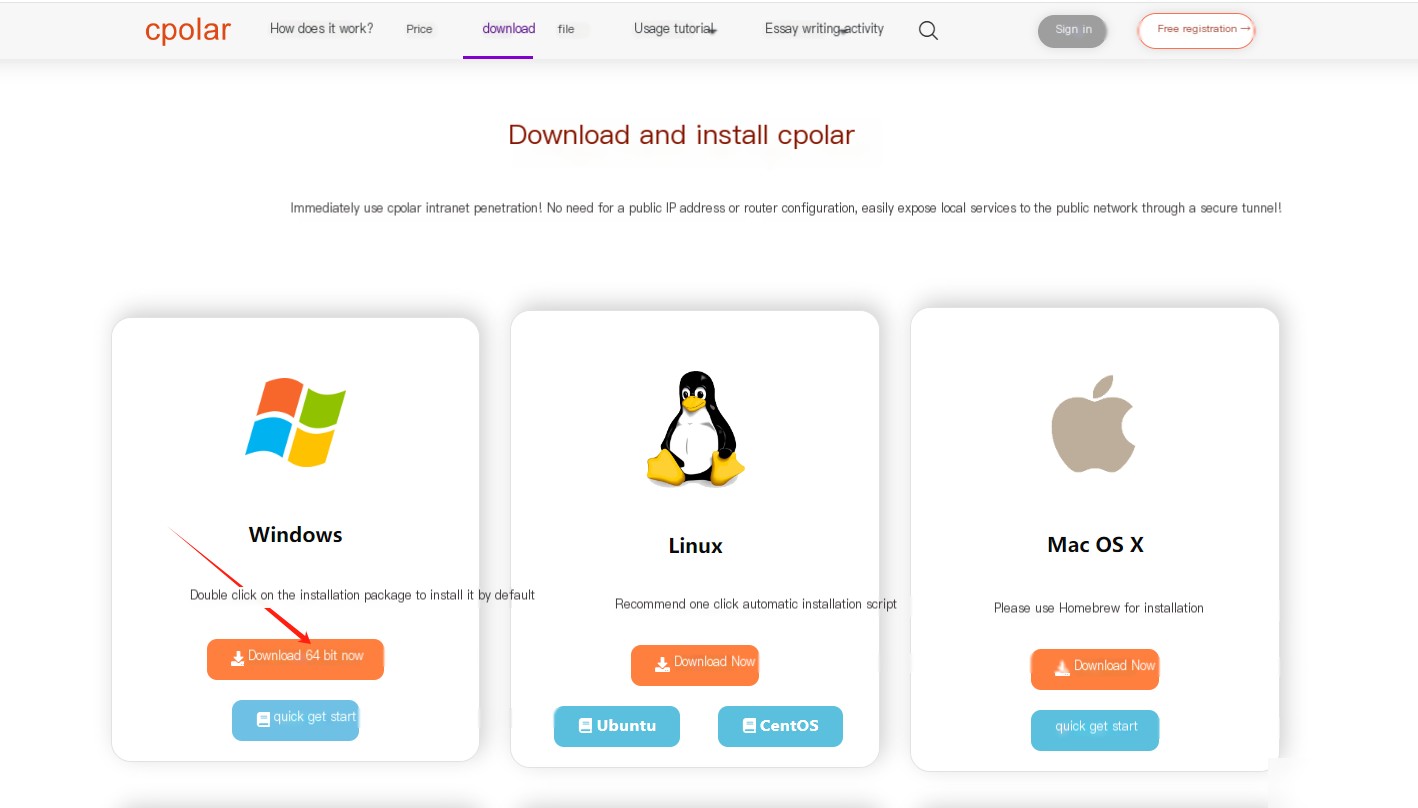 image-20240319175308664
Once cpolar is successfully installed, visit http://localhost:9200 in your browser and log in using your cpolar account. Once logged in, you will see the cpolar web configuration interface, where you can continue configuring.
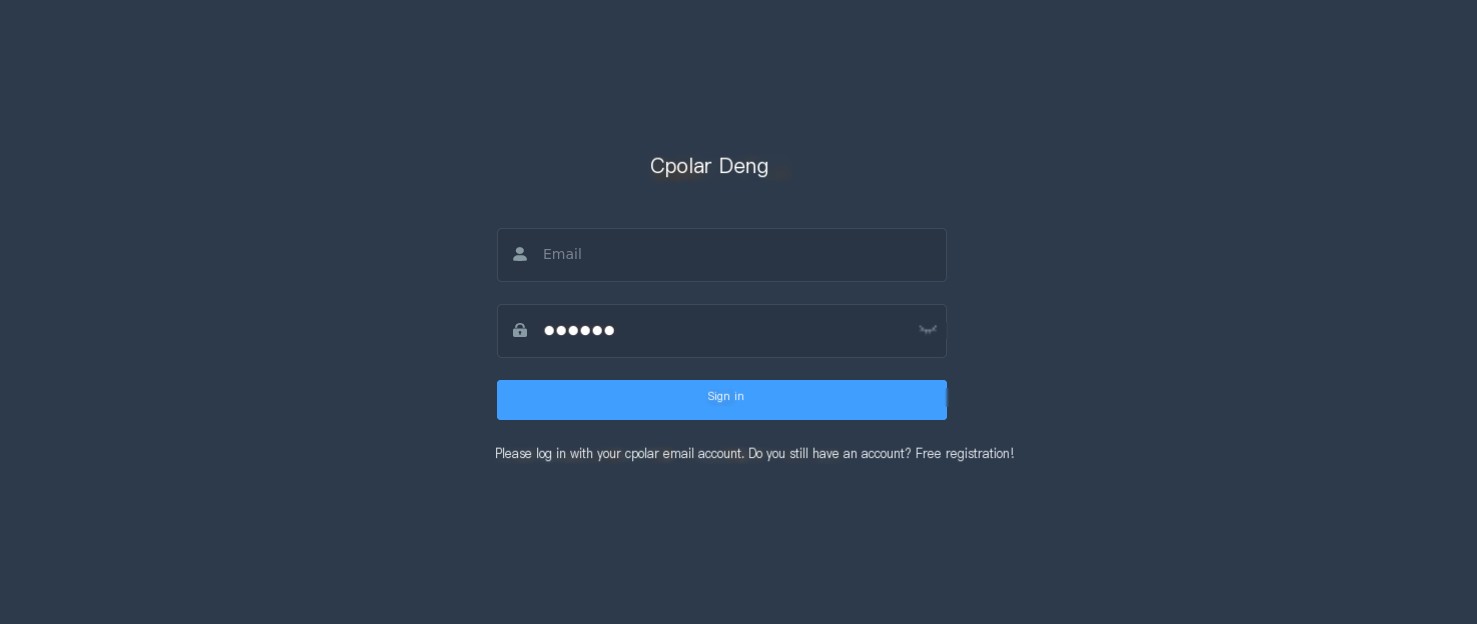 img
img
Next, configure the Open WebUI public address,
After logging in, click on Tunnel Management in the left dashboard — Create Tunnel,
Create a public http address tunnel for ollama1:
- Tunnel Name: ollama1 (the name can be customized, make sure not to duplicate the existing tunnel name)
- Protocol: select http
- Local Address: 3000 (the address for local access)
- Domain Type: free and choose a random domain
- Region: select China Top
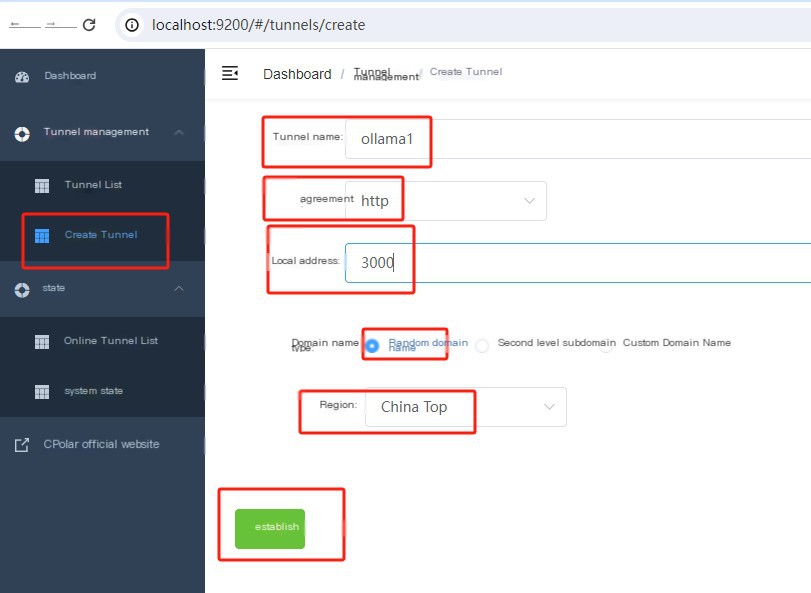 db922938915f169100c3099795edd0a
Once the tunnel is successfully created, click Status — Online Tunnel List on the left to view the generated public address, available in two access methods: http and https:
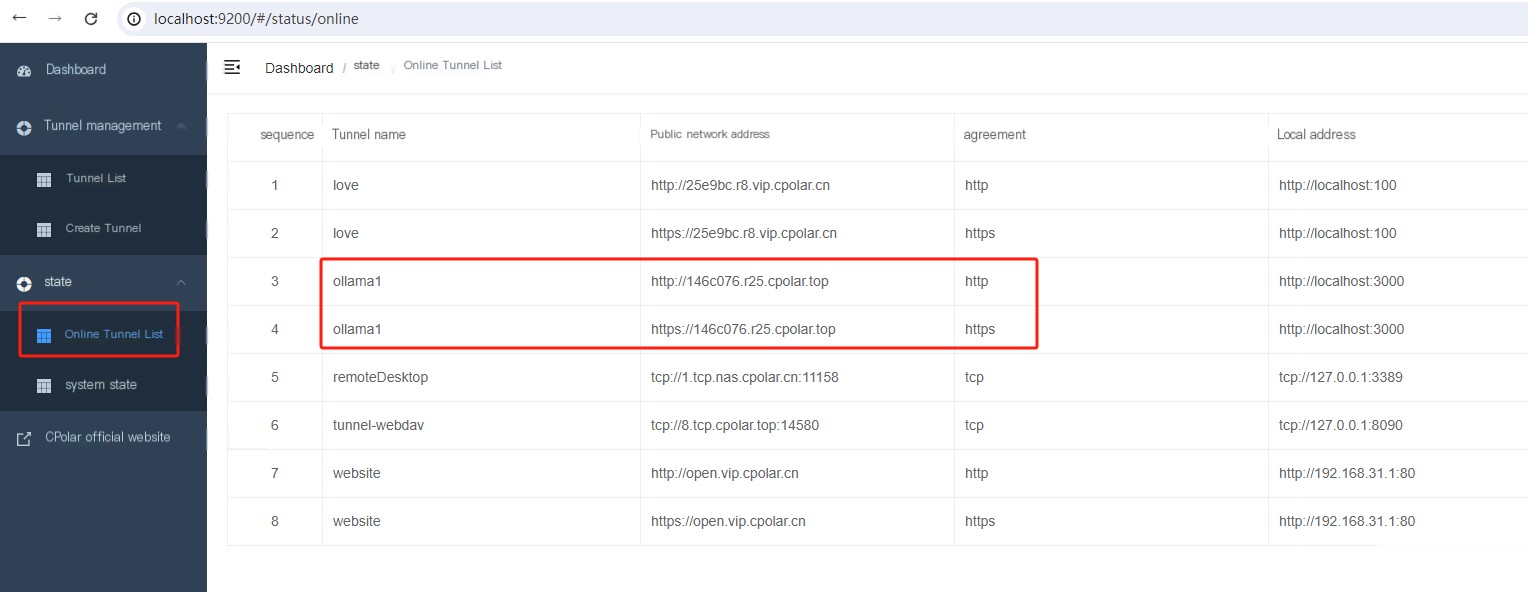 image-20240412152551655
Using any one of the above public addresses, you can log in via a browser on your phone or any device to successfully view the Open WebUI interface. Thus, a public address for remote access is created using cpolar’s public domain without needing to purchase a cloud server, allowing Open WebUI access on a public network!
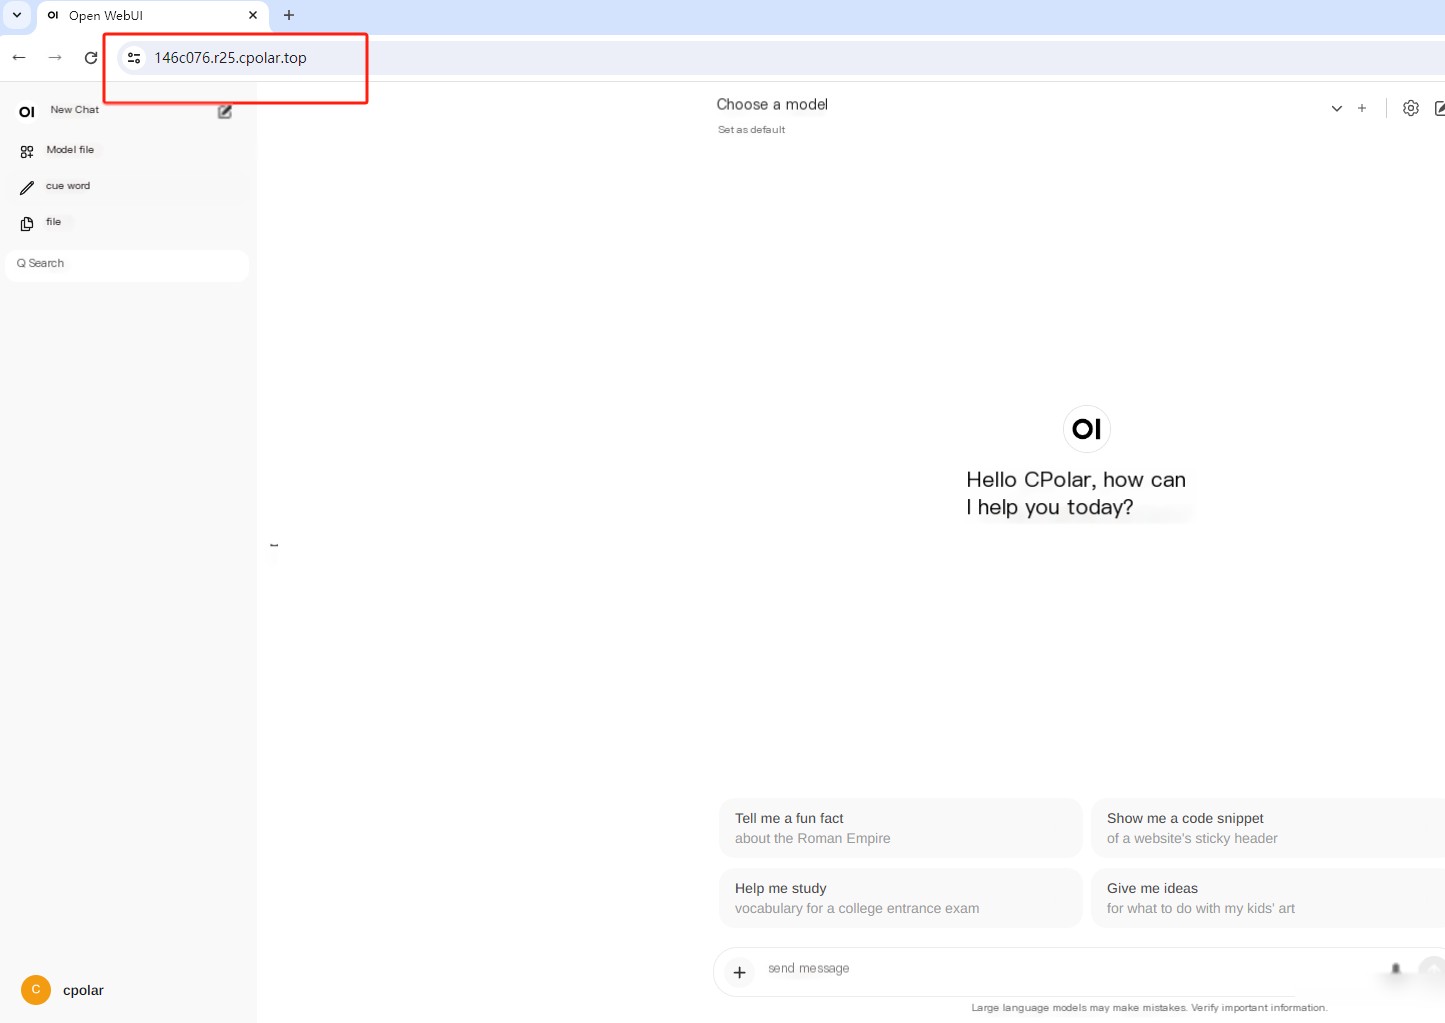 image-20240412152651947
Summary
If we need prolonged remote access to Open WebUI from different locations, since the previously created address is random and changes every 24 hours, and its address is generated by random characters making it hard to remember. If you wish to change the domain to a fixed subdomain and avoid creating a new tunnel every time to access Open WebUI, we can opt to create a fixed public address to address this issue.
4. Creating a Fixed Public Address
Next, we’ll configure a fixed HTTP port address for it, a convenient way to share with others for long-term viewing of the projects you have deployed, without needing to modify server addresses daily.
Configuring a fixed HTTP port address requires upgrading cpolar to a professional plan or above.
Log in to cpolar’s official website, click Reservations on the left, choose Reserve subdomain, set a subdomain name, and click Reserve. Once reserved, copy the reserved subdomain name
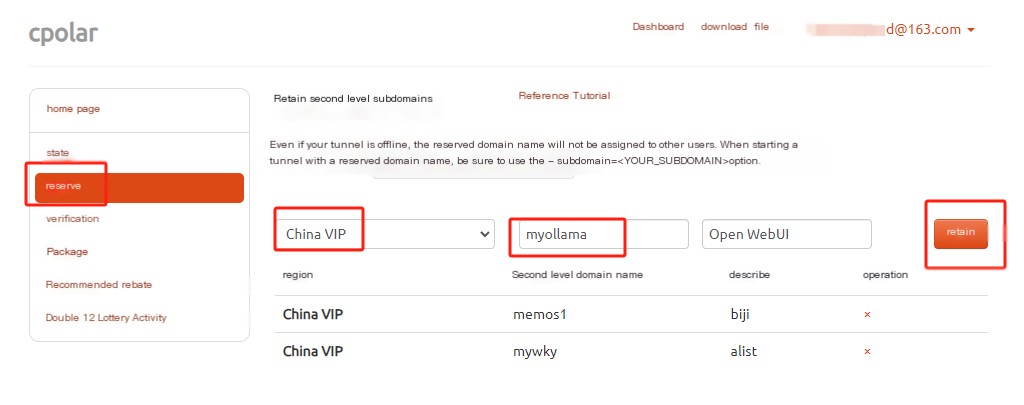 image-20240412152906479
After a successful reservation, copy the reserved subdomain name: myollama, or set a name you prefer.
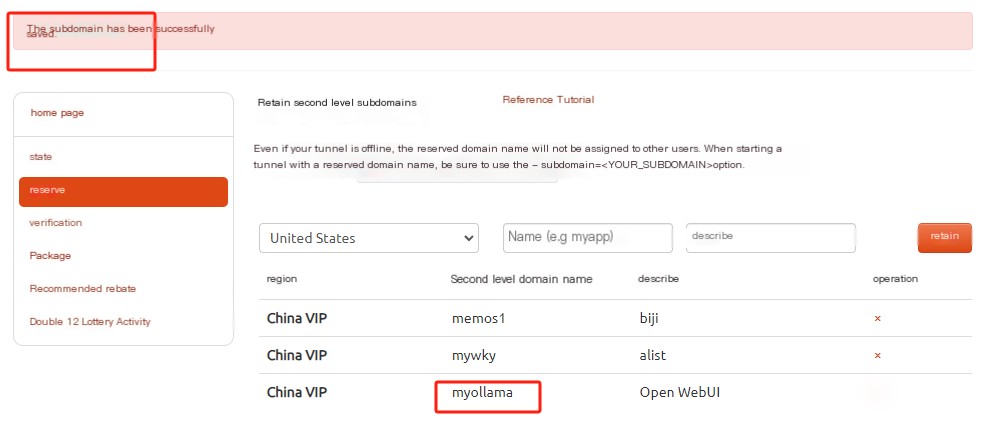 image-20240412152954731
Return to the Cpolar web UI management interface, click Tunnel Management — Tunnel List in the left dashboard, find the tunnel to configure: ollama1, and click the Edit button on the right:
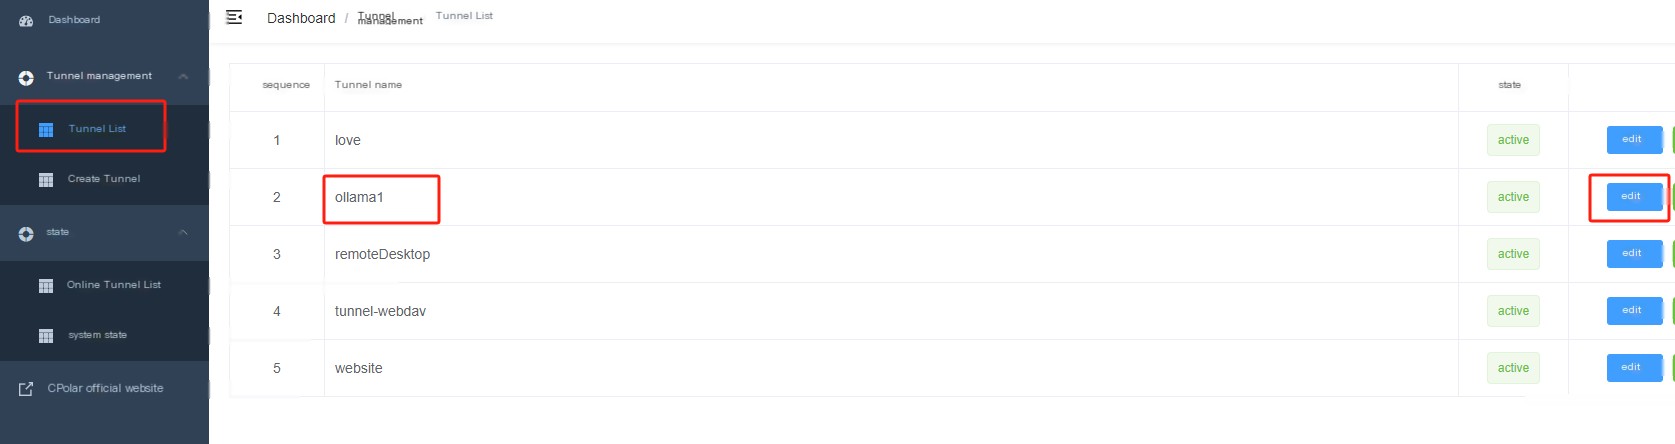 image-20240412153114908
Update the tunnel information and configure the reserved subdomain in the tunnel
- Domain Type: Select Subdomain
- Sub Domain: Enter the reserved subdomain: myollama
Click Update (note: click once to update, no need for repeated submissions)
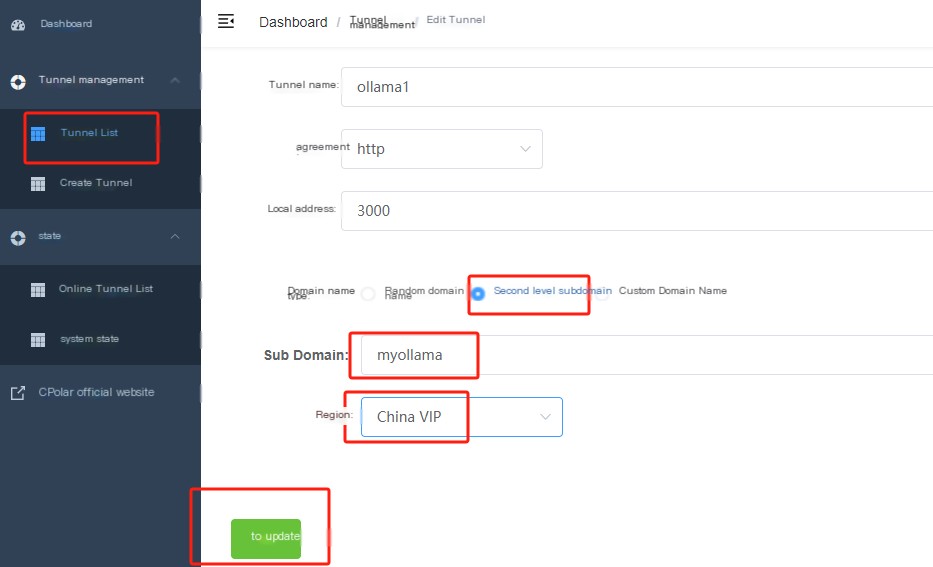 image-20240412153213518
Upon completion, navigate to the Online Tunnel List, where you’ll see the public address has changed, and the address name is now a fixed subdomain name:
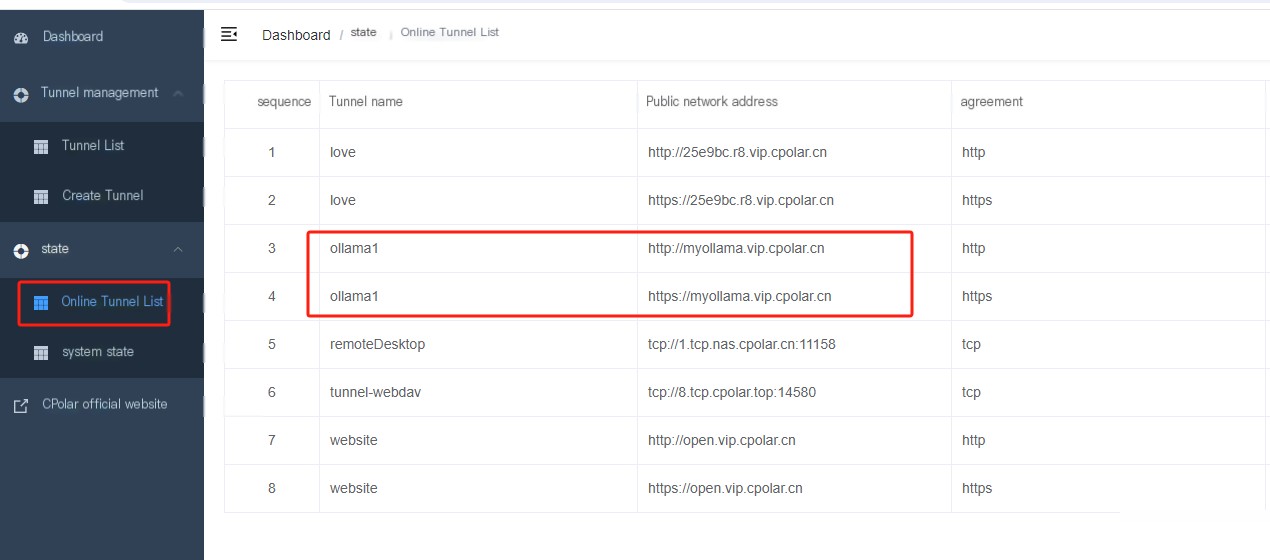 image-20240412153253106
Finally, we use a fixed public https address to access successfully, thus setting up a fixed and permanent public address, allowing access to the locally-deployed Open WebUI from different locations in a public network environment!
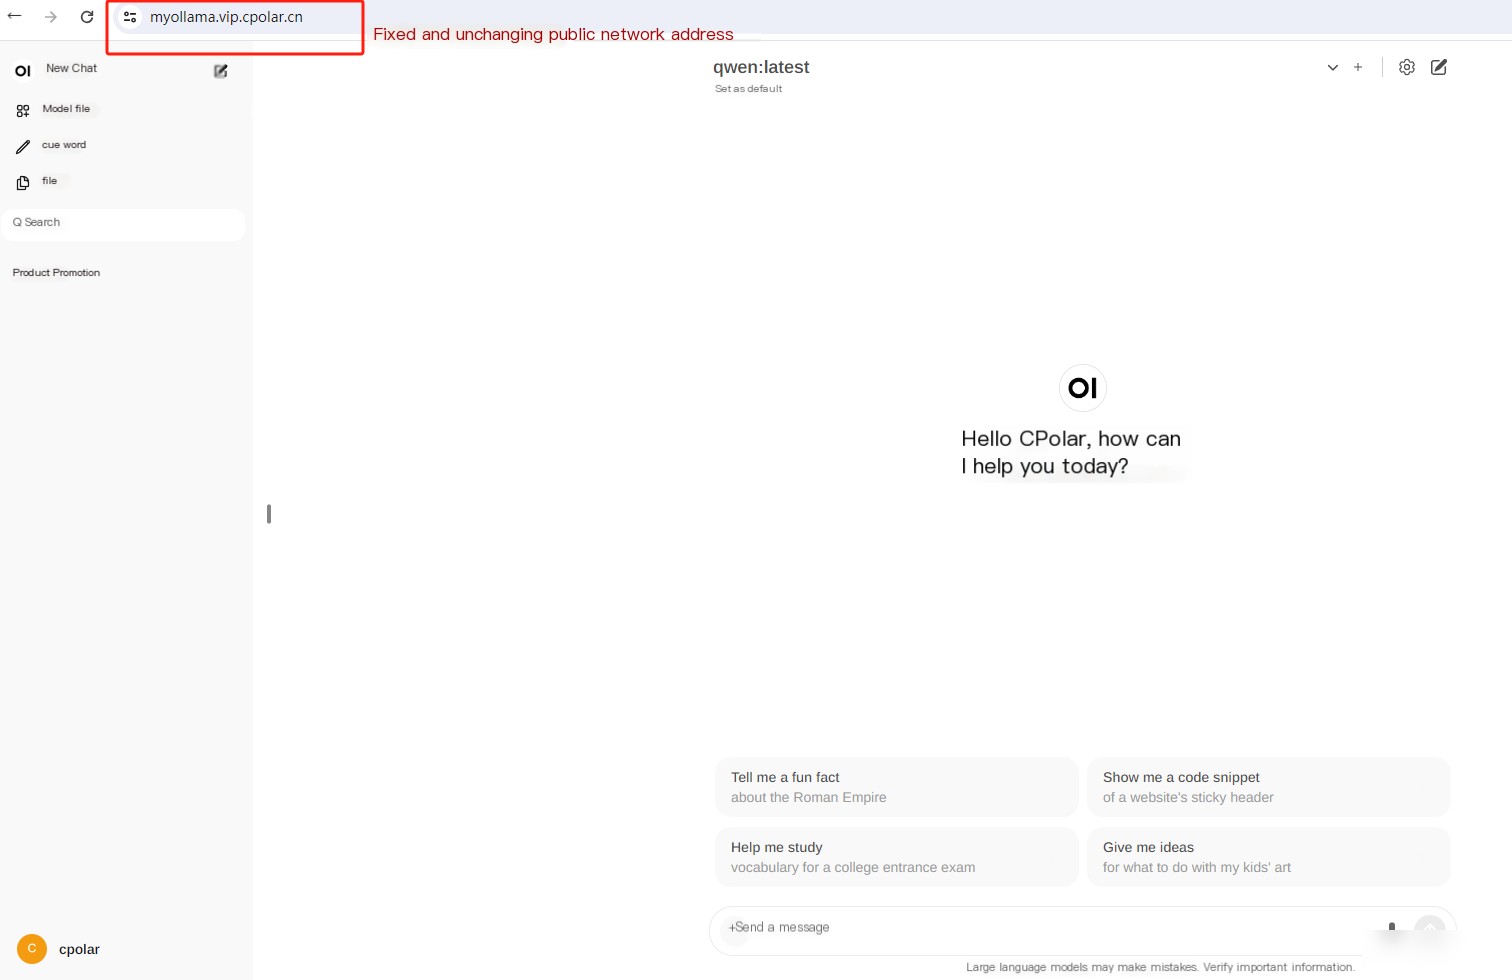 image-20240412153508464
This covers the full process on how to install the Ollama tool for large models locally on a Windows system and deploy Open WebUI using Docker, achieve public network access to a local LLM using the cpolar network tunneling tool, and configure a fixed and unchanging subdomain public address for remote access. Thanks for watching, and feel free to leave comments for any questions you might have.