
Introduction
It was supposed to be a calm and sunny day. Out of boredom, I opened the Windows Event Viewer. Didn’t I change the default port for RDP (Remote Desktop Protocol)? Why are there still so many login logs? Changing ports really is a false sense of security. It’s been subjected to an RDP brute force attack. Upon further inspection, no IP addresses were recorded in the events. Well, time to get to work.
 >
>
Security Event Log
Security Event Analysis
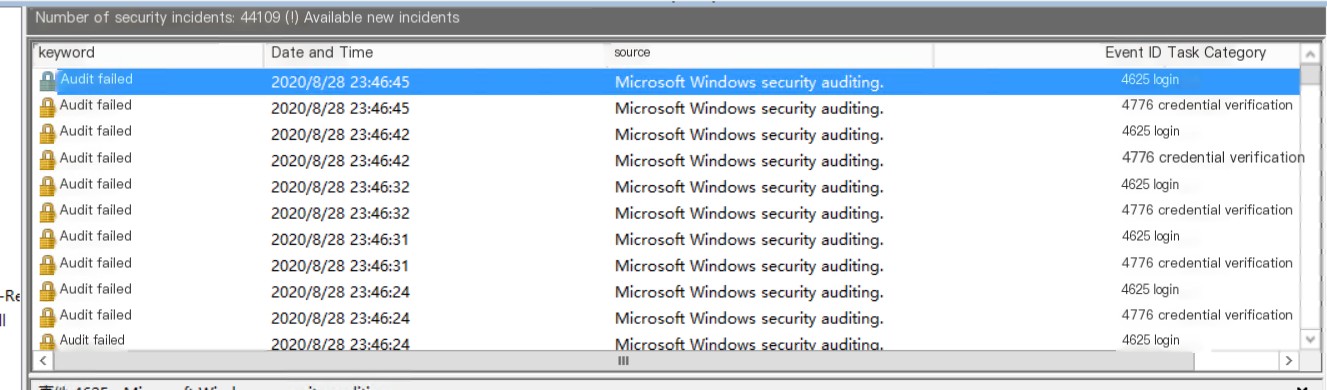
First, let me explain my environment: Windows Server 2012 R2. Aside from changing the 3389 port, I haven’t configured any security settings. At first glance at the logs, I thought the issue was with SMB (445), NETBIOS (135, 139) services because the event IDs were 4625 and 4776. The former’s LogonProcessName is NtLmSsp, and the latter’s PackageName is MICROSOFT_AUTHENTICATION_PACKAGE_V1_0.
Using the two keywords above, I found many articles related to NTLM attacks (later realized it actually had nothing to do with this…), so I started from SMB security configuration (The decisive trick is to directly disable SMB. It’s simple and convenient. Readers can skip the following steps. But I want to explore what exactly this attack is all about).
Disable Vulnerable SMBv1
1. Method to Check SMBv1 Status:
Run the command in PowerShell:Get-SmbServerConfiguration | Select EnableSMB1Protocol
If it prints “True”, it indicates that SMBv1 is enabled.
2. Method to Disable SMBv1
Run the command in PowerShell:Set-SmbServerConfiguration -EnableSMB1Protocol $false
For more reference, see Microsoft Documentation.
Enable SMB Signing
Due to an analysis of Windows SMB Replay Attack published on Freebuf, I decided to enable SMB signing.
Set the registry key “RequireSecuritySignature” to 1 to enable SMB signing. You can execute it in PowerShell:Set-ItemProperty -Path "HKLM:\SYSTEM\CurrentControlSet\Services\LanmanWorkstation\Parameters" RequireSecureNegotiate -Value 1 –Force
Configure NTLM-Related Security Options via Group Policy
Made some modifications in Local Group Policy -> Computer Configuration -> Windows Settings -> Security Settings -> Security Options.For example:
Network Security: Restrict NTLM: Audit Incoming NTLM Trafficset toEnable Auditing for All AccountsNetwork Access: Do Not Allow Anonymous Enumeration of SAM Accountsset toEnable
I’m not very clear about the above settings either, so I haven’t elaborated here. Note: Incorrect modifications might result in being unable to connect to the server oneself. More details can be found in this article: Enhancing Windows AD Security to Protect Intranet Security
Brute Force Continues
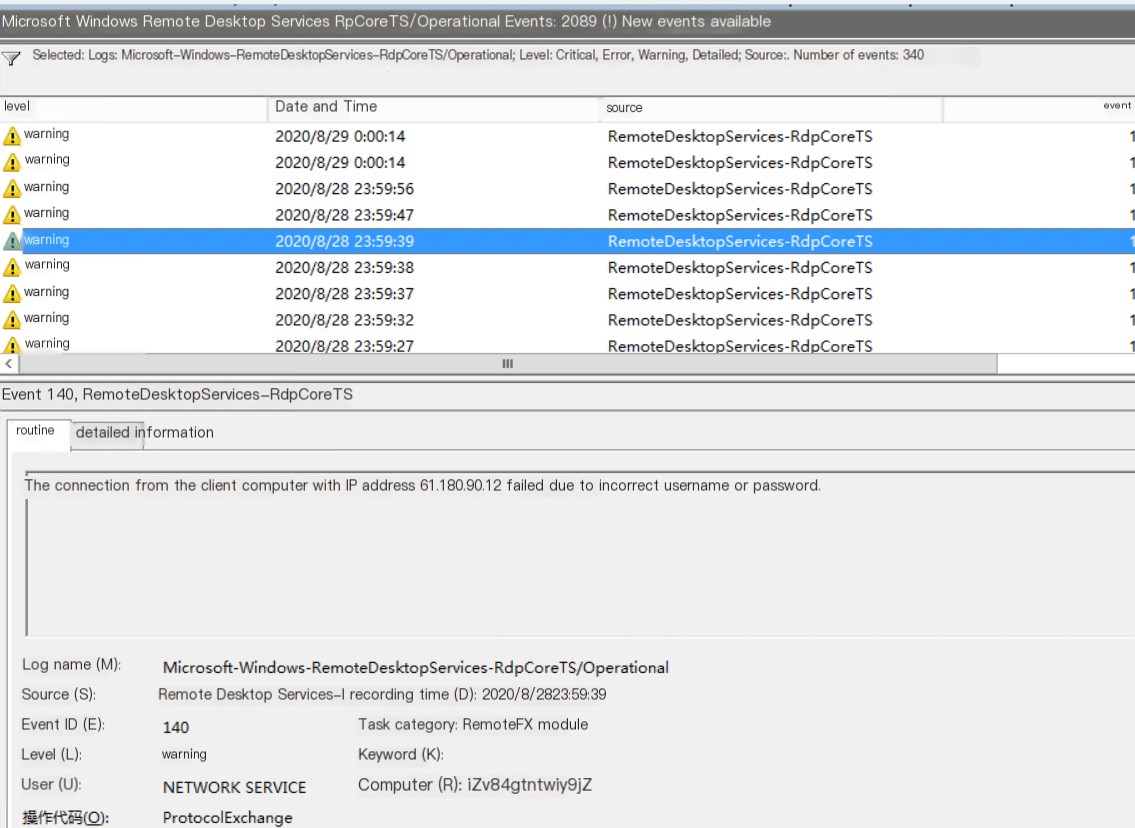
After making the above changes, the security event logs were still overflowing with warnings. I checked the security group of the cloud server and realized that I hadn’t even opened ports like 445, 139. Then, I noticed the Microsoft-Windows-RemoteDesktopServices-RdpCoreTS/Operational event logs in the Application and Services Logs.
 >
>
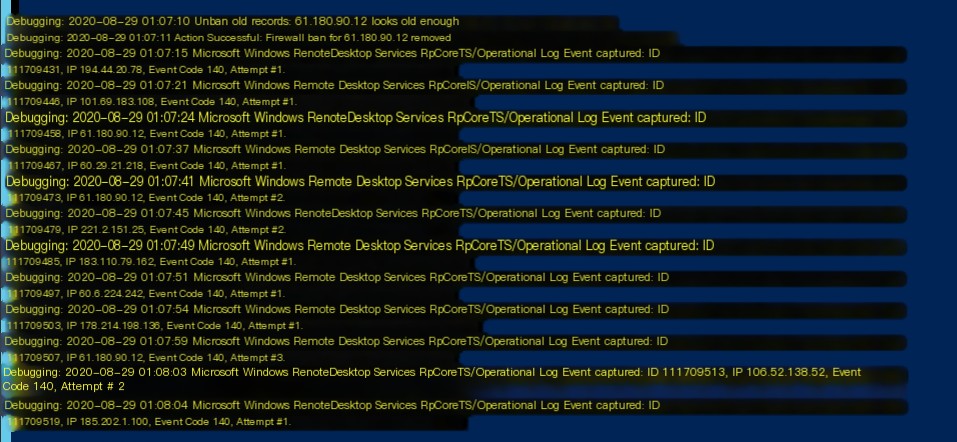
Microsoft-Windows-RemoteDesktopServices-RdpCoreTS/Operational
After filtering out the information-level logs, we obtained the results shown above. Ha! So, it was still RDP brute-force! And there were source IPs. Let’s continue.
RDP Brute Force Defense
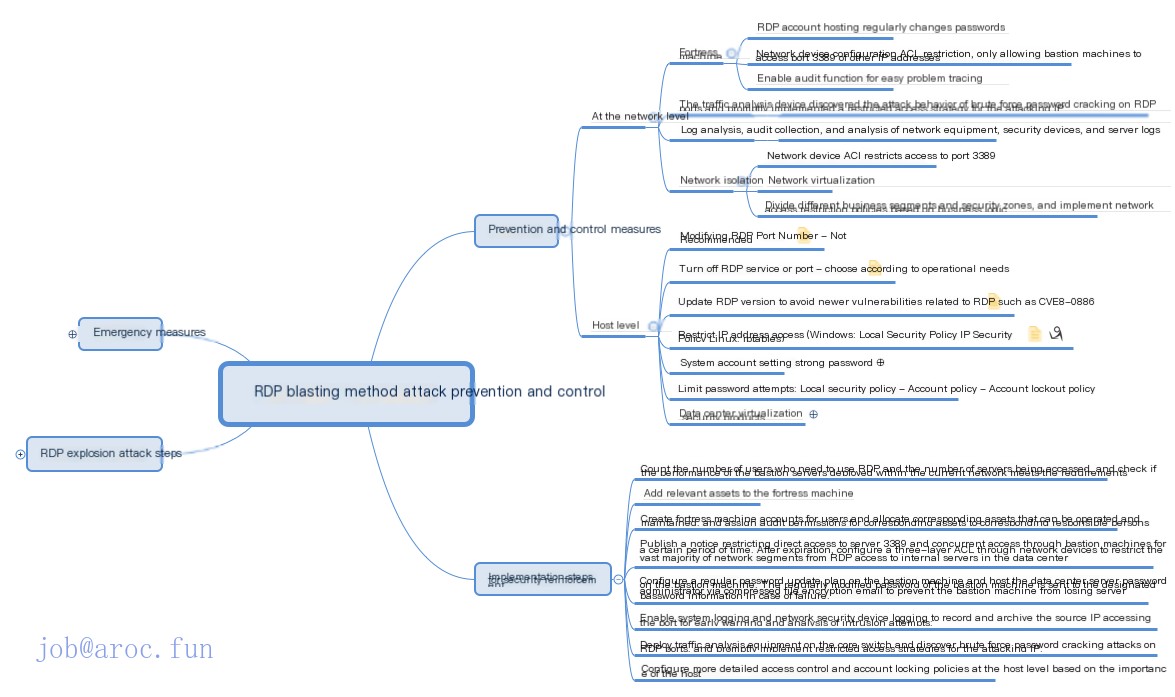
Overview of Defense Strategies Against RDP Brute Force Attacks
Simple and Effective – Group Policy Restrictions
Based on the summary from the above image, I prioritized using Group Policy to configure account lockout policies. This configuration is relatively simple. Run gpedit.msc and configure it as shown in the image below.
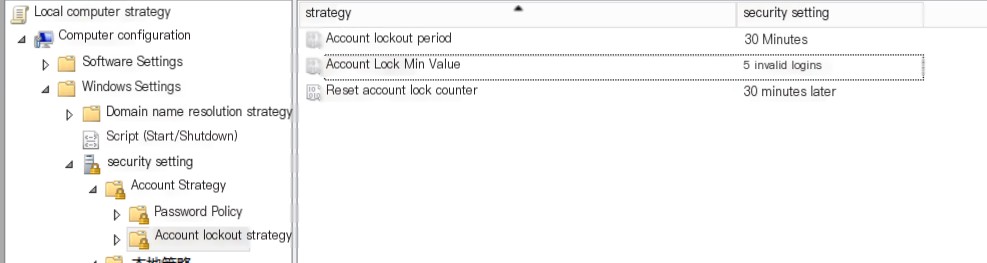
Account Lockout Policy
However, even after configuring, there were still many different IPs attempting brute force after a period of waiting. I even started to suspect that the IPs here were fabricated through some vulnerability.
And since I used the security group policy of the cloud service provider to avoid unnecessary trouble, I didn’t turn on the Windows Firewall. So, it might not have been able to block successfully? So I had to continue.
wail2ban
wail2ban is akin to a tool in Linux known as fail2ban. wail2ban is essentially its Windows version, doing roughly the same job – matching and extracting IPs from logs (events) and banning them. See: Windows Server Wail2ban and Folder Sharing not working together – Error 4625 no IP Using it is relatively simple.
- Based on the introduction above, add an event to $EventTypes in wail2ban.ps1, modifying it to
$EventTypes = "Application,Security,System,Microsoft-Windows-RemoteDesktopServices-RdpCoreTS/Operational",$CHECK_COUNTcontrols the attempt count, default is 5. - Then add to wail2ban_config.ini
[Microsoft-Windows-RemoteDesktopServices-RdpCoreTS/Operational]140=RDP Logins139=RDP Logins With Tls1.0The 139 event can be omitted; it will be used later on.
- Enable Windows Firewall.
Note: When enabling the firewall, if you’re not using the default 3389 port, you need to manually add the inbound rule.
The effect after configuration:
wail2ban
In this way, it’s clear that they are indeed different IPs. (And it seems that after enabling the firewall, the group policy configuration also became effective.)
Packet Analysis
Actually, I could have stopped here, but I wanted to see if there was any weakness in the server’s configuration that resulted in this attack. I wanted to see the difference between the attacker’s RDP brute force and my normal RDP connection. So, Wireshark installation!
Since the TLS layer was involved, I even conducted decryption later (not necessary if you choose not to). For the specific method, see: How to Use Wireshark to Decrypt Windows Remote Desktop (RDP) Protocol.
My capture filter is port [port number], and the display filter is not ip.addr eq [local IP].
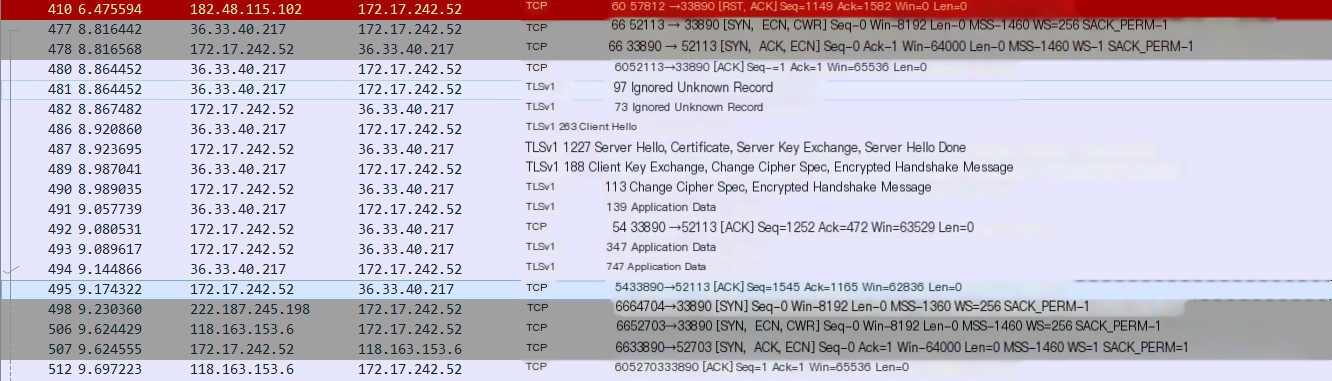
Brute Force Packet
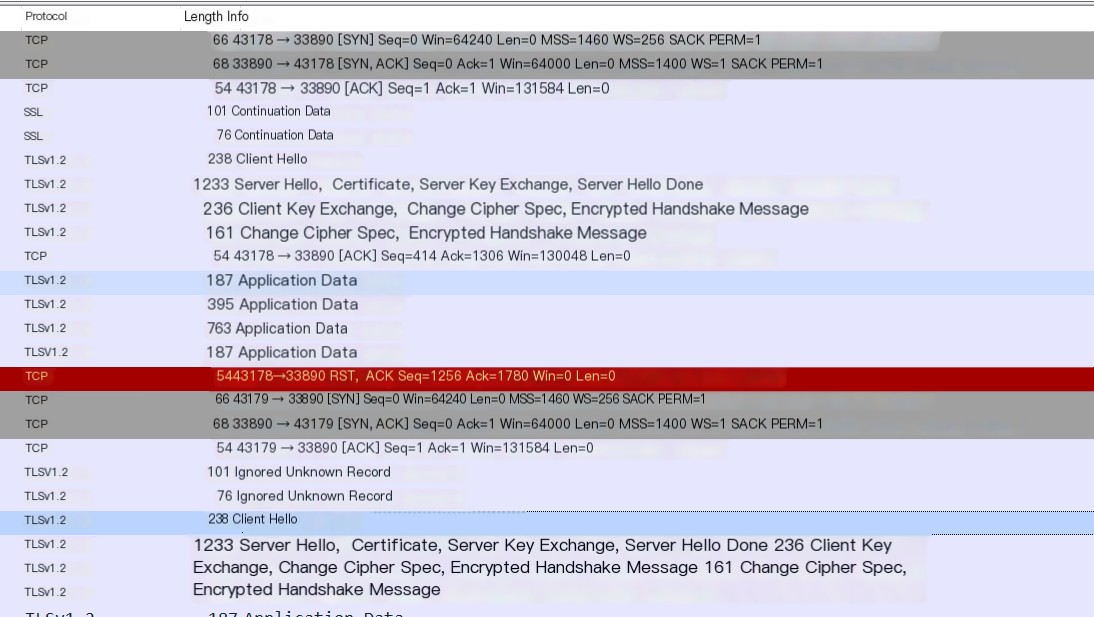
Normal Login Packet
As you can see, his protocol is using Tlsv1, whereas I am using Tlsv1.2. Tls 1.0 has its share of issues, so it’s simple – quickly disable Tls1.0.
Disable TLS1.0
- Force Using TLS via Group Policy (Ineffective)
In Group Policy, underComputer Configuration\Windows Components\Remote Desktop Services\Remote Session Environment, setRequire Use of Specific Security Layer for Remote (RDP) Connectionto TLS1.0.
You might be puzzled… It was said we wouldn’t use 1.0 anymore, so why force it to 1.0? This seems to be Microsoft’s display error T_T. But based on my tests, it indeed didn’t work… Details can be found in the Microsoft documentation. - Disable Tls1.0 via Registry
HKLM:\SYSTEM\CurrentControlSet\Control\SecurityProviders\SCHANNEL\Protocols\TLS 1.0\Server– Create a DWORD named Enabled and set its value to 0.
To avoid unnecessary trouble, I performed a restart after configuring.
Effect
After disabling TLS1.0, going back to check the events showed that the former 140 event had turned into 139, described as The server security layer detected an error (0x80090304) in the protocol stream and has disconnected the client (client IP:45.145.64.5). The attacker couldn’t make a single successful attempt!
wail2ban can remain active, and with some additional configuration, it can defend against more brute force events.
Finally, I performed a threat intelligence IOC for the first time, imitating others. Below are the IPs involved in this attack event.