The loading of pure IP in Suricata is handled as a separate module, known as the IpOnly rule.
This article will introduce how to optimize the program from three perspectives.
- What is the IpOnly rule
- How the IpOnly rule is organized
- How the IpOnly rule matches
1 What is the IpOnly rule
The IpOnly rule, after rule parsing, is judged by the SignatureIsPDOnly function. Rules not meeting the IpOnly criteria can generally be categorized as follows:
- Unknown protocol, that is, protocols not defined in the AppProtoEnum structure
- Contains pattern matching, as in option with content, or pcre, etc.
- Presents a non-rule in the address, such as !1.1.1.1 any -> any any
- Some options incompatible with IpOnly, such as DETECT_FLOWBITS (requires setbits)
2 How the IpOnly rule is organized
The IpOnly rule is relatively unique. It’s generally considered sufficient to hit the source and destination IP addresses and then verify other header information to determine that the packet matches the rule. Therefore, our focus is on how to organize and efficiently match IPv4 and IPv6 addresses.
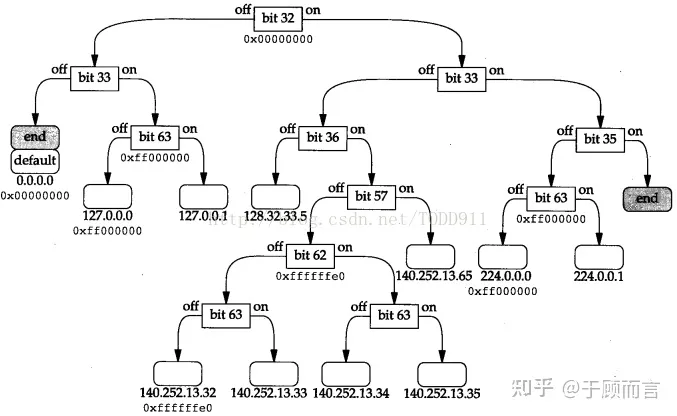
Here, Suricata draws from the routing table lookup algorithm in the BSD operating system – Radix Tree. Essentially, routing table lookup involves performing longest mask matching on the destination IP to index the next hop in the routing table. Let’s first look at the basic concept of the radix tree.
The Radix Tree is essentially a binary tree, consisting of internal nodes and external nodes. Internal nodes indicate the position for a bit test and determine the search direction based on test results, while external nodes store key values.
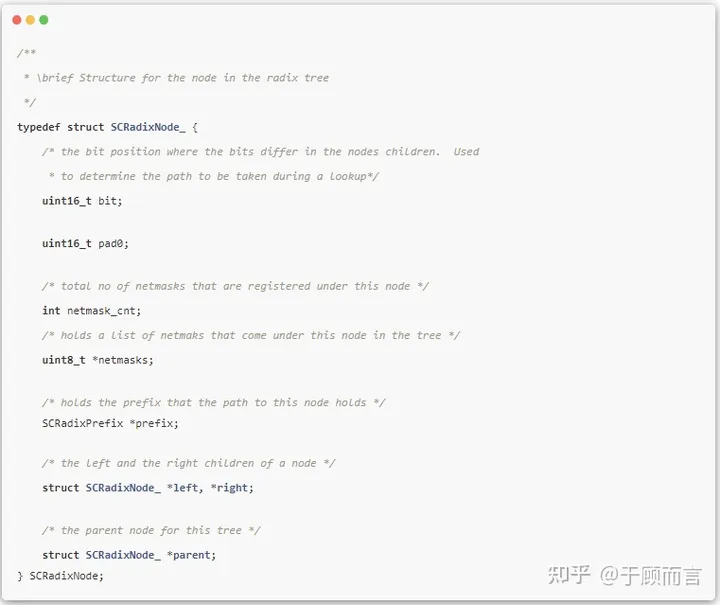
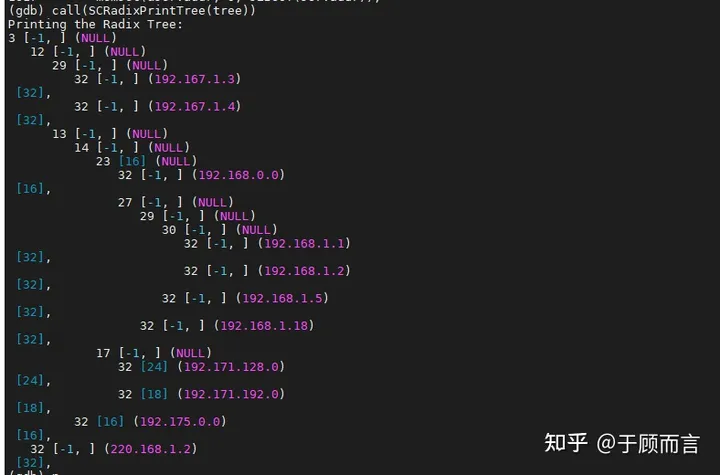
The specific implementation in Suricata is in IPOnlyPrepare, where four Radix Trees are constructed to represent source IPv4/6 and destination IPv4/6.
Steps for adding precise IPs:
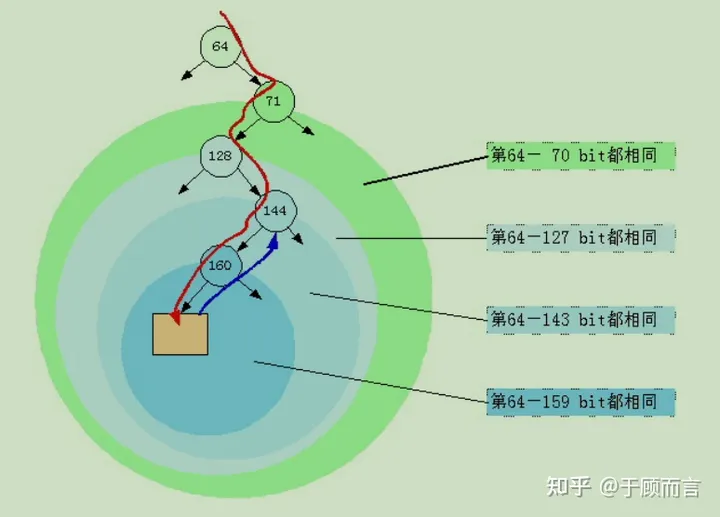
- Place the node to be inserted in the tree for matching. If the key is the same, attach it to the appropriate position on the mask list; otherwise, note where their first different bit occurs.
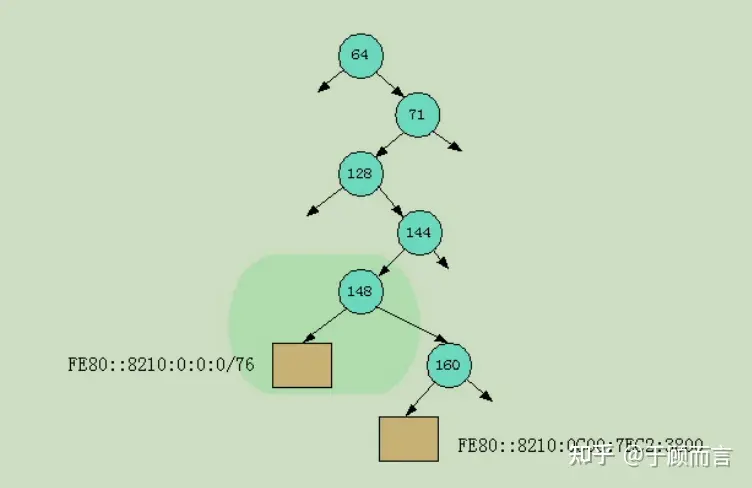
- Split the common identical mask. The following diagram helps in understanding this concept: the first difference between the old node and the new node is at position 148:
Before insertion:
After insertion:

Steps for adding subnetwork IPs:
- For subnet type IPs like 192.171.192.0/18, firstly perform an AND operation on the IP and the mask to generate a key, continuously perform bit tests to find the leaf node, and then identify the maximum common position to create a new parent node. This step is the same as the insertion of a precise IP.
- If the mask of the current subnet IP is less than or equal to the bit position of the parent node, we can consider that the leaf node can cover all nodes under the parent node, hence the netmask of the new parent node is set to 18.
3 How the IpOnly rule matches
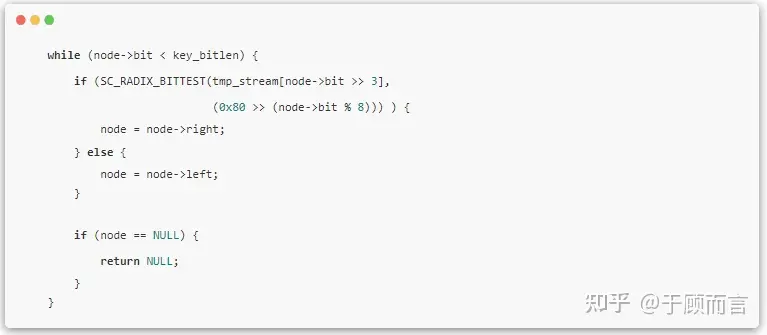
The matching happens in the SCRadixFindKeyIPV4BestMatch and SCRadixFindKeyIPV6BestMatch functions. The lookup steps can be divided into three steps: find leaf -> distinguish duplicates -> backtrack:
- Continuously perform bit tests to delve into left or right paths, ending at a leaf node, and determining if the leaf node is the same as the lookup key.
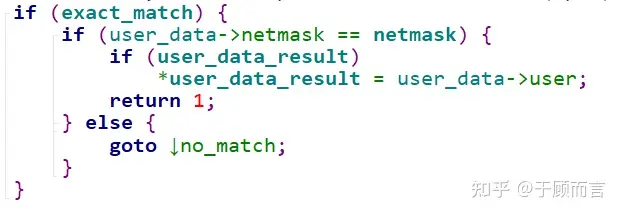
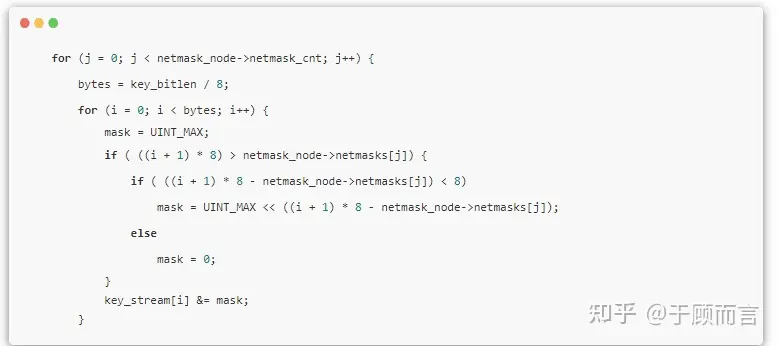
- If a precise match doesn’t occur in the first step, look for potential mask matches in the duplicate key list at this leaf node. Masks are arranged from large to small: 192.168.0.0/16 and 192.168.0.0/20
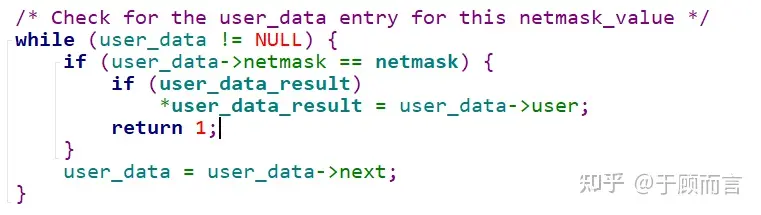
//Lookup mask list
SCRadixPrefixContainNetmaskAndSetUserData(node->prefix, netmask_node->netmasks[j], 0, user_data_result))
//Precise match
SCRadixPrefixContainNetmaskAndSetUserData(node->prefix, key_bitlen, 1, user_data_result)
- If no results are found in the second step, backtrack to the parent node, perform a logical AND operation on the lookup key and the existing mask, generate a new lookup key, and search again. As the tree top represents IP addresses with common prefixes, there’s a possibility for network matching if a suitable mask exists in the intermediate node’s mask list.