This article is a machine translation. If you can read English, it is recommended to read the original: [https://newtonpaul.com/cobalt-strike-bypassing-c2-network-detections/](https://newtonpaul.com/cobalt-strike-bypassing-c2-network-detections/).
The topic of **Network Detection Bypass** is crucial for understanding how adversaries evade security measures in network environments. This article explores techniques used to bypass C2 (Command and Control) network detections, focusing on methods employed by tools like Cobalt Strike. It discusses various evasion strategies, including traffic obfuscation, domain fronting, and encrypted communication channels.
By understanding these techniques, security professionals can better defend against advanced threats and improve their network monitoring capabilities.
0x01 Introduction
In this short blog post, we will explore how to easily bypass network detection for Cobalt Strike beacons. Many AV products, such as Symantec Endpoint Protection (SEP), have network detection capabilities that monitor traffic passing through a device’s network interface. Additionally, IDS and IPS systems have basic detection mechanisms for C2 traffic, primarily looking for specific patterns in network packets.
For popular tools like Cobalt Strike, the default “out-of-the-box” beacon settings are fingerprinted by vendors, making them easily detectable.
In Cobalt Strike, Malleable profiles are used to define C2 configurations. You can choose different protocols for C2, with HTTP, HTTPS, and DNS being the most common. Since the payload is unencrypted, HTTP beacons are easily detected. For HTTPS connections, detection occurs based on the certificate used for encryption.
As with any exploitation tool, using default settings significantly increases the likelihood of detection. There are Malleable profiles available on GitHub that modify the default C2 settings. However, these profiles have also been fingerprinted and can trigger detections. The profiles available on GitHub are primarily intended for testing detection capabilities against different APT and CrimeWare C2 configurations observed in the wild.
https://github.com/rsmudge/Malleable-C2-Profiles
0x02 Solution
Fortunately, Cobalt Strike’s Malleable C2 profiles are highly customizable. In fact, customization is one of the key reasons why Cobalt Strike is so popular and effective. You can create your own profiles, and there are online guides available to help you do so.
However, there is an even simpler solution: C2 Concealer. This tool, created by FortyNorth Security and released last year, includes a Python script that generates C2 profiles based on a few user-defined variables.
https://github.com/FortyNorthSecurity/C2concealer
0x03 Demonstration
Installation is straightforward—simply clone the GitHub repository and run the installation script.
Once installed, run the script and specify the hostname you want to use.
C2concealer --hostname newtpaul.com --variant 1Next, C2Concealer will scan your system to locate c2lint. C2lint is a tool included with Cobalt Strike that is used to test and troubleshoot profiles before deployment.

Once the scan is complete, you will be prompted to select an SSL option. Using a legitimate LetsEncrypt certificate is the most effective way to avoid detection. However, this requires pointing an A record to your team server. For this demonstration, we will use a self-signed certificate instead.

You will be asked to fill in some basic certificate details. The specific values you enter here do not matter.
Once completed, you should receive confirmation that the profile has passed the c2lint check. The name of the newly created profile will also be displayed.

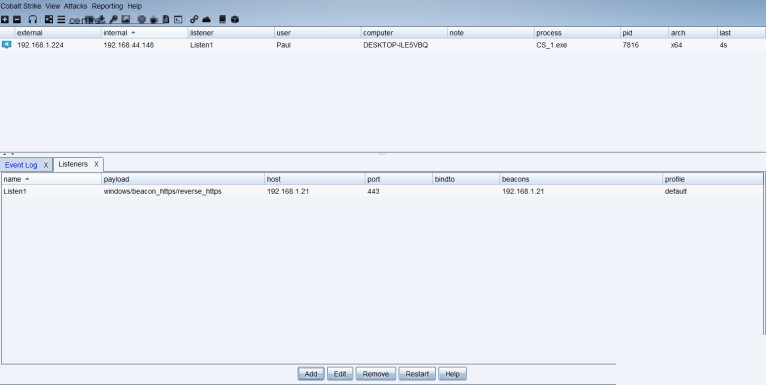
Next, start your team server, this time specifying the profile to load.
sudo ./teamserver 192.168.1.21 *Password* ~/C2concealer/C2concealer/34c5a462.profileGenerate your new listener and payload of choice.
0x05 Before vs. After
Before using our newly created profile, SEP blocked outbound connections to the Cobalt Strike team server. This is the expected behavior when using the default C2 profile.
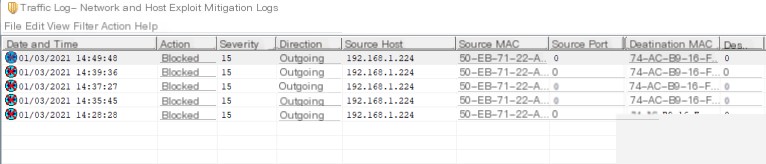
However, after applying our new profile, nothing was blocked, and we successfully established C2 communication.