
In the basics of the Windows Registry, detailed information about the registry has been introduced. This article focuses on forensic practice with the registry, creating a system image to export a copy of the registry.
Obtaining Windows Registry Hives
During an incident response event, we must obtain a complete disk image for analysis. We can extract the hives by installing tools on our PC and navigating to the hive location.
However, creating a disk image during an event can take a very long time, depending on the size of the disk. Time is crucial during an event, and we don’t want to waste any of it. We can choose to obtain only the registry hives or relevant disk locations as needed.
Creating Disk Images with FTK Imager and the Windows Registry
https://www.exterro.com/digital-forensics-software/ftk-imager
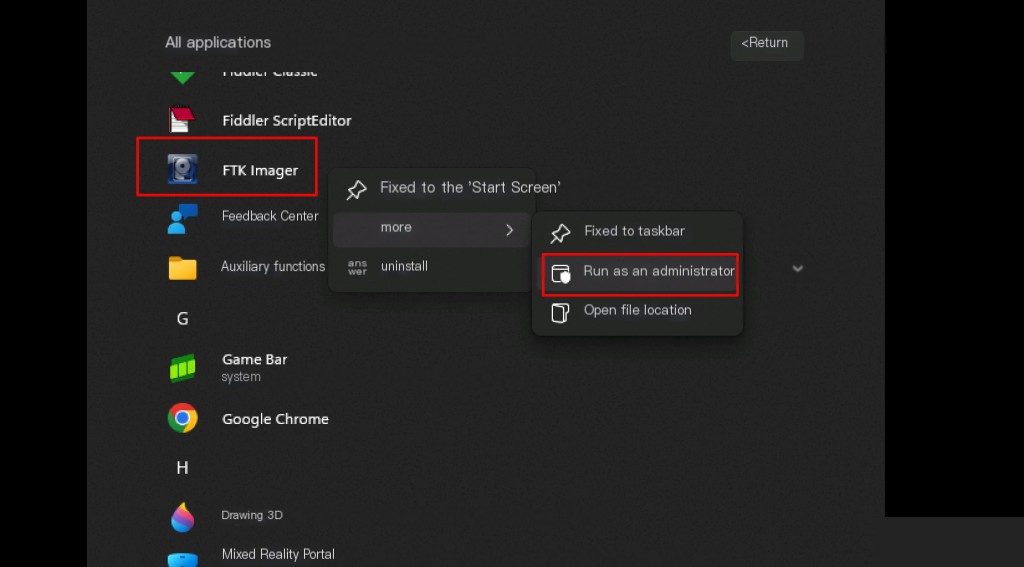
Registry hive files are critical system files, so Windows locks them while they are active. Locking these files helps prevent unauthorized users or malware from modifying or deleting them, which could otherwise cause serious system issues. These files are known as system-protected files. We can use specially designed tools like FTK Imager to obtain copies of these protected files. Therefore, FTK Imager must be launched as an administrator.
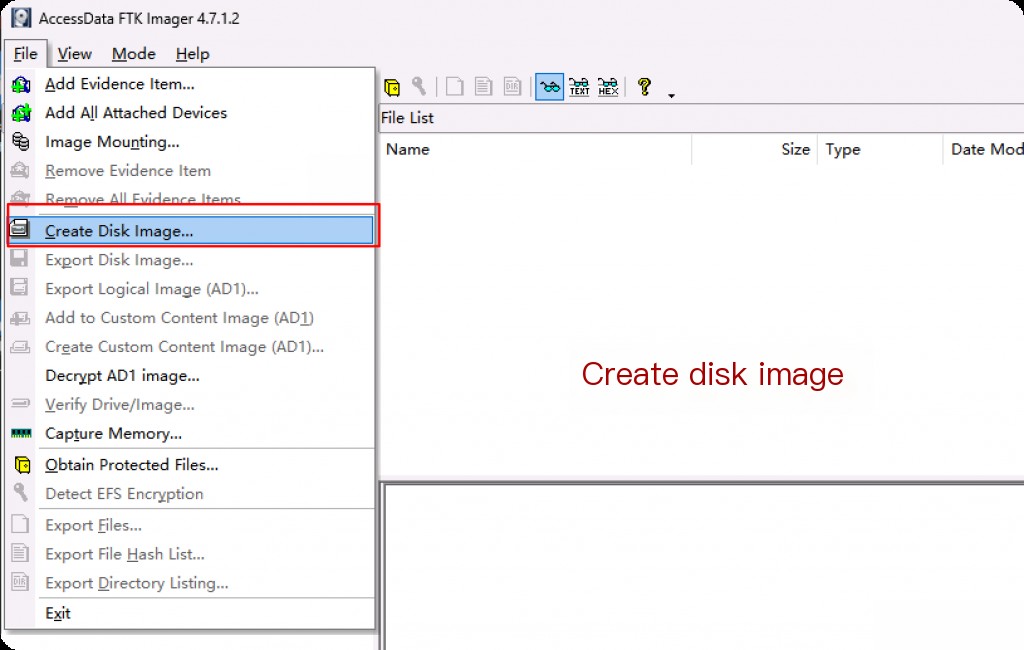
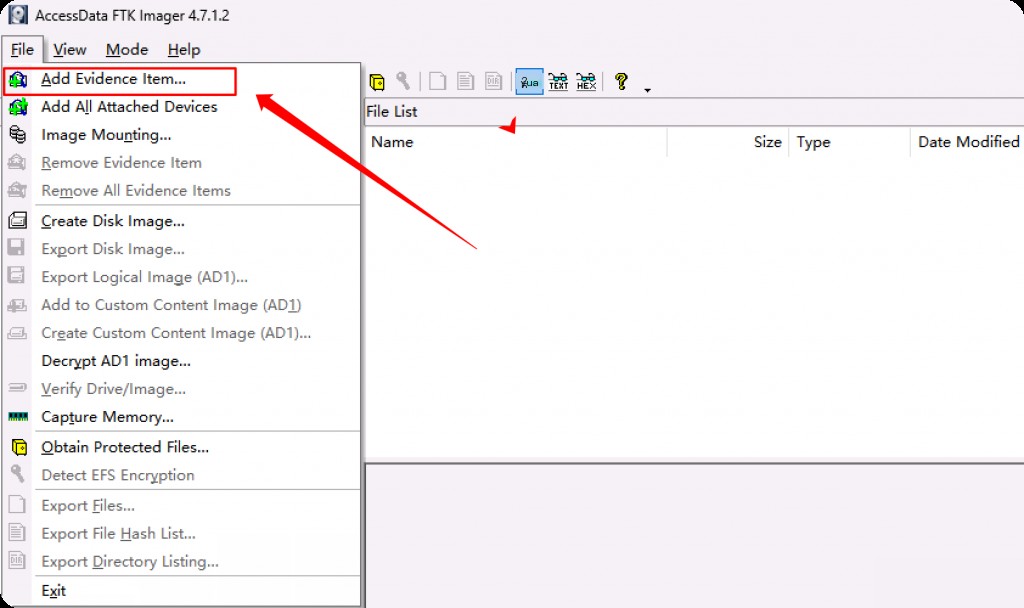
File -> Create Disk Image.
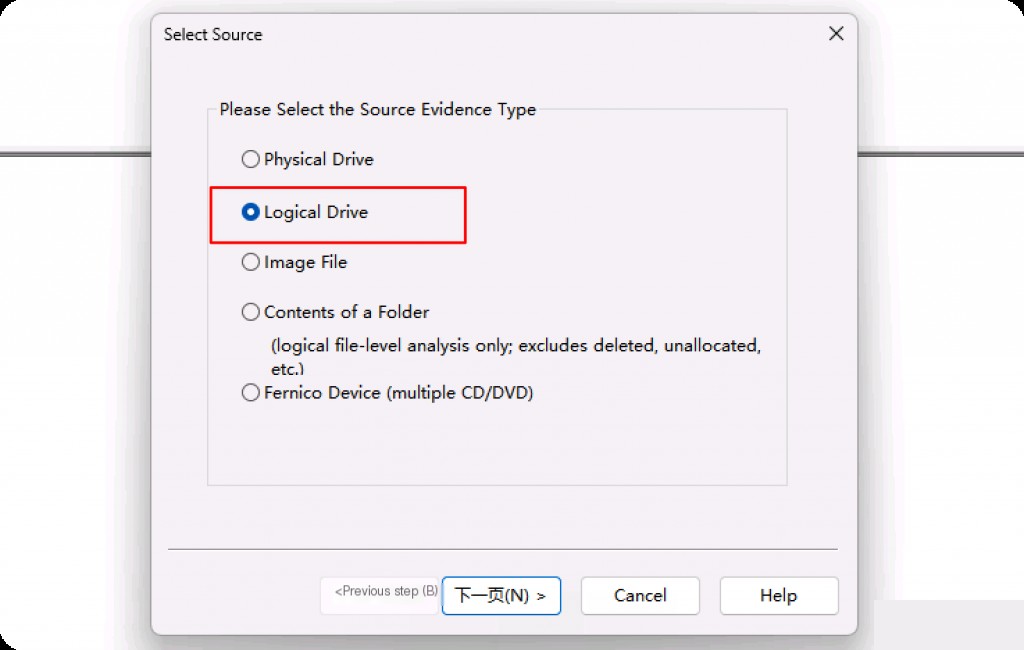
Selecting the source means choosing the type of disk we want to add evidence from.
- Physical Drive: Drives connected to the computer, such as mechanical hard drives, solid-state drives, etc. This drive contains the full capacity of the physical hardware, including allocated and unallocated space. This usually takes up more space but allows for the recovery of deleted files/content.
- Logical Drive: Similar to physical drives, like C drive, D drive. But unallocated space does not exist.
- Image File: If we want to use the acquired disk image and extract specific files/content from it, we can use this source.
- Contents of a Folder: This allows us to obtain all data from the folder we want. This option only includes the specified logical space folder. You can choose physical, logical, or the last one, while obtaining from an active system.
We will select the logical drive and then choose the drive from which to obtain data. Windows is usually installed on the C drive, so we will select this drive.
Since the entire C drive’s capacity is too large, and there is no place to store the image file, I actually chose to image the C:\Windows directory.
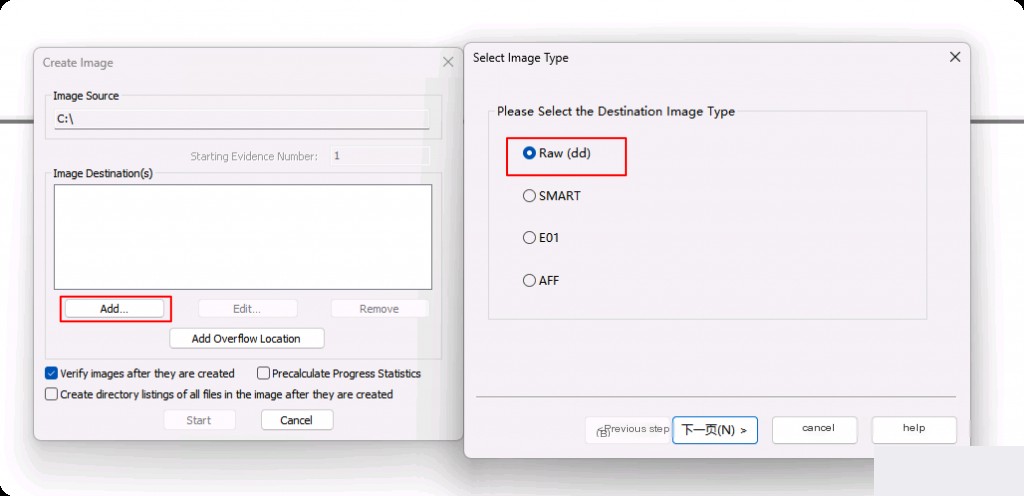
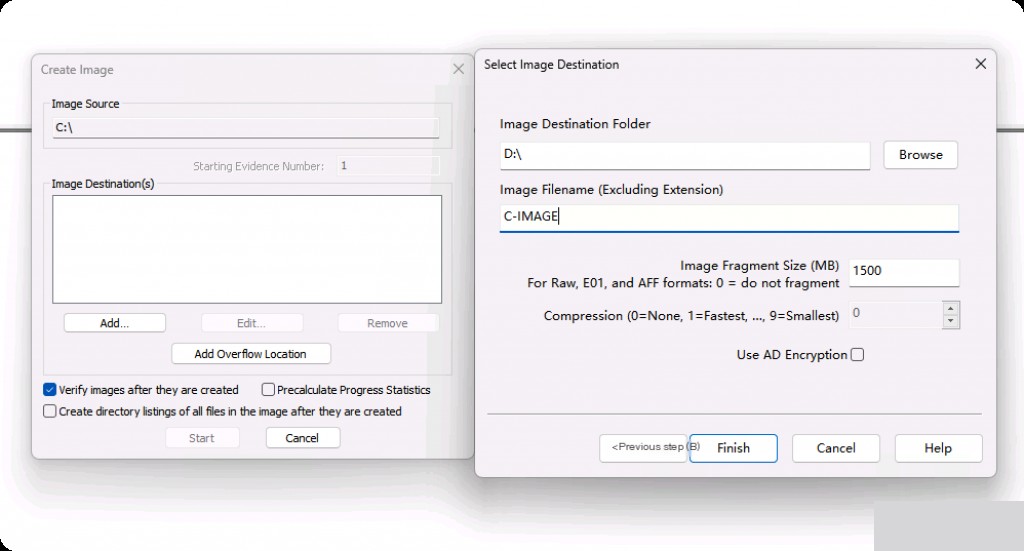
After creating the image of the C drive, it can be placed in another disk directory. Note that creating the image will take a long time.
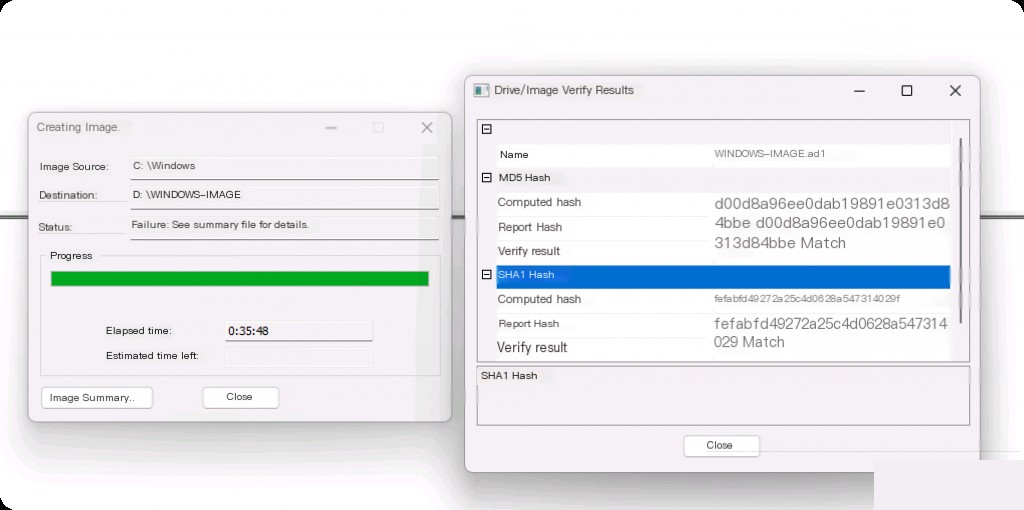
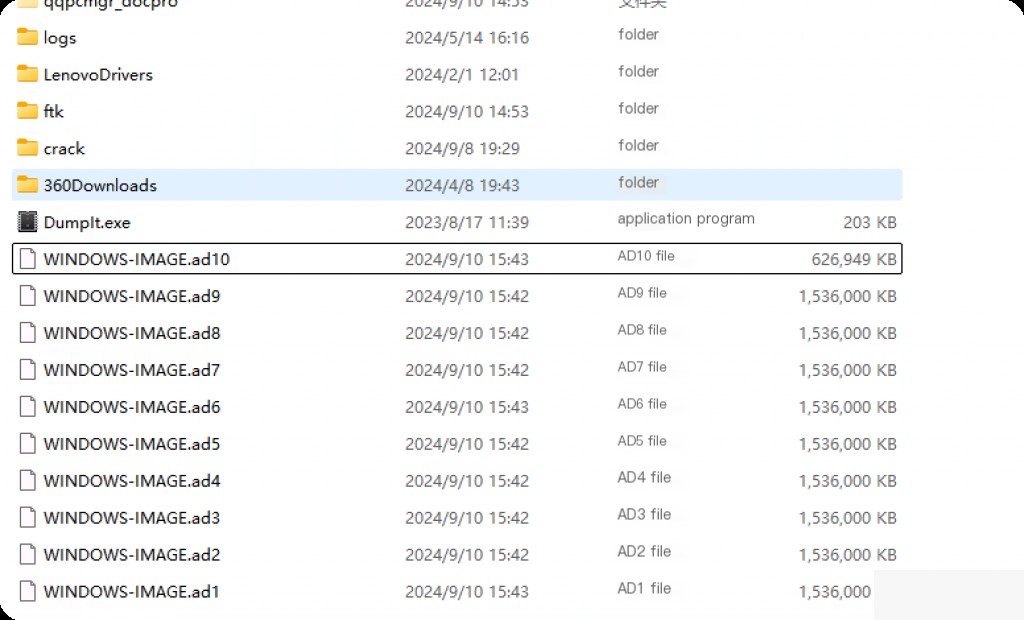
Then you can see the generated image file in the corresponding directory.
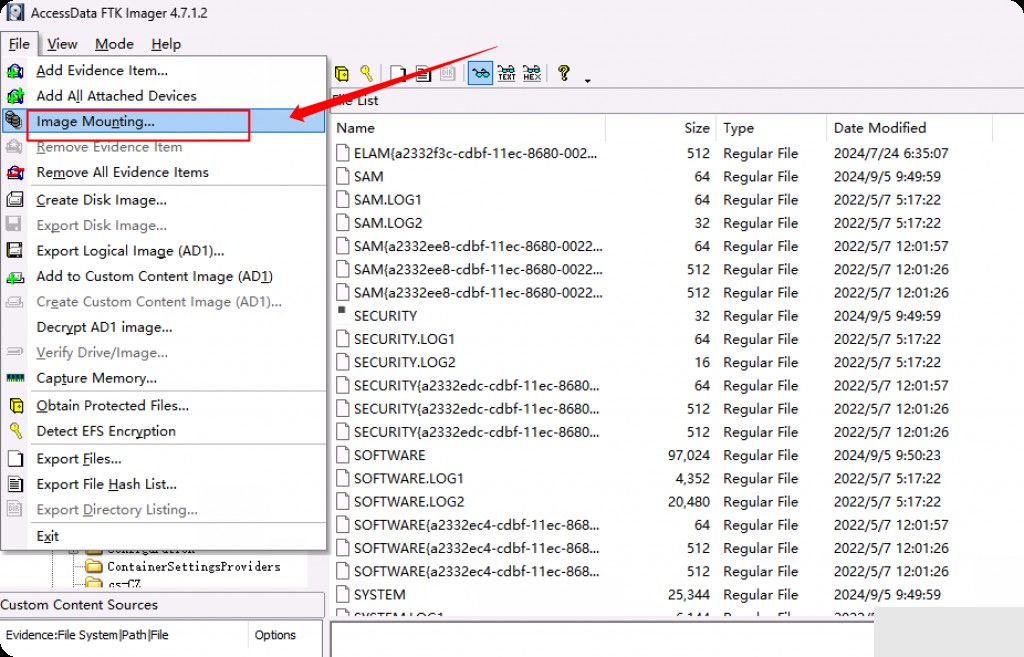
Mounting the Image
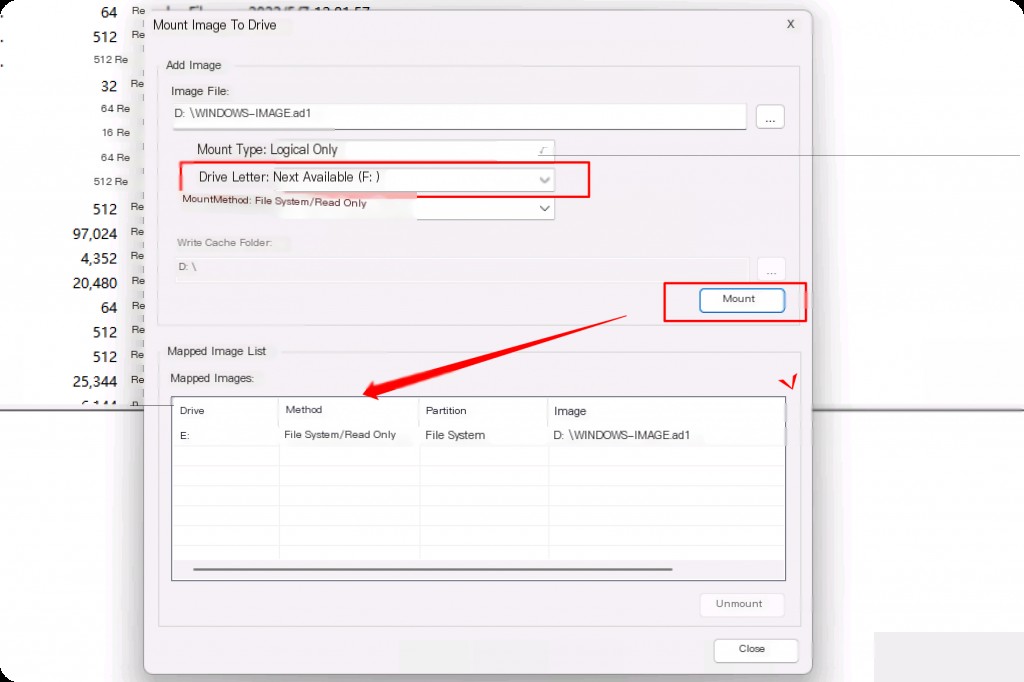
Select Image Mounting, click Next.

Note that you only need to select the image file with the ad1 extension here.
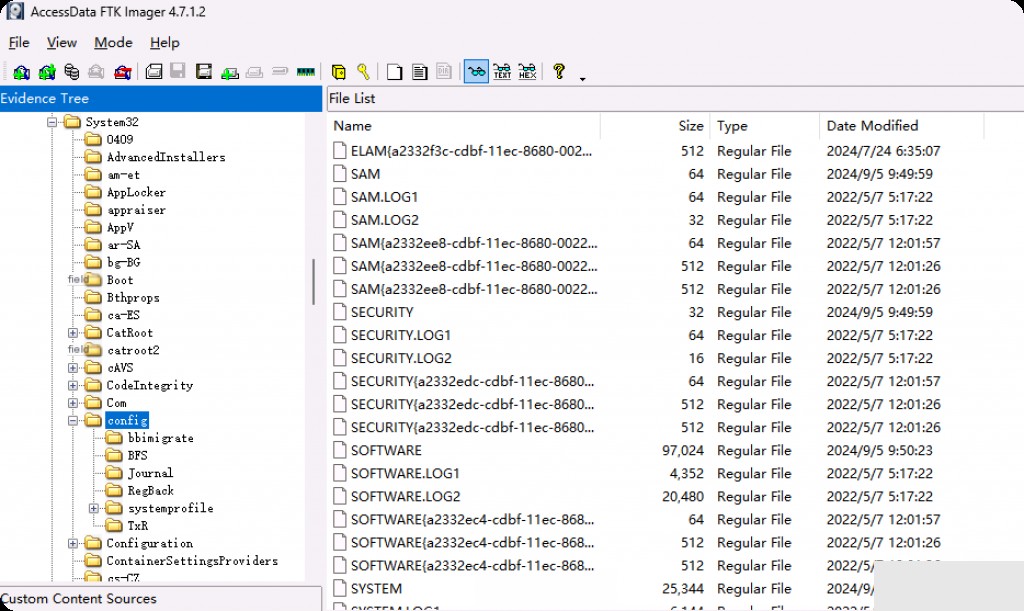
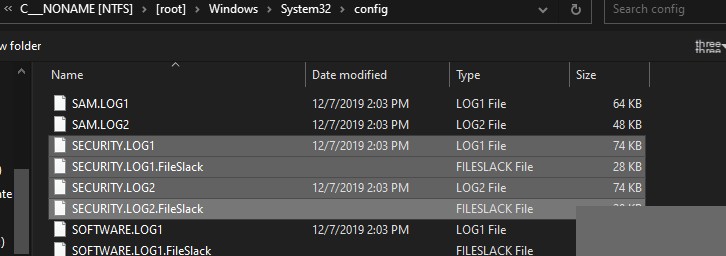
We navigate to the C:\Windows\System32\config directory, where our registry hives are stored.
Built-in Regedit
Regedit (Registry Editor) is a utility in the Windows operating system that allows users to view and edit the registry. With Regedit, you can view, create, and modify registry keys and values, as well as import and export data from the registry. It is a powerful tool that can be used to configure various settings in the operating system and troubleshoot problems. However, you must be very careful when using Regedit, as changes to the registry can have unexpected consequences and, if done incorrectly, can even cause serious system issues.
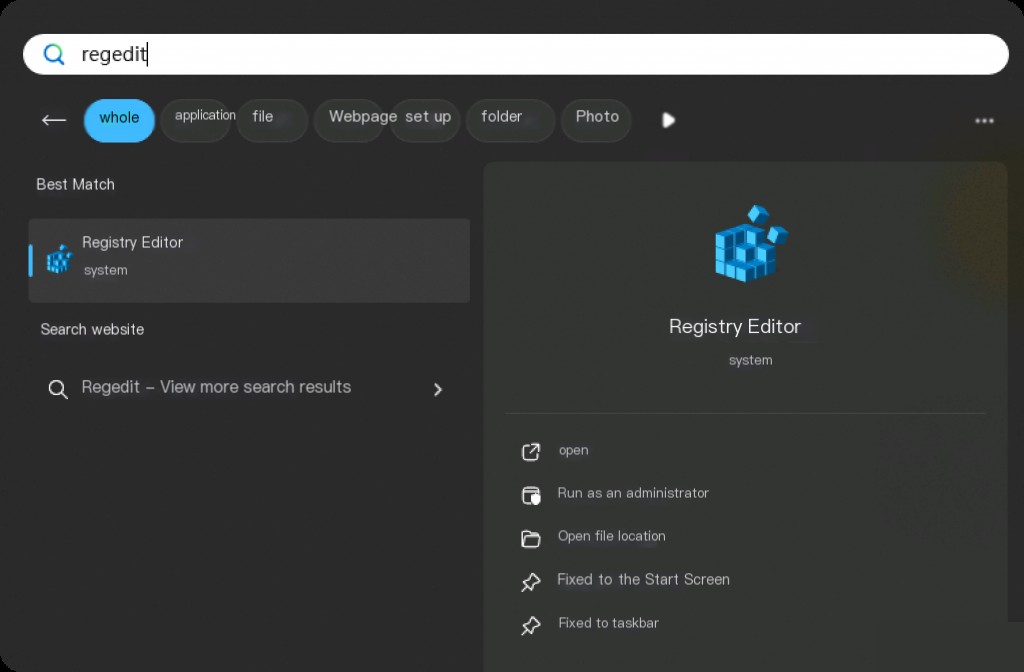
Note: Regedit is by default present in Microsoft Windows. To open Regedit, you can go to the “Search” on the taskbar and search for Regedit:
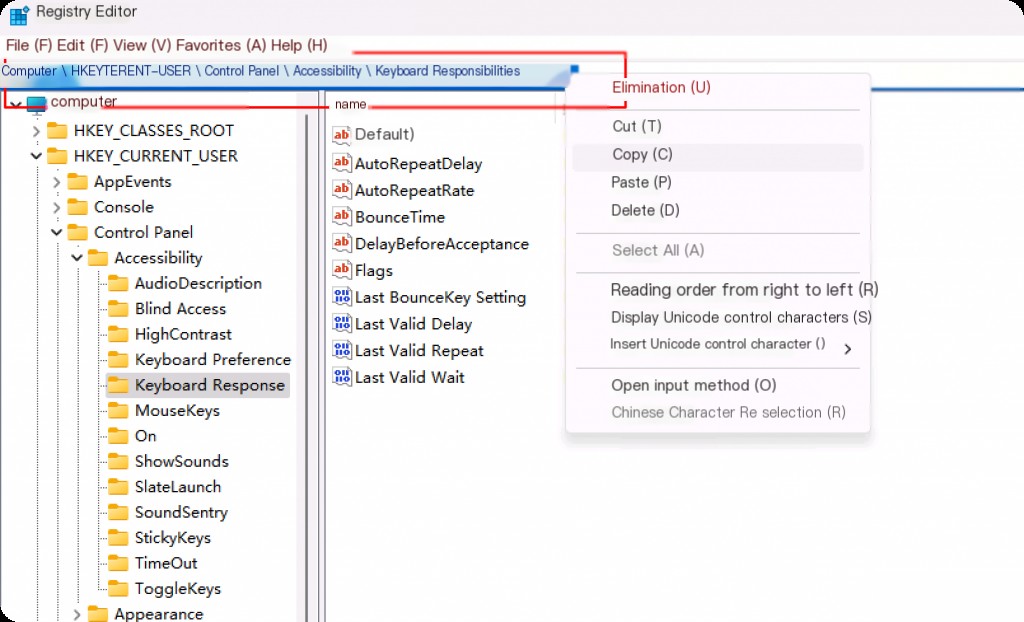
You can write down the key path in the top search panel, so we can directly find the target.
Eric Zimmerman’s Registry Explorer
Eric Zimmerman has a set of tools commonly known as EZ tools, all related to digital forensics and incident response. We choose Registry Explorer over Regedit because Registry Explorer allows us to investigate both live hives and offline hives. It also parses transaction logs, enriching our hives to provide comprehensive visibility.
https ://ericzimmerman.github.io/# !index.md
Note: It needs to be run as an administrator to avoid issues.
Live Hives
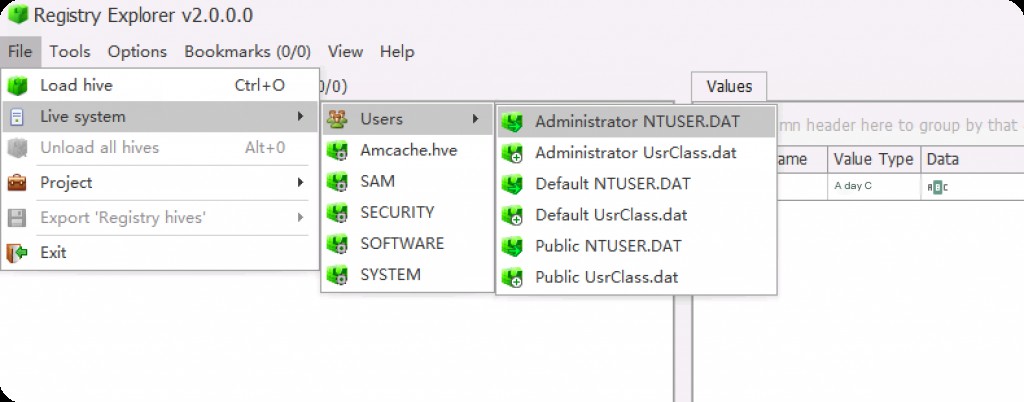
Go to “File” and click “Live System”. This allows us to load 1, 2, or all hives in the tool. The user option allows us to select any user-specific hives present on the system.
Here we load the SAM hive as an example.
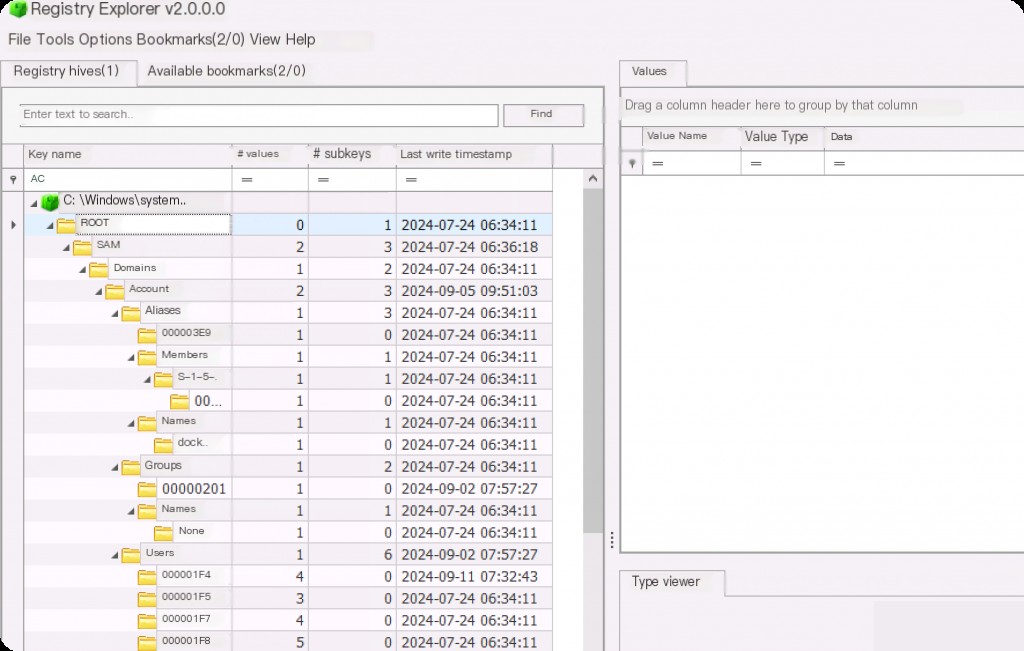
Most data is located under the “ROOT” key. You can also analyze related deleted records, as these often contain deleted/modified values not present in the latest hives.
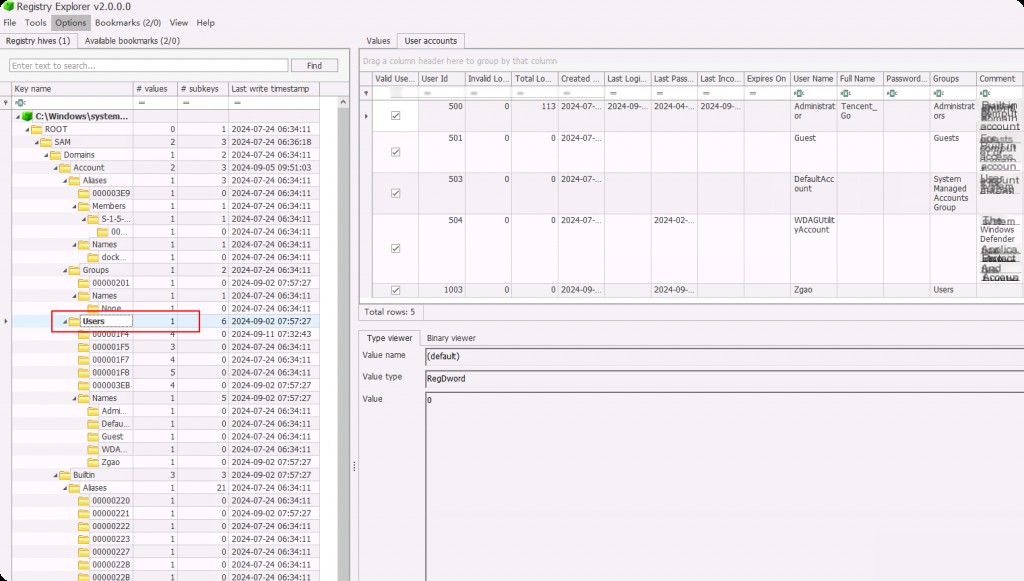
Here, opening the Users subkey, you can see that Registry Explorer presents a much more intuitive view than Regedit.
Offline Hives
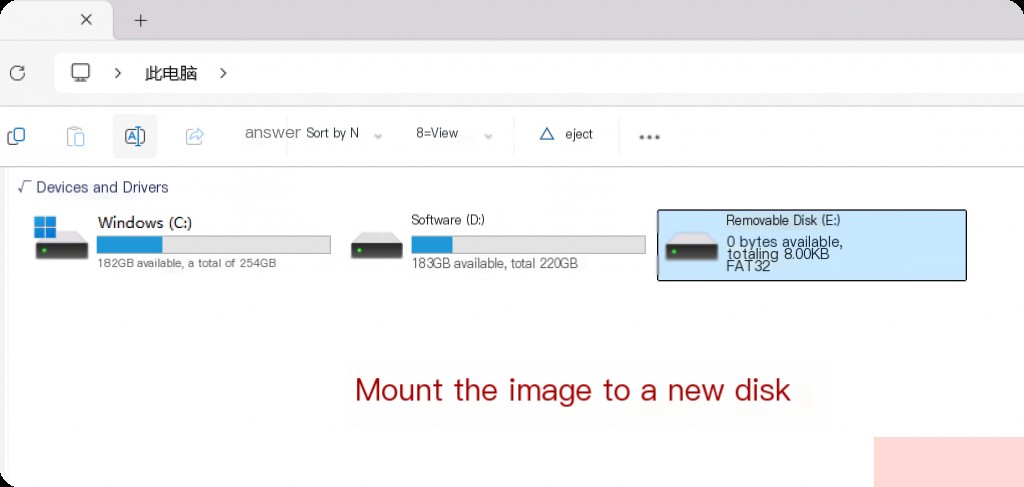
We will load the offline registry hives using the image created with FTK above. It needs to be mounted to a new drive first.
Returning to Registry Explorer, we need to clear the hives loaded in the previous step. Go to “File” and then click “Unload All Hives”. Now, go to “File” again and click “Load Hive”.
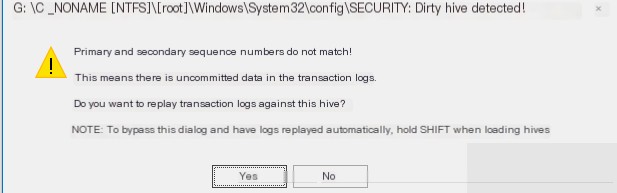
It will prompt to select the file again. The program will prompt this dirty hive dialog for each loaded hive.
As seen in the image above, for security purposes, it will ask for confirmation to “Replay Transaction Logs for this Hive”. You need to hold down the SHIFT button while selecting the secure transaction logs.