

1. Introduction
Mergecap is a complementary command in Wireshark, one of the optional tools that come with Wireshark installation, used to merge multiple packet files.
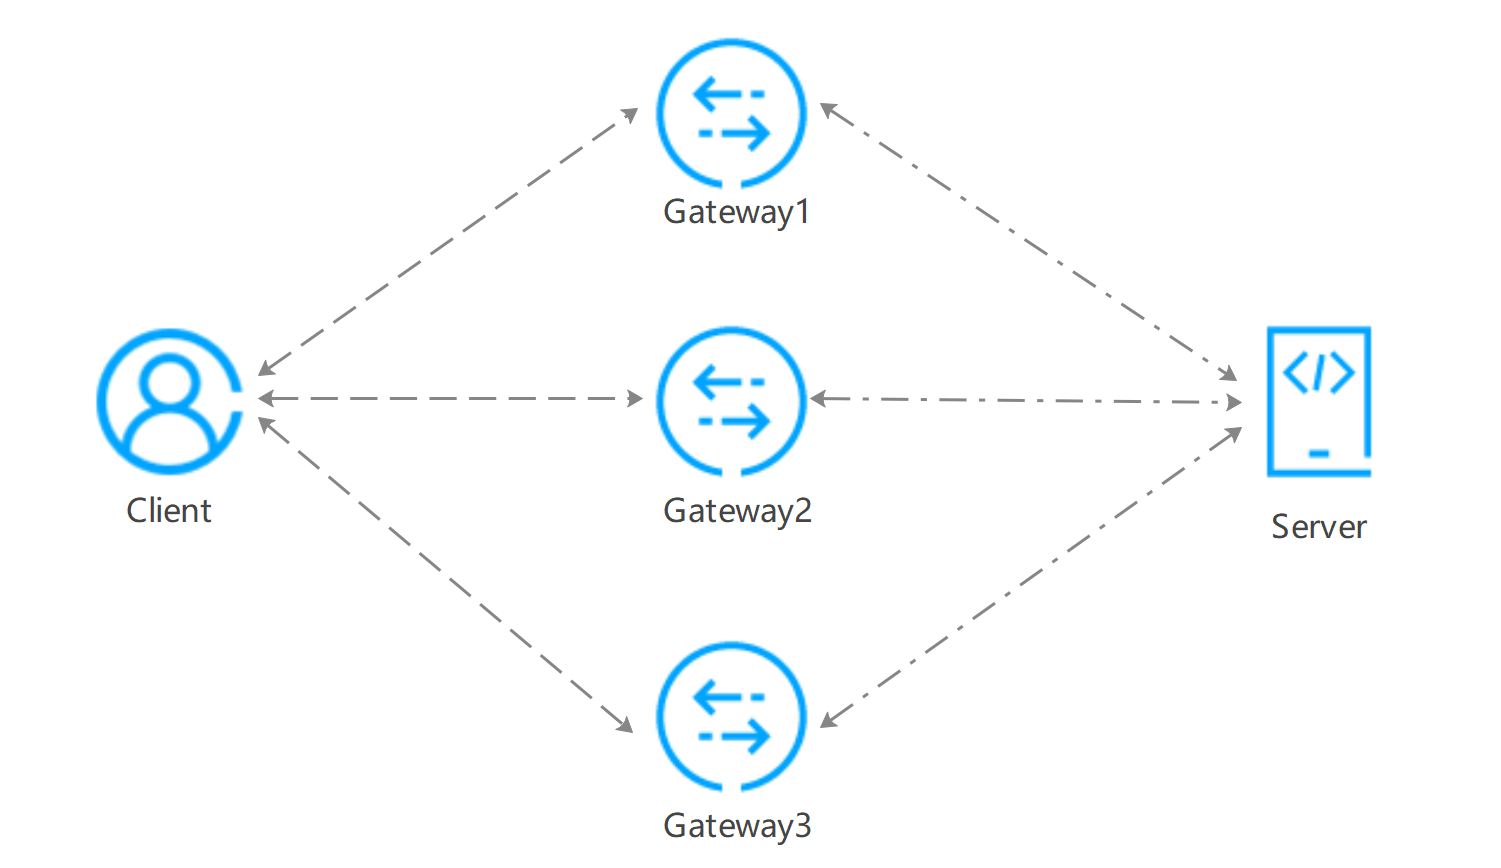
In everyday network packet capture troubleshooting, gateways and clusters may form a complete entity consisting of multiple machine nodes, or the nodes through which the outbound and inbound directions pass may differ, resulting in more than one packet file. Each packet file represents a part passing through one of the composing nodes, and to fully analyze the entire stream, these packet files must be merged into one, forming a complete interaction message. Therefore, mergecap is typically used in the following scenarios:
This article will elaborate on the usage and case studies of mergecap in detail.
2. Installation
Linux
| Distribution | Installation Command |
|---|---|
| Archlinux | pacman -Sy wireshark-cli |
| Centos/Redhat | yum install -y wireshark |
| Debian/Ubuntu | apt install -y wireshark |
| Gentoo | emerge –ask wireshark |
Windows
After installing Wireshark, mergecap is by default located in the Wireshark installation path:
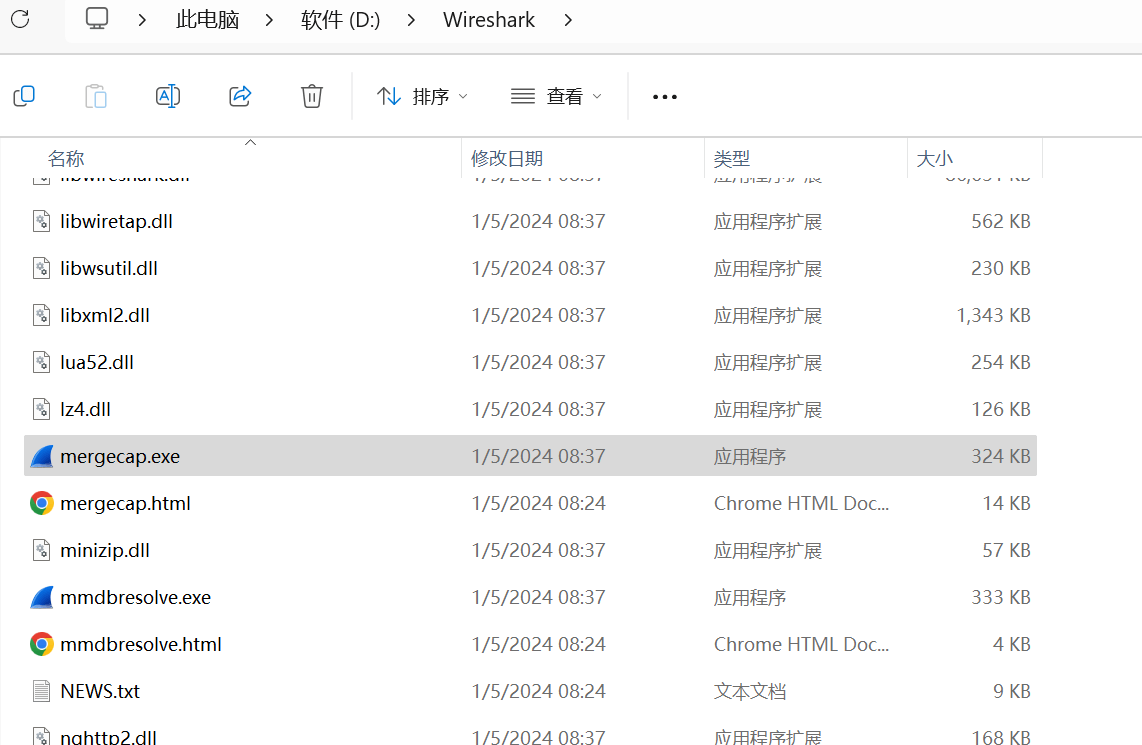
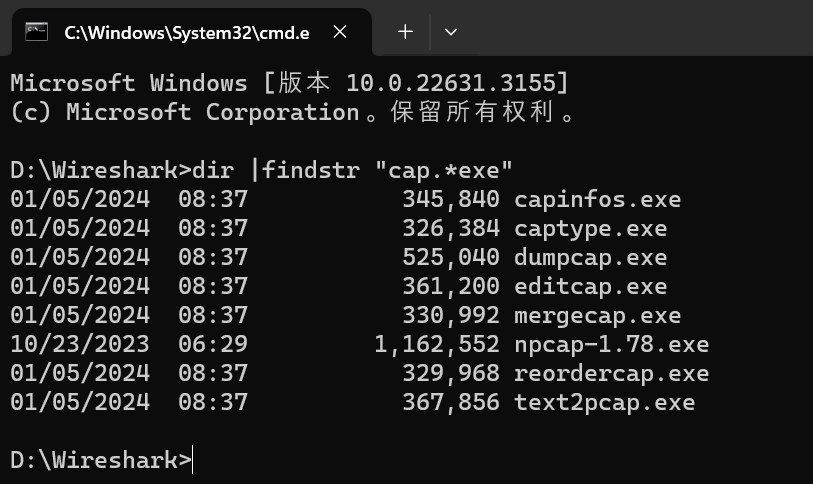
Other supporting commands are also in this path:
You can choose to add the path to the environment variables or directly use it from the path.
MacOS
Install Wireshark using homebrew, which will also install mergecap by default:
3. Usage Case Analysis
1. Merge Multiple Packets (-w)
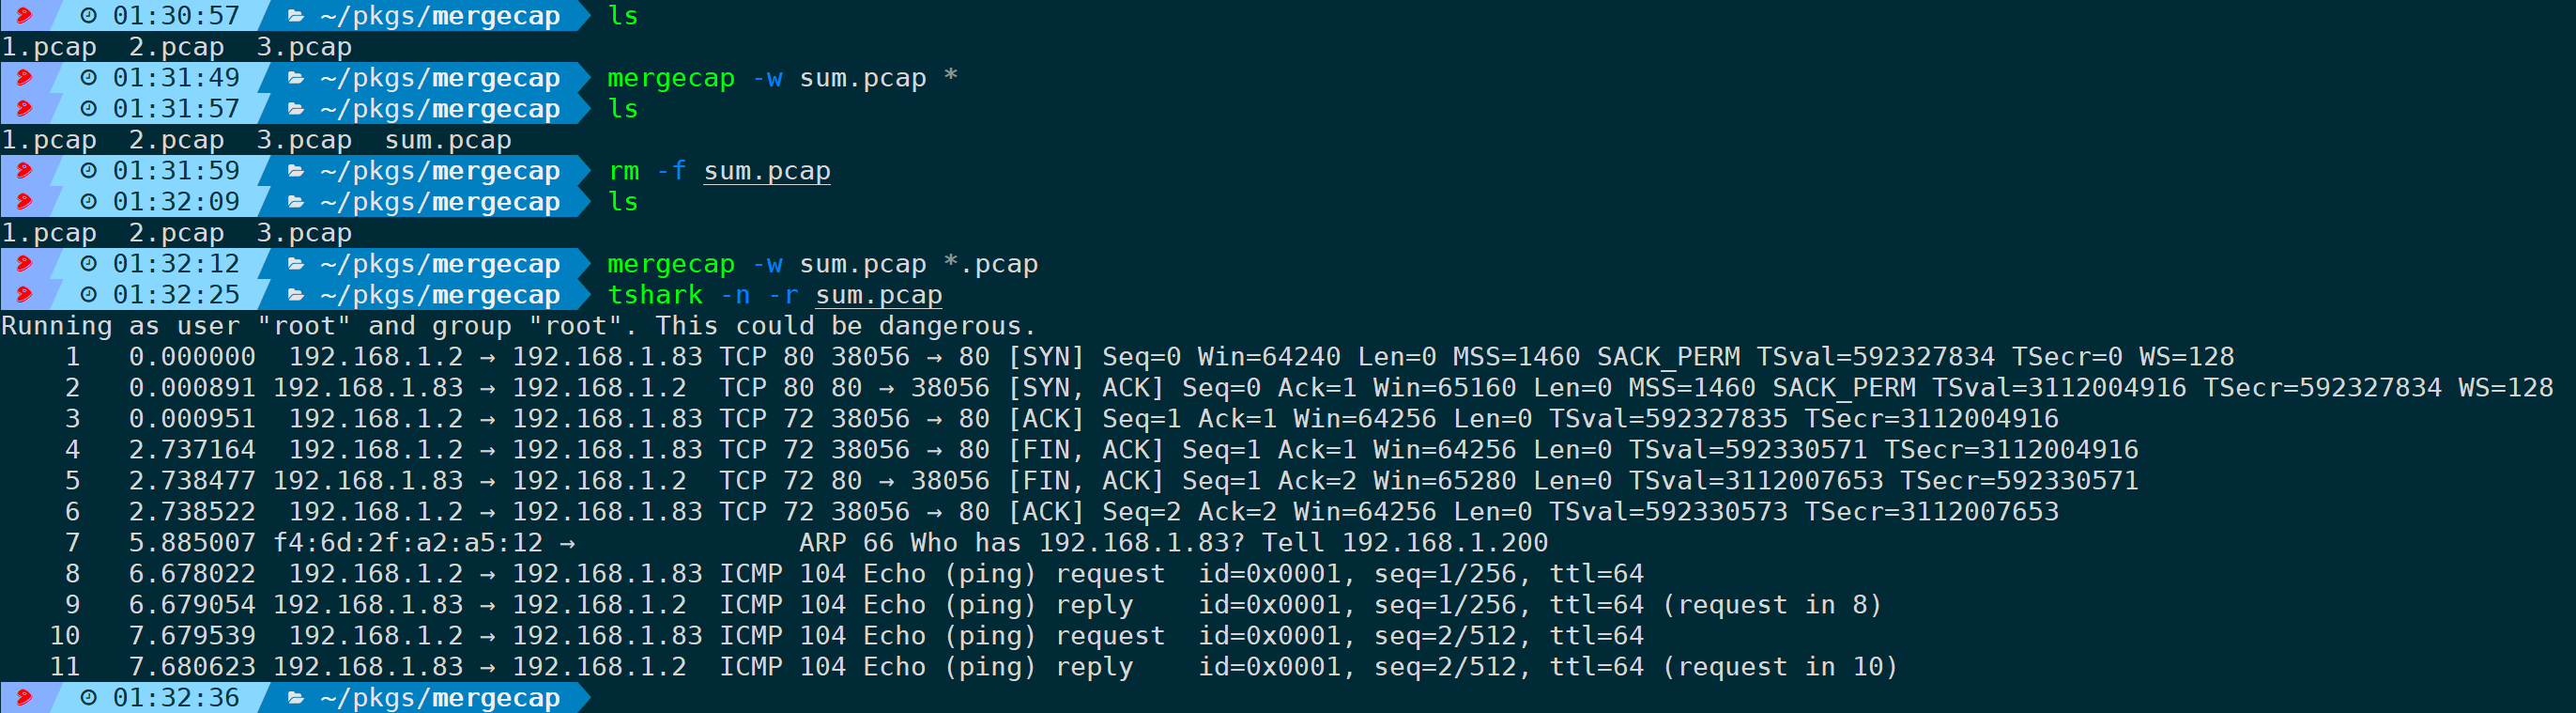
For example, the three packet files above, a complete TCP stream is split into three files:

If we want to analyze the TCP stream, analyzing a single packet alone does not constitute a complete TCP stream, increasing the difficulty of analysis. Therefore, it is necessary to merge these three packets into one packet; specify the output packet name with parameters. Currently, there are three known packet files in the current directory: …, merging into …, which could be:
Clearly, merging after analysis of the complete TCP stream is more conducive:
Additionally, an extended notation is supported:
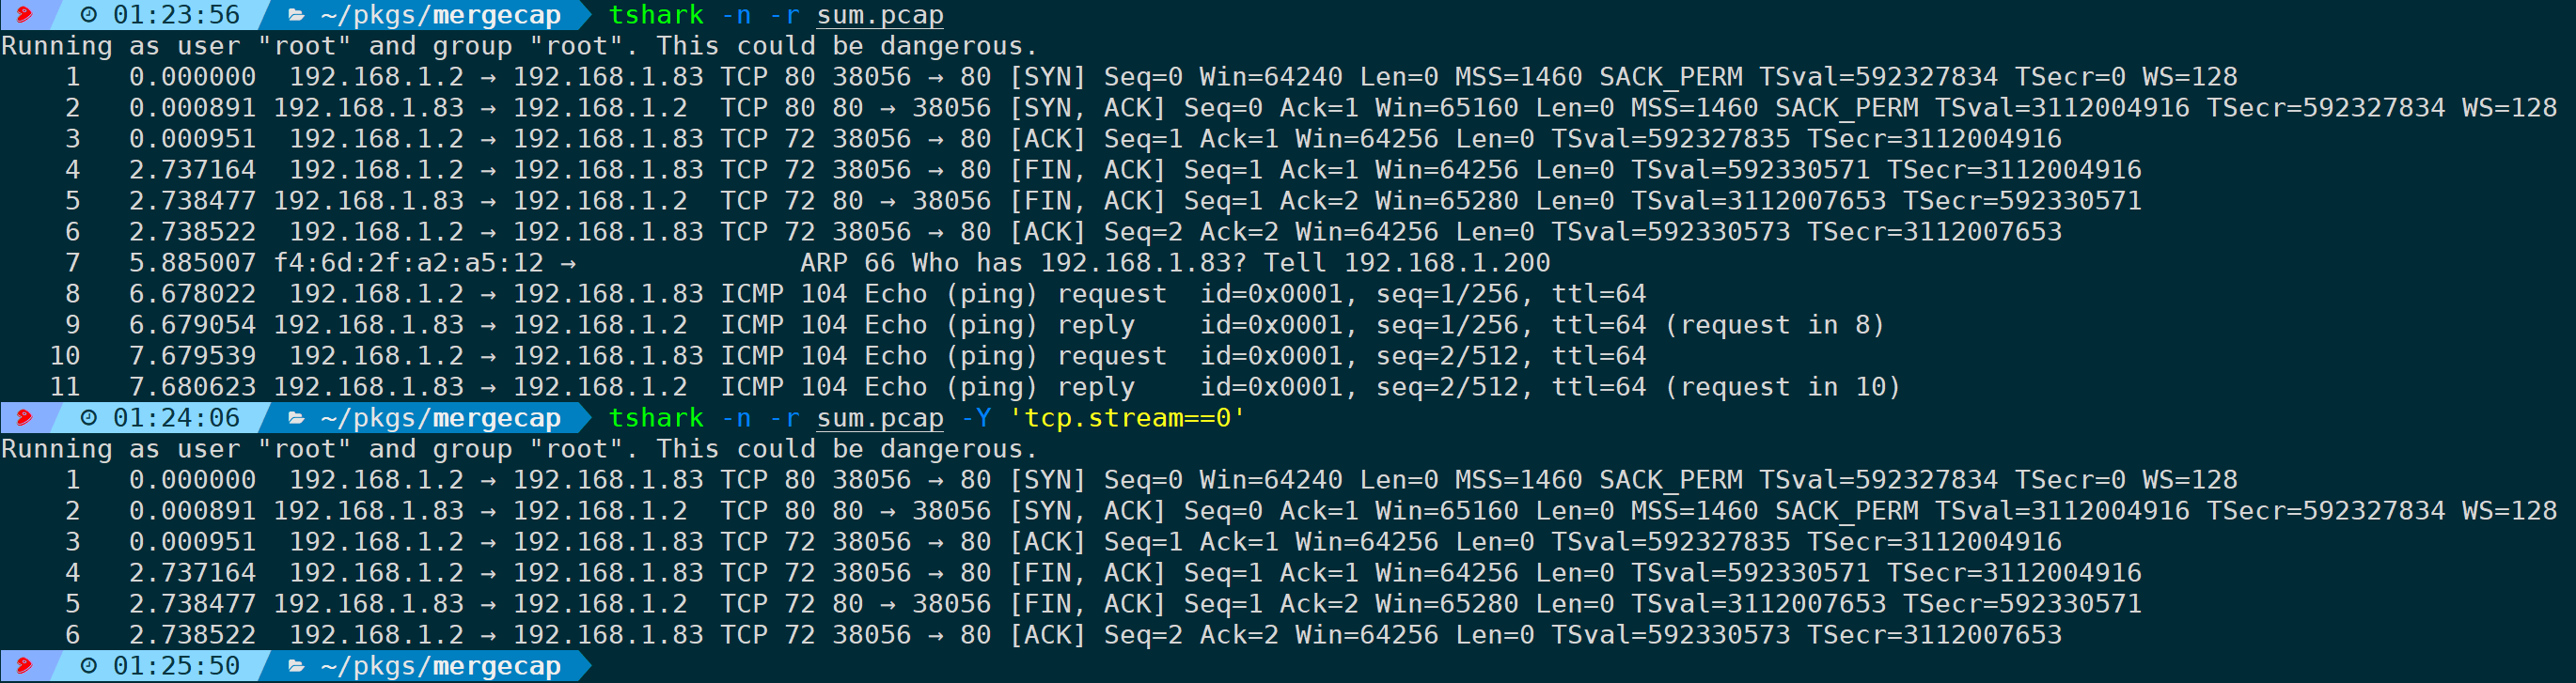
If you do not need to merge into a file but just output for processing, such as piping to …, it also supports using standard parameter “”, such as merging and outputting to, then piping to read:
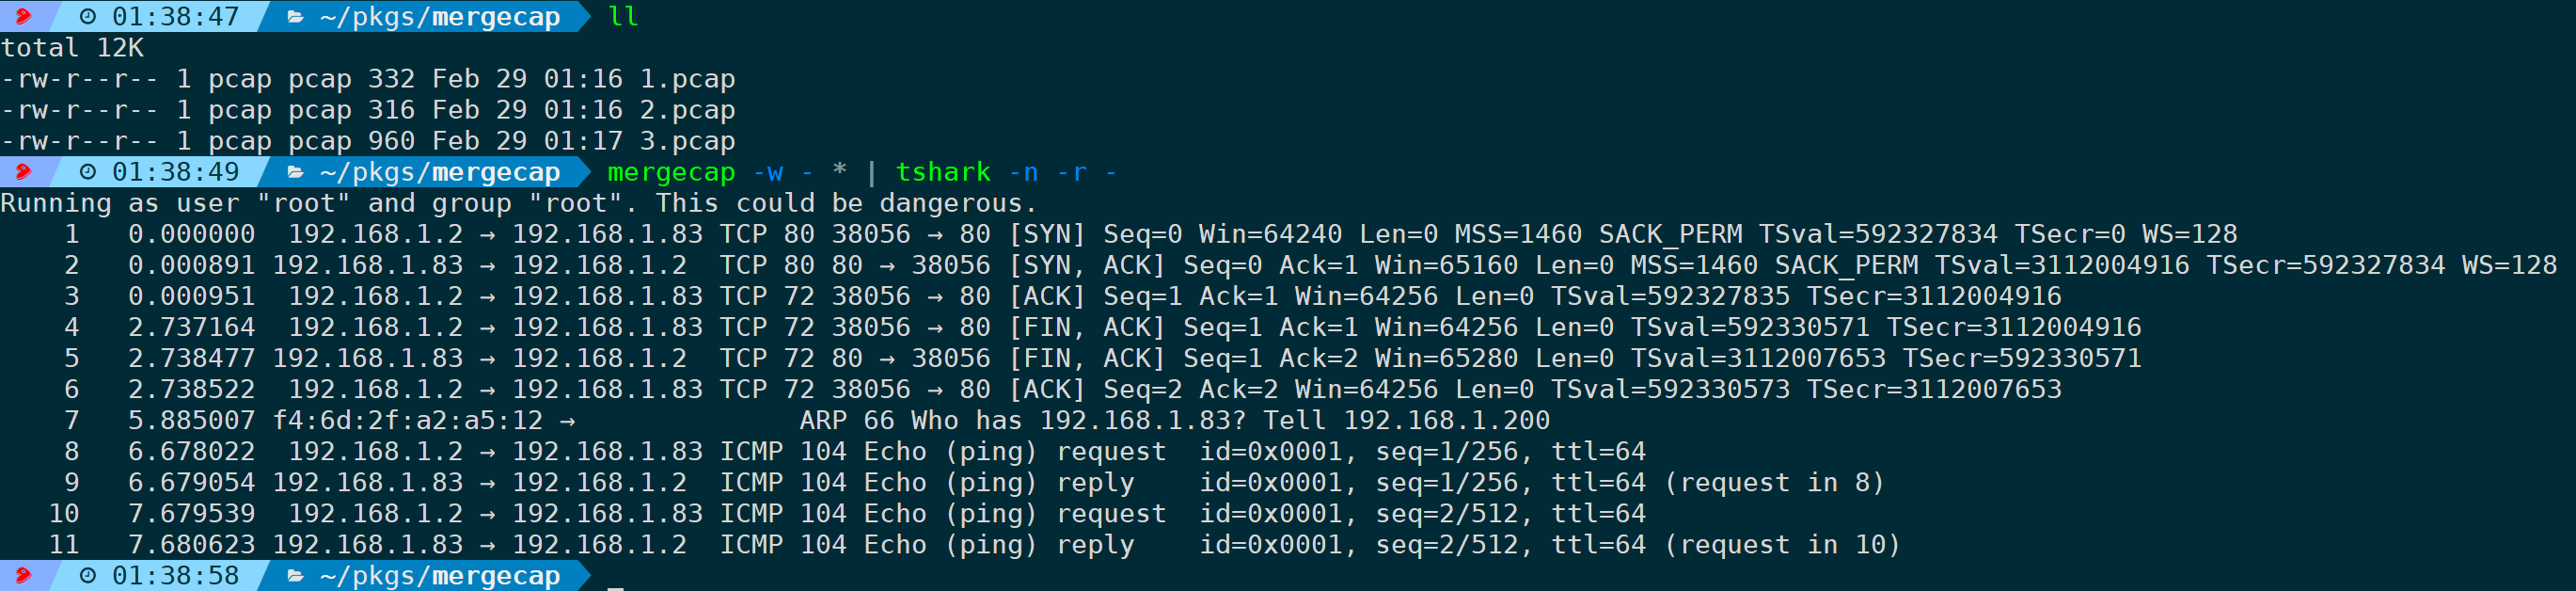
Similarly, it can also be submitted to for processing, even performing some filtering on top, such as filtering the first TCP stream:

2. Merge in Packet Order, Not Timestamp Order (-a)
With the parameter by default, frames are merged in timestamp order. If you do not wish to merge in timestamp order, but instead arrange by the absolute sequence of input files, you can add the parameter:
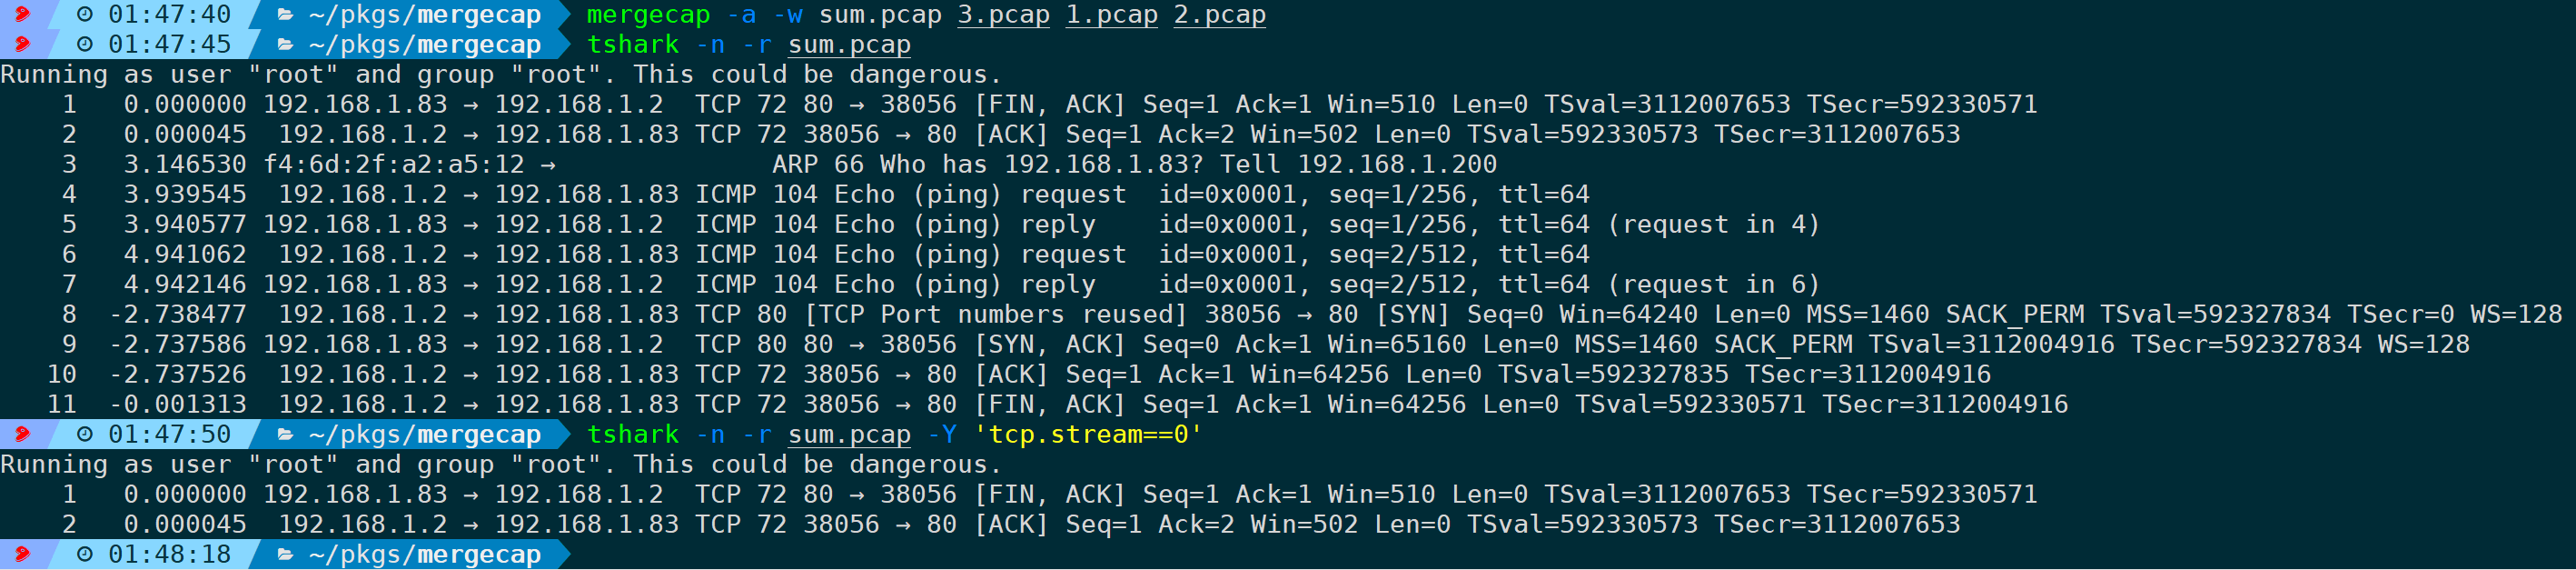
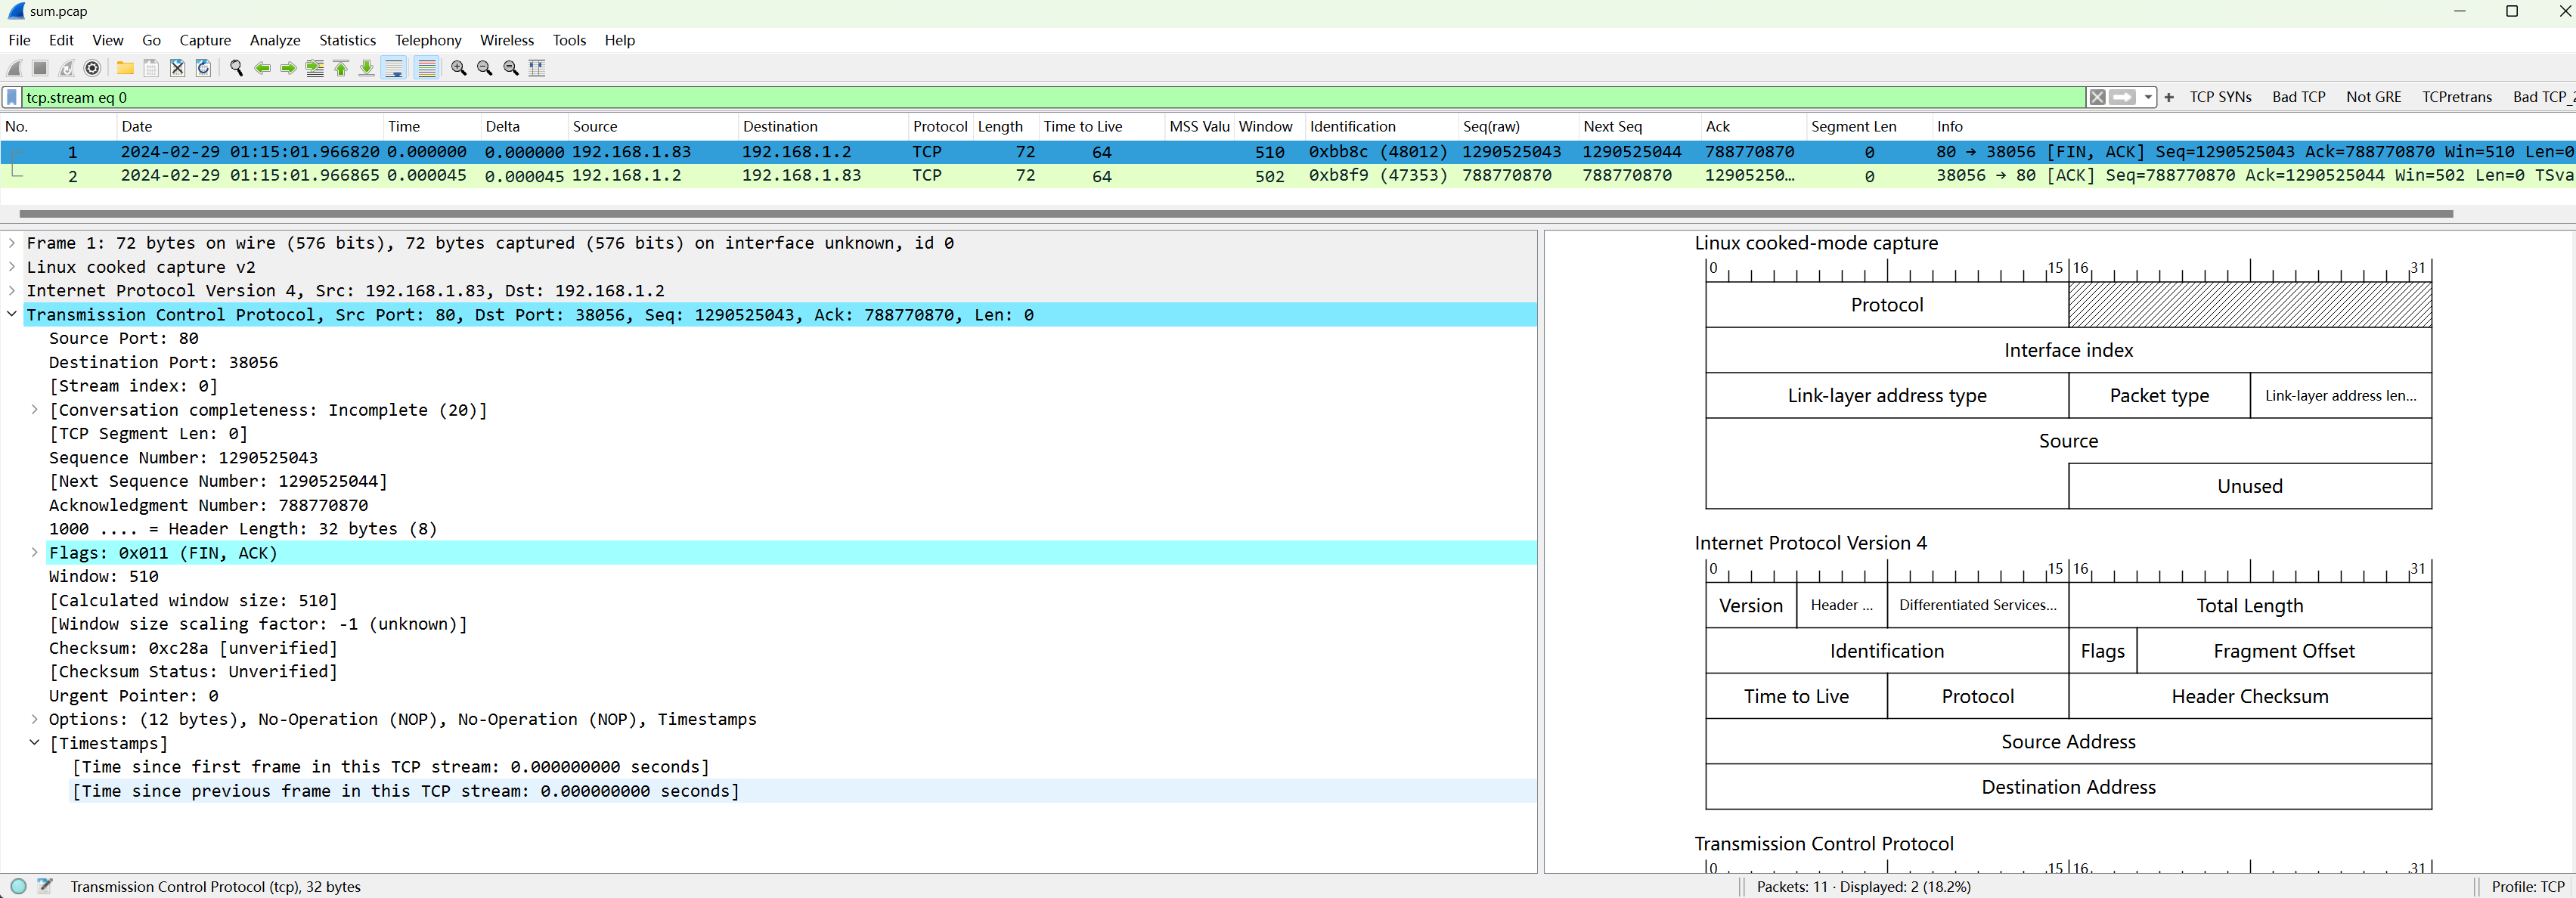
Here, for demonstration, the order of the three packet inputs … is deliberately disrupted, and merged into …, you can see the packet sequence is strictly merged according to the order of the input packet files, making TCP stream analysis unable to read the complete stream.
Even if opened with Wireshark, it remains incomplete:
This merge scenario usually arises from capturing multiple packets at different nodes with inconsistent times. Without this parameter, it defaults to timestamp order merge, causing packet disorder, while adding ensures strict merging in the order of input packet files. This option is not commonly used and is not recommended unless you know exactly what you’re doing.
3. Set Truncation Length for Merging (-s)
Without this parameter by default, a single frame is merged as-is. The parameter allows truncating each packet before merging, for instance, merging only the first 60 bytes of a frame, significantly reducing file size and removing unhelpful content.
In the example below, a complete HTTP stream is split into two packet files, and :

If you’re not concerned with the seventh layer (HTTP) and just need to analyze whether there are anomalies in TCP, you can truncate during the merge to:

You can see the HTTP layer is truncated, but the TCP layer is still displayed normally, with no fields missing from the TCP header.
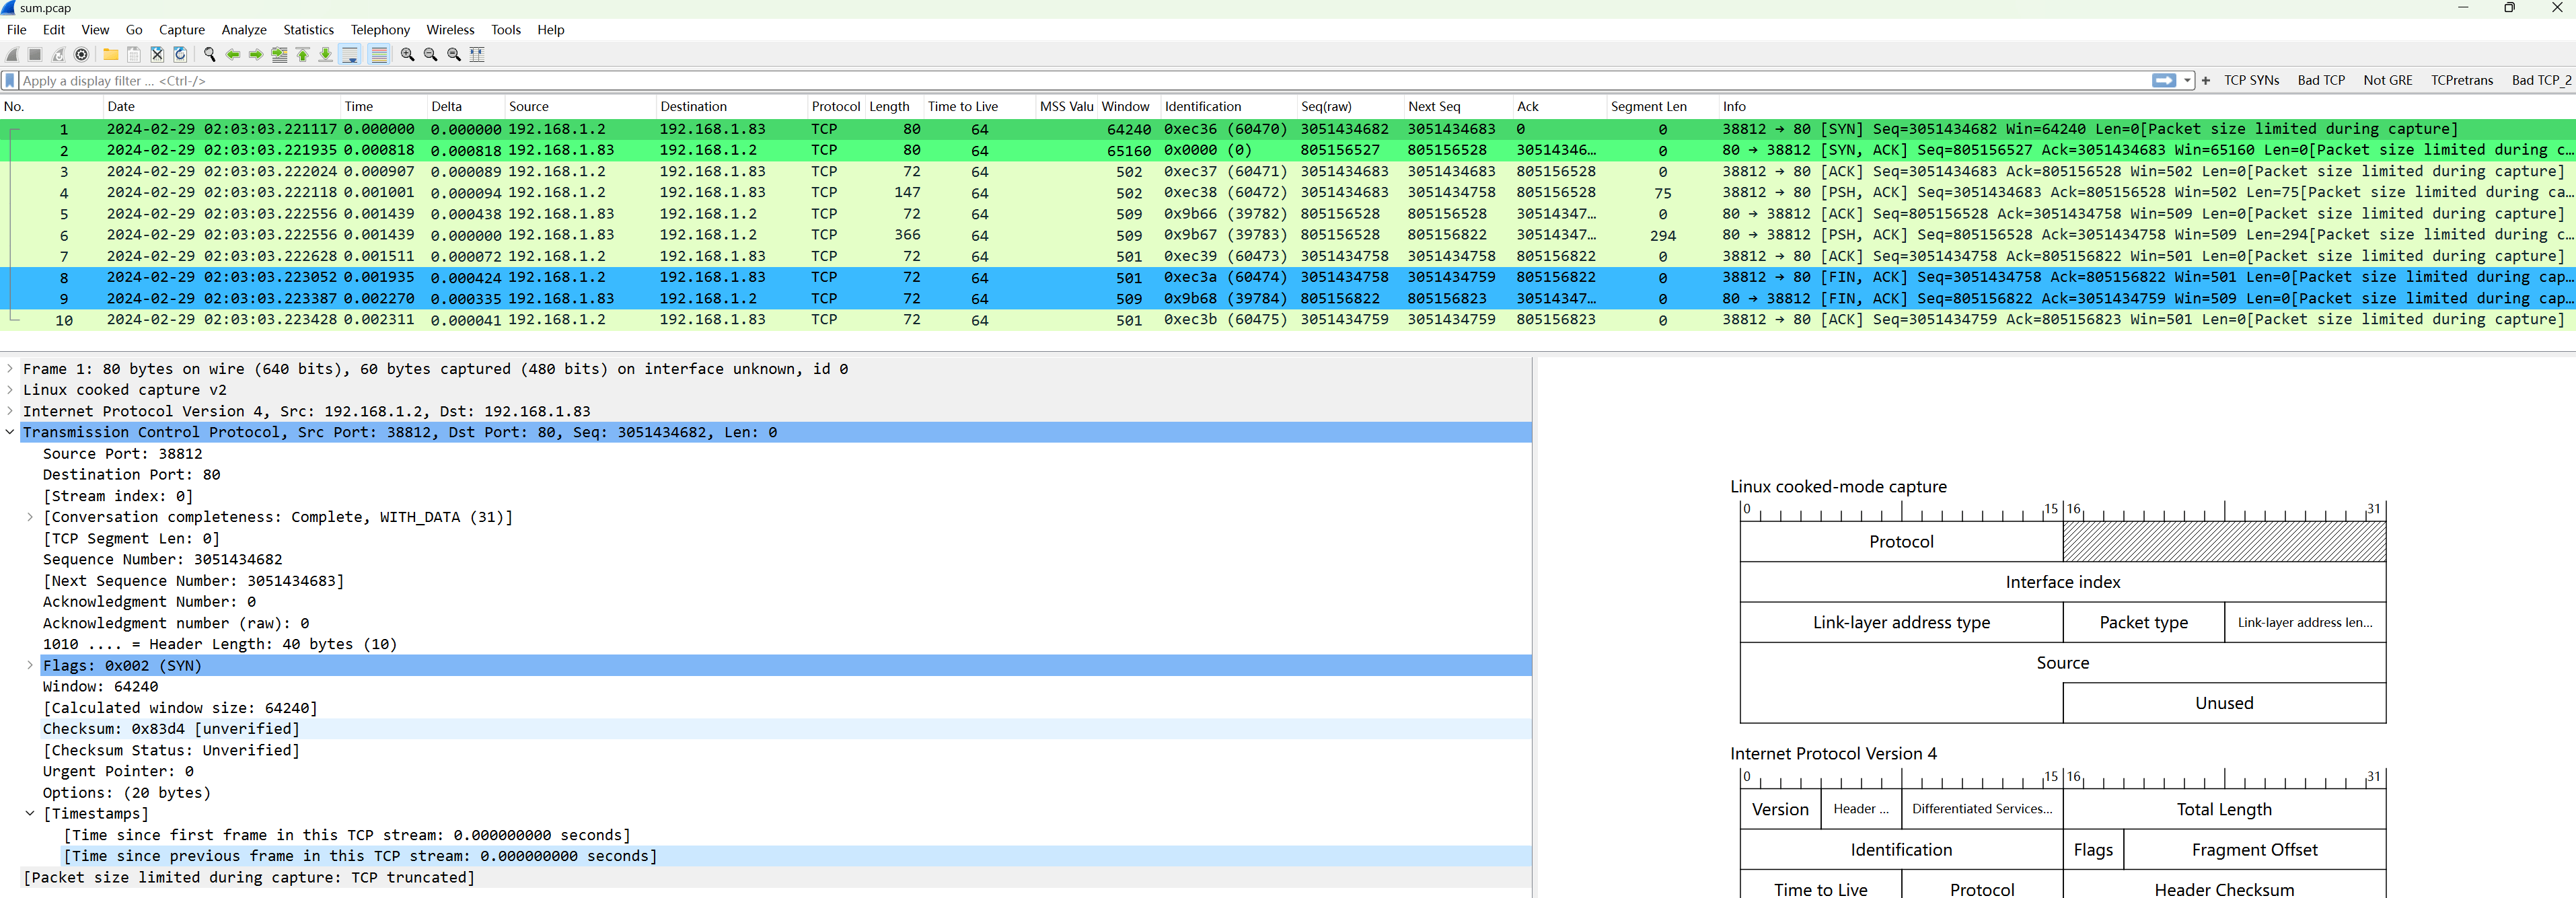
1) Why 60 bytes and not 54 bytes?
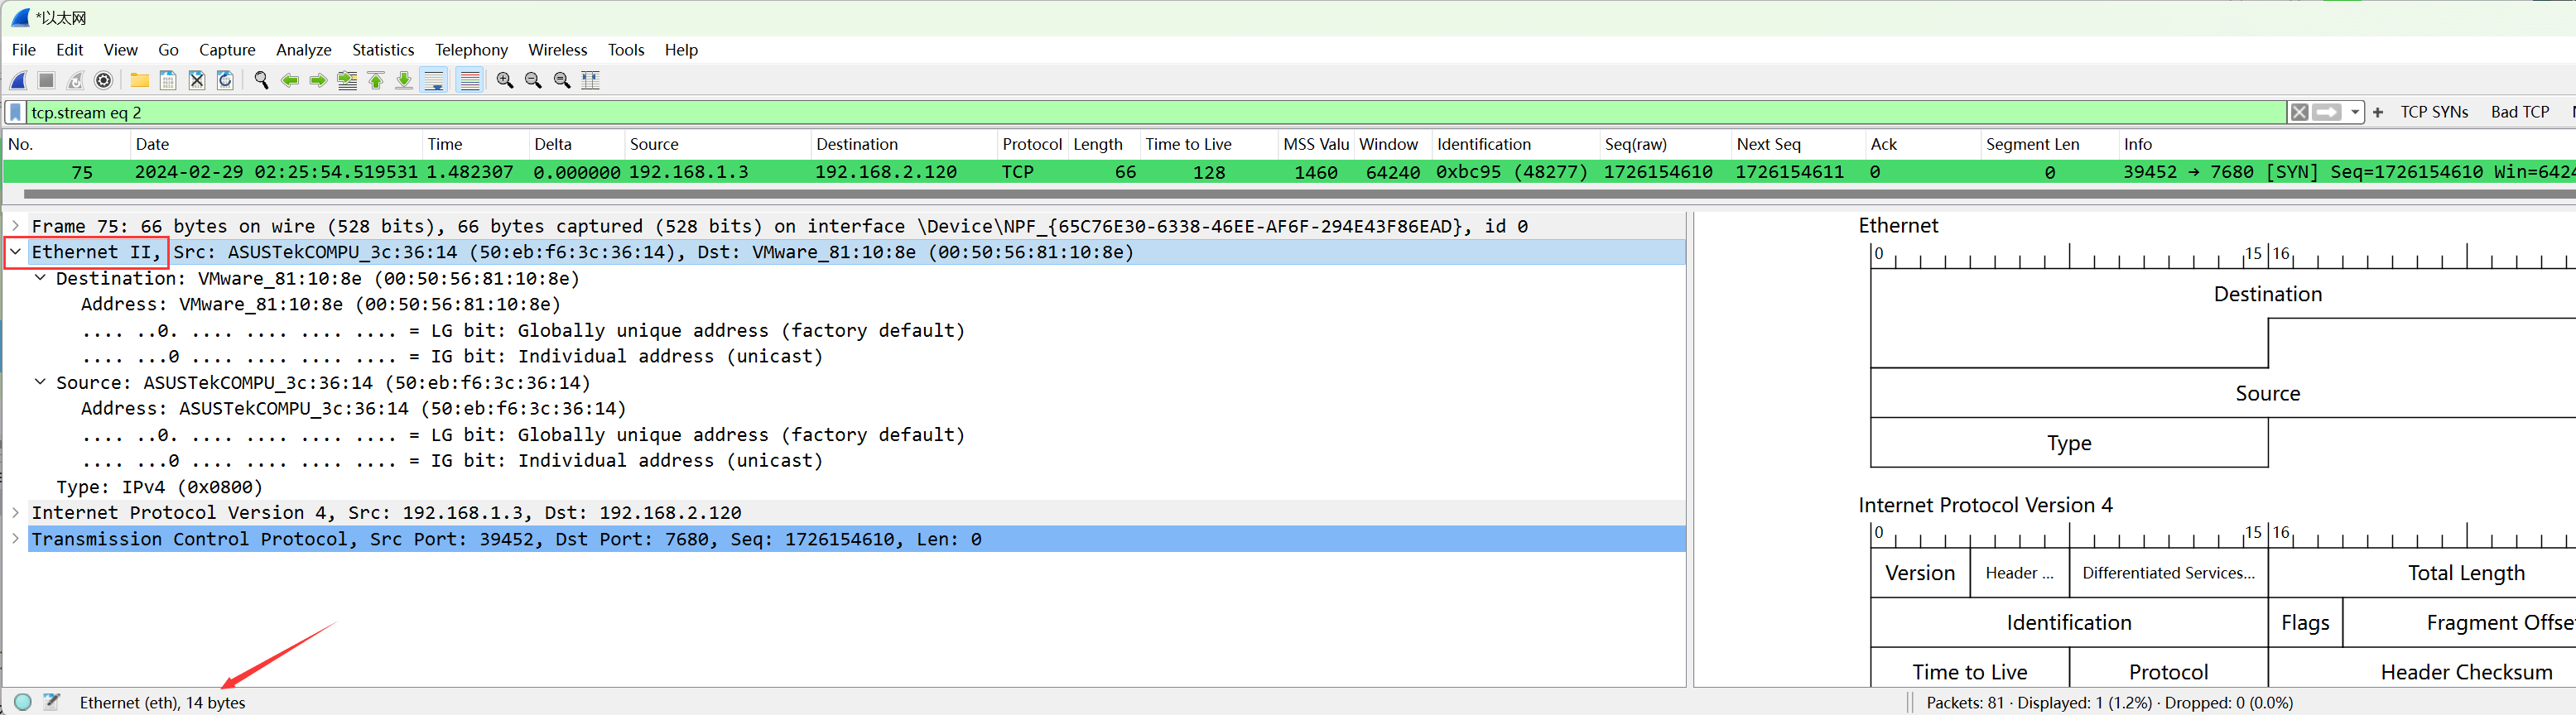
By default, the 54-byte configuration is: 14 (Ethernet header) + 20 (IPv4 header) + 20 (TCP header) = 54 bytes:
When capturing on Linux, specifying the capture interface as , capturing all interfaces, the datalink layer may no longer display as Ethernet but as , a pseudo-protocol on Linux, since not all interfaces on a single machine have the same datalink layer header, refer to .
This header occupies at least , 6 bytes more than the Ethernet header:

2) Linux Cooked Capture (SLL) Packet Structure
The version packet structure is:
Thus, up to the TCP header, the total bytes are: 20 (datalink layer header) + 20 (IPv4 header) + 20 (TCP header) = 60 bytes;
4. Set Merge Save Format or Format Conversion (-F)
It automatically detects file format and correctly parses and displays packets. Even if a pcapng file is saved as a pcap suffix, these tools can still recognize and open it. Pcapng is the upgraded version of pcap, offers better detail display and performance improvements, hence pcapng is recommended.
1) Format List
Other formats are saved as needed. Without any parameters, it can list supported save formats:
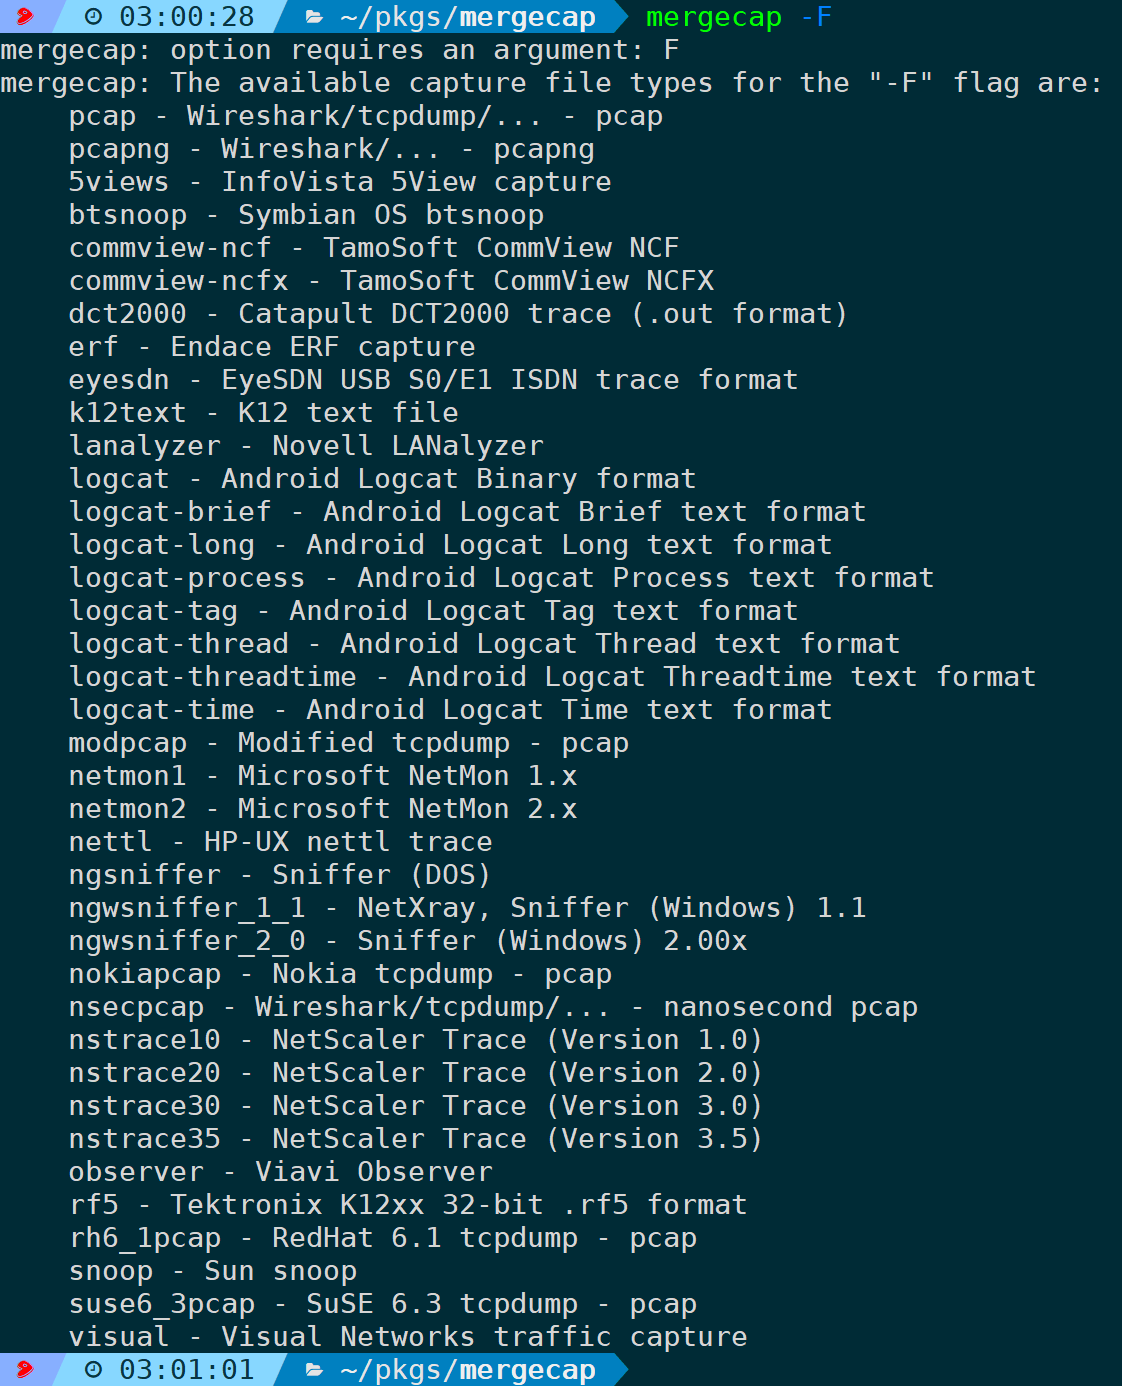
Note that …, other formats need specification. If you merely modify the format suffix without specifying the corresponding format via -F, it is still saved in pcapng format, resulting in the inability to read the corresponding format correctly. Therefore, you can understand this option as being able to convert a capture file format to another format.
Lacking a ready environment, using pcapng format as an example, still set truncation length to 60:

2) Format Conversion
It also supports format conversion, such as converting pcapng to pcap:

Converting to other formats follows the same principle.
4. Summary
At this point, we have thoroughly discussed the usage scenarios of , detailing how to merge multiple packet files and convert between different formats, while analyzing how to truncate and save capture files to reduce file size and ease work burdens, introducing the concept of Linux cooked capture in the process.
Additionally, the article first introduced the use cases of , then demonstrated through real cases how to use the tool in different scenarios. By reading this article, readers should be able to proficiently master the usage skills of and flexibly apply them in practical work, thereby improving work efficiency and the accuracy of packet analysis.