
1. Overview of the PWNAT Experiment
1.1 Introduction to the PWNAT Experiment
Among the numerous tools for creating communication tunnels, PWNAT is an exceptionally useful tool. This experiment focuses on establishing a NAT-to-NAT communication tunnel. NAT stands for Network Address Translation. This guide will demonstrate how to use the PWNAT tool in Kali Linux to create such a tunnel.
In addition to explaining the use of PWNAT, the experiment will delve into fundamental concepts like the TCP/IP protocol and the OSI seven-layer model. These foundational concepts are essential for understanding how PWNAT operates to create a NAT-to-NAT communication tunnel.
Note: Due to the high configuration requirements of the cloud server used for the experiment, usage is limited to no more than six attempts per experiment.
1.2 Key Concepts of PWNAT
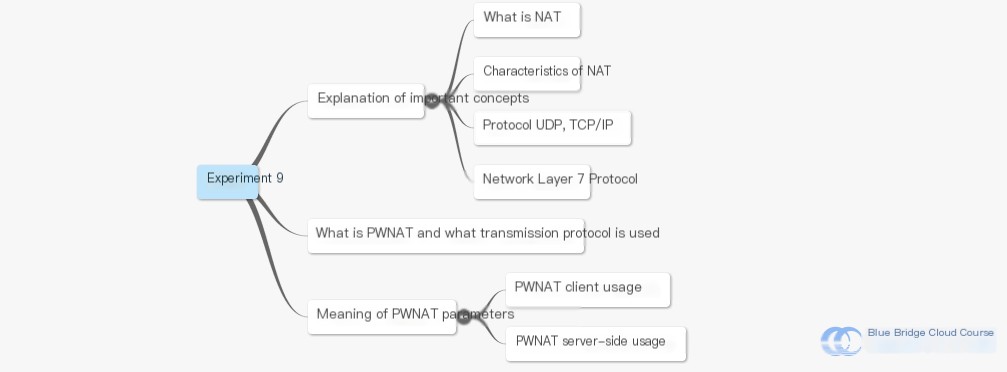
In the previous session, we introduced using Weevely to create PHP backdoors, and the next session will cover creating malware files. For this session, we will focus on essential theoretical knowledge, as the experiment is more concept-oriented. Key concepts you’ll need to understand include NAT, UDP, and the OSI seven-layer model. The core knowledge points for this session are as follows:
- Basic operation skills with Linux systems
- Fundamental concepts of NAT and UDP
- Basic knowledge of the TCP/IP protocol
- Understanding PWNAT tool parameters
- The basic process of creating communication tunnels using PWNAT
1.3 PWNAT Experimental Environment
This course’s experiment environment is provided by the Lab Building platform. Due to the unique nature of the experiment, the environment cannot be connected to an external network or saved. For this experiment, the host system is Ubuntu 14.04, with two virtual machines installed: Kali Linux and Metasploitable2. All operations will be conducted on the Kali Linux machine.
Kali Linux is an operating system preinstalled with various information security penetration testing tools. One such tool, Metasploit, is particularly popular among hackers and information security specialists. In this experiment, we’ll first cover essential conceptual knowledge, followed by instructions for using PWNAT to create a NAT-to-NAT communication tunnel.

2. Initializing the PWNAT Environment
2.1 Starting the Experiment Environment
This experiment involves creating a NAT-to-NAT communication tunnel using PWNAT. First, on the host system (Ubuntu 14.04), launch the Kali virtual machine using the following commands. Then, connect to the Kali virtual machine using SSH. The password for root@Kali is toor. Note: The letter “K” in “Kali” is uppercase. Using a lowercase “k” will result in an error.:
 # Launch the Kali Linux virtual machine
sudo virsh start Kali

# Connect to the Kali virtual machine
ssh root@Kali

Important Note: If you attempt to connect to Kali immediately after starting it, you may encounter the error ssh: connect to host Kali port 22: No route to host. This occurs because the Kali virtual machine hasn’t fully booted yet. Give it a moment to complete the startup process.
3. Key Concept Explanations
3.1 What is NAT?
NAT, or Network Address Translation, is also known as IP masquerading. It emerged to address the shortage of IP addresses and primarily aims to facilitate address reuse. NAT is divided into two categories: basic NAT and NAPT (Network Address/Port Translator).
Proposed in 1994, NAT allows devices within a private network to communicate with devices on the internet without requiring encryption. This is achieved by installing NAT software on the router connecting the private network to the internet. The router, now a NAT router, must have at least one valid external global IP address. Local addresses used by devices within the private network are translated into global IP addresses by the NAT router to enable internet communication.
3.2 Characteristics of NAT
Devices under a NAT-enabled router do not receive true IP addresses and cannot interact with certain internet protocols. Protocols that require externally initialized TCP connections or rely on stateless behavior (like UDP) may not function properly.
While NAT simplifies address management, its limitation of full-duplex connectivity can sometimes be seen as a security feature. By requiring local devices to initiate connections, NAT can mitigate malicious activities from external networks.
3.3 What is PWNAT, and What Protocol Does It Use?
PWNAT is a tool that establishes connections between computers behind NATs without requiring external assistance. Created by renowned hacker Samy Kamkar, this tool employs a clever technique for communication.
The server (behind NAT) continuously sends ICMP packets to 3.3.3.3. When the client wants to connect, it sends a forged ICMP unreachable response to the server’s external IP. This response is routed to the server, signaling it to start a UDP hole-punching process. Both sides can then establish a direct connection.
User Datagram Protocol (UDP), a simple and connectionless transport layer protocol, is used in this process. ICMP, a core protocol in the Internet Protocol Suite, facilitates the communication of control messages between devices and routers.
Let me know if further refinements are needed!
In typical network communication documents, we often encounter the TCP/IP protocol. TCP/IP is the abbreviation for Transmission Control Protocol/Internet Protocol, which is translated as **Transmission Control Protocol/Internet Protocol** in Chinese, also known as the **Network Communication Protocol**. It is the most fundamental protocol of the Internet , forming the foundation of the global Internet. It consists of the Network Layer ‘s IP protocol and the Transport Layer ‘s TCP protocol.
The seven-layer network protocol is structured as follows, listed from top to bottom:
| Protocol Layer | Role of the Protocol Layer |
|---|---|
| Application Layer | Handles communication between applications on different computers, offering communication services tailored for application programs. |
| Presentation Layer | Primarily responsible for defining data formats and handling encryption. |
| Session Layer | Manages how a session begins, is controlled, and ends, including handling multi-directional messages and session management. |
| Transport Layer | Provides functionalities such as error recovery or selecting an error-free protocol. |
| Network Layer | Defines end-to-end packet transfer, specifying logical addresses for all nodes and routing mechanisms. |
| Data Link Layer | Controls how data is transmitted over a single link and is specific to the type of medium used. |
| Physical Layer | Focuses on transmission media standards, referring to specifications defined by the OSI physical layer, often developed in conjunction with other official standards organizations. |
4. Implementation Process
4.1 PWNAT Parameter Definitions
After gaining an understanding of what NAT and PWNAT are and reviewing the seven-layer network protocol, let’s proceed to use the PWNAT tool to create NAT-to-NAT communication tunnels. Start by entering the following command in the Kali Linux terminal:
 # Display help information for the pwnat tool
pwnat -h
The image below showcases the meaning of various parameters:
| Parameter | Description |
|---|---|
-c | Parameter used by the PWNAT client to establish a connection with the server. |
-s | Parameter used by the PWNAT server to connect with the client. |
-6 | Indicates the use of an IPV6 communication tunnel. |
-v | Displays bug-related debug information from the PWNAT tool. |
-h | Displays help information for the PWNAT tool. |
4.2 Start Server to Listen
Using the pwnat -h command from earlier, we know the syntax for starting the server is as follows:
 # Parameters: [Local IP address] [Proxy port] [Allowed hosts] [Allowed ports]
 : [local ip] [proxy port (def:2222)] [[allowed host]:[allowed port] ...]
Input the following command in the Kali Linux terminal:
 # Listen on local proxy port 8080
pwnat -s 8080
The output, Listening on UDP 0.0.0.0:8080, indicates it is using the **User Datagram Protocol (UDP)**.
4.3 Start the Client Connection
In the Ubuntu host machine, open a new terminal window to connect to the Kali Linux virtual machine:
Referring to the client syntax from pwnat -h, the client command format is as follows:
 # Parameters: [Local IP address]   [Proxy port]
: [local ip]   [proxy port (def:2222)]
Execute the following command in the Kali Linux terminal:
 # Establish a PWNAT connection
pwnat -c 8000 192.168.122.101 8080 shiyanlou.com 80
Note: In real-world scenarios, the remote host address configured for the client connection needs to be set up manually. As this is a simulated lab environment without actual network connectivity, full NAT traversal could not be demonstrated. Once everything is configured correctly, successful hole punching will display the following type of output:
This lab emphasized understanding the process of creating a NAT-to-NAT communication tunnel using PWNAT. Key concepts such as NAT characteristics, the seven-layer network protocol, and the differences between TCP and UDP must be thoroughly grasped. The focus of backdoor-related experiments is on establishing communication between the attacker’s machine and the target machine after compromising the target. In the next section, we’ll explore developing a malicious program to achieve new connection methods.
5. Summary and Reflection
5.1 Key Takeaways
This lesson introduces the process of using PWNAT to perform NAT traversal. Covered topics include fundamental concepts such as NAT, UDP, TCP/IP protocol basics, explanations of PWNAT parameters, and the steps required for establishing a communication tunnel. These theoretical knowledge points require continuous reinforcement for better understanding.
Apart from PWNAT, another similar tool is **N2NC**, which also employs UDP hole punching. UDP (User Datagram Protocol) is a simple, connection-less transport layer protocol. It is often discussed alongside TCP/IP, leading beginners to easily confuse the two. The lab document content is structured as follows:
6. Post-Lesson Assignment
6.1 Post-Lesson Questions
To gain a deeper understanding of how various communication tunnels are established, it’s essential to explore the range of protocols used in networking, particularly the OSI seven-layer model. In this experiment, the NAT-to-NAT communication tunnel is created using a tool called PWNAT. The GitHub source code for PWNAT is linked below:
After completing this experiment, please reflect on the following questions:
- What are the similarities and differences between socket programming and using PWNAT to establish a NAT-to-NAT communication tunnel?
- Besides using PWNAT to create NAT-to-NAT communication tunnels, are there any other similar tools available?