
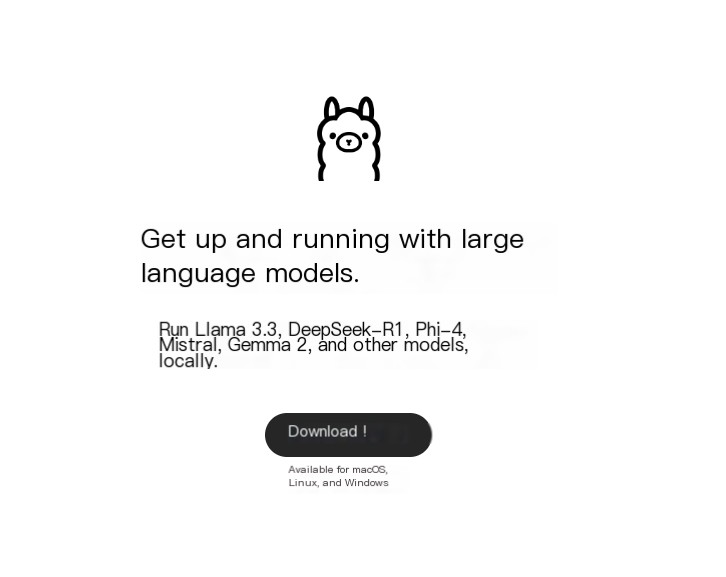
In the field of artificial intelligence, large language models (LLMs) are becoming increasingly popular. Many users wish to run these models in their local environment to ensure data privacy, meet customization needs, or enjoy the convenience of offline work. DeepSeek-R1 is a high-performance AI reasoning model that has recently garnered significant attention, focusing on tasks in mathematics, programming, and natural language reasoning. Meanwhile, Ollama is a powerful tool that helps users easily deploy and manage large language models in their local environment.
This article will provide a detailed guide on how to deploy the DeepSeek-R1 model in a local environment using Ollama and Open WebUI. It will also briefly introduce Ollama and DeepSeek-R1 to help users quickly get started and achieve local deployment.
If you want to deploy DeepSeek-R1 locally and use a machine with a 2GB GPU, this guide will help you achieve that smoothly. We will use Ollama as a tool and guide you step-by-step through the deployment process. Here are the detailed steps:
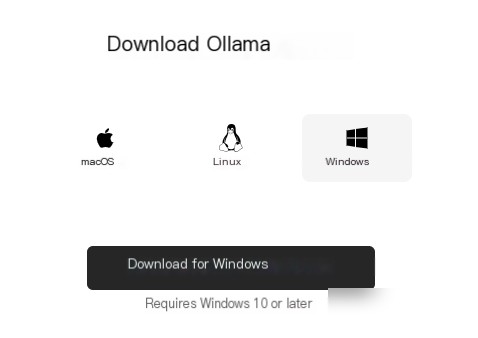
Installing Ollama
Ollama is an easy-to-use tool that helps us effortlessly deploy DeepSeek-R1 locally. First, ensure that your machine meets the following requirements:
- Operating System: Linux/MacOS or Windows
- GPU: Graphics card with 2GB of memory (such as GTX 1050 or similar)
The main features of Ollama include:
- User-Friendly
Ollama offers an intuitive command-line interface (CLI), allowing users to easily install, run, and manage AI models from the command line. Both beginners and experienced developers can quickly get started. - Local Deployment Support
Ollama allows users to run AI models on their local computers without relying on cloud services. This means you can directly run and debug models locally without worrying about network latency and data privacy. - Lightweight Support
Ollama is particularly suited for devices with limited resources. Even GPUs with smaller memory (like 2GB) can run some lightweight models. This enables many users to utilize older devices for local AI model execution. - Cross-Platform Support
Ollama supports multiple operating systems, including Linux, MacOS, and Windows. Regardless of the operating system you use, Ollama offers a consistent experience. - Multi-Model Management
Ollama supports managing multiple AI models, allowing you to easily switch between different models for various tasks on a single platform. This is very convenient for developers who need to frequently switch models. - Automated Updates
Ollama provides automated update functionality to ensure users can promptly access the latest versions of models and tools. This helps maintain model efficiency and access the latest features and security patches. - GPU Acceleration
Ollama fully supports GPU acceleration, running deep learning models on GPUs that support CUDA. It leverages the computing power of GPUs to significantly enhance training and inference speeds. - Support for Different Frameworks
Ollama supports mainstream machine learning frameworks such as TensorFlow and PyTorch. It allows users to choose models from various frameworks for local execution, providing great flexibility. - Simplified Model Management
Ollama simplifies the installation, downloading, execution, and update of models through one-click commands in the command line, eliminating the complex manual configuration process. It also provides clear version control for each model, helping developers manage and use different versions of models. - Bandwidth and Data Privacy Savings
By locally deploying models, Ollama avoids uploading and downloading large amounts of data, reducing bandwidth burden. Additionally, data remains on the local computer, ensuring data privacy, especially suitable for scenarios involving sensitive data. - Efficient Resource Utilization
Even on devices with smaller memory, Ollama effectively utilizes hardware resources for optimization, supporting low-memory devices for inference and deployment. Installation command: According to your operating system, execute the following commands to install Ollama.
On Linux or MacOS:
curl -sSL https://ollama.com/download | bashOn Windows:
Download the Ollama installer and follow the prompts to install.
Configure the Environment
After installation, ensure your environment is configured correctly. Run the following command to verify:
ollama --versionIf version information is displayed, the installation was successful.
Introduction to DeepSeek-R1
DeepSeek-R1 is an intelligent model based on advanced deep learning technology, designed for efficient image analysis and object detection. It utilizes deep convolutional neural networks (CNNs) and other efficient algorithms to perform various tasks such as object recognition, image classification, and object tracking in image or video data. The model is particularly suited for applications requiring real-time processing and high accuracy, such as security monitoring, medical image analysis, and autonomous driving.

Key Features
- High-Accuracy Object Detection undefinedDeepSeek-R1 employs the most advanced object detection architecture, combining efficient feature extraction and region proposal algorithms to accurately identify and locate multiple objects in images. This makes it highly applicable in fields such as security monitoring and autonomous driving.
- Real-Time Performance undefinedDeepSeek-R1 is optimized to support real-time image analysis, even on resource-constrained devices, providing quick responses. This is particularly important for applications requiring low latency, such as video surveillance or real-time systems.
- Efficient Resource Utilization undefinedThe model can run on devices with relatively small memory, such as 2GB GPUs. This makes it suitable not only for high-performance computing resources but also for more constrained hardware environments.
- Flexible Architecture Design undefinedDeepSeek-R1 offers highly configurable parameters, allowing users to adjust the model structure according to different task requirements, such as modifying convolution layers, activation functions, and loss functions to optimize performance and accuracy.
- Cross-Platform Support undefinedIt supports running on various operating systems, including Windows, Linux, and MacOS. It can be easily deployed on both server and local environments.
- Built-In Optimization Algorithms undefinedDeepSeek-R1 includes various optimization algorithms to enhance processing speed and reduce computational resource consumption. It supports GPU acceleration and can leverage technologies like CUDA to improve computational efficiency.
- Support for Multiple Input Data Formats undefinedDeepSeek-R1 supports multiple data formats, including images, video streams, and real-time sensor data. This makes it widely applicable in video analysis, autonomous driving, medical imaging, and other fields.
- Easy Integration undefinedDeepSeek-R1 provides a simple interface, allowing users to quickly integrate it into existing applications or platforms. This lowers the barrier to use for developers, enabling more efficient system integration.
Application Scenarios
- Video Surveillance: Real-time detection of abnormal activities or specified targets in surveillance video.
- Autonomous Driving: Recognize and track pedestrians, vehicles, and other obstacles on the road, providing decision support.
- Medical Imaging: Automated analysis of medical imaging data to assist doctors in diagnosis, such as tumor detection or organ identification.
- Industrial Inspection: Conduct product inspection and defect identification on production lines, improving production efficiency and product quality.
Steps to Deploy DeepSeek-R1 with Ollama
The steps to deploy the DeepSeek-R1 model using Ollama are relatively simple. Here is the detailed deployment process:
Step 1: Install Ollama
- Download Ollama: First, visit the Ollama official website to download the version suitable for your operating system (Windows or macOS).
- Install Ollama: Complete the installation process following the installation guide.
Step 2: Install the DeepSeek-R1 Model
- Open Terminal or Command Prompt: Open the command line tool according to your operating system (macOS users use Terminal, Windows users use Command Prompt or PowerShell).
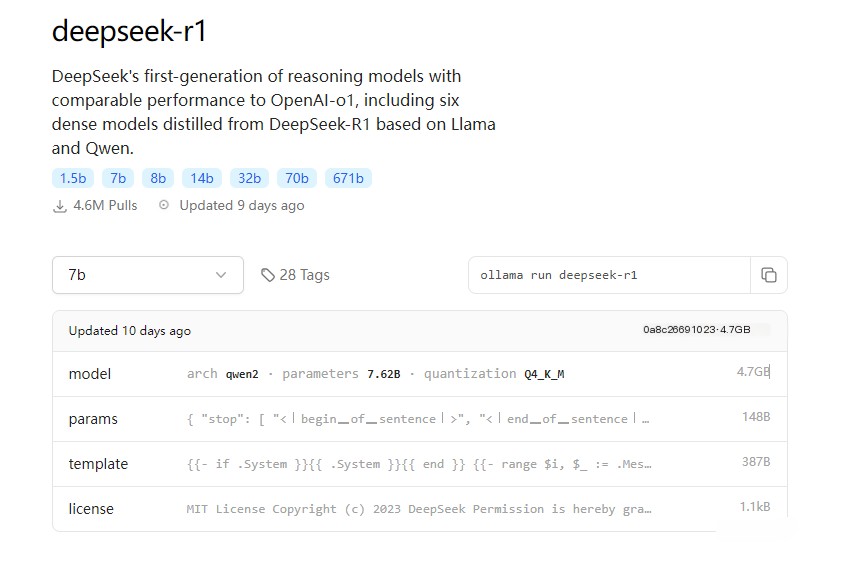
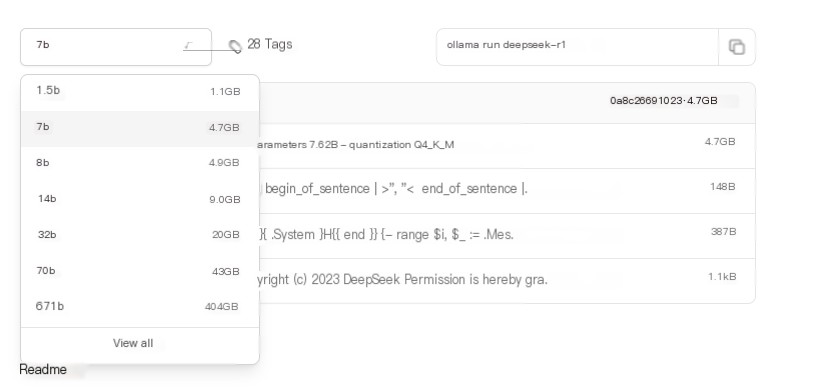
- Pull the Model: In the terminal, enter the following command to download the DeepSeek-R1 model:
ollama pull deepseek-r1This command will pull the DeepSeek-R1 model from Ollama’s official model repository and download it locally.
Step 3: Launch the Model
- Run the DeepSeek-R1 Model: Use the following command to start the DeepSeek-R1 model:
ollama run deepseek-r1This command will start the model and initiate an inference service in the local environment.
 Insert image description here
 Insert image description here
 - Install Open WebUI: Ensure your system has Open WebUI installed. If not, you can install it using the command:
pip install open-webui - Configure WebUI: Run the following command to start Open WebUI:
open-webui startAfter starting, you can access the WebUI interface via your browser, typically at
http://localhost:5000.
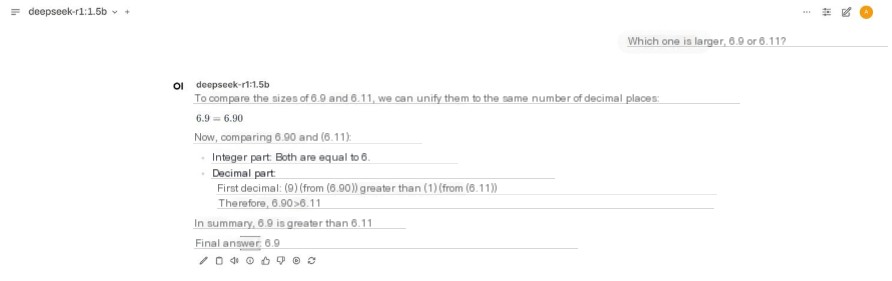
Step 5: Access and Use the Model
- Enter WebUI: In the browser, enter
http://localhost:5000to open the Open WebUI page. - Select DeepSeek-R1: In the WebUI interface, you will see the DeepSeek-R1 model as an available option. Select this model and start inputting text or code, and the model will return inference results.
Step 6: Custom Settings (Optional)
- Configure Parameters: You can adjust the input parameters of the model, maximum inference duration, and other settings as required.
- Model Customization: If specific domain customization is needed, you can optimize the model by providing data or by fine-tuning.
Following the above steps, you can successfully deploy the DeepSeek-R1 model in a local environment and interact with it via Ollama and Open WebUI.
Summary
This article provides a detailed guide on how to deploy and use the DeepSeek-R1 model in a local environment, specifically utilizing the Ollama tool for installation and configuration. The article starts by summarizing the main features of Ollama, including its ease of use, multi-platform support, GPU acceleration, and local deployment advantages, making it highly suitable for resource-constrained devices. Then, the article introduces the capabilities and application scenarios of the DeepSeek-R1 model, such as high-precision target detection, real-time performance, cross-platform support, emphasizing its extensive use in image analysis and target detection tasks.
By following specific steps, the article demonstrates how to install and configure DeepSeek-R1 via Ollama and interact with the model using Open WebUI. The steps include: installing Ollama, downloading and running the DeepSeek-R1 model, configuring Open WebUI, and accessing and using the model through a browser. Additionally, it explains how to perform custom settings and model customization to meet specific task requirements.
Overall, this article provides a practical guide that helps users quickly deploy and use the DeepSeek-R1 model in a local environment, especially suitable for scenarios that require data privacy and local inference.
Original Declaration: This article is authorized by the author to be published by the Tencent Cloud Developer Community. No reproduction is allowed without permission.
If there is any infringement, please contact [email protected] for deletion.
DeepSeek Tencent Tech Creation Camp S11 #Restart Life #DeepSeek