
IDS (Intrusion Detection System) Mode Configuration
**Configure Snort directories**
1. Create a Snort user and group, ensuring Snort is a non-privileged user.
groupadd snort
useradd snort -r -s /sbin/nologin -c SNORT_IDS -g snort
2. Configure Directories In IDS mode, some directories will be created, with configuration files stored in /etc/snort, rules stored in /etc/snort/rules, compiled rules stored in /usr/local/lib/snort_dynamicrules, and logs stored in /var/log/snort
# Create snort directories
mkdir /etc/snort
mkdir /etc/snort/rules
mkdir /etc/snort/rules/iplists
mkdir /etc/snort/preproc_rules
mkdir /usr/local/lib/snort_dynamicrules
mkdir /etc/snort/so_rules


# Create storage for rule files
touch /etc/snort/rules/iplists/black_list.rules
touch /etc/snort/rules/iplists/white_list.rules
touch /etc/snort/rules/local.rules
touch /etc/snort/sid-msg.map

# Create log directories
mkdir /var/log/snort
mkdir /var/log/snort/archived_logs


# Change directory permissions
chmod -R 5775 /etc/snort
chmod -R 5775 /var/log/snort
chmod -R 5775 /var/log/snort/archived_logs
chmod -R 5775 /etc/snort/so_rules
chmod -R 5775 /usr/local/lib/snort_dynamicrules


# Change ownership of files
chown -R snort:snort /etc/snort
chown -R snort:snort /var/log/snort
chown -R snort:snort /usr/local/lib/snort_dynamicrules


# Copy configuration files from source files into /etc/snort/
cd /snort-2.9.18.1/etc/    # (enter the snort installation directory, may vary for each user)
cp *.conf* /etc/snort
cp *.map /etc/snort
cp *.dtd /etc/snort

cd /root/snort-2.9.18.1/src/dynamic-preprocessors/build/usr/local/lib/snort_dynamicpreprocessor
cp * /usr/local/lib/snort_dynamicpreprocessor/
3. Configure Rules We use the free community rules provided by the official site. You can choose other packages from the official site if needed (Community package is free; register to get the registered package; paid packages available).
wget https://www.snort.org/downloads/community/community-rules.tar.gz
Extract and add
tar -xvzf community-rules.tar.gz
cp community-rules/* /etc/snort/rules/
4. Modify Configuration File
vim /etc/snort/snort.conf
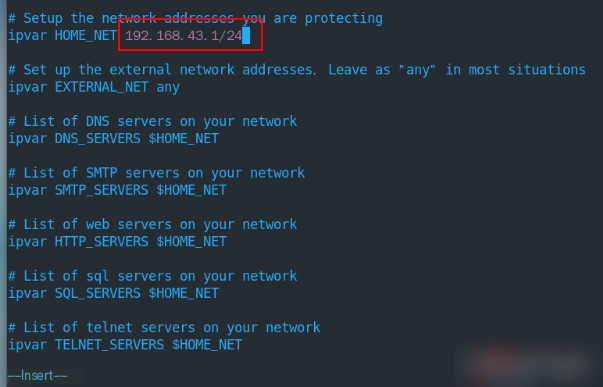
# Around line 45, modify ipvar HOME_NET to the internal network of your machine
ipvar HOME_NET .1/24
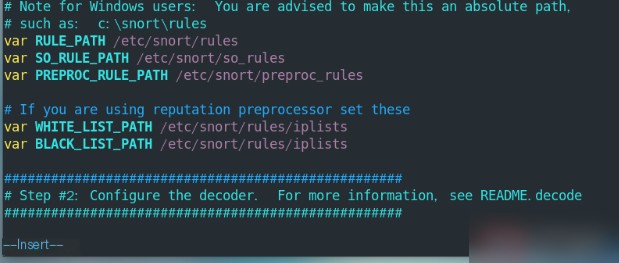
# Around line 104, configure the rule file paths
var RULE_PATH /etc/snort/rules
var SO_RULE_PATH /etc/snort/so_rules
var PREPROC_RULE_PATH /etc/snort/prepproc_rules
var WHITE_LIST_PATH /etc/snort/rules/iplists
var BLACK_LIST_PATH /etc/snort/rules/iplists
# At line 515, add after output unified2: .......
output unified2: filename snort.u2, limit 128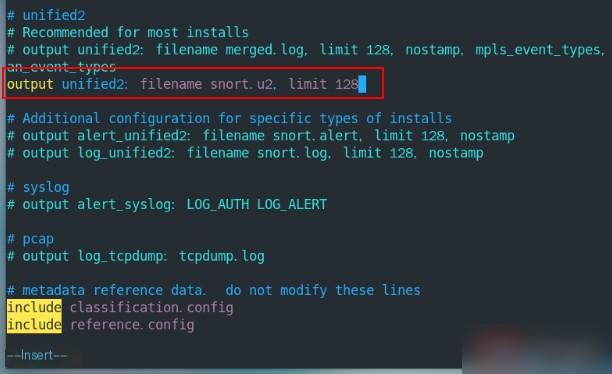
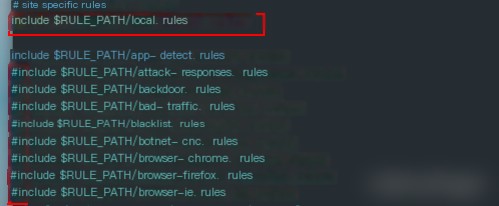
# At line 546, uncomment the local.rules file and comment the include files after it
include $RULE_PATH/local.rules
Save and exit
Check if the rules are properly configured
snort -T -c /etc/snort/snort.conf
Seeing the interface below indicates the rule configuration is complete
At this point, we have successfully configured Snort as an IDS to protect our network
5. Rule Writing for Detection Snort rule format Snort allows users to write their own rules to generate logs for incoming/outgoing network packets. Snort rules mainly consist of “header” and “options”, which are composed of different fields as shown below:
### Header Fields (Required)
action: The action Snort takes when a rule matches, including (alert, log, pass, activate, dynamic)
Protocol: The protocol used by the traffic (ip, tcp, udp, icmp, etc.)
Source IP: The attacker's/visitor's IP
Source port: The attacker's/visitor's port
Direction operator: "->", "<>" indicates the direction of network traffic from sender to receiver
Destination IP: The target IP, usually the host protected by the IDS
Destination Port: The target port, usually the host accepting traffic

### Option Fields (In parentheses, optional. Parameters and values separated by colons, parameters separated by semicolons)### There are four main categories of option fields (general, payload, non-payload, post-detection triggers)### Below are common rules1).msg: Message printed in alerts and logs,
2).logto: Logs to a user-specified file instead of the standard output file, e.g., logto:'';3).ttl: Tests the TTL field in the IP packet header
4).tos: Tests the TOS field in the IP packet header
5).id: Tests whether the IP fragment identifier field has a specific value
6).ipoption: Tests the IP options field
7).fragbits: Tests the fragmentation bits in the IP packet header
8).dsize: Tests the size of the packet data segment
9).flags: Tests whether the TCP flags match a specific value
10).seq: Tests whether the sequence number in the TCP packet matches a specific value
11).ack: Tests whether the acknowledgement field in the TCP packet matches a specific value
12).itype: Tests the type field in the ICMP packet
13).icode: Tests the code field in the ICMP packet
14).icmp_id: Tests whether the ICMP echo ID is a specific value
15).content: Searches for a pattern in the packet data segment
16).content-list: Searches for a pattern list in the packet data segment
17).offset: Sets the offset to start the search
18).depth: Sets the maximum search depth
19).nocase: Case insensitive match for the content string
20).session: Strips the application layer information of a session
21).rpc: Observes the RPC service call to a specific application
22).resp: Activates countermeasures (disconnect, etc.)
23).react: Activates reaction measures (block WEB site)
Practice detecting access to port 80 in the following way
vim/etc/snort/rules/local.rules
alert tcp any any ->192.168.43.97 80(msg:"A test guys";reference:"A Robot";sid:1)
Create a rule for packets from ping
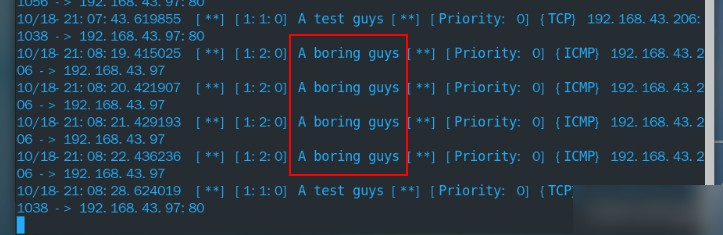
alert icmp any any ->192.168.43.97 any (msg:"A boring guys";reference:"A Robot";sid:2)
Save and exit
Activate the snort console to monitor traffic
snort -A console -q -u snort -g snort -c /etc/snort/snort.conf -i ens33
Access port 80 from a browser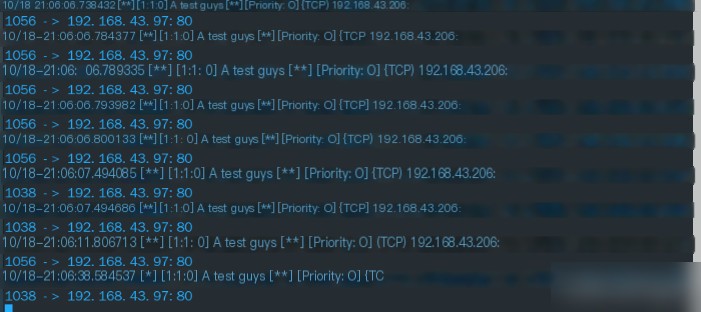
You can see the attacker’s IP and port from the image above
Now simulate another user/attacker pinging the host
ping192.168.43.97
You can see the traffic detected on the console from 192.168.43.206 to 192.168.43.97
 More on familiarizing yourself with detection rules in the next post
For detailed rules, see:
http://drops.xmd5.com/static/drops/%E6%9D%A9%E6%84%AE%E6%B7%AE%E7%80%B9%E5%A4%8A%E5%8F%8F-9232.html