
**HIDS vs NIDS**: **Snort** is an open-source Network Intrusion Detection System (NIDS) that employs signature-based detection methods to monitor network traffic and detect potential threats. It features a versatile rule language, enabling users to create custom detection rules or adjust existing ones. Furthermore, Snort leverages a large collection of community-contributed rules for enhanced threat detection.
While many people are familiar with Host Intrusion Detection Systems (HIDS), fewer are acquainted with NIDS. This article demonstrates how to deploy the open-source Snort as a NIDS to monitor host traffic.
Differences Between HIDS vs NIDS
The primary characteristics and differences between HIDS (Host Intrusion Detection Systems) and NIDS (Network Intrusion Detection Systems):
| Feature | HIDS (Host Intrusion Detection System) | NIDS (Network Intrusion Detection System) |
|---|---|---|
| Monitoring Scope | Monitors internal activities and states of a single host | Monitors data flow across the network |
| Deployment Location | Deployed on a specific host | Deployed at critical network intersections, such as network boundaries or near core switches |
| Detection Content | System calls, file system access, system logs, etc. | Captures and analyzes network traffic, such as packet content |
| Primary Functions | Detects unauthorized file modifications, abnormal system configurations, malware activities, etc. | Detects denial-of-service attacks, port scans, malicious traffic patterns, etc. |
| Threat Focus | Focuses on internal threats and backdoor attacks | Focuses on detecting network-level attacks and anomalies |
| Limitations | Cannot access network-level information and may impact host performance | Limited ability to analyze encrypted traffic and lacks deep insight into specific application layers on a single host |
Installing Snort: HIDS vs NIDS Explained
apt install snort -y
After installation, check the Snort version.
 root@VM-24-5-ubuntu:~# snort -V

   ,,_     -*>  Snort! <*-
  o"  )~   Version 2.9.15.1 GRE (Build 15125)
   ''''    By Martin Roesch & The Snort Team: http://www.snort.org/contact#team
           Copyright (C) 2014-2019 Cisco and/or its affiliates. All rights reserved.
           Copyright (C) 1998-2013 Sourcefire, Inc., et al.
           Using libpcap version 1.10.1 (with TPACKET_V3)
           Using PCRE version: 8.39 2016-06-14
           Using ZLIB version: 1.2.11
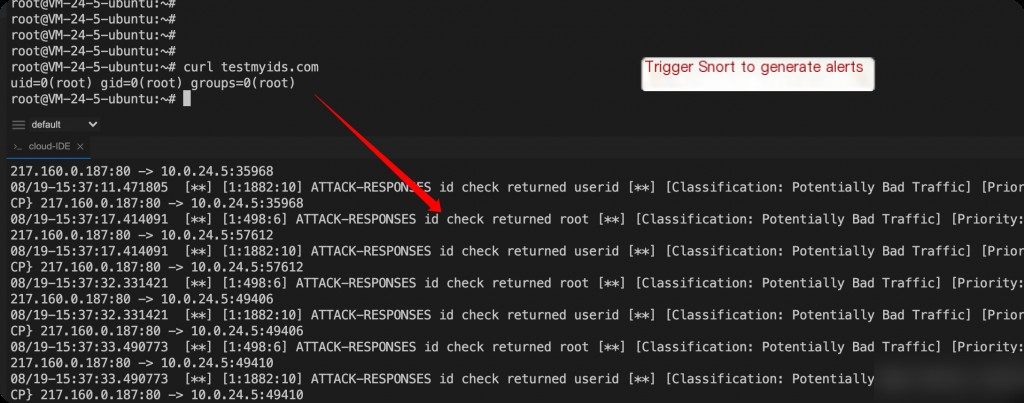
 curl testmyids.com
tail -f /var/log/snort/snort.alert.fast
Test whether Snort is functioning correctly.
Analyzing PCAP Files with Snort
To begin analysis, a PCAP file must exist on the system running Snort. You can use tcpdump on the Snort host to capture packets and save them as a PCAP file, which Snort can then analyze. Execute the following commands in three separate terminal windows:
 python3 -m http.server 80
tail -f /var/log/snort/snort.alert.fast
tcpdump -i eth0  -w snort-test.pcap
Use Python to listen on port 80.
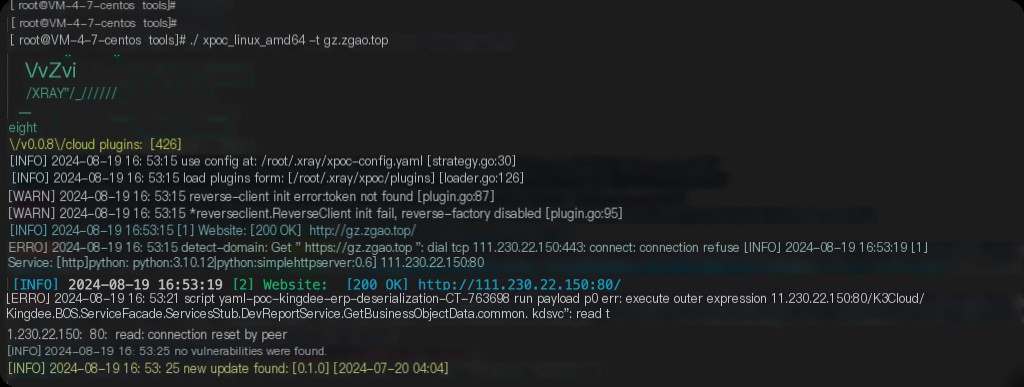
Then, use any scanner to perform a scan.
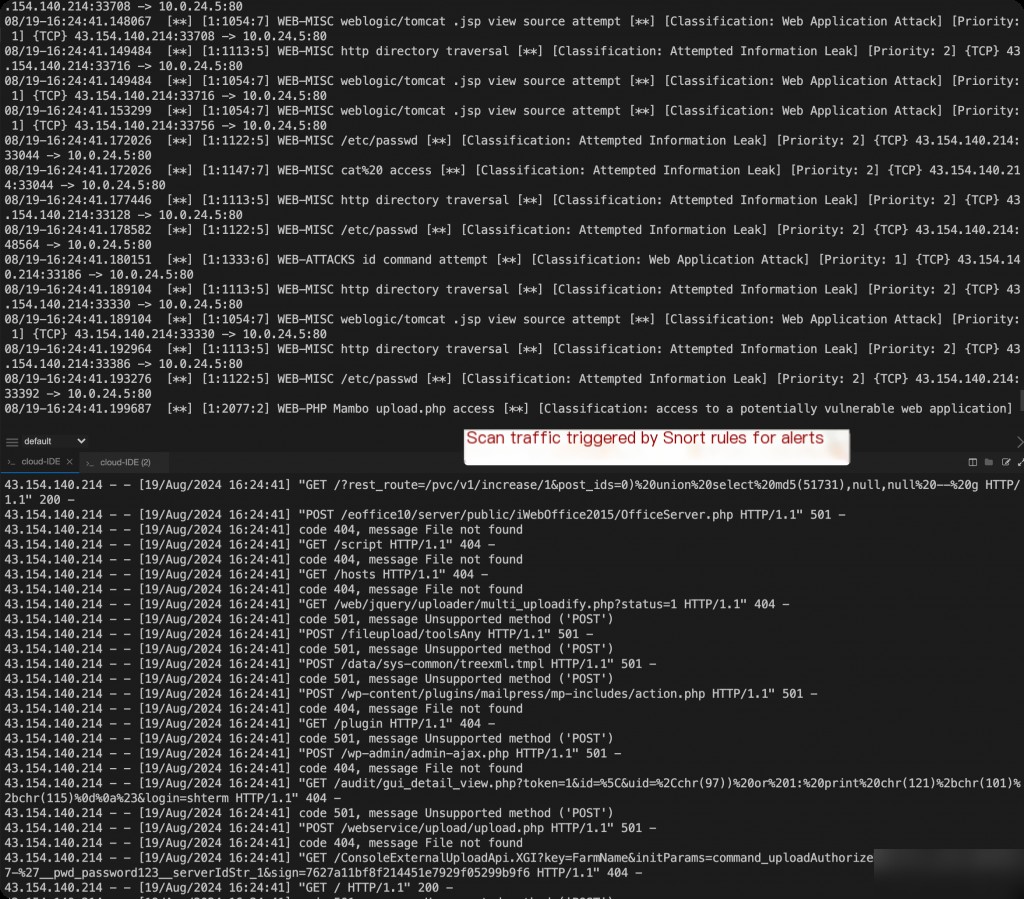
After completing the scan, stop the tcpdump capture.
snort -r snort-test.pcap -c /etc/snort/snort.conf 2> &1 | less
Use Snort to analyze the captured PCAP traffic.
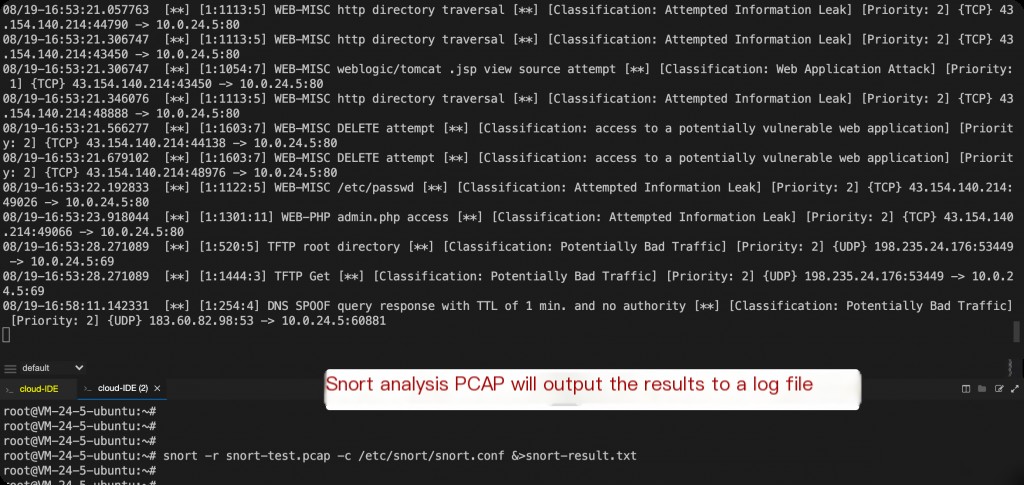
Alert details are output to the /var/log/snort/snort.alert.fast file.
Viewing Snort Alert Logs
Snort log files are located at: /var/log/snort
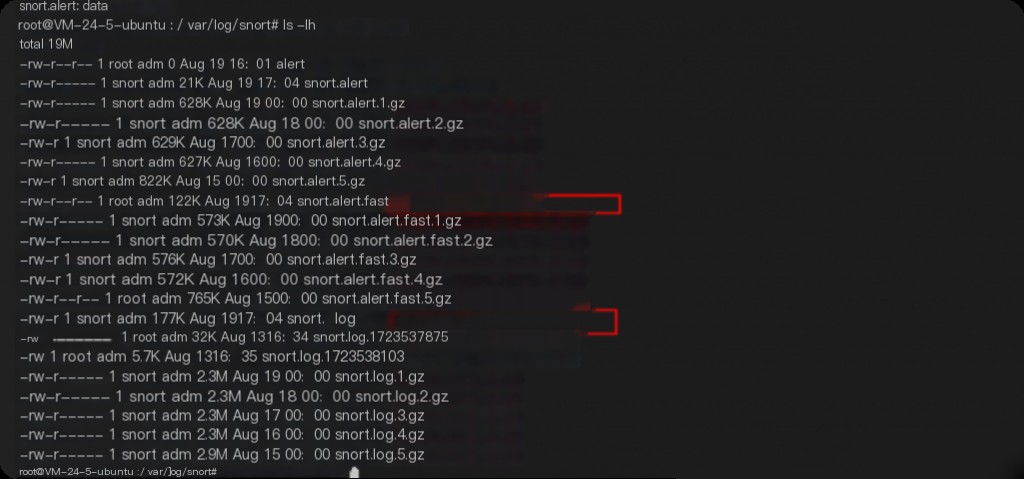
The snort.alert.fast file contains concise alert information, such as triggered rules and their corresponding IDs.
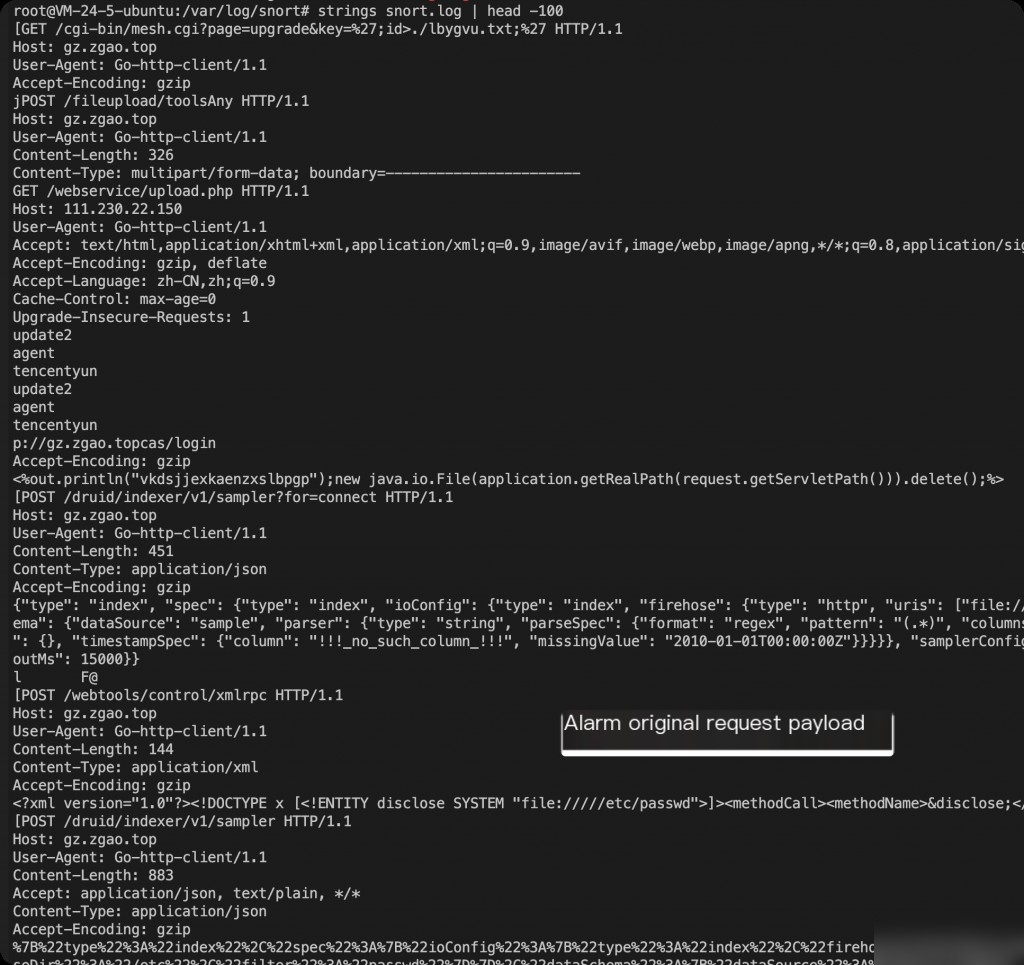
Meanwhile, Snort.log contains raw request details that triggered the alerts.
Manually Adding Snort Rules
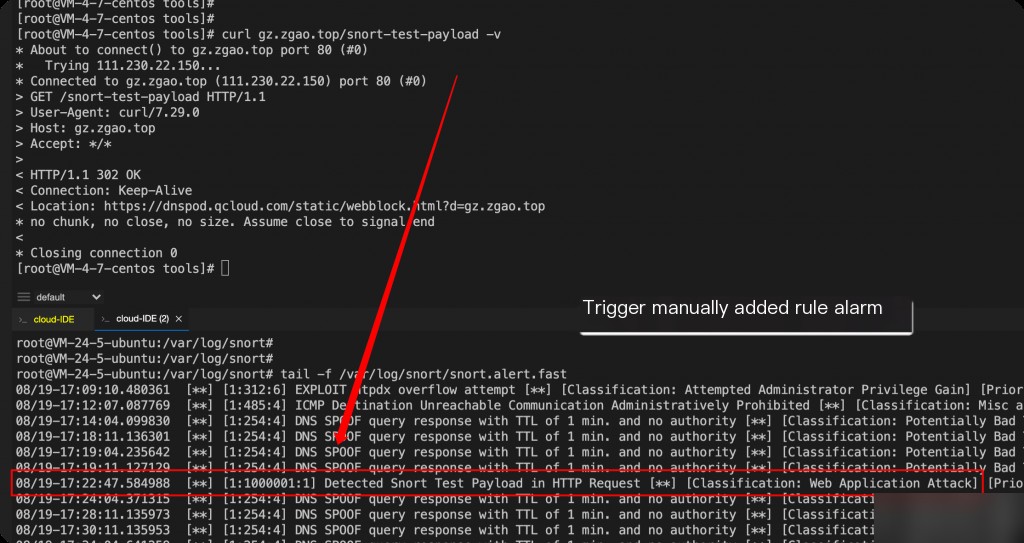
The tests above used Snort’s default rules. You can also add custom rules, such as triggering an alert when an HTTP request contains “snort-test-payload.”
vim /etc/snort/rules/local.rules
Add the following content and restart Snort:
alert tcp $EXTERNAL_NET any -> $HOME_NET $HTTP_PORTS (msg:"Detected Snort Test Payload in HTTP Request"; flow:to_server,established; content:"snort-test-payload"; http_uri; sid:1000001; rev:1; classtype:web-application-attack; priority:2;)
systemctl restart snort
The components of this rule are explained as follows:
- alert tcp: Rule action and protocol, indicating an alert for TCP traffic.
- $EXTERNAL_NET any -> $HOME_NET $HTTP_PORTS: Network addresses and ports, specifying traffic from any external address to internal HTTP ports.
- msg:”Detected Snort Test Payload in HTTP Request”: Message displayed when the rule is triggered.
- flow,established: Traffic direction and state, detecting only established traffic to the server.
- content:”snort-test-payload”: Rule content, detecting the string “snort-test-payload” in the HTTP request URI.
- http_uri: Specifies that the
contentcheck applies to the HTTP URI. - sid:1000001: Unique identifier for the rule (Signature ID).
- rev:1: Revision number of the rule.
- classtype: Rule classification.
- priority:2: Rule priority level.
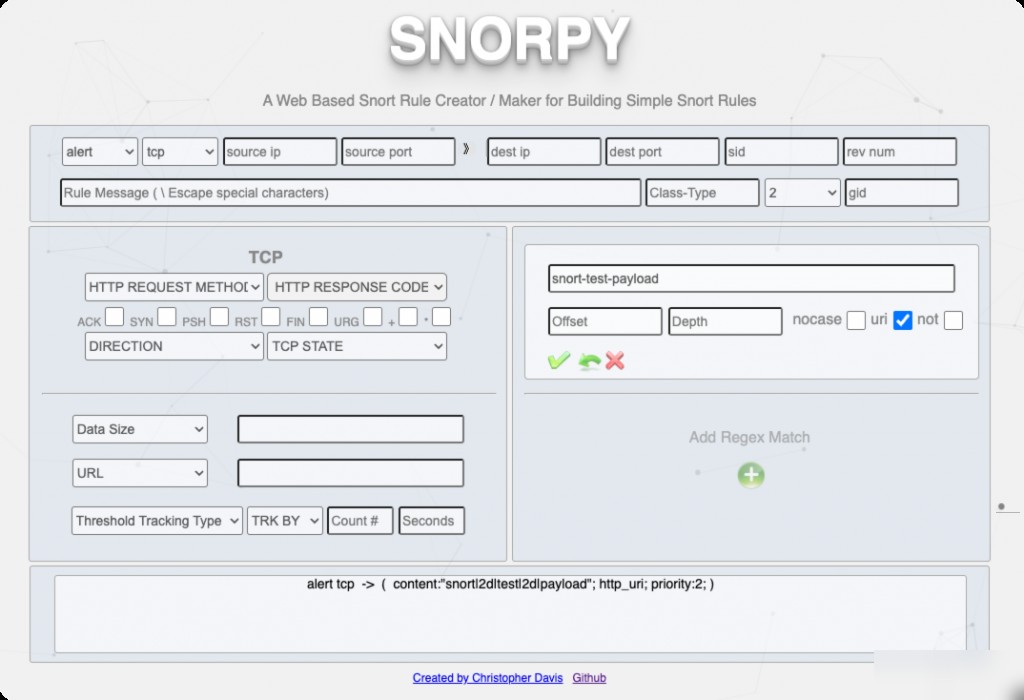
Automatically Generating Snort Rules
Writing rules manually can be tedious. Fortunately, there are online tools for generating Snort rules:
https://github.com/chrisjd20/Snorpy
Disabling Specific Snort Rules
I have deployed Snort on Tencent Cloud, and the cloud host itself performs ping actions, which continuously trigger Snort rule alerts.
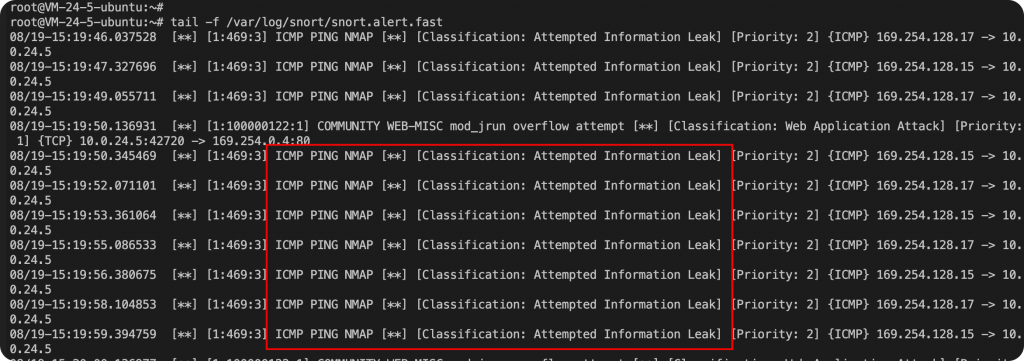
The false positives cause significant interference for us, so we can disable this rule.
plaintext
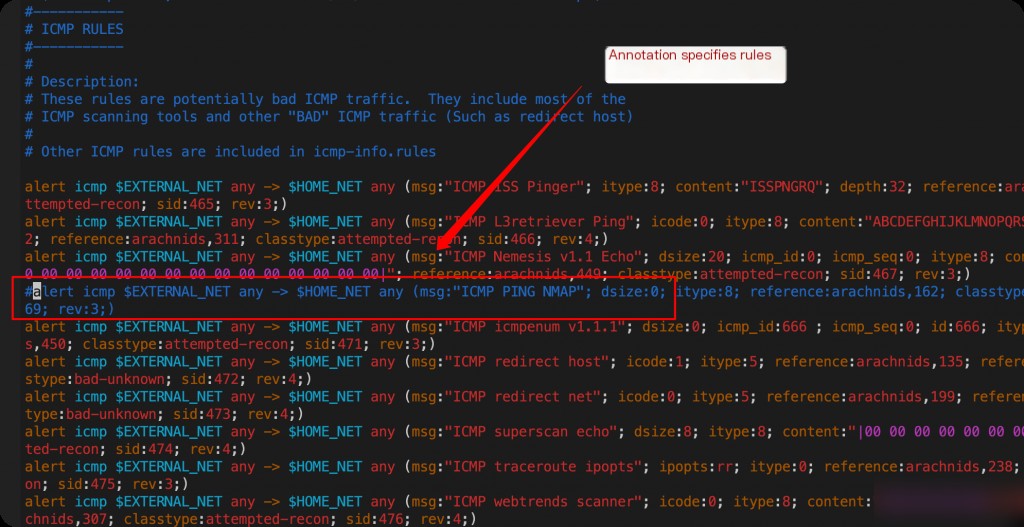
root@VM-24-5-ubuntu:~# grep -irn “ICMP PING NMAP” /etc/snort/rules/
/etc/snort/rules/icmp.rules:32:alert icmp $EXTERNAL_NET any -> $HOME_NET any (msg:”ICMP PING NMAP”; dsize:0; itype:8; reference:arachnids,162; classtype:attempted-recon; sid:469; rev:3;)
Locate the corresponding rule file and manually comment it out.
After modifying the rule file, you need to restart the Snort service for the changes to take effect.