
When users connect to another system using RDP, small-sized (bitmap) images are stored in their RDP configuration file, allowing faster retrieval/pull if the same image is needed during the session. This enhances the overall RDP session experience, especially if the connection speed is slow. Thumbnail forensics can sometimes help us identify what the user saw during their RDP session.
RDP Cache
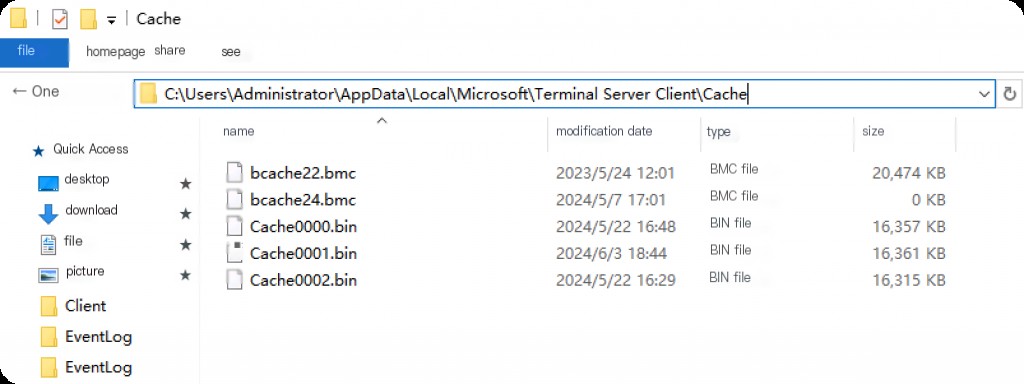
In forensics involving lateral movement using RDP, RDP bitmap cache files are one of the important pieces of evidence. Each user’s cache is different and user-specific, located at:
%userprofile%\AppData\Local\Microsoft\Terminal Server Client\Cache
We can analyze this file in cases of lateral movement within an internal network, which will help us uncover the attacker’s activities on the lateral movement victim.
RDP Cache Extraction Tools
https://github.com/ANSSI-FR/bmc-tools
https://github.com/BSI-Bund/RdpCacheStitcher
Using bmc-tools will output many small images, which can be manually reviewed or viewed using RdpCacheStitcher. We obtain the cache files and place them in a folder named bitmap, then run the bmc tool.
bmc Extract Cache Images
First, copy the RDP Cache folder from the target host.
 └─# git clone https://github.com/ANSSI-FR/bmc-tools.git
└─# cd bmc-tools
└─# python3 bmc-tools.py -h
usage: bmc-tools.py [-h] -s SRC -d DEST [-c COUNT] [-v] [-o] [-b] [-w WIDTH]

RDP Bitmap Cache Parser (version 3.02, March 2, 2023)

Options:
-h, --help                Show this help message and exit
-s SRC, --src SRC         Specify the BMCache file or directory to process.
-d DEST, --dest DEST      Specify the directory to store extracted bitmaps.
-c COUNT, --count COUNT   Extract only the given number of bitmaps.
-v, --verbose             Determine the amount of information displayed.
-o, --old                 Extract old bitmap data found in BMCache files.
-b, --bitmap              Provide a large bitmap aggregating all tiles.
-w WIDTH, --width WIDTH   Specify the number of tiles per row in the aggregate bitmap (default=64).
Execute bmc to extract RDP cache images.
python3 bmc-tools.py -s ./Cache -d ./output -b
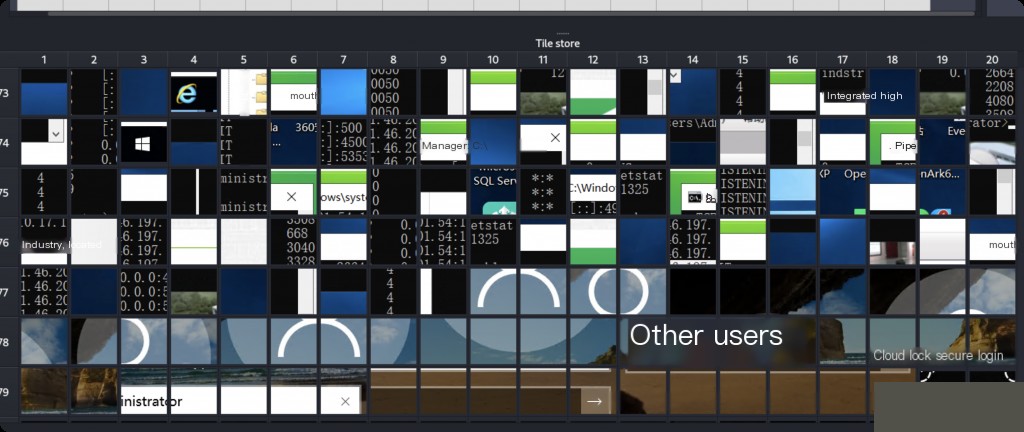
Note that when using the bmc tool, we added a -b option to create a collage. If we search for the keyword collage in the folder storing all bitmaps, we will get a file.
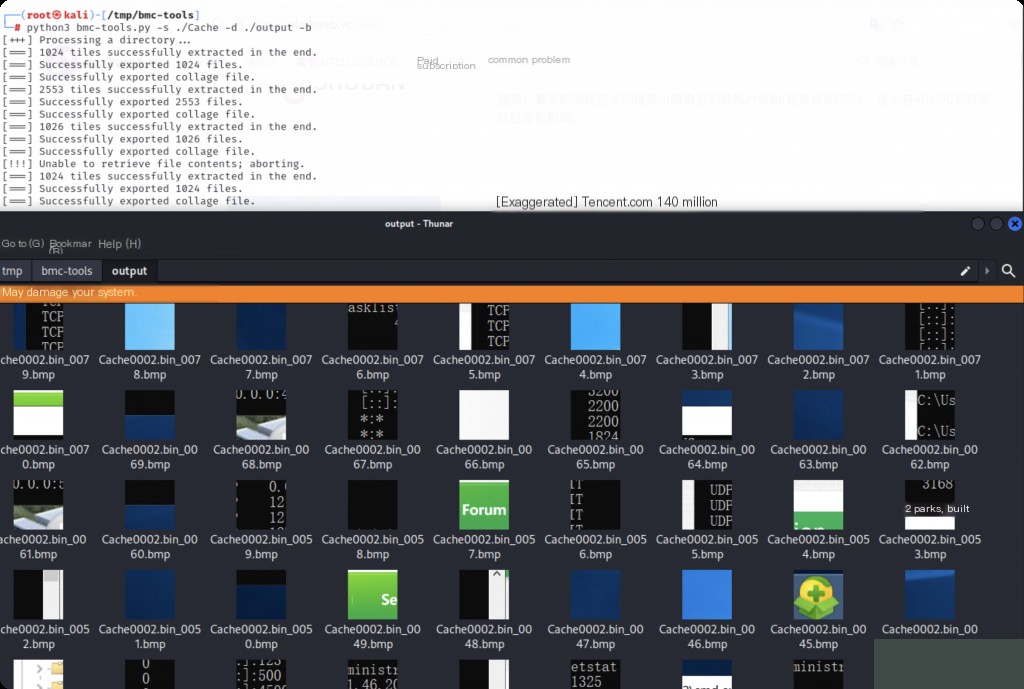
We can browse all these images as they are like screenshots of the RDP session, only smaller in size.
We will also find more small full-screen images. For example, if the attacker runs commands in the command prompt, uses a browser, or performs any actions. We can use this to discover the attacker’s activities. The only downside is that it is very time-consuming, especially in real cases where there will be many images.
A useful tip is to open the folder where all files are placed and maximize the window. This will display all image previews, allowing us to identify what each image is.
RdpCacheStitcher Reassemble Images
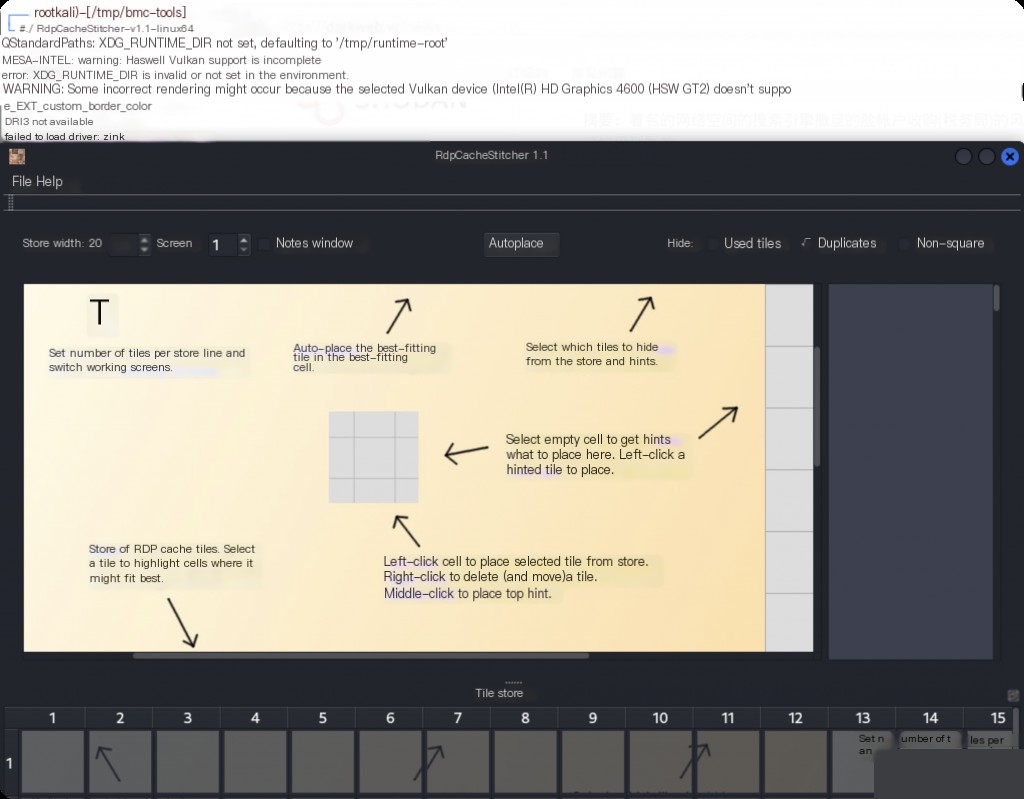
Now use the RdpCacheStitcher tool, which is more useful than manual image analysis. It will help us reconstruct more meaningful screenshots from all the small bitmap images. Open the tool, go to File and New Case.
Press ctrl + N to create a new case, then browse to the directory storing all bitmap images. Double-click the directory, then click Select Folder.
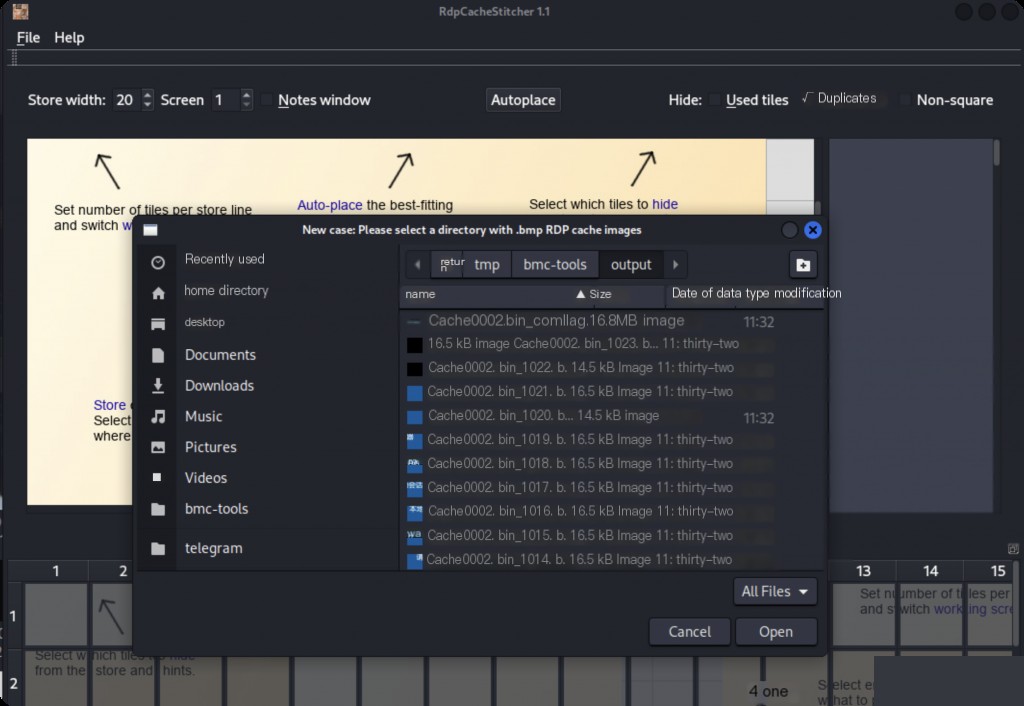
All bitmap images will be loaded.
Although the images are still messy, it is easier to understand each image than before.
Thumbnail Cache
ThumbCache is a feature provided by the Windows operating system since Windows Vista, used to cache file thumbnails for Windows Explorer views. When you open Windows Explorer in thumbnail view, the files in the folder are displayed as small images representing the file contents. These images are stored in centralized thumbnail cache files. The purpose of this feature is to avoid heavy disk I/O, CPU processing, and loading times. Microsoft Windows stores thumbnails for many file types, including JPEG, BMP, GIF, PNG, TIFF, AVI, PDF, PPTX, DOCX, HTML, MP4, etc.
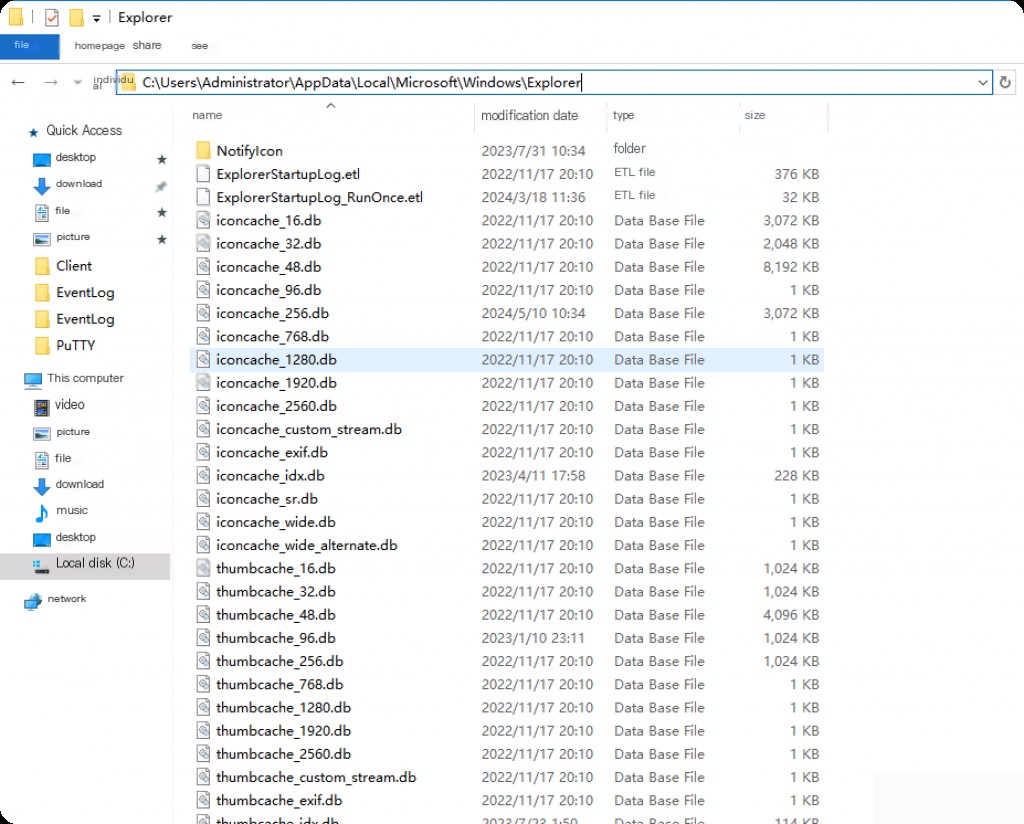
ThumbCache artifacts are stored at the following location:
%userprofile%\AppData\Local\Microsoft\Windows\Explorer
These files are named Thumcache_xxx.db and iconcache_xxxx.db, where xxx is the bit/pixel/resolution value.
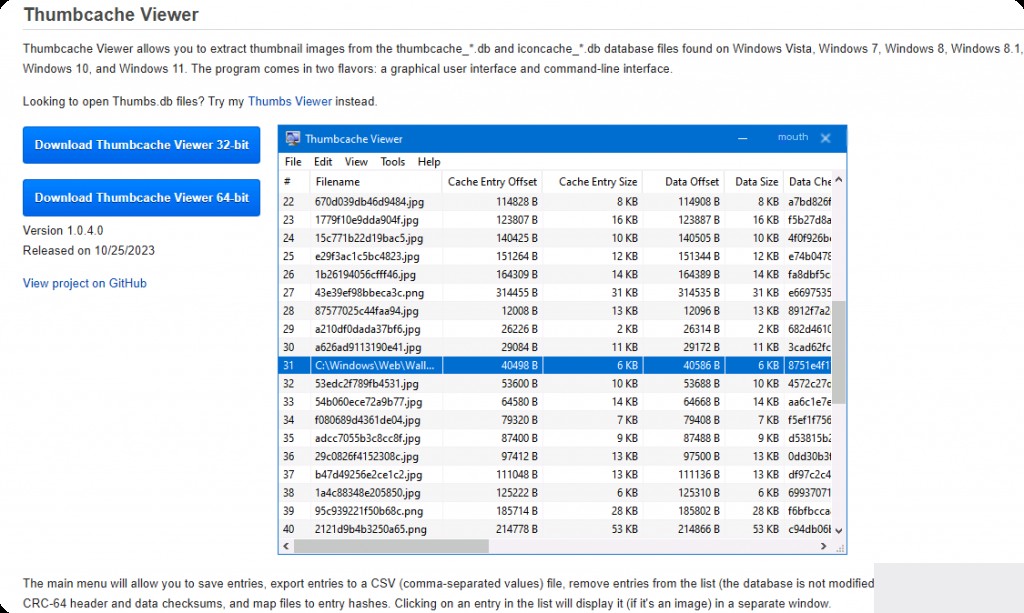
We will obtain thumbnails, screenshots, or images of the files, the size of the files, and the location of the source cache files.
Download ThumbCache Viewer
We use ThumbCache Viewer to analyze these database files.
https://thumbcacheviewer.github.io
ThumbCache Viewer Analyze Cache Images
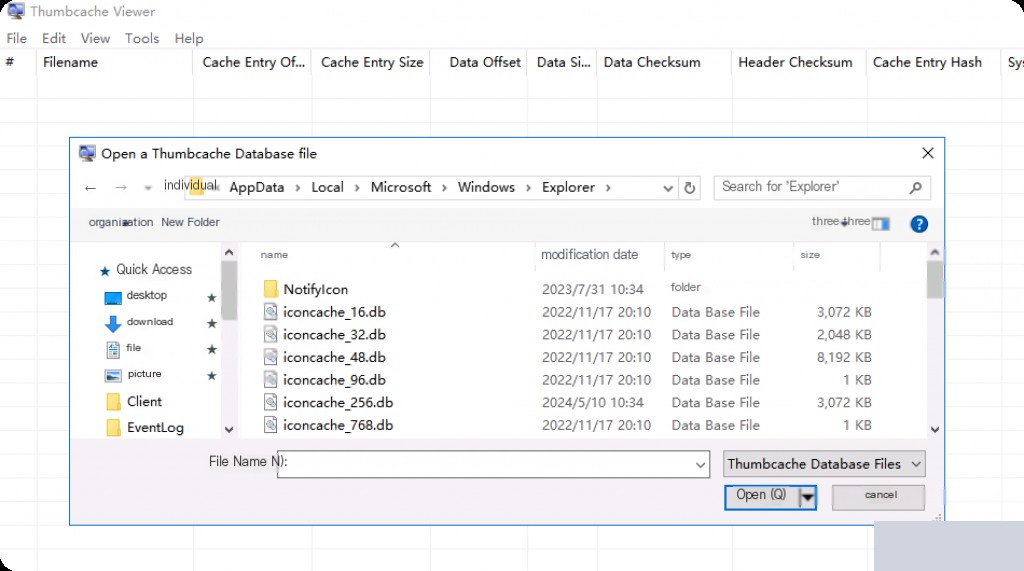
Select all the DB files to load and analyze.
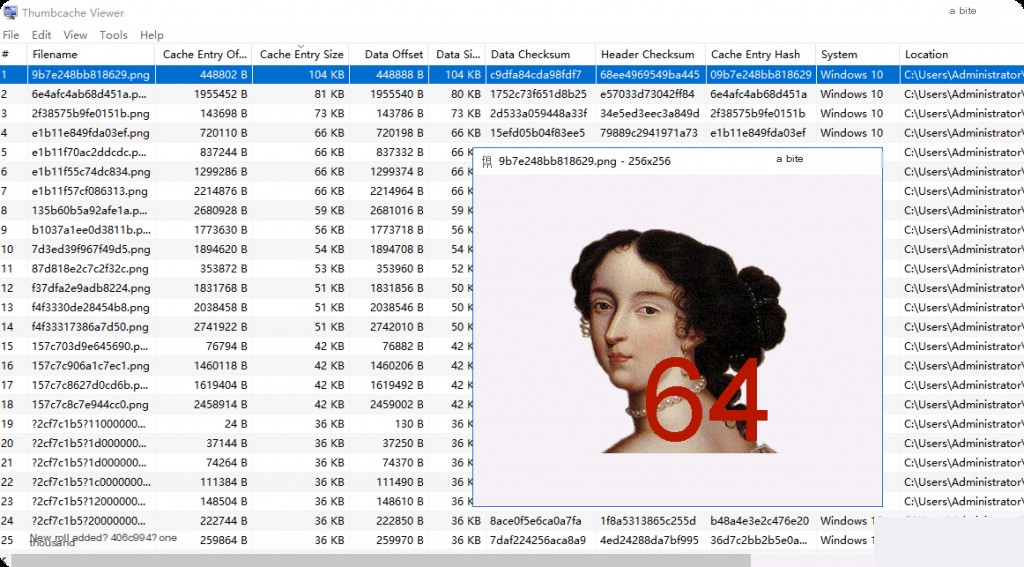
Once loaded, double-click to view the cached thumbnail files. In File Explorer, we set the view option to “Extra Large Icons,” so the thumbnails saved in the database have higher resolution. If we keep the File Explorer view option as other options (like medium or small), the images in the thumbnail cache database will be smaller and less clear.
It is known that law enforcement agencies have used thumbnail cache files to prove that files were stored on a Windows system hard drive even if they were deleted. When a user deletes a file, its thumbnail remains in the cache file. Analysis of ThumbCache files can produce metadata such as the original file’s metadata, its cache ID, header checksum, data offset, data type, and data size. Metadata can provide forensic investigators with critical information, such as the file’s creation time, its location in the file system, last accessed time, last modified time, etc.