
Computer forensic analysis is the process of collecting and evaluating digital evidence, typically used to identify illegal activities. PowerShell is a powerful tool for forensic analysis on Windows systems. This article introduces efficient usage techniques of PowerShell in emergency response investigations.
Event Log Analysis
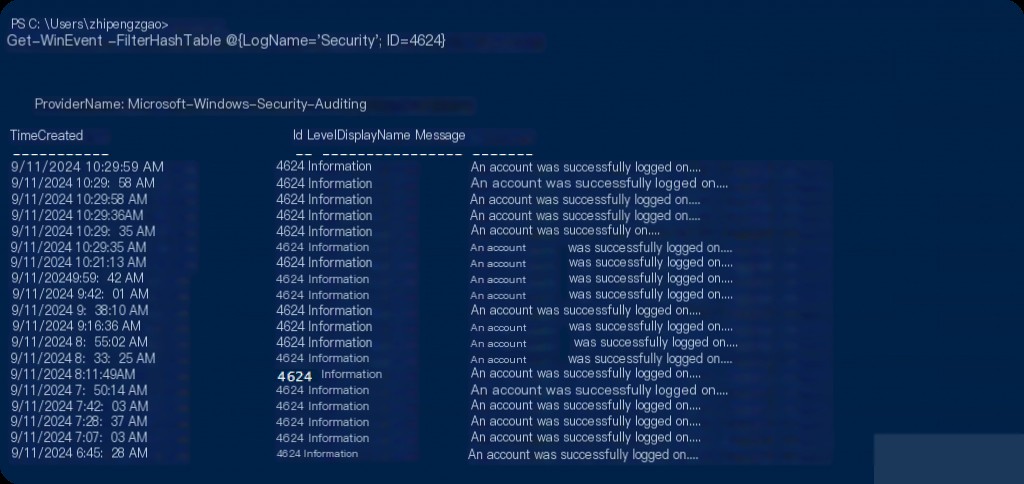
Forensic analysis usually starts with examining system logs. Windows Event Logs are an important source of information and can be accessed using PowerShell’s Get-WinEvent cmdlet. For example, we can filter events by specific event ID to find suspicious user activities:
Get-WinEvent -FilterHashTable @{LogName='Security'; ID=4625}
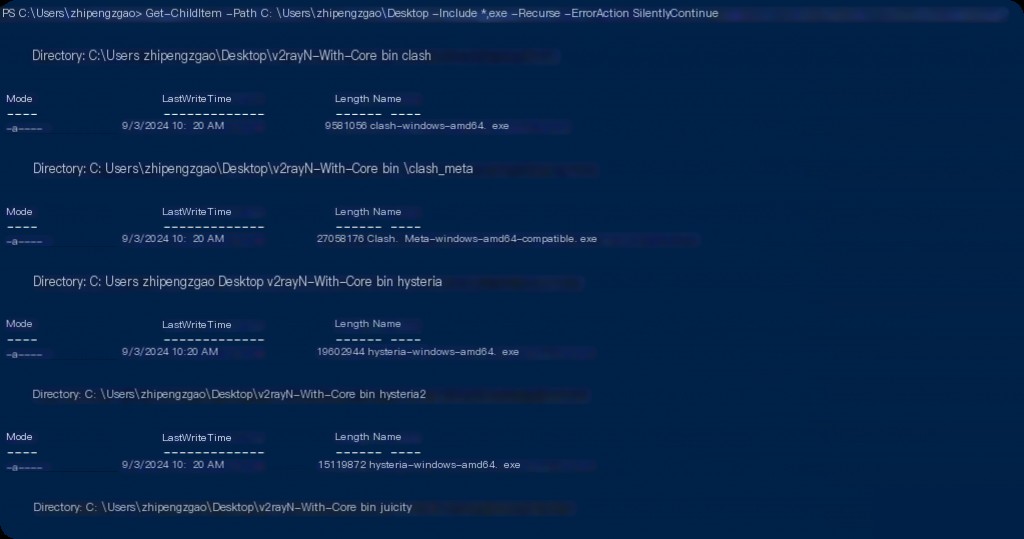
PowerShell can also be used to analyze files and folders. The Get-ChildItem cmdlet is used to list files in a folder, which can be piped to perform operations on them. For example, we can search for files with specific file extensions:
 Get-ChildItem -Path C:\ -Include *.exe -Recurse -ErrorAction SilentlyContinue
Get-ChildItem -Path C:\ -Include *.locked -Recurse -ErrorAction SilentlyContinue
File System Analysis
Identifying files created or modified within a certain date range is a crucial step in forensic analysis. PowerShell provides powerful tools for this:
 $StartDate = Get-Date -Year 2024 -Month 6 -Day 1 -Hour 8 -Minute 0 -Second 0
$EndDate = Get-Date -Year 2024 -Month 8 -Day 30 -Hour 17 -Minute 0 -Second 0

Get-ChildItem -Path C:\ -Recurse |
Where-Object {$_.CreationTime -gt $StartDate -and $_.CreationTime -lt $EndDate} |
Select-Object FullName, CreationTime
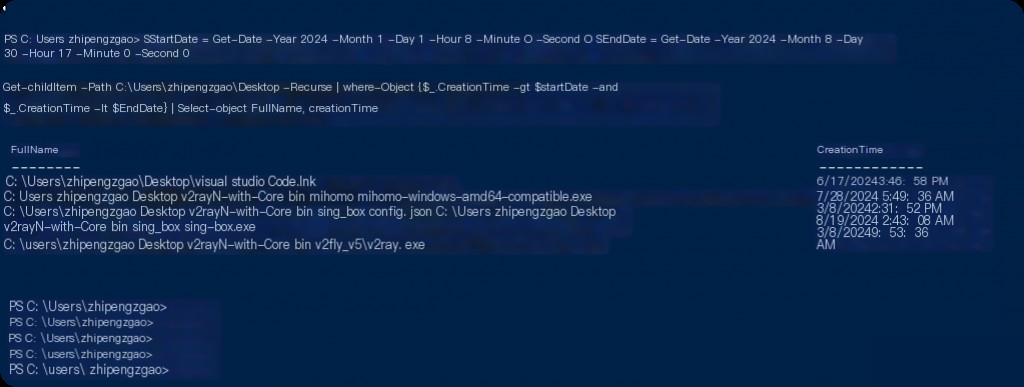
The script above allows us to obtain a list of files created within the provided date and time range.
System Information
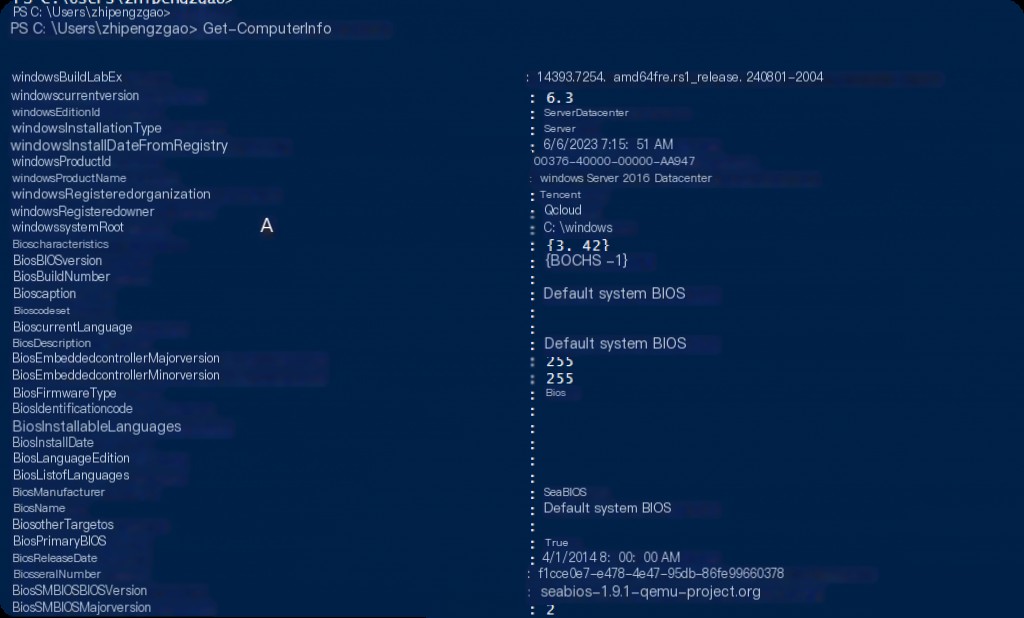
Forensic analysis requires collecting detailed information about the target system. This may include the operating system version, network configuration, running processes and services, installed programs, etc. PowerShell can be used to gather most of this information. For example, we can use the Get-ComputerInfo cmdlet to collect system information:
Get-ComputerInfo
The Get-ComputerInfo cmdlet provides very detailed information about the system, as shown in the screenshot below:
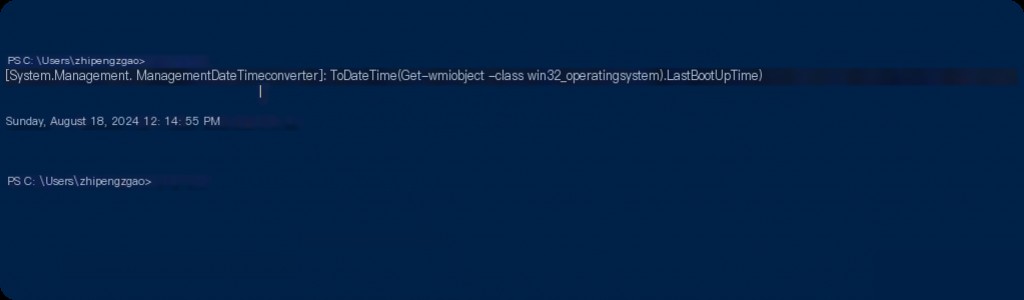
The last reboot time of the system is important information for forensic analysis. We are more likely to obtain findings about the attacker and their activities on a system that has not been rebooted since the attack. We can use the following command to find out the last reboot time of the system:
[System.Management.ManagementDateTimeconverter]::ToDateTime((Get-WmiObject -Class Win32_OperatingSystem).LastBootUpTime)
Running Applications and Services
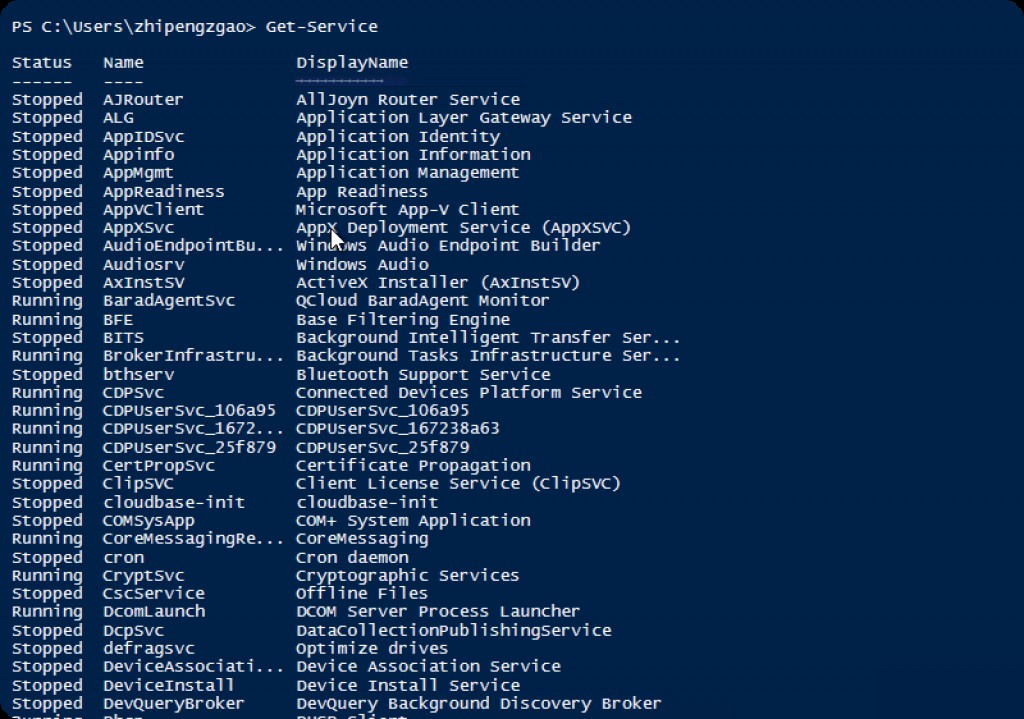
PowerShell provides various cmdlets to support memory analysis. For example, the Get-Process cmdlet returns information about all running processes. However, more advanced memory analysis will require third-party tools. As for what to analyze, we can easily get a list of running processes and services using PowerShell.
 Get-Process
Get-Service
Additionally, PowerShell can integrate with tools that perform more complex operations, such as memory dumps and analysis. For example, PowerShell scripts can manipulate SysInternals and Windows debugging tools like “procdump” and “WinDbg”.
However, memory analysis usually requires more sophisticated tools and techniques. For example, memory analysis tools like Volatility can perform various analyses on a given memory dump file. Such tools can analyze running processes, open files, network connections, installed drivers, services, registry information, and many other details. However, these are usually accomplished with tools other than PowerShell.
User Review
Invoke-Expression -Command 'query user'
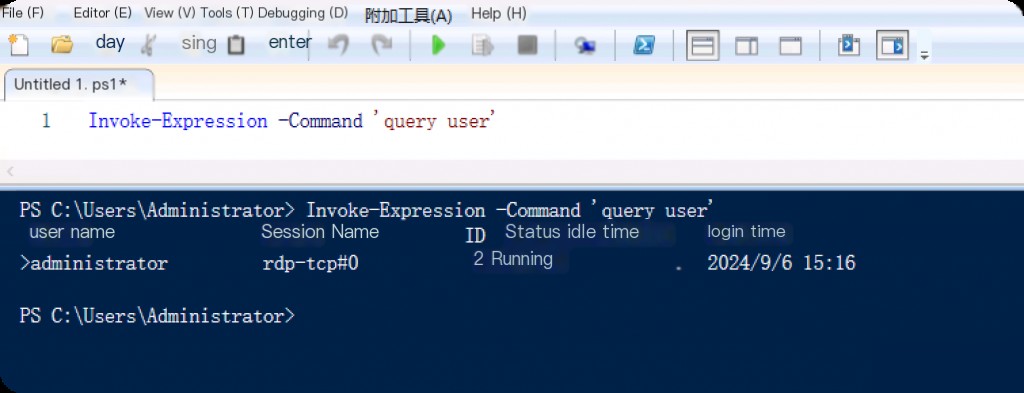
For the forensic analysis process, how users log in is crucial. To obtain information about how relevant users log in, we need to find the last log record of the user in the EventLogs with EventID 4624 and check the logon type value in it.
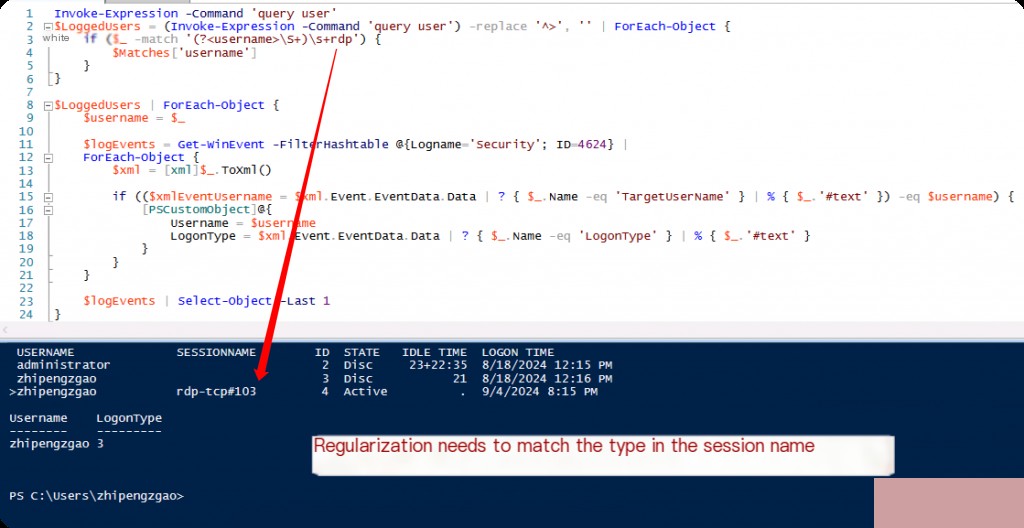
We first obtain the list of active users. Then, by retrieving the usernames from the USERNAME section of this list one by one, we find the last 4624 events of these usernames in the EventLogs and finally extract the logon type data from this record.
We need to know the logon types of Windows. For example, 2 indicates an interactive (console) logon, 3 indicates a network logon, and 10 indicates a remote desktop logon.
LSASS Access
On Windows systems, LSASS (Local Security Authority Subsystem Service) memory dumps are often associated with malicious activities aimed at extracting credentials from memory. It is common to check system logs and running processes to determine if LSASS memory has been dumped.
In Windows, when a process memory dump is performed, an event with ID 1000 (application error) is triggered. Therefore, the first step might be to control such events.
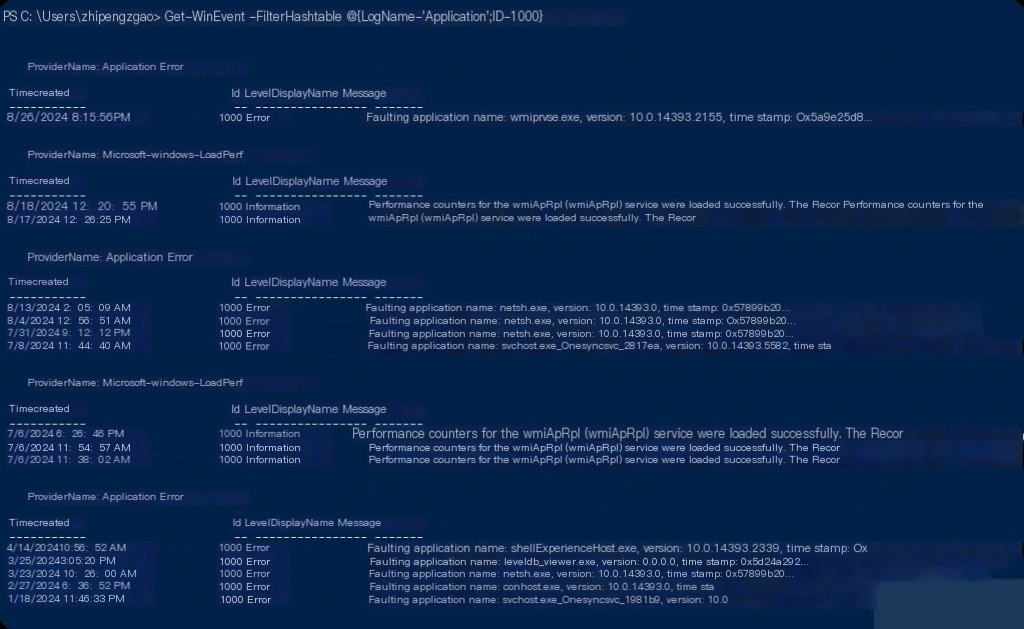
This output may have a high false positive rate, as many application errors are recorded using this event ID. Further filtering of the results may be necessary.
WMI Activity
Windows Management Instrumentation (WMI) is often used to retrieve system information, perform operations on processes and services, and even run code. Attackers may abuse these capabilities, which is why WMI events are often closely scrutinized during emergency response security incidents.
Windows’ WMI event logs contain many different types of events, but typically the most interesting are the events recorded when new processes are created through WMI activity or when services are stopped or started through WMI activity.
Get-WinEvent -FilterHashtable @{LogName='Microsoft-Windows-WMI-Activity/Operational'}
Using this command will return the “Microsoft-Windows-WMI-Activity/Operational” log. However, this log is usually very large and contains a lot of information, so further filtering is necessary. For example, you can search only for events with specific EventIDs or events within a specific time period.

Additionally, processes created through WMI typically use the Win32_Process WMI class’s Create method. This is usually recorded in the event log when the transaction is created. To find such events, you can filter the WMI event log for events and return only those containing Win32_Process and Create.
Finally, many malicious WMI activities are associated with specific processes (e.g., PowerShell or cmd.exe). Therefore, it is often useful to look for WMI events involving such operations. However, this type of search often returns many false positives, as these processes are also commonly used for legitimate activities.
Reviewing WMI event logs is often useful. However, this type of analysis usually has to be combined with many other forensic analysis techniques. When scanning WMI events using PowerShell, we can focus on some of the most common and most abused event IDs. For example, 5861 and 5859 are typically triggered when WMI activity types start and complete.
The following PowerShell code snippet can be used to detect suspicious WMI events:
 # Event IDs
$suspiciousEventIDs = 5861, 5859

#GetEvents
$events = Get-WinEvent -FilterHashtable @{LogName='Microsoft-Windows-WMI-Activity/Operational'; ID=$suspiciousEventIDs} -ErrorAction SilentlyContinue

#CreateLoop
foreach ($event in $events)
{
	# Set format to XML
	$xml = [xml]$event.ToXml()

		# If event found…
	if ($xml.Event.EventData.Data -contains 'Win32_Process' -or $xml.Event.EventData.Data -contains 'Create')
	{
		Write-Output ("Time: " + $event.TimeCreated)
		Write-Output ("Event ID: " + $event.Id)
		Write-Output ("Description: " + $event.Message)
		Write-Output ("--------------------------------------------- ----")
	}
}
This script extracts events with specific event IDs (5861 and 5859 here) from the Microsoft-Windows-WMI-Activity/Operational log. Events involving Win32_Process or Create are considered potentially malicious and will be displayed.
Application Analysis
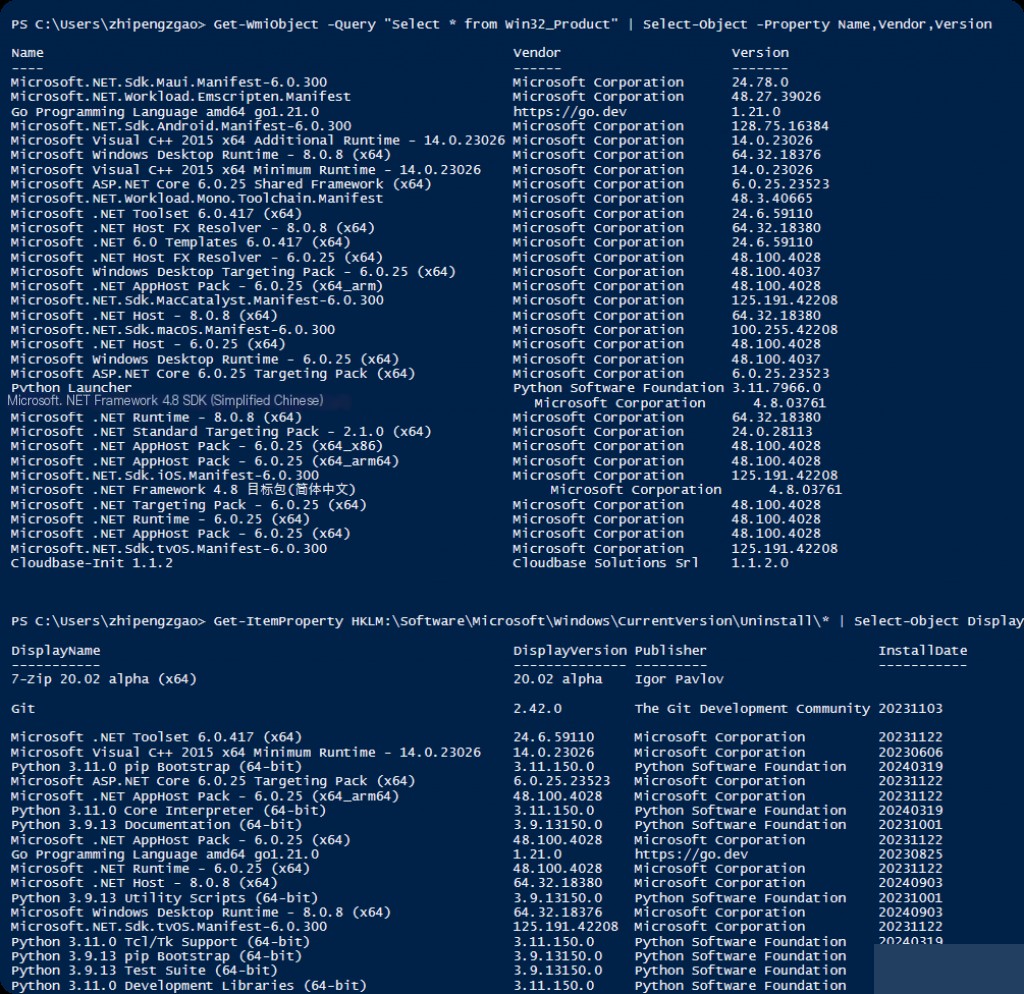
Another crucial piece of information for forensic analysis is the applications installed on the system and their details. We can access these using WMI through PowerShell. It is important to note that some applications might not appear in the “Installed Applications” list due to the way they were installed. Therefore, it is essential to perform a secondary check by looking at the “Uninstall Registry” section in the registry:
powershell
Get-WmiObject -Query “Select * from Win32_Product” | Select-Object -Property Name,Vendor,Version
Get-ItemProperty HKLM:\Software\Microsoft\Windows\CurrentVersion\Uninstall\* | Select-Object DisplayName, DisplayVersion, Publisher, InstallDate
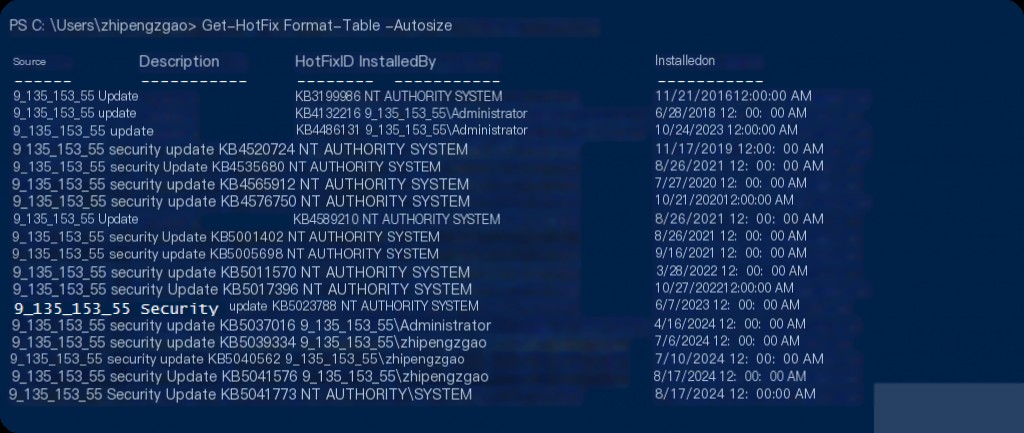
Another important aspect during forensic analysis is the status of system updates. Obtaining a list of installed updates can be very helpful.
powershell
Get-HotFix | Format-Table -AutoSize
In forensic analysis, the list of uninstalled updates is as important as the installed ones. This list can provide very valuable information about which vulnerabilities the attacker might have exploited.
Using PowerShell, we can check for any unapplied updates on the system and report the results.
powershell
$updateSession = New-Object -ComObject Microsoft.Update.Session
$updateSearcher = $updateSession.CreateUpdateSearcher()
$updatesToDownload = New-Object -ComObject Microsoft.Update.UpdateColl
$searchResult = $updateSearcher.Search(“IsInstalled=0 and Type=’Software’”)
if ($searchResult.Updates.Count -eq 0) {
Write-Output “No updates to install.”
} else {
Write-Output “$($searchResult.Updates.Count) updates to install.”
$searchResult.Updates | ForEach-Object {
Write-Output (“Title: ” + $_.Title)
Write-Output (“Description: ” + $_.Description)
Write-Output (“IsDownloaded: ” + $_.IsDownloaded)
Write-Output (“——————“)
}
}
Auto-Run Applications
In the Windows operating system, there are many ways certain applications can be set to run automatically at system startup. Attackers often use these methods to gain persistence in the system.
powershell
# Startup Items
Get-CimInstance -Class Win32_StartupCommand
# Startup Folder
Get-ChildItem -Path “$env:USERPROFILE\AppData\Roaming\Microsoft\Windows\Start Menu\Programs\Startup”
# Services
Get-Service | Where-Object {$_.StartType -eq ‘Automatic’}
# Drivers
Get-WmiObject Win32_SystemDriver | Where-Object {$_.StartMode -eq ‘Auto’}
# Registry
Get-ItemProperty -Path ‘HKLM:\Software\Microsoft\Windows\CurrentVersion\Run’
Get-ItemProperty -Path ‘HKLM:\Software\Microsoft\Windows\CurrentVersion\RunOnce’
Get-ItemProperty -Path ‘HKCU:\Software\Microsoft\Windows\CurrentVersion\Run’
Get-ItemProperty -Path ‘HKCU:\Software\Microsoft\Windows\CurrentVersion\RunOnce’
# Scheduled Tasks
Get-ScheduledTask | Where-Object {$_.Settings.StartWhenAvailable -eq $true -and $_.State -ne “Disabled”}
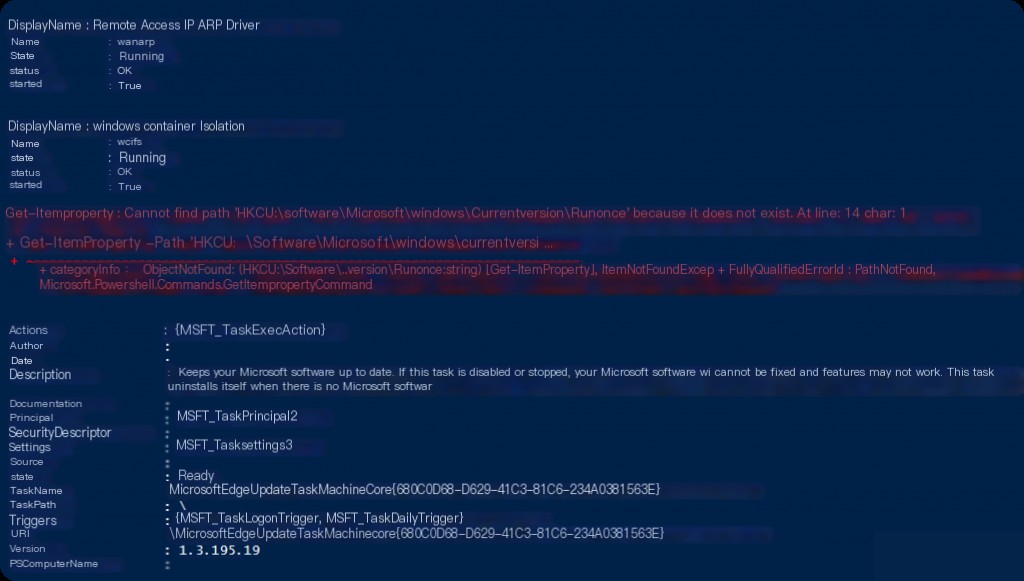
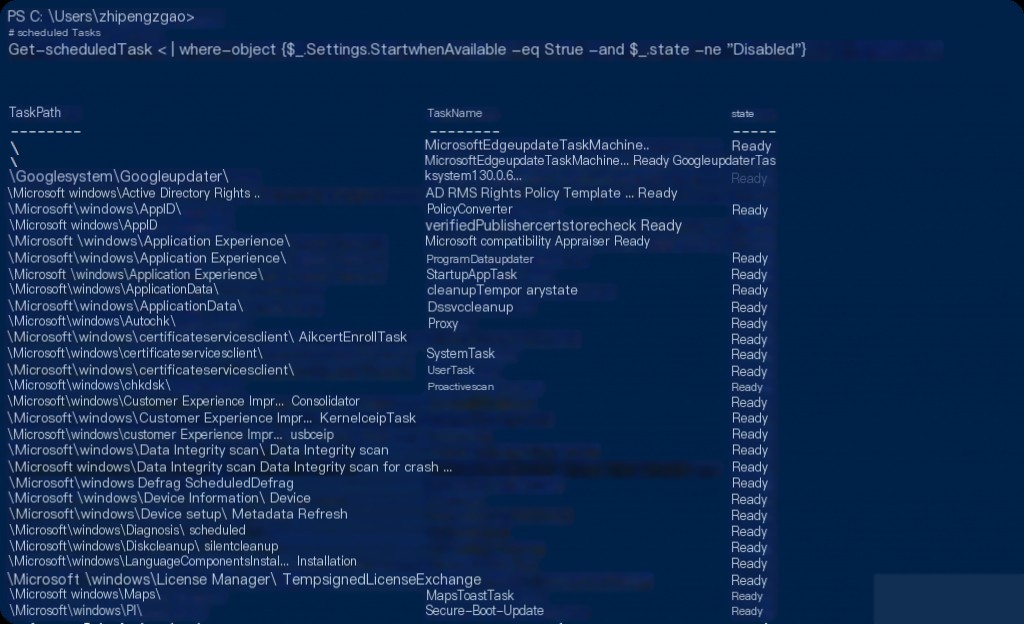
The areas where attackers can gain persistence in the Windows operating system are not limited to these, and it is impossible to control all these areas with PowerShell alone. However, if we need to conduct a deeper investigation, we might need to include tools that allow for more detailed analysis, such as the Autoruns tool from SysInternals.
Script Summary
Each incident has its own unique structure, so each incident may contain different inputs and outputs specific to that event. We can combine the operations performed above and other actions into a script like the one shown below, and quickly create an archive at the start of the investigation, which can be directly used during incident response.
powershell
# Example script combining various checks
# Analyze-System.ps1
# Download and Prepare procdump
# Note: Endpoint protection tools may consider procdump.exe as malicious.
# So you may need to define an exception
Invoke-WebRequest -Uri “https://download.sysinternals.com/files/Procdump.zip” -OutFile “.\Procdump.zip”
Expand-Archive -Path “.\Procdump.zip” -DestinationPath “.\Procdump”
my money(
[DateTime]$StartTime = (Get-Date).AddDays(-1),
[DateTime]$EndTime = (Get-Date)
)
# Prepare export folder
$hostname = $env:COMPUTERNAME
$timestamp = Get-Date -Format “yyyyMMdd_HHmmss”
$outputPath = “.\$($hostname)_$($timestamp)_analyze”
New-Item -ItemType Directory -Force -Path $outputPath | Out-Null
# Function to export data to CSV
function ExportToCSV($data, $fileName) {
$data | Export-Csv -Path (Join-Path -Path $outputPath -ChildPath “$fileName.csv”) -NoTypeInformation
}
# Get event logs
$eventLogs = Get-WinEvent -FilterHashTable @{LogName=’Application’; StartTime=$StartTime; EndTime=$EndTime}
$eventLogs += Get-WinEvent -FilterHashTable @{LogName=’System’; StartTime=$StartTime; EndTime=$EndTime}
$eventLogs += Get-WinEvent -FilterHashTable @{LogName=’Security’; StartTime=$StartTime; EndTime=$EndTime}
ExportToCSV -data $eventLogs -fileName “EventLogs”
# Get LSASS memory dump
# Note: This requires procdump.exe to be available on the system, and the script to be run as administrator
& .\procdump\procdump.exe -ma lsass.exe lsass.dmp
Move-Item -Path .\lsass.dmp -Destination $outputPath
# Get active process hashes
# Note: This requires Sysinternals suite to be available on the system
$processes = Get-Process
# Start Foreach loop for process list
foreach ($process in $processes) {
# Find current process path
$filePath = $process.MainModule.FileName
if ($filePath) {
$hashes= {Get-FileHash $filePath}
}
}
ExportToCSV -data $hashes -fileName “ProcessHashes”
# Get DLL and EXE hashes
$files = Get-ChildItem -Path C:\Windows, C:\Windows\System32 -Include *.dll, *.exe -Recurse -ErrorAction SilentlyContinue
$hashes = $files | ForEach-Object {Get-FileHash $_.FullName}
ExportToCSV -data $hashes -fileName “FileHashes”
# Get directory metadata
$directories = Get-ChildItem -Path C:\Windows, C:\Windows\System32 -Recurse -Directory -ErrorAction SilentlyContinue
ExportToCSV -data $directories -fileName “DirectoryMetadata”
# Get listening ports and applications
$ports = Get-NetTCPConnection | Where-Object {$_.State -eq ‘Listen’}
ExportToCSV -data $ports -fileName “ListeningPorts”
# Get logged in users and login types
# Note: This requires the ‘logon’ module to be available on the system
$loggedInUsers = Get-LoggedOnUser | Where-Object {($_.LogonTime -ge $StartTime) -and ($_.LogonTime -le $EndTime)}
ExportToCSV -data $loggedInUsers -fileName “LoggedInUsers”
# Get installed applications
$installedApps = Get-ItemProperty HKLM:\Software\Wow6432Node\Microsoft\Windows\CurrentVersion\Uninstall\*
ExportToCSV -data $installedApps -fileName “InstalledApps”
# Get installed updates
$installedUpdates = Get-Hotfix
ExportToCSV -data $installedUpdates -fileName “InstalledUpdates”
# Get pending updates
# Note: This requires the ‘PSWindowsUpdate’ module to be available on the system
$pendingUpdates = Get-WUList
ExportToCSV -data $pendingUpdates -fileName “PendingUpdates”
# Get auto-start applications
$autoStartApps = Get-CimInstance -Class Win32_StartupCommand
ExportToCSV -data $autoStartApps -fileName “AutoStartApps”
# Get computer info
$computerInfo = Get-ComputerInfo
ExportToCSV -data $computerInfo -fileName “ComputerInfo”
# Compress output folder
Compress-Archive -Path $outputPath -DestinationPath “$outputPath.zip”
# Delete output folder
Remove-Item -Path $outputPath -Recurse -Force 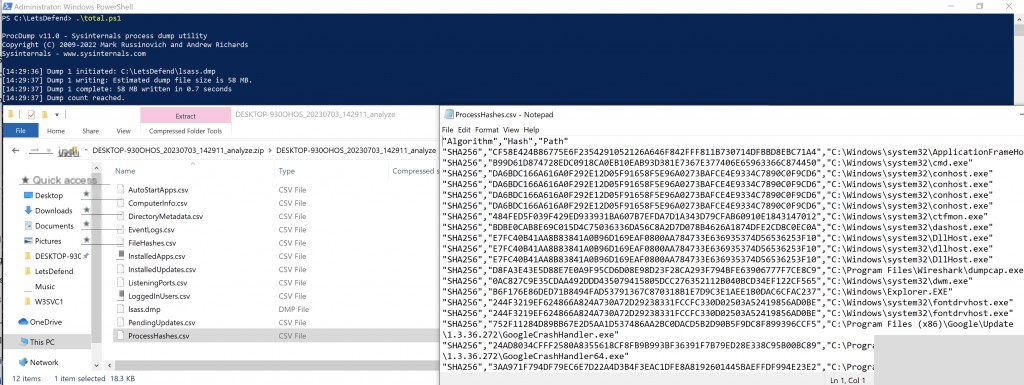
When our script runs, it first creates a directory containing the name of the system it is running on, along with date and time information. The collected information is saved in this directory as files, which are then compressed into a zip file. The folder is deleted after completion. The generated zip file can be moved to any desired environment for further analysis.
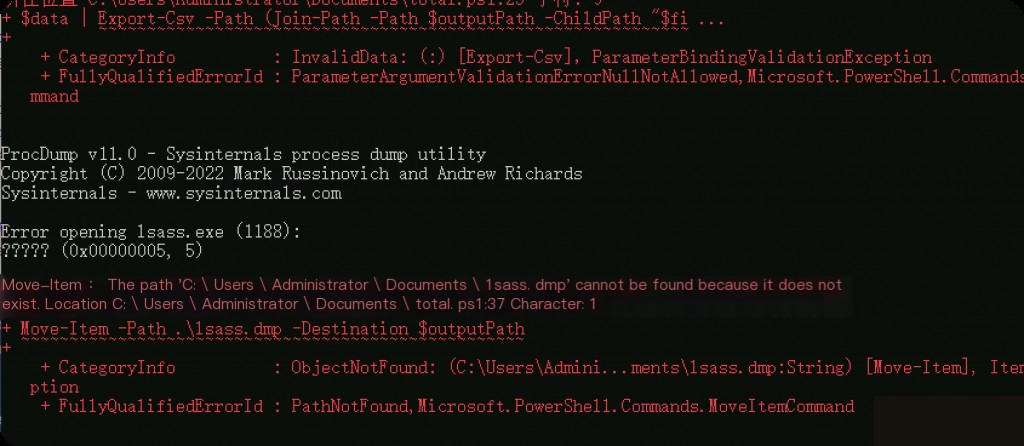
Note that in actual scenarios, dumping LSASS memory might be intercepted, so adjustments should be made based on the actual situation.