
Nmap Integrated with Metasploit for Port Scanning
I. Experiment Overview
1.1 Experiment Introduction
This experiment focuses on the basic and advanced usages of Nmap. It also covers importing scanned data into Metasploit and explores the modules used within Metasploit.
This course is a hands-on tutorial. Only by practicing can you truly acquire IT knowledge. At the end of the article, we will recommend some excellent Nmap usage techniques to help consolidate your theoretical foundation while practicing.
Note: Due to the high configuration cost of the cloud host used for this experiment, the number of uses is limited to no more than six per experiment.
1.2 Key Knowledge Points
In this experiment, you will continue learning the basic and advanced operations of Nmap within Kali Linux, as well as the Metasploit modules. The key knowledge points covered in this course are as follows:
- Basic usage of the Nmap scanner
- Advanced usage of the Nmap scanner
- Importing scan data into Metasploit
- Modules used within Metasploit
- Vulnerability analysis in Metasploit
Below is the mind map for the key knowledge points of this experiment:

1.3 Experiment Environment
This experiment uses an environment consisting of two virtual machines: an attack machine and a target machine:
Attack Machine: Kali Linux 2.0 virtual machine, hostname is kali, IP address is 192.168.122.101, and the default username/password is root/toor.
Target Machine: Metasploitable2 virtual machine, hostname is target, IP address is 192.168.122.102, and the default username/password is msfadmin/msfadmin.
The experiment involves penetration testing within the Kali Linux environment. First, log into Kali via SSH, and then use Metasploit to interact with the target machine.
II. Basic Usage of the Nmap Scanner
2.1 Basic Features of Nmap
Nmap (Network Mapper) is a free and open-source network security tool used for network discovery and security auditing. Its name, Nmap, is short for “Network Mapper.”
Nmap can determine whether target hosts are online, identify open ports, detect running service types and software versions, and inspect operating systems and device types. It is one of the essential software tools for network administrators to evaluate network security. Below, we will introduce the basic usage of Nmap and guide you through its use in the experiment environment.
Nmap has four core functionalities:
- Host Discovery
- Port Scanning
- Version Detection
- Operating System Detection
Launch Kali and the target Metasploitable2 virtual machines in the experiment environment:
sudo virsh start Kali

sudo virsh start Metasploitable2
Log into Kali via SSH using the default password toor:
ssh root@Kali
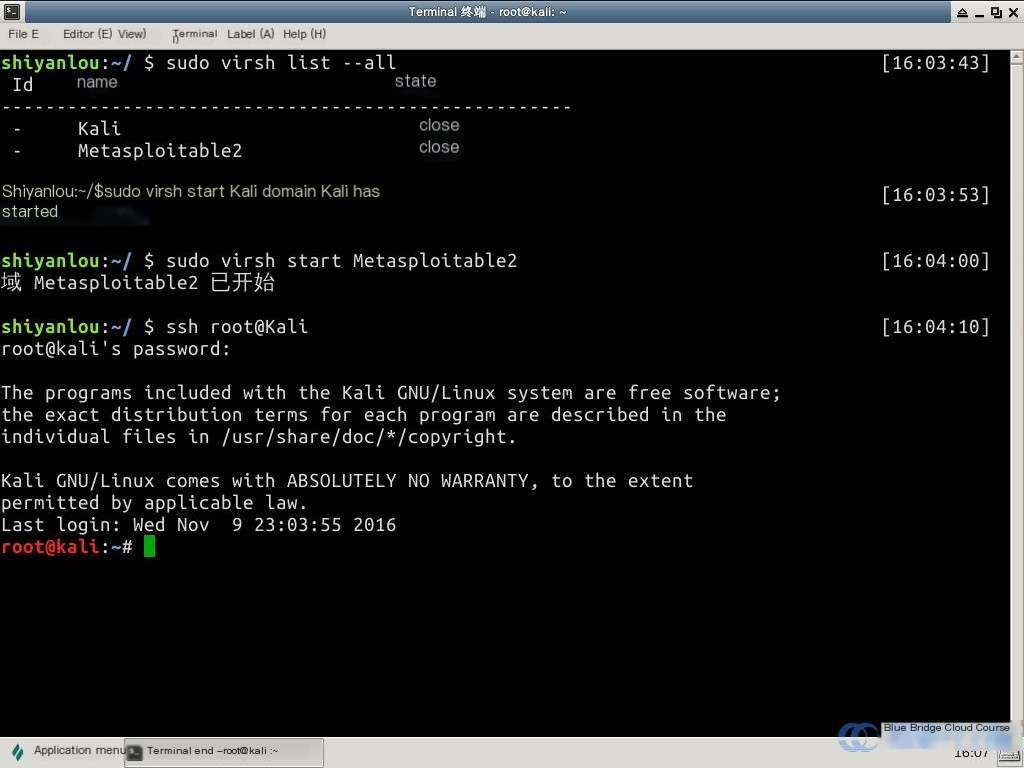
Note that the virsh startup process takes approximately four minutes.
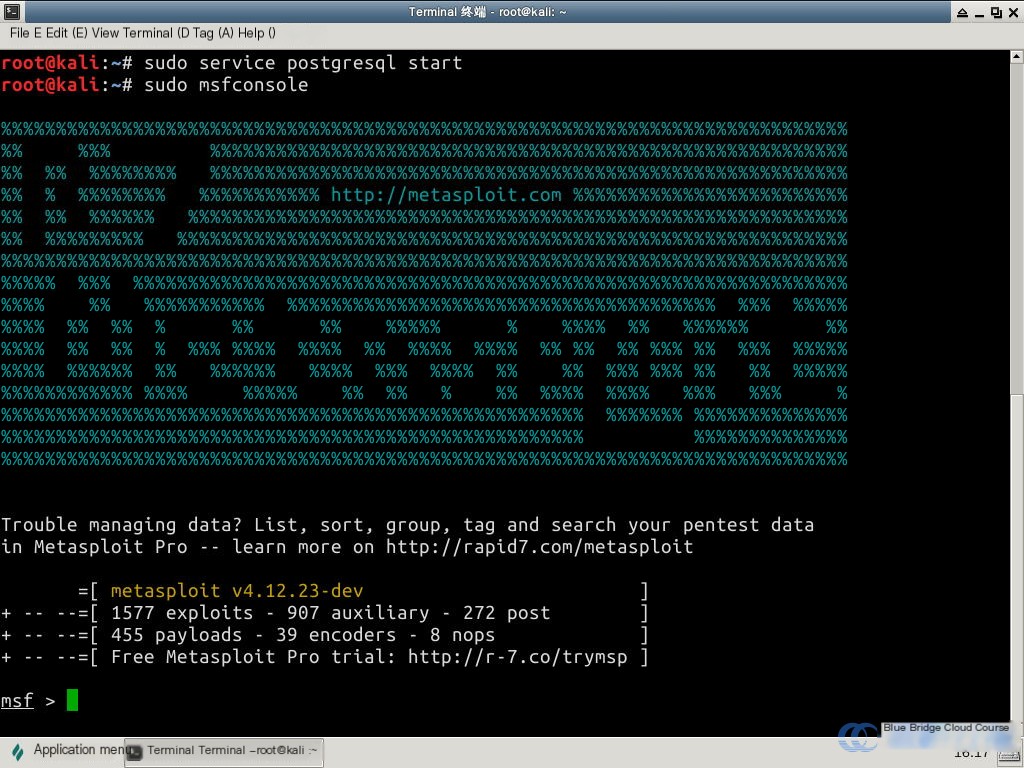
After logging into Kali, use this command to start the Postgresql service:
sudo service postgresql start
Starting the service may take around ten seconds:
Then initialize the database. This process takes approximately 10 minutes:
msfdb init
Next, enter the following command to access the Metasploit console:
sudo msfconsole
This will take about two minutes to load:
To rebuild the database cache, use this command:
db_rebuild_cache
Rebuilding the cache takes about 5–10 minutes. Once completed, the search command will execute much faster, with results appearing in seconds.
After setting up the environment, we will explore the various functionalities of Nmap.
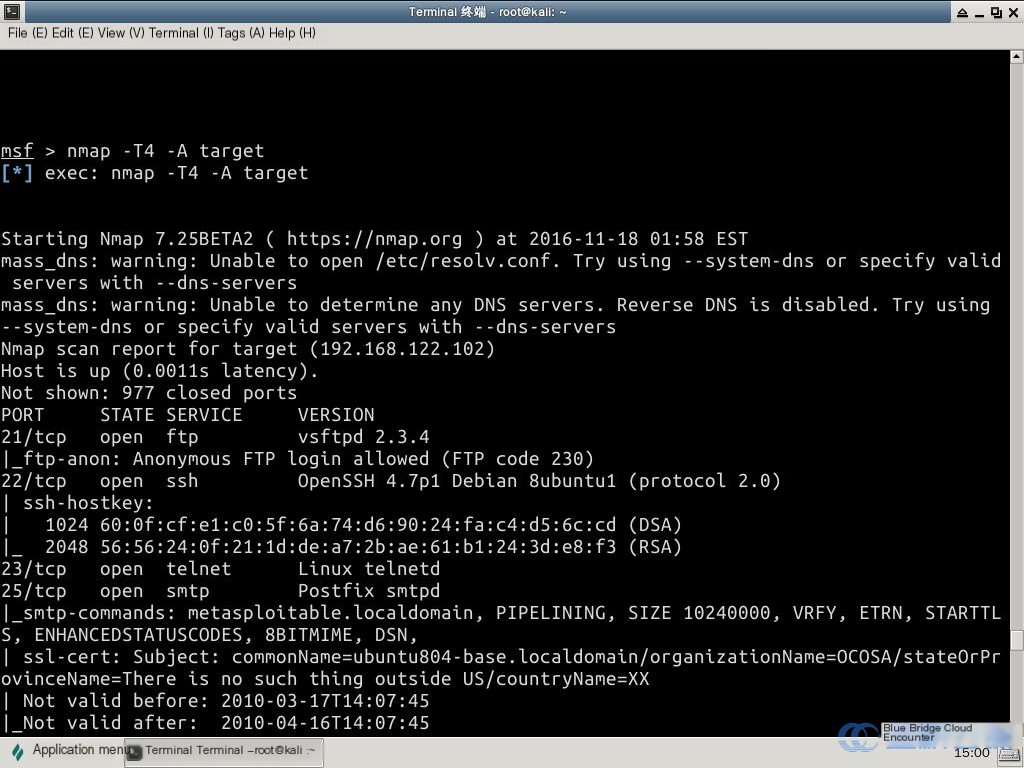
2.1.1 Comprehensive Scan
To gather extensive information, use a comprehensive scan with the following syntax:
nmap -T4 -A
In the experiment terminal, run the following command:
# This command yields a lot of scan data, so you need to wait for about a minute
# The target IP address in the experiment is predefined as 'target,' which is equivalent to using 192.168.122.102

nmap -T4 -A target
In the Nmap tutorial, the option -T is used to set the scan speed.
| Parameter | Meaning of the Parameter |
|---|---|
nmap T0 | Extremely slow scanning, useful for evading IDS (Intrusion Detection Systems) |
nmap T1 | Slow scanning, with a speed between T0 and T2, can also evade some IDS |
nmap T2 | Decreased scanning speed, generally not commonly used |
nmap T3 | Default scanning speed |
nmap T4 | Faster scan that may overwhelm the target, potentially triggering firewalls |
nmap T5 | Highly aggressive scan, sacrificing accuracy for speed |
2.1.2 Host Discovery
One of Nmap’s basic scanning techniques is host discovery. The syntax is as follows:
nmap -T4 -sn
Enter the following command in the terminal:
nmap -T4 -sn target

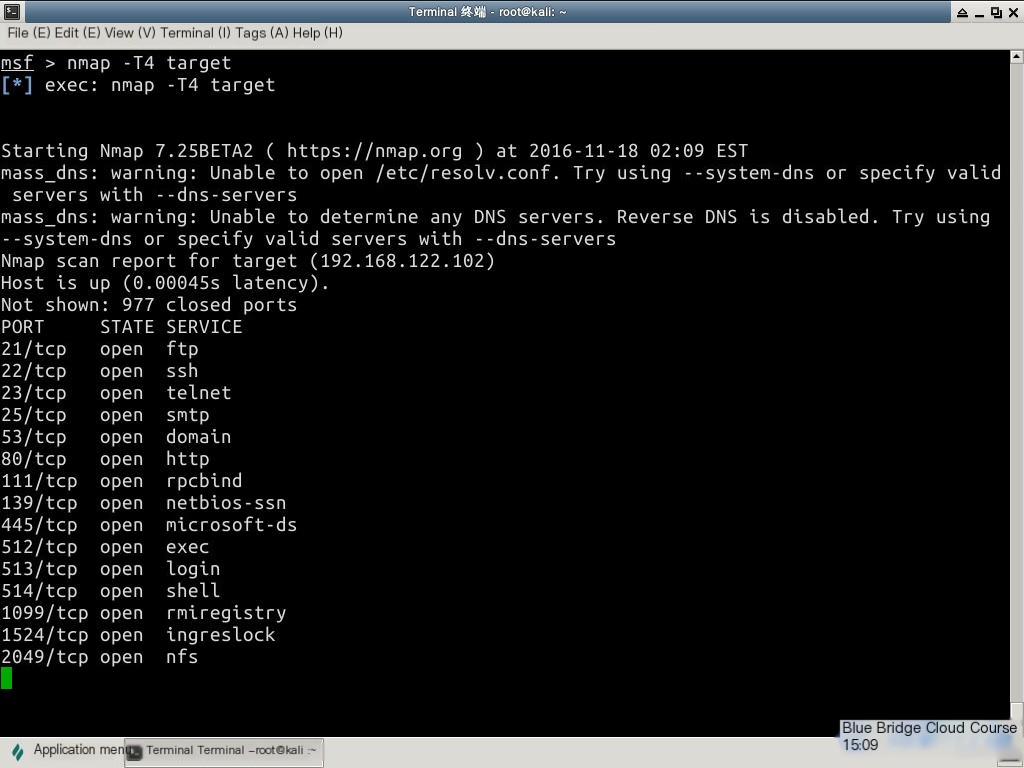
2.1.3 Port Scanning
The syntax for performing a port scan is as follows:
nmap -T4
Enter the following command in the terminal:
nmap -T4 target
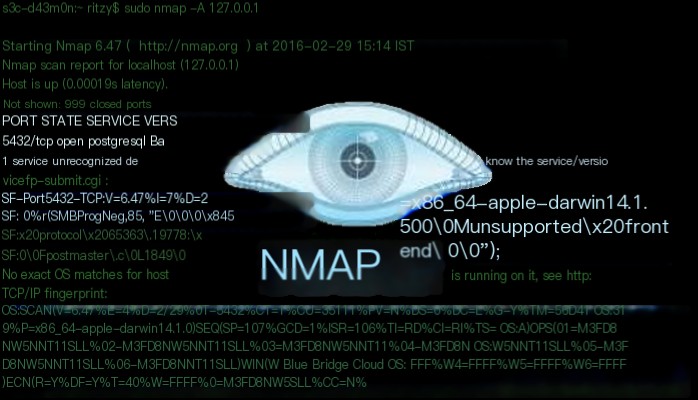
2.1.4 Operating System Scan
The syntax for scanning operating systems is as follows:
nmap -T4 -O
Enter the following command in the terminal:
nmap -T4 -O target
| Parameter | Meaning of the Parameter |
|---|---|
-O | Enables TCP/IP fingerprinting to identify the remote host’s operating system |

The methods outlined above meet general information-gathering needs. For use cases requiring more detailed information, you should carefully design Nmap commands to precisely control its scanning behavior.
Advanced Nmap Scanner Usage
Below is an introduction to advanced usage of the Nmap scanner.
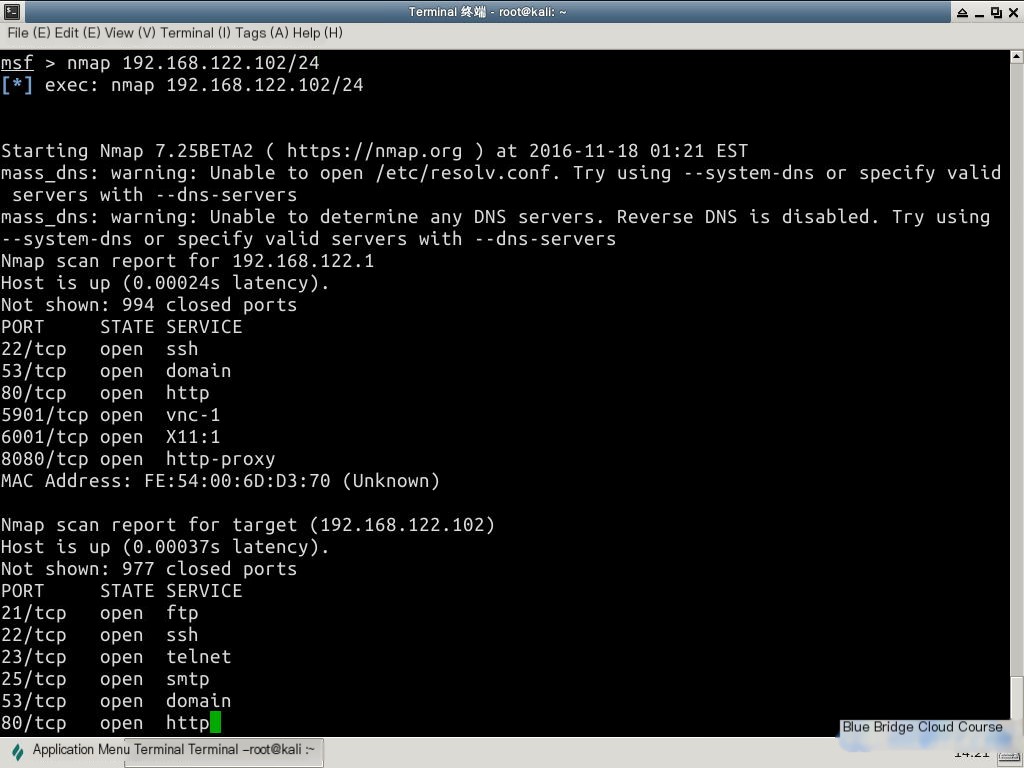
3.1.1 Scan an Entire Subnet
The syntax for scanning an entire subnet is:
nmap
 nmap 192.168.122.102/24

# Or nmap target/24
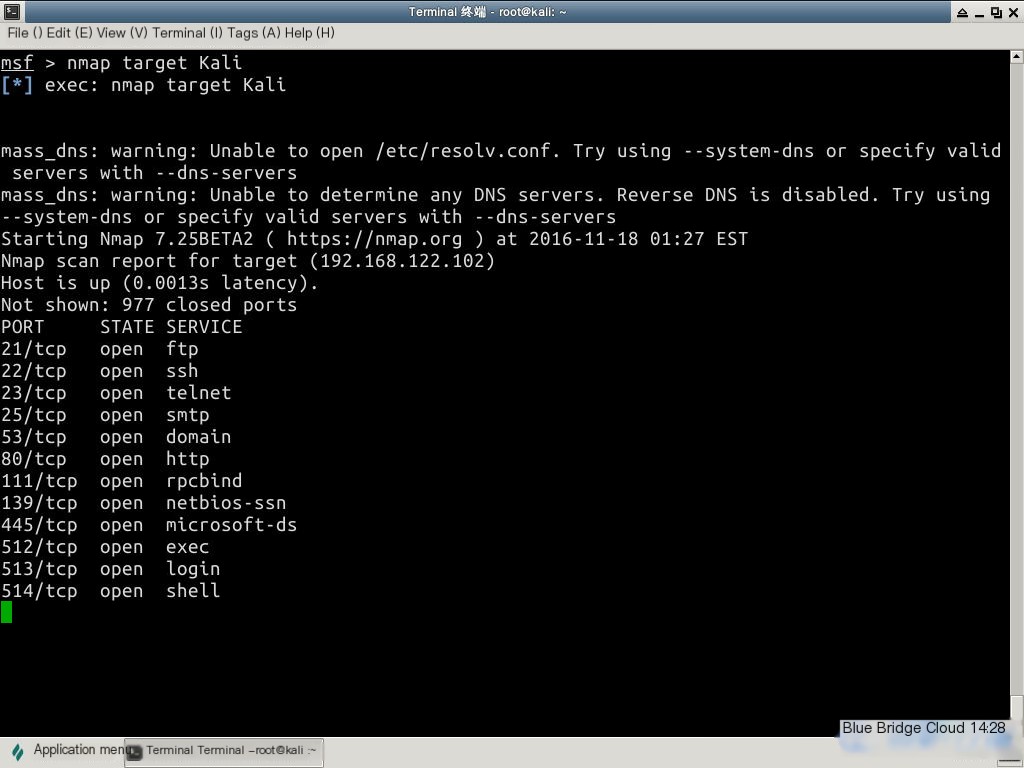
3.1.2 Scan Multiple IP Targets
To scan multiple IP targets, use the following syntax:
nmap
Enter the following command in the terminal:
 nmap 192.168.122.102 127.0.0.1

# Equivalent to nmap target Kali
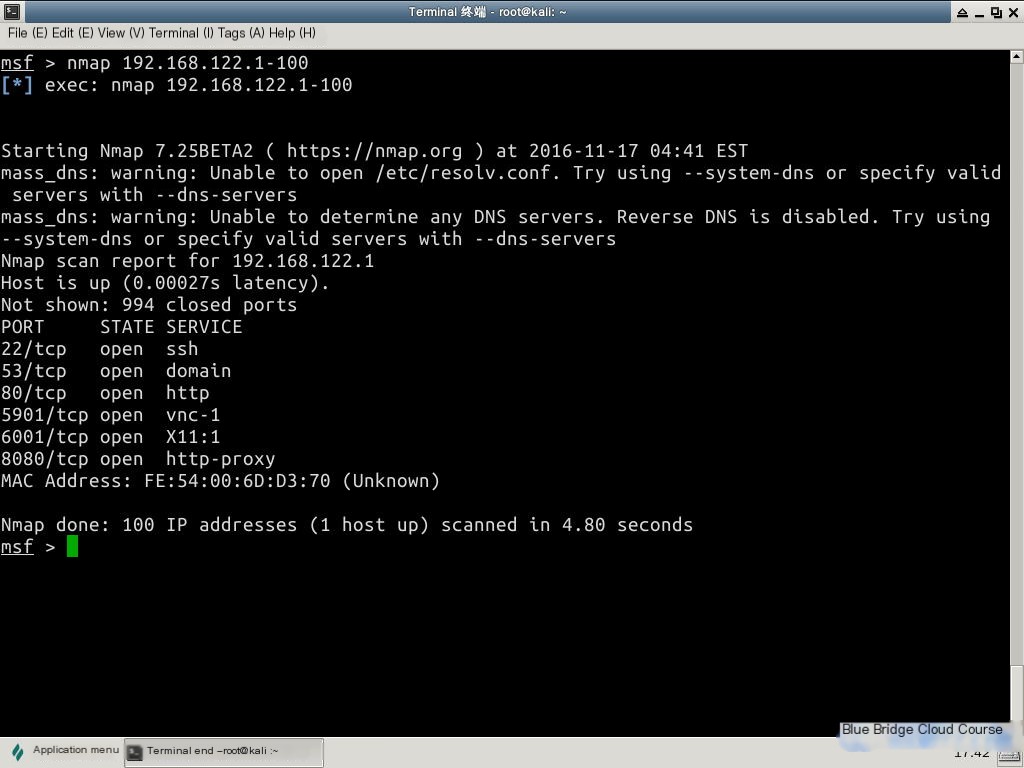
3.1.3 Scan a Range of Targets
To scan a range of 100 IP addresses:
nmap 192.168.122.1-100
3.1.4 Exclude a Specific IP
To scan all hosts on a subnet except one specific IP, enter this command in the terminal:
nmap 192.168.122.102/24 -exclude 192.168.122.88
Here’s the translation of the plain text content while keeping all HTML and structure as it is:
—
3.1.5 Scanning Specific Ports
nmap scans specific ports
nmap -p,,
| Parameter | Meaning of the Parameter |
|---|---|
-P | Specifies the port number (or range of port numbers) to scan |
For example, to scan ports 22, 66, 88, enter the command in the terminal:
nmap -p80,22,66 192.168.122.102
3.1.6 Viewing Local Routes
nmap --iflist
3.1.7 Specifying Network Interface and IP Address
Specify the network interface and IP address using the following syntax:
nmap -e eth0
In the Experimental Platform terminal, enter the following command:
nmap -e eth0 target
| Parameter | Meaning of the Parameter |
|---|---|
-e | Specifies which interface Nmap should use to send and receive packets |
3.1.8 Customizing Probe Packets
Nmap provides the -scanflags option, which allows users to have complete control over the flags in the TCP probe packets.
3.1.9 SYN Scan
Perform a basic SYN scan to identify port states:
nmap -sS -T4 target
Nmap by default scans only the top 1,000 most commonly open ports.
3.1.10 FIN Scan
Use the FIN scan technique to probe the firewall state. FIN scanning is often used to detect whether a port is closed. Receiving an RST response indicates the port is closed; otherwise, it signifies the port is either open or filtered.
In the Experimental Platform terminal, enter the following command:
nmap -sF -T4 target
3.1.11 ACK Scan
Use ACK scanning to determine whether a port is filtered. For an ACK probe, unfiltered ports (whether open or closed) respond with an RST packet.
nmap -sA -T4 target
3.1.12 Scanning Router TFTP
Most routers support the TFTP protocol (Trivial File Transfer Protocol), which is often used for backing up and restoring router configuration files. This protocol operates on UDP port 69. The given command can help detect whether the router supports TFTP:
nmap -sU -p69 -nvv target
4. Import Scan Data into Metasploit
4.1 Importing Scan Data into Metasploit
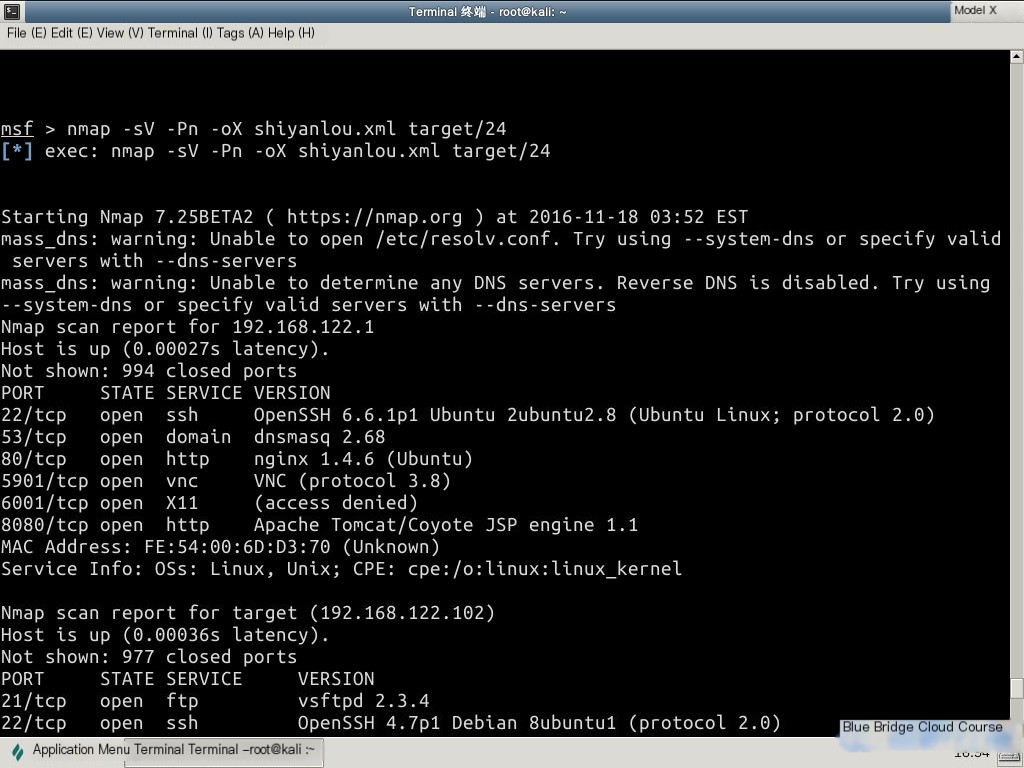
Use nmap to scan the subnet of the target host and input it into a file named shiyanlou.xml in XML format:
nmap -sV -Pn -oX shiyanlou.xml target/24
Input the command to import the shiyanlou.xml file into Metasploit:
db_import shiyanlou.xml
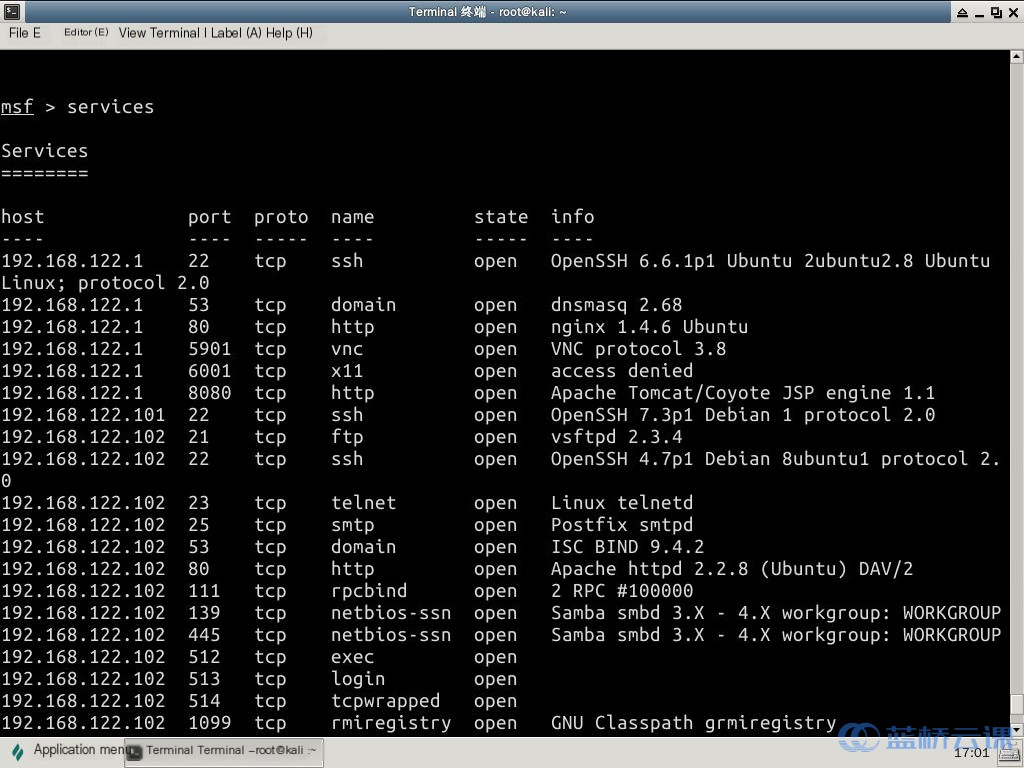
Execute the command to view the scan results stored in the database. In the terminal, enter the command:
services
5. Using Modules in Metasploit
5.1 Displaying Modules in Metasploit
Use the show command to view available modules. Since there are many modules, loading them may require patience:
msf > show
msf > show auxiliary
msf > show exploits
msf > show payloads
msf > show encoders
msf > show nops
5.2 Searching and Using Modules in Metasploit
The ms12-020 vulnerability is one disclosed by Microsoft in a security bulletin. It pertains to a vulnerability in Remote Desktop that may allow remote code execution (2671387). It was originally published on March 31, 2012. If the target host has the ms12-020 vulnerability, our attack process would be as follows:
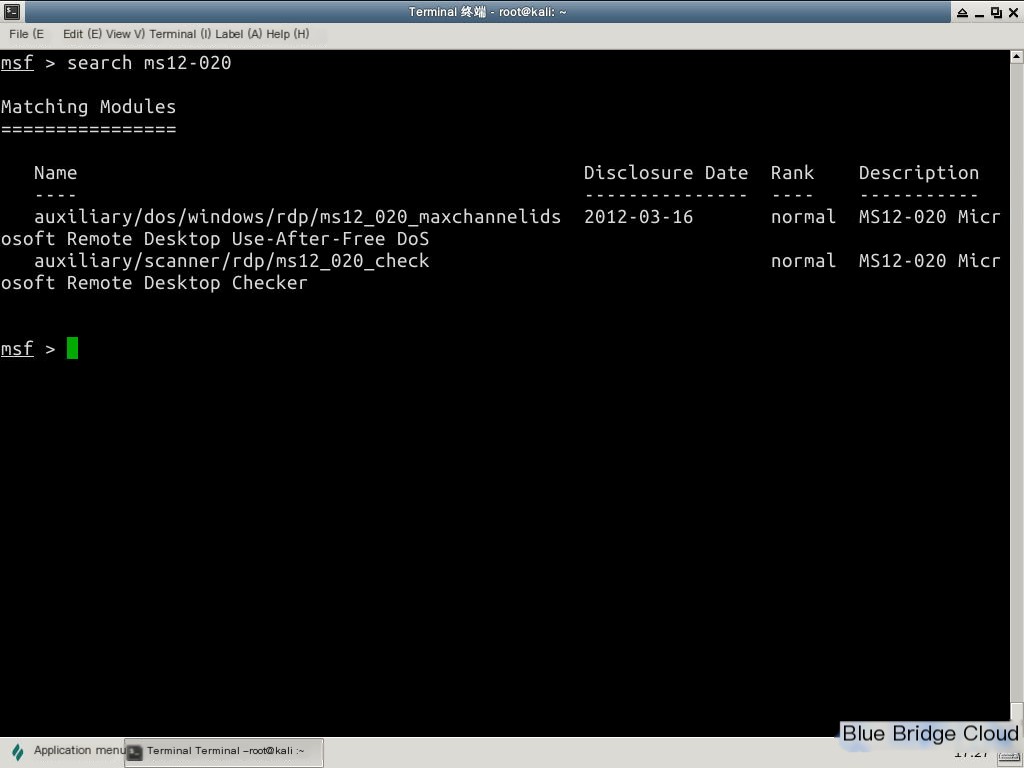
1. Use the command to search for modules:
search ms12-020
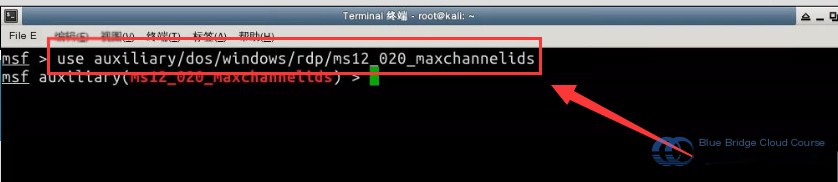
2. Use the use command to load the module:
use auxiliary/dos/windows/rdp/ms12_020_maxchannelids
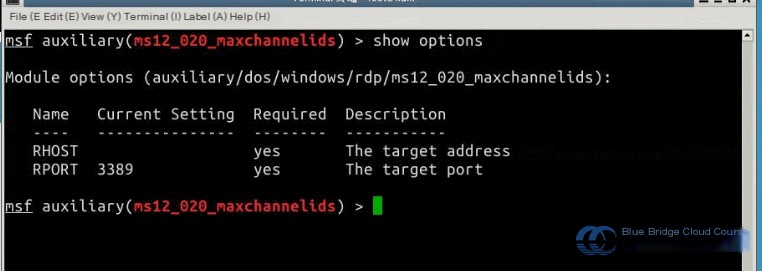
3. Use the show options command to view required parameters in the Nmap tutorial.
show options
4. Configure the required parameters using the set command, such as the RHOST parameter in this Nmap tutorial:
set RHOST 192.168.122.102
5. Finally, execute the module using the run command:
6. Vulnerability Analysis
Using the Nmap scan results from earlier, enumerate the target information to improve the penetration success rate. These foundational steps are crucial during penetration testing. From the earlier Nmap scans, some essential details include:
- The operating system version in use
- The server name
- The service versions
- The state of open ports
When analyzing vulnerabilities, use Nmap effectively. For example, to determine the status of a host behind a firewall, use nmap -sP IP or subnet. The parameters here include:
| Parameter | Description |
|---|---|
-sP ping scan | Determines host status by sending specific ICMP packets and interpreting response information |
Continual analysis is key to identifying target host vulnerabilities and improving penetration success rates.