I. Experiment Objectives and Requirements:
1. Master the installation and configuration methods of Snort.
2. Master the methods of defining Snort rules.
3. Master the methods of using Snort to analyze network status.
4. Specific content:
1) Learn the working principles of Snort.
2) Configure Snort rule files.
3) Use Snort to detect network intrusion events.
II. Experimental Equipment and Environment:

III. Experimental Principles:
1 , Overview, Function, and Principles of Intrusion Detection Systems
Analyze and handle malicious use of computer and network resources, a technology based on detecting behaviors that violate security policies within a computer, mainly to ensure the security of the computer system and detect unauthorized or abnormal behaviors.
Intrusions can be classified into external and internal intrusions; based on the direction of intrusion, intrusion detection can be divided into network-based and file system change-based.
Components of network-based intrusion detection systems include: data capturer, data processor, responder, and database.
The process is shown in Figure 1:
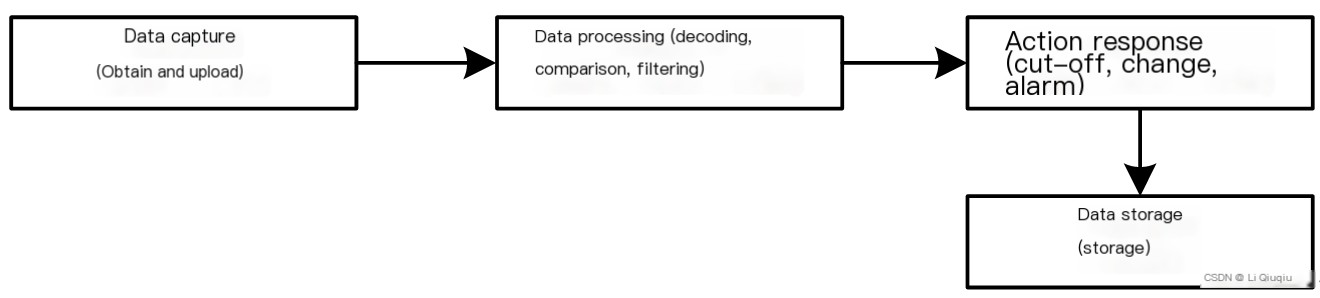
This experiment is based on a network-based intrusion detection system.
2 , Function of Snort Tool
An open-source network intrusion detection software based on local detection rules. Main functions include packet sniffing (detection), packet recording (storage), and intrusion detection;
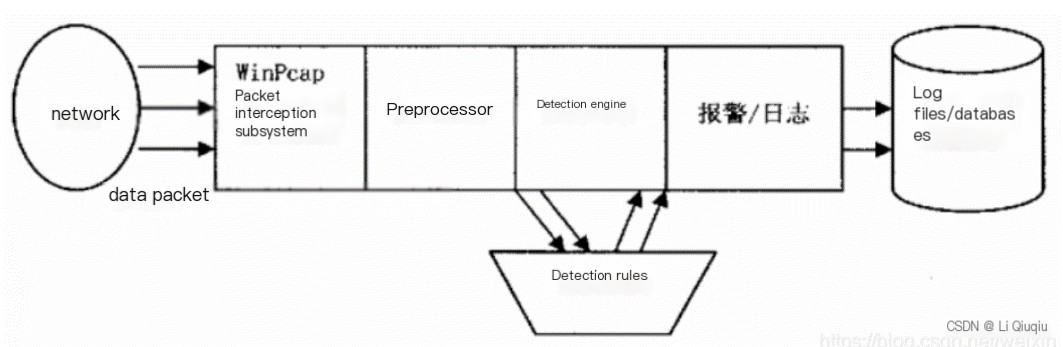
Working process: 1) Capture network packets from the network card; 2) Decode the packets and fill them into the link layer protocol packet structure; 3) The preprocessor checks the packets; 4) The detection engine processes the packets. As shown in Figure 2.
Snort command format: Snort [-a|-e|s|e|t] [options];
3 , Snort Rules
From a logical perspective, Snort rules = rule header + rule options;
Rule header: rule action, protocol type, address, port number, direction operator;
Rule options: e.g., msg, flags, sid, rev, classtype, etc.
IV. Experimental Steps:
(1) Environment Configuration
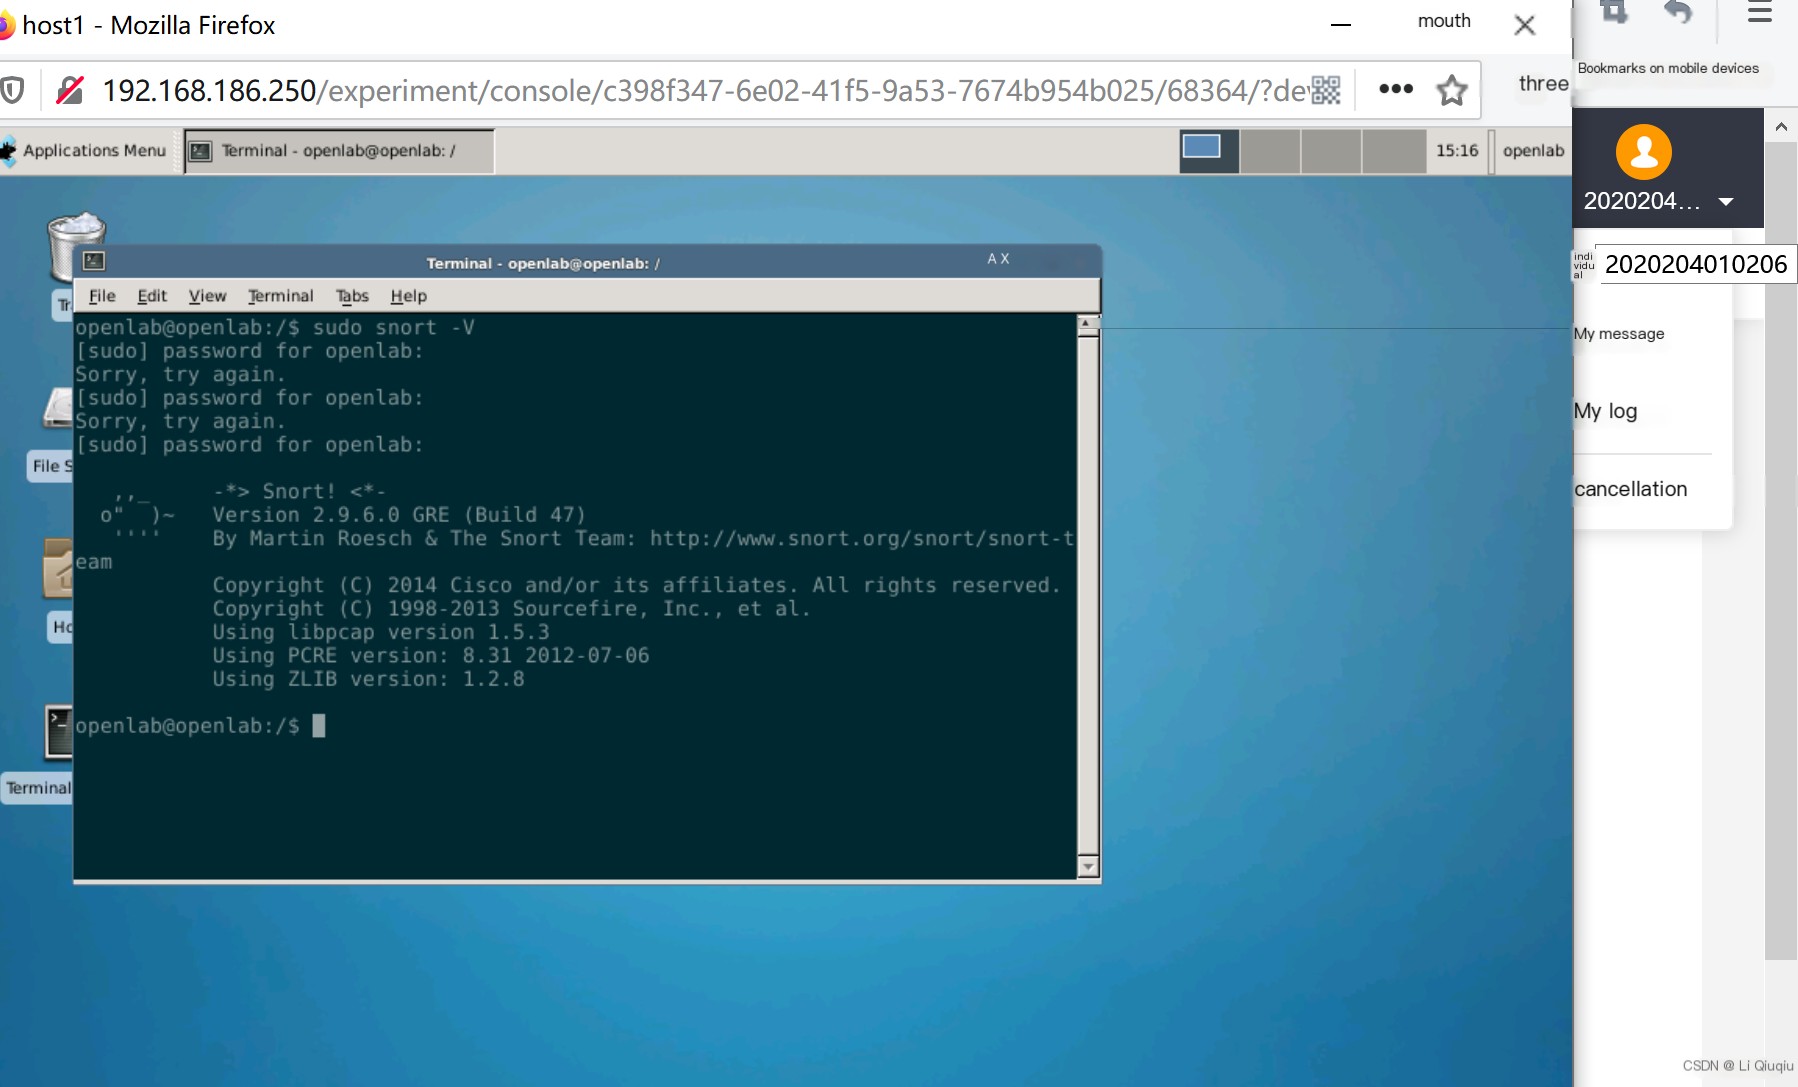
1. Environment detection: Log in to host 1, execute the command “sudo snort -V” to check if the installation is successful;
2. Configuration modification:
① Execute the command “sudo vi /etc/snort/snort.conf”, the snort.conf file contains a snort configuration sample, divided into five steps. Set network variables, configure dynamic load libraries, configure preprocessors, configure output plugins, add any runtime configuration guides, and modify attribute values of custom rule sets.
var RULE_PATH /etc/snort/rules (configure rules file path)
var SO_RULE_PATH /etc/snort/so_rules (configure so_rules path)
var PREPROC_RULE_PATH /etc/snort/preproc rules (experimental rules)
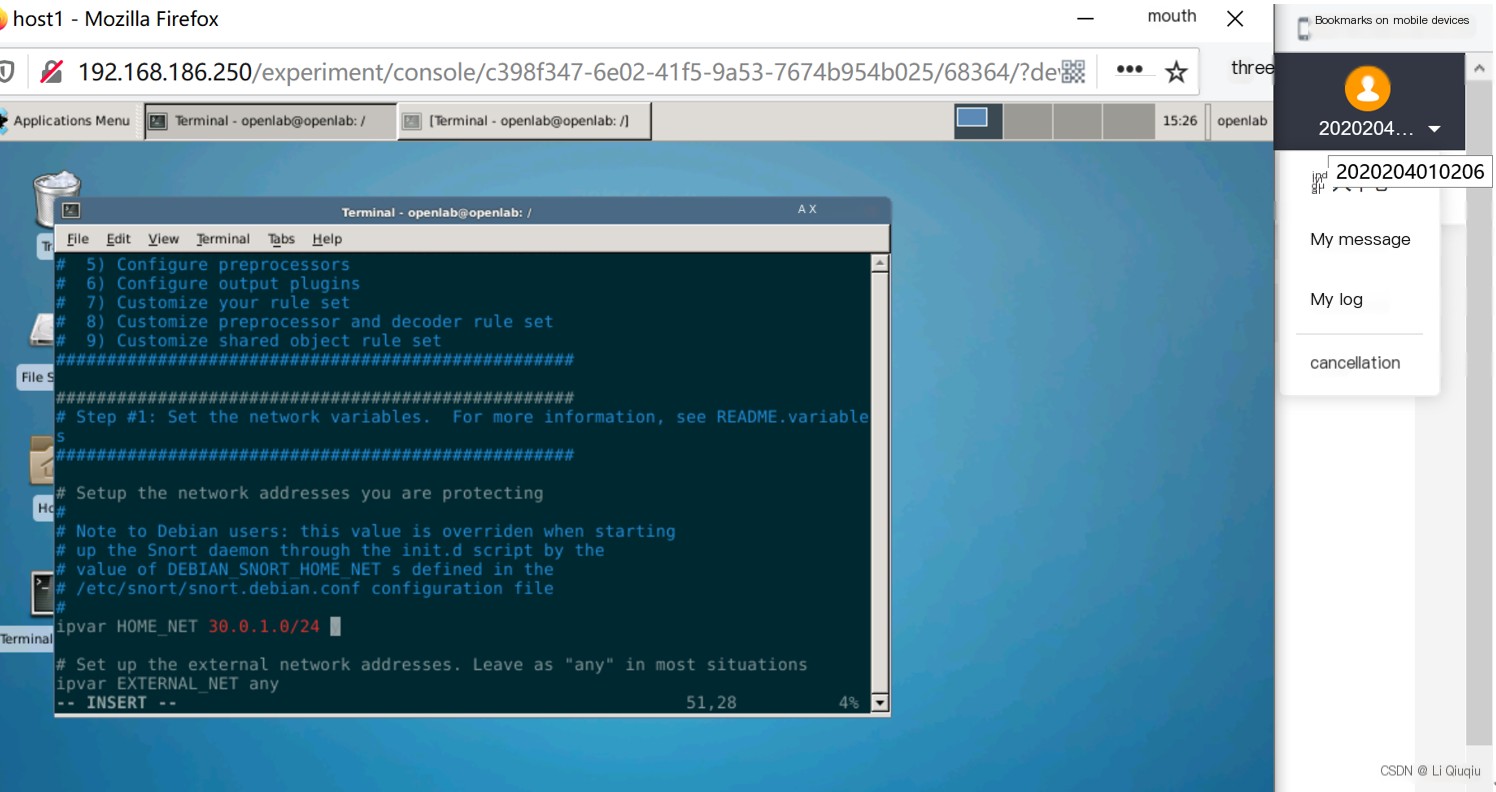
② Modify the ipvar HOME_NET value, i.e., the network segment where the local machine is located:
ipvar HOME_NET 30.0.1.0/24
③ Modify the output unified2 value, set the snort.unified2 format data set. Unified output file, file name is snort.log, limit 128, mpls event types, vlan event types:
“output unified2: filename snort.log, limit 128, mpls_event_types, vlan_event_types”
④ Restart Snort: Execute the “sudo service snort restart” command;
3. Configure Snort detection rules:
① Delete previous log files: Execute the command “sudo rm /var/log/snort/snort.log”. Prepare the environment for new rules.
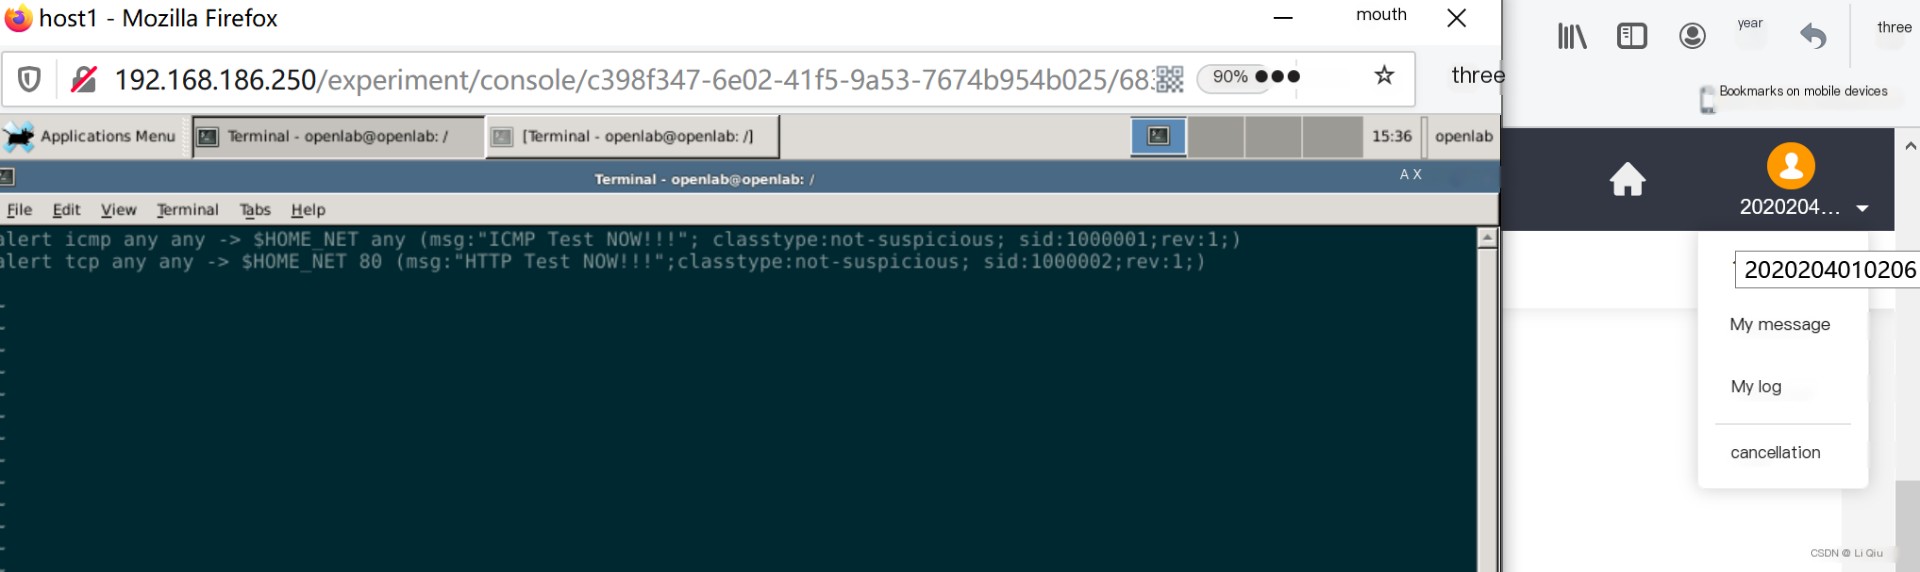
② Add content to the local rule file: Any ICMP and HTTP packets sent to the local machine will trigger Snort alerts; among them, “/etc/snort/rules” is the path used to store rule files, and Snort provides alerts and prompts to users based on numerous rule files. Execute the “sudo vi /etc/snort/rules/local.rules” command:
“alert icmp any any -> $HOME_NET any (msg:“ICMP Test NOW!!!”; classtype:not-suspicious; sid:1000001;rev:1;)
alert tcp any any -> $HOME_NET 80 (msg:“HTTP Test NOW!!!”; classtype:not-suspicious; sid:1000002;rev:1;)”
③ Clear rules: Execute the “sudo vi /etc/snort/snort.conf” command, comment out all rules except local.rules (comment out the include statements after local.rules);
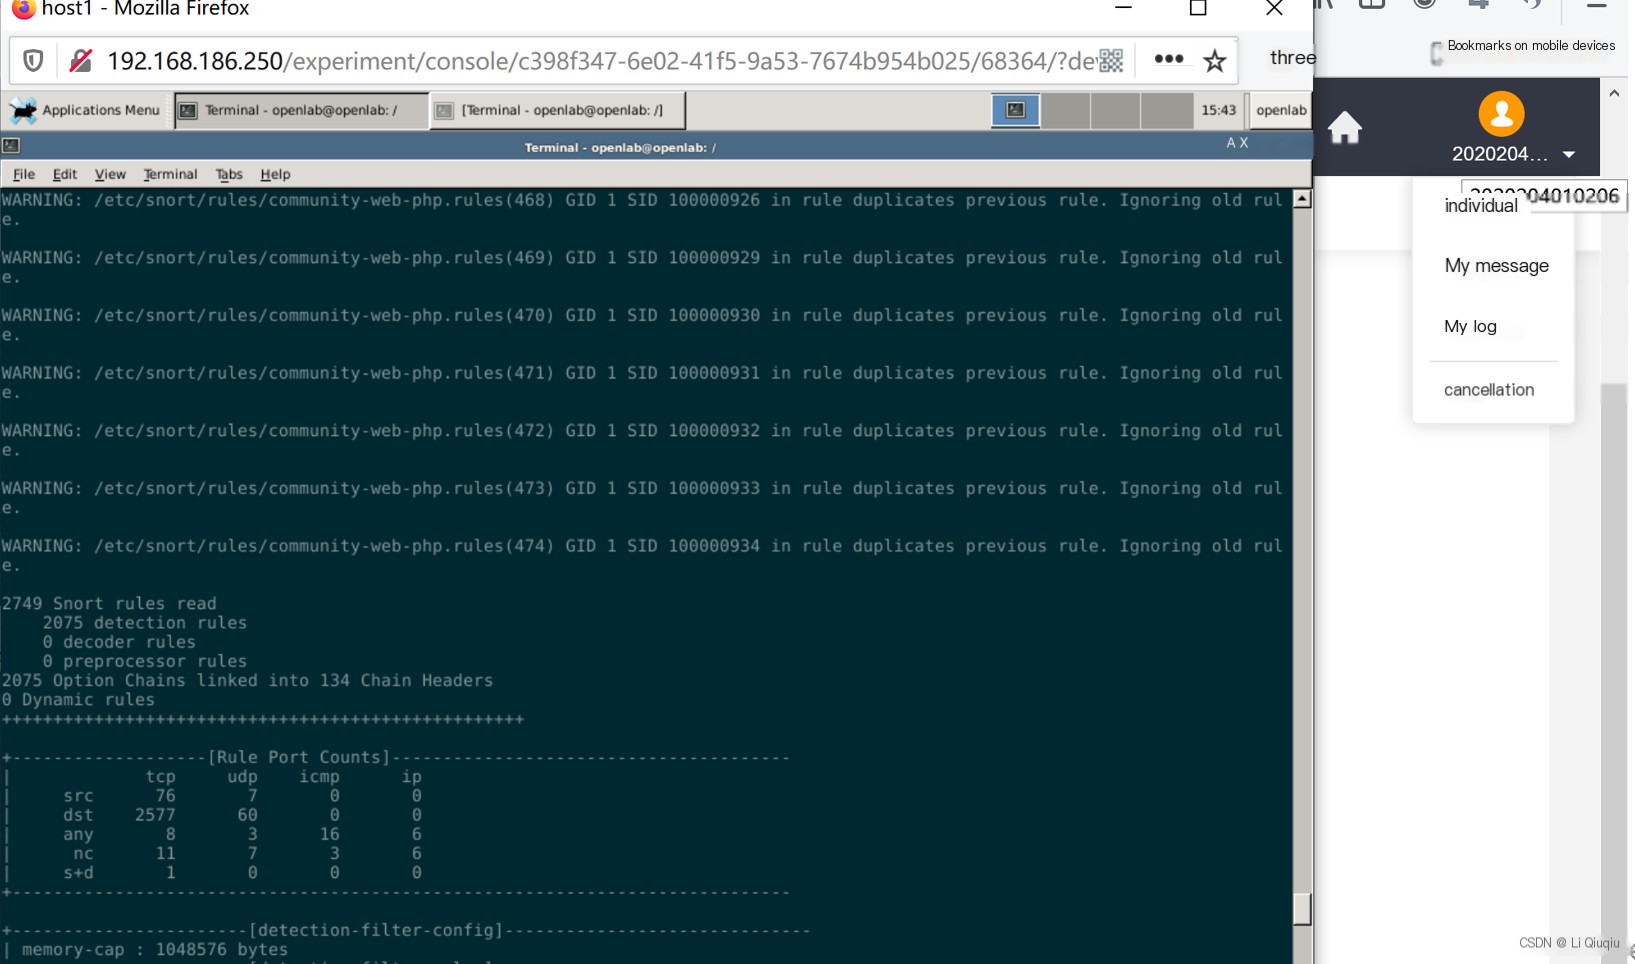
④ Check if the configuration is successful: Execute the “sudo snort -T -c /etc/snort/snort.conf” command; as shown in Figure 2;
(2) Use Snort for Intrusion Analysis
1. View information: Execute the “ifconfig” command to view the host network card information:
eth0 is the network card of the local machine, if there are multiple network cards, it will display eth1, eth2, etc.
2. Monitor intrusion: Execute the “sudo snort -A console -q -u snort -g snort -c /etc/snort/snort.conf -i eth0” command
3. Start execution: Log in to host 2, Ping host 1, “ping 30.0.1.4”
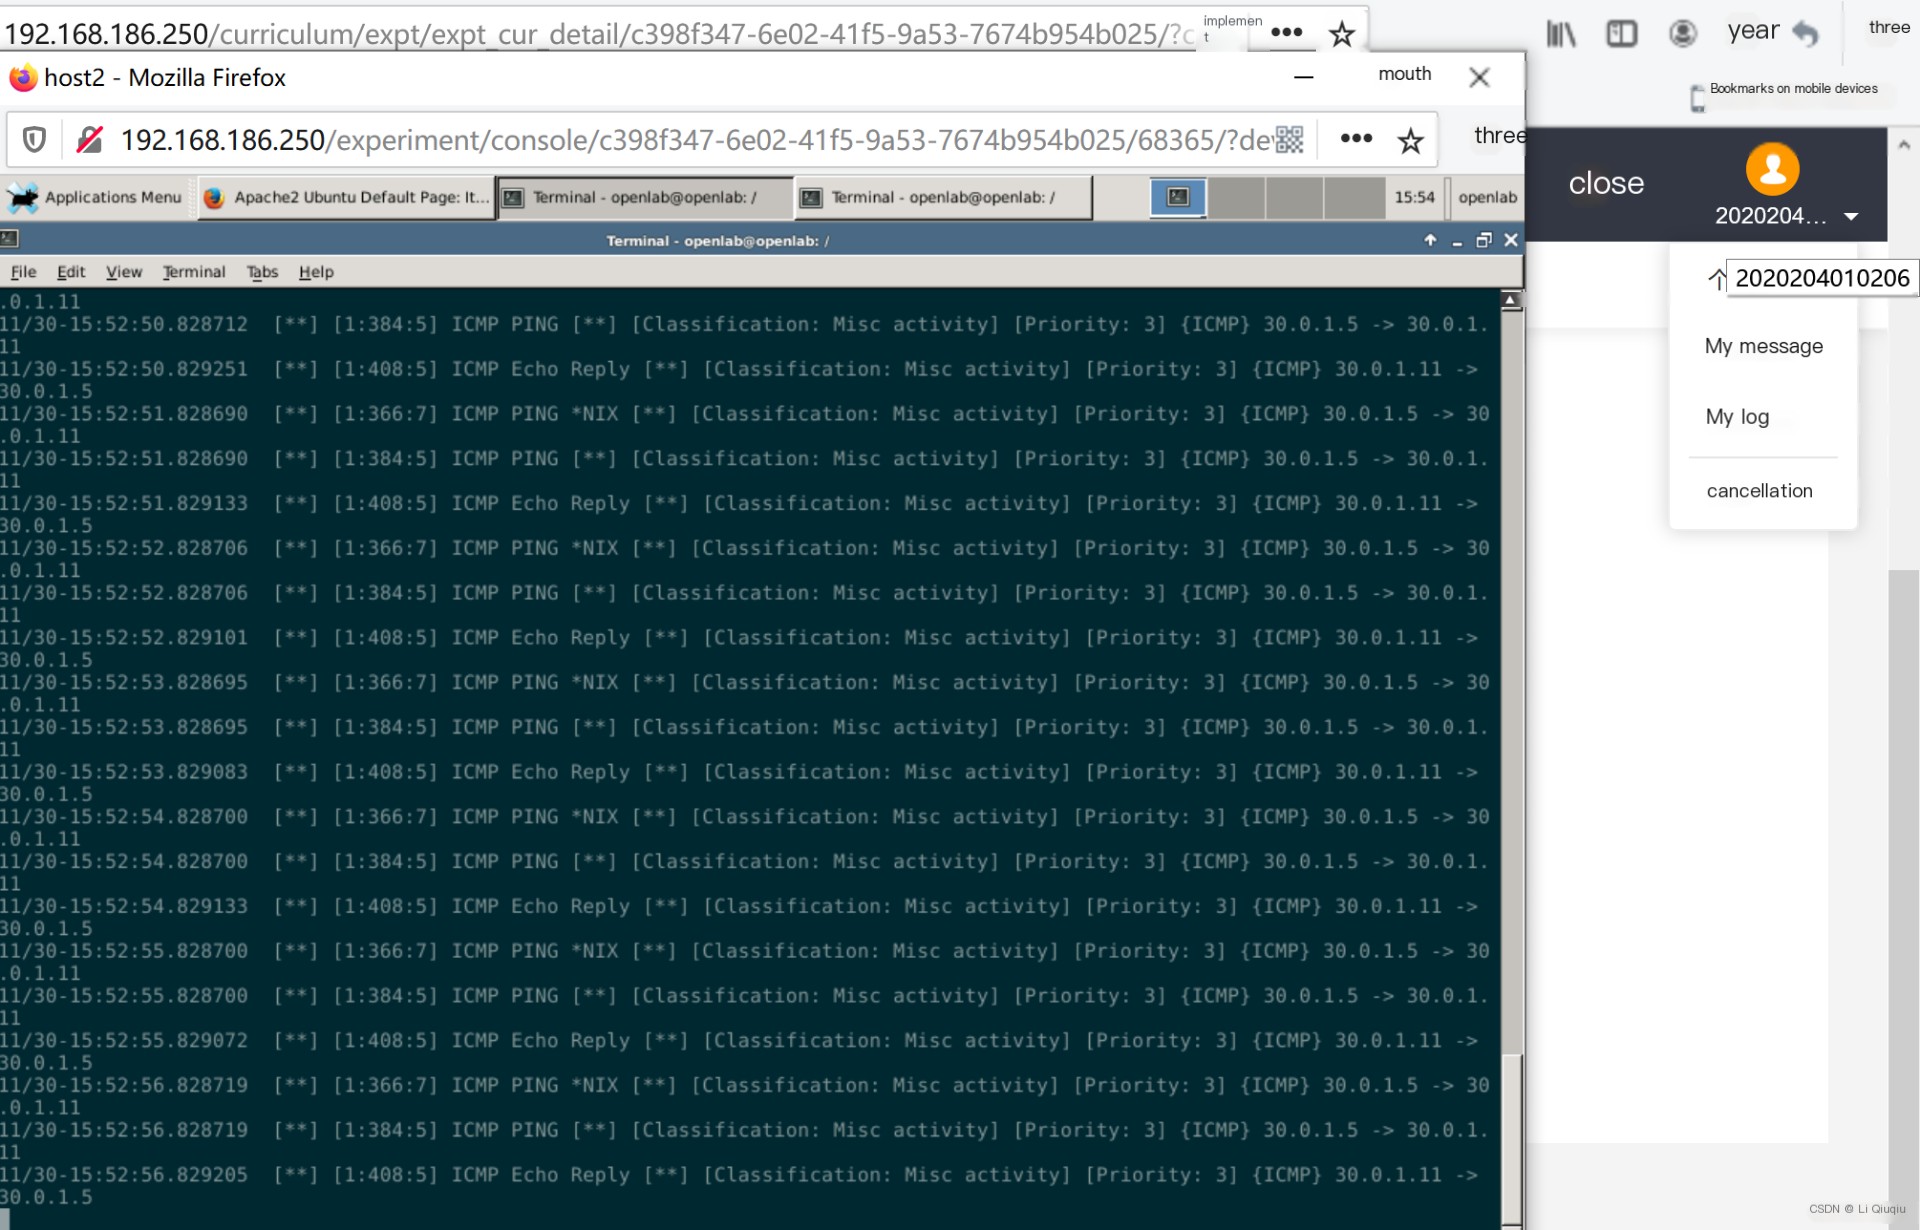
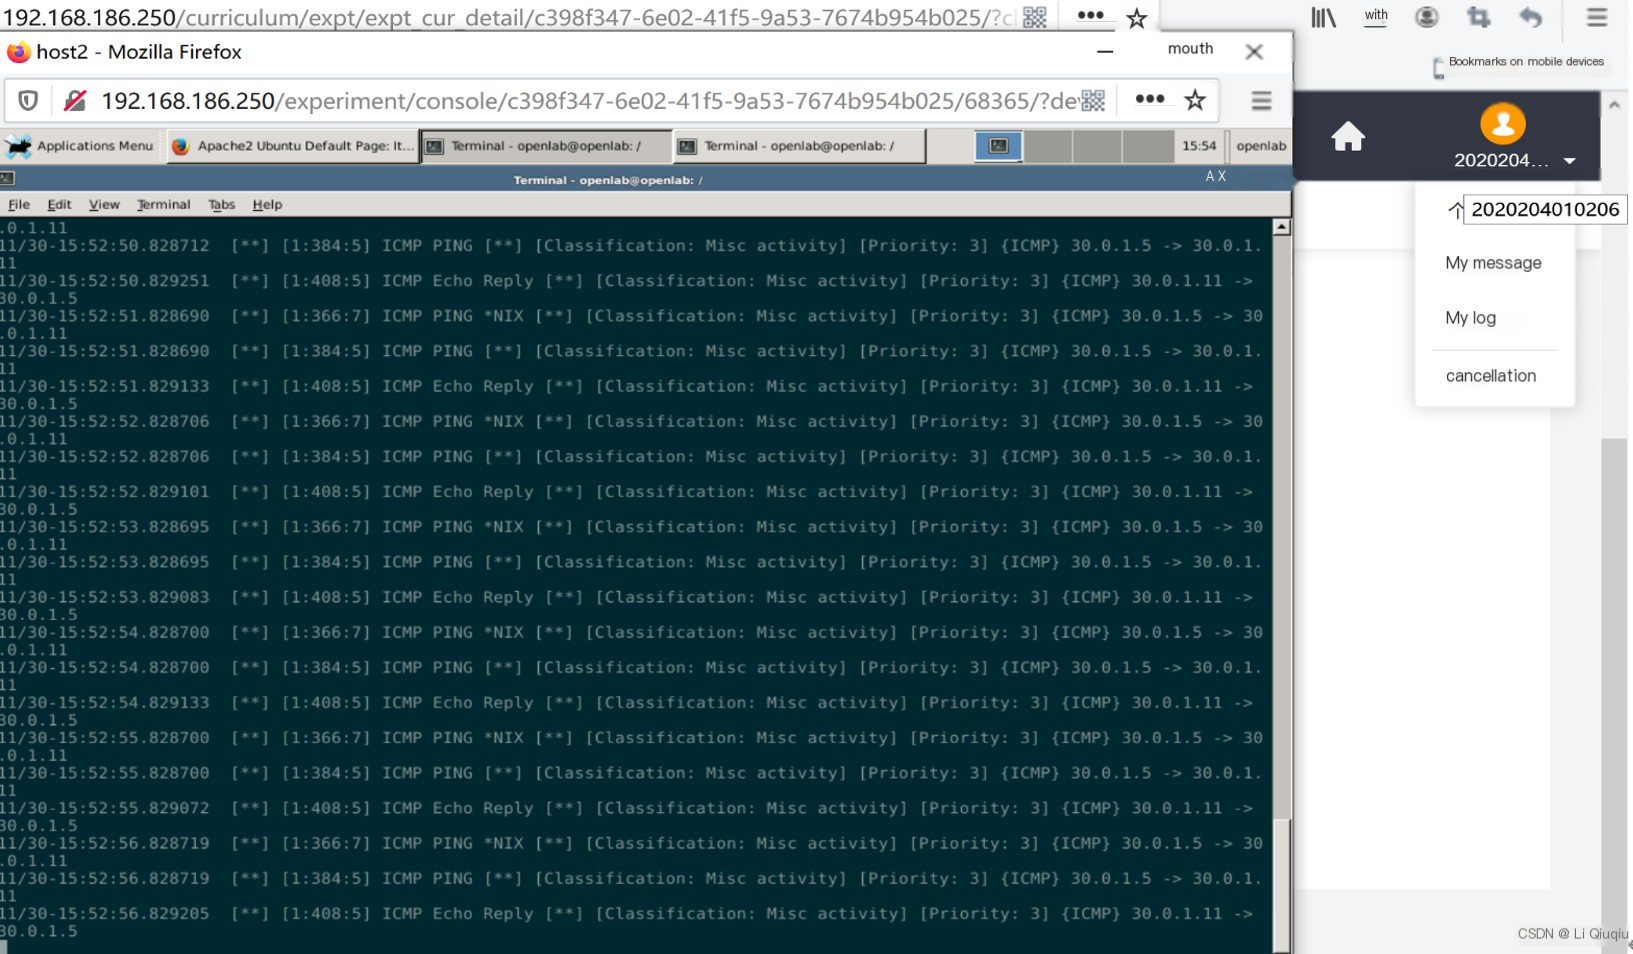
4. View packet information: Enter the terminal to view;
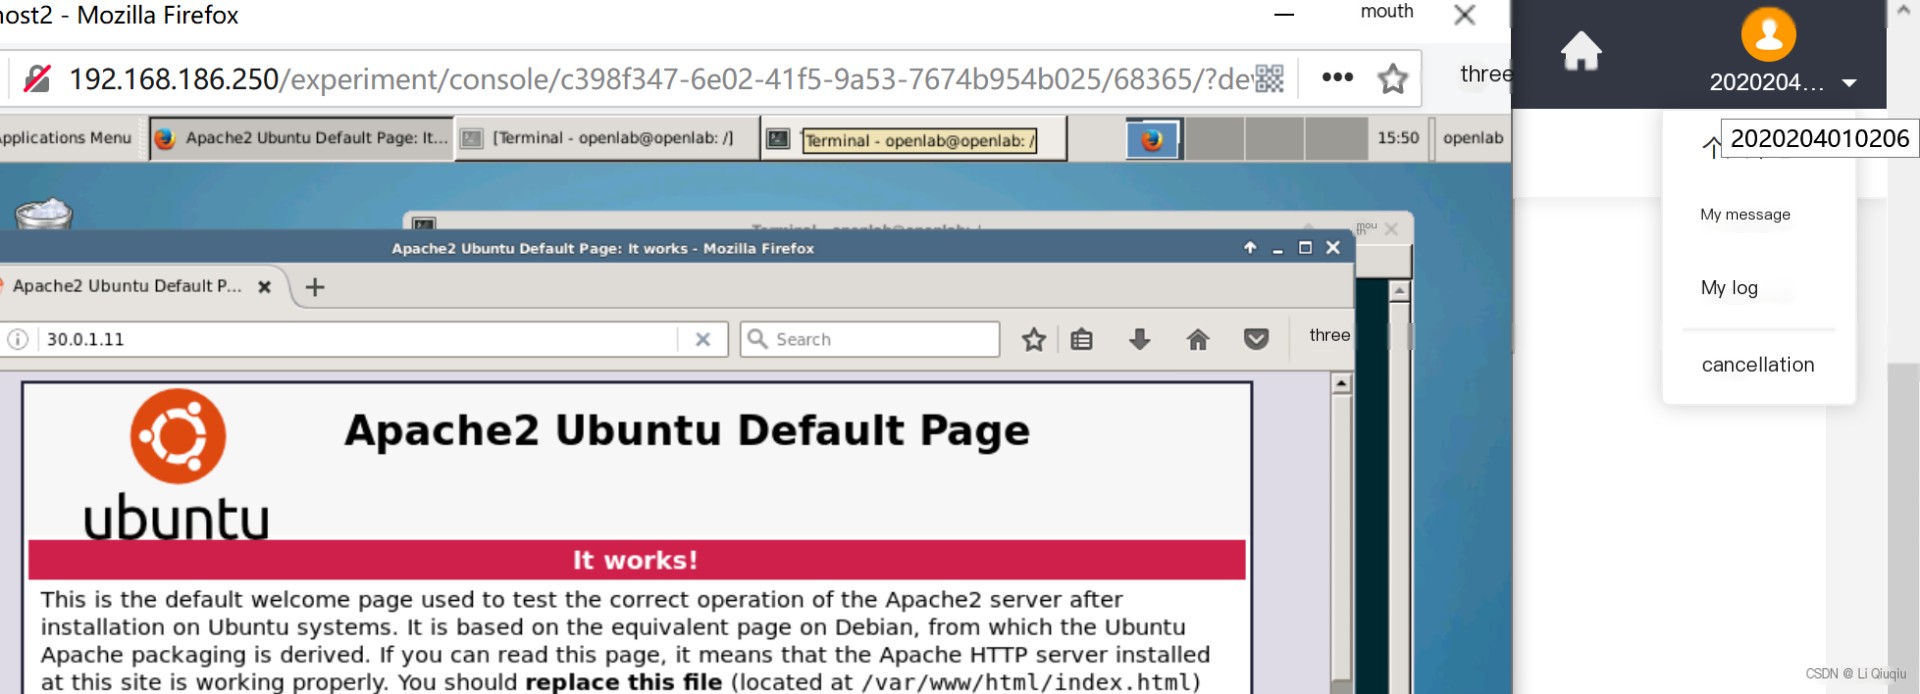
5. Browser interaction: Use host 2 to access host 1 via the browser. Enter http://30.0.1.4 in the browser
6. Return to the terminal window to view the detected data
V. Experimental Phenomena, Results Recording, and Organization:
1. In the environment detection, the Snort tool has been successfully installed;
2. In the environment configuration modification, there are many configuration files that can be modified according to user needs, such as regular path settings, network variables, load libraries, etc.;
3. In the configuration of detection rules, rules can be set according to user needs and actual situations. In this experiment, ICMP and HTTP packets were set;
4. During the actual operation of the experiment, it was found that the Snort tool successfully detected packet information.
VI. Analysis, Discussion, and Answers to Thought Questions:
1. The detection engine of intrusion detection constitutes the core of the Snort detection engine through the analysis of rule options. What are the main options?
① The first category is various feature description options related to packets, such as: content, flags, dsize,③BASE: Basic Analysis and Security Engine, a PHP-based analysis engine;
④Sguil: A console tool for network security experts to monitor network activities.
7. Experiment Screenshots