0×00 Background
Don’t be complacent; there’s always an eye watching your every move.
Hacker attacks are inevitable. If you’re in the cybersecurity field, it’s not a matter of if, but when you’ll be hacked (no one can claim their network is absolutely secure). What should you do if you get hacked? The first thing is to fix the vulnerabilities and remove any backdoors! How do you fix the vulnerabilities? Where are they? This is when IDS researchers come into play:
IDS:
IDS stands for Intrusion Detection System. Technically, IDS monitors the network and system operations based on certain security policies using software and hardware. It aims to detect various attack attempts, behaviors, or results to ensure the confidentiality, integrity, and availability of network system resources.IPS:
IPS, which stands for Intrusion Prevention System, is a step up from IDS. While IDS detects attacks without taking action, IPS takes action after detecting attack attempts or behaviors.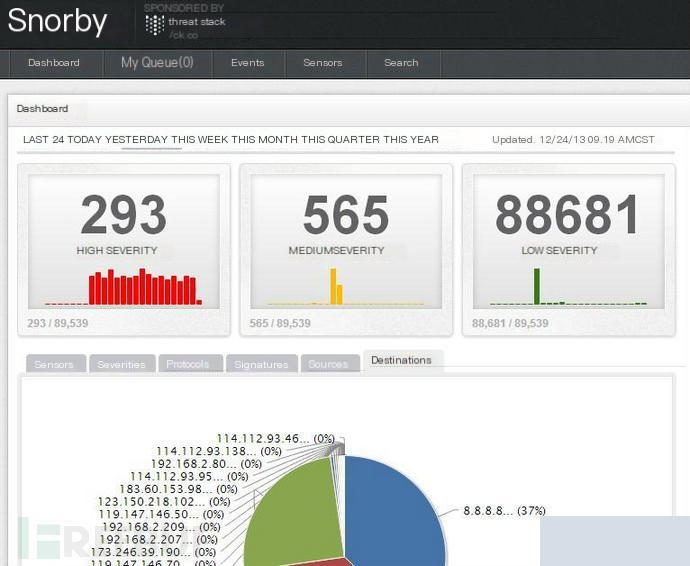
Using a scanner, the image after scanning.
0×01, Introduction to Pfsense & Snorby
pfSense is an open-source version based on FreeBSD, customized for firewall and router functions. It is installed on a computer to act as a firewall and router in the network, known for its reliability and features often found only in expensive commercial firewalls (such as VPN, IDS, IPS).
Snorby is a Ruby on Rails web application that interfaces with popular intrusion detection systems (Snort projects Suricata and Sagan) for network security monitoring. The project’s goal is to create a free, open-source, and competitive network monitoring application for private and enterprise use.
0×02 Snorby Installation and Deployment
First, set up the installation source (use the EPEL source)
Snorby GitHub: https://github.com/Snorby/snorby
Here’s how to install it, no need for lengthy explanations.
Detailed installation guide: http://hi.baidu.com/huting/item/7a60eb725e66cb206e29f6b8
(Just follow the first part for installation.)
Snorby only analyzes data; data capture is done by Suricata in pfSense. The captured data is saved in the MySQL database on the Snorby server, and Snorby analyzes the data by querying the local MySQL database.
Therefore, the Snorby server just needs to be placed where pfSense can access it.
Can it be accessed from the internet? It should be possible, but I haven’t tested it.
After installation, the default credentials are: Username: [email protected], Password: snorby
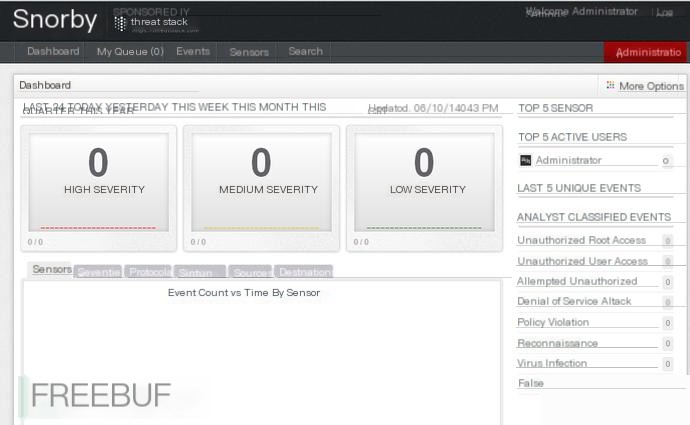
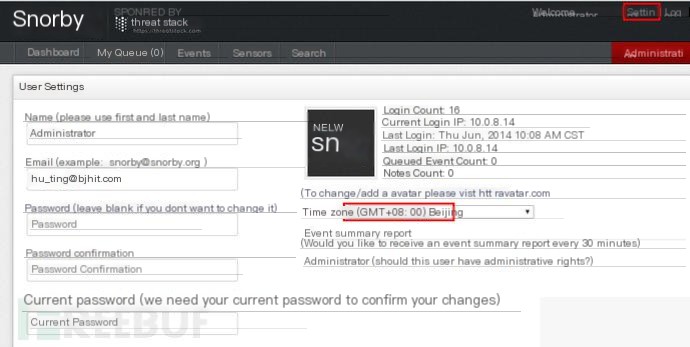
Click on Settings, and there’s a time setting below (this is very important; incorrect time settings can cause issues)
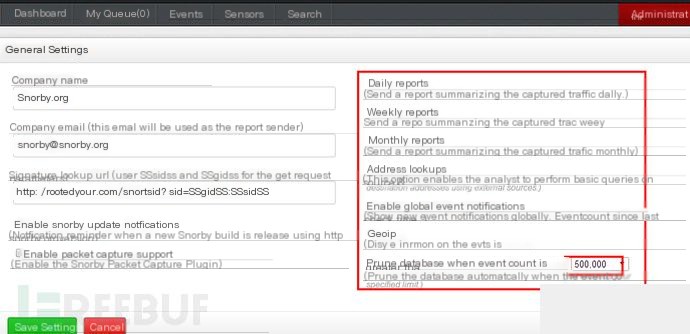
The 500000 value below is a very important parameter (this is a peak value).
0×03 pfSense Deployment and Configuration
The installation of pfSense is not covered here; it’s widely available online.
As a firewall, pfSense is deployed at the network’s edge, which is self-explanatory.
A. Download and Install Suricata Package
System -> Packages, as shown below:
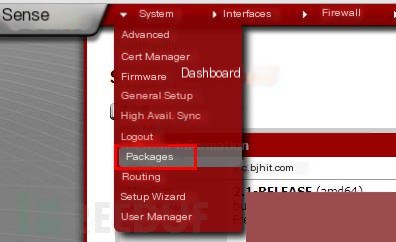
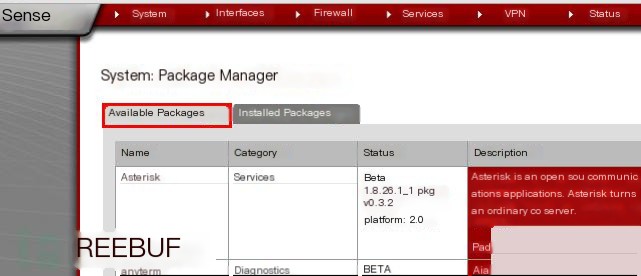

Note: Set up DNS before this step; otherwise, you won’t be able to resolve domain names and download the package.
B. Global Settings Configuration
After installation, find Suricata in Services and perform basic configuration.
The interface is as follows:

First, perform basic settings in Global Settings, which are divided into three parts.
The first part is rule downloads
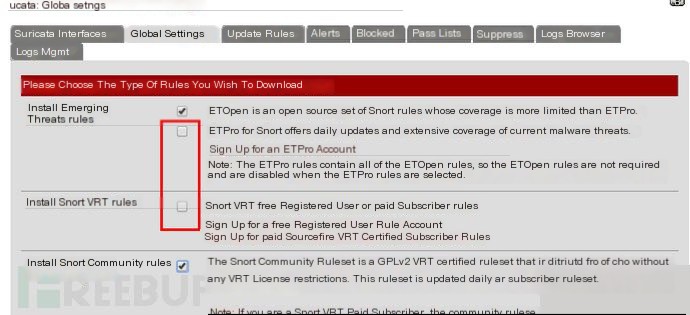
There should be four options, the second and third require a code.
I’m not sure if there’s a fee, so I didn’t try it.
The second part is rule update settings
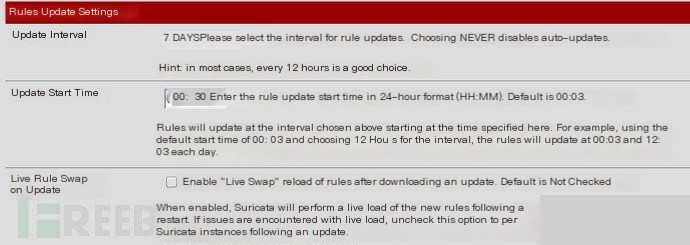
I set it to update once a week.
The third part is general settings

Here’s a crucial setting.
Remove Blocked Hosts Interval: I set it to 15 minutes, the default is NEVER.
What does this mean? This is related to the IPS mentioned later. When IPS detects a threat, it adds the target to Blocked. IP addresses in Blocked are not allowed through the firewall.
I set it to clear the Blocked IP addresses every 15 minutes.
C. Other Settings
Rule Library Download
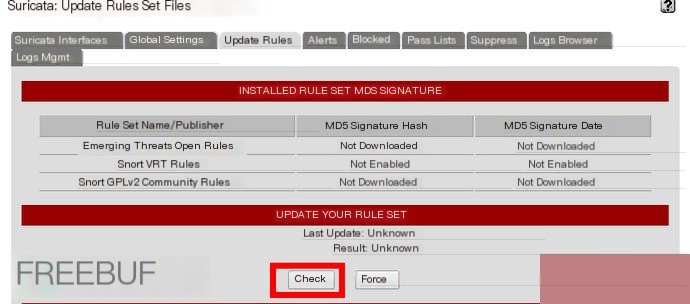
Once set, click Check to download the rule files.
Pass Lists (this is a whitelist)
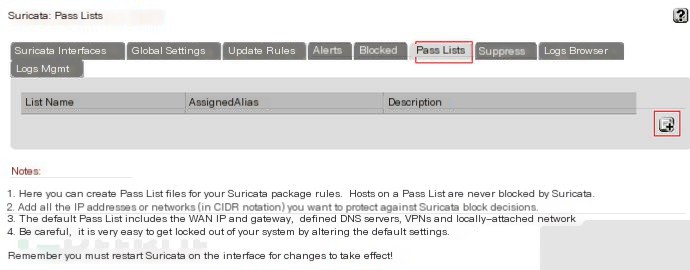
Not much to explain here; this will be covered when discussing IPS.
0×04 Pfsense + Snorby == IDS & IPS
Enable IDS Functionality
Key pfSense Configuration
Add Monitoring Network Interface
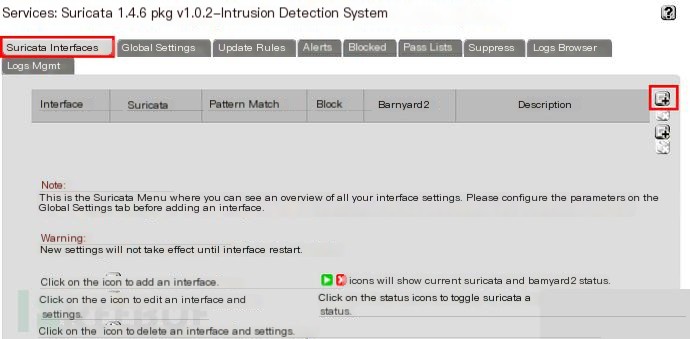
I only have two network interfaces, so I chose WAN, the external network interface (make sure to check the box above).
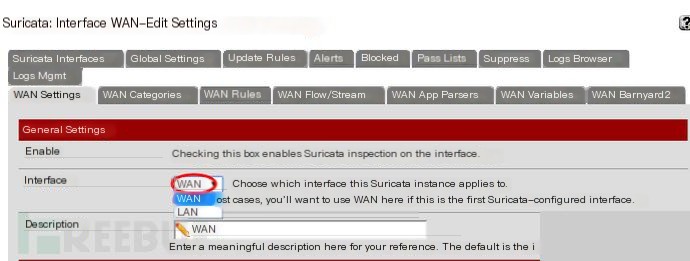
Set Iface Categories
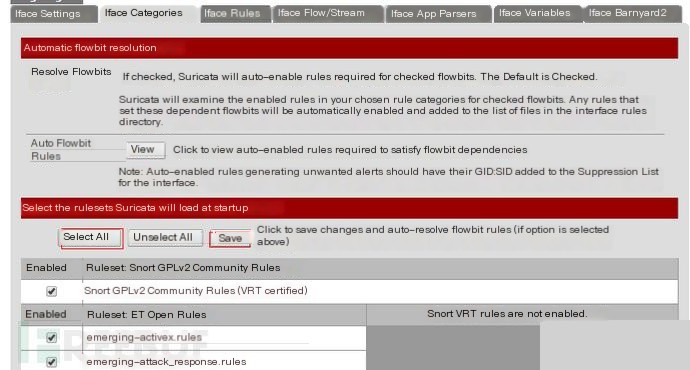
I chose all categories and saved (you can choose based on your needs).
Set Iface Rules
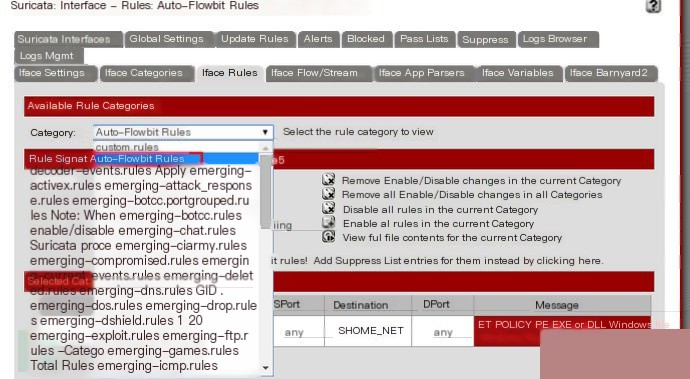
Select Auto-Flowbit Rules and apply.
Set Iface Barnyard2 (critical)
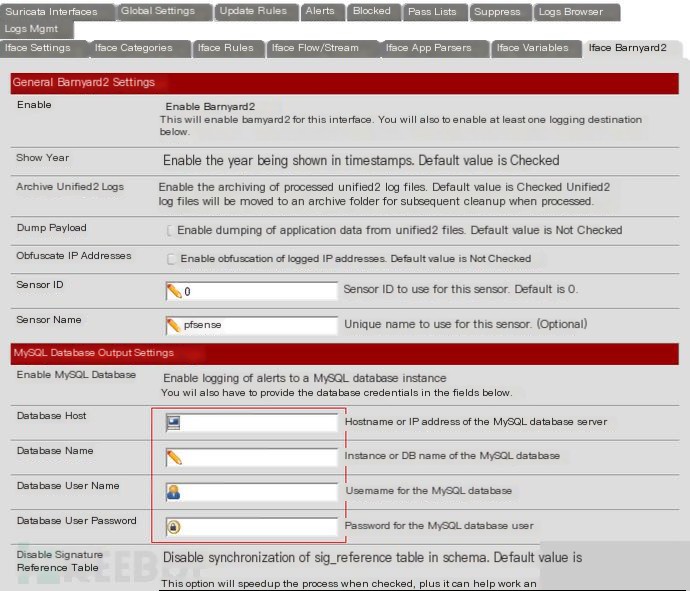
Enabling MySQL is critical; enter the MySQL information for the Snorby server here.
(Note: MySQL must be configured for remote access. Save each configuration page after completing it.)
The basic IDS configuration is now complete, as shown below.

Click the red cross to start.
The effect after starting.
If successful, you can see the effect on Snorby, as shown in the image below:
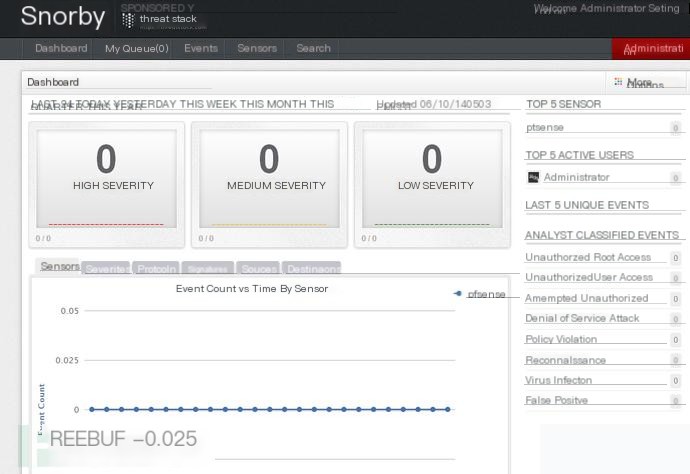
Let me scan and see the effect. I will use nmap for a light scan.
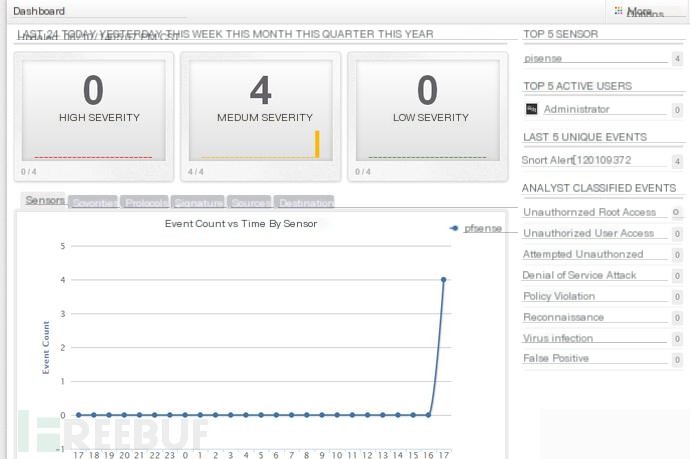
I did it in a virtual machine, and it was extremely laggy!
Impressive, right? You can directly see that you are using nmap to scan.

Enable IPS functionality
In the WAN Settings, there is an Alert Settings section, as shown below:

After setting, select save and then restart Suricata to take effect.
The second checkbox is quite powerful; if a certain IP is found to be dangerous, it will directly disconnect all connections to that IP.
Here, the focus is on setting up the whitelist for IPS
Step 1: Set up aliases
Under Firewall, go to Aliases (add your own)

Step 2: Set up Pass Lists
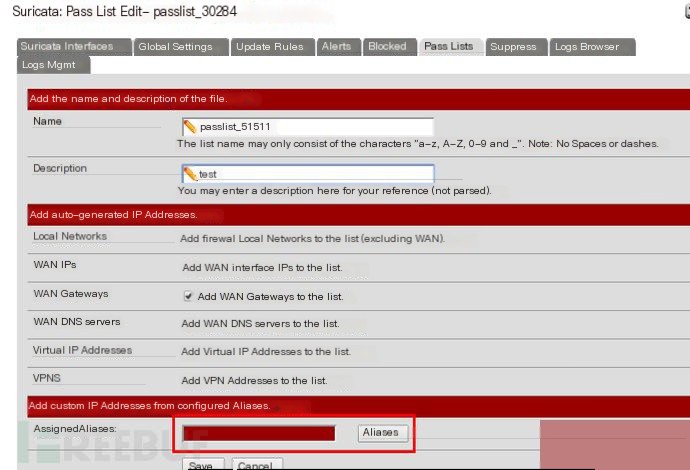

Save,
In the WAN Settings
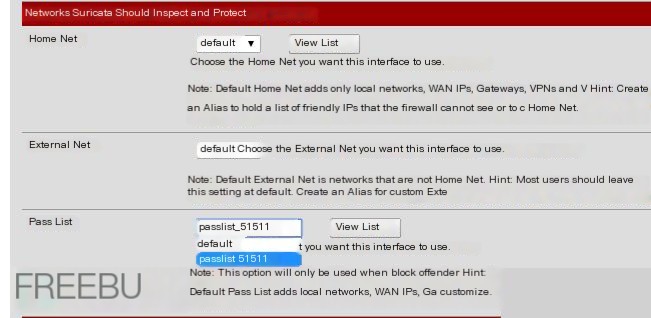
Click save and restart Suricata to take effect.
There is one last setting, which is when to unban the blocked IP.
This is mentioned in the General Settings under Global Settings.

Here, it is set to 15 minutes.
This means that after 15 minutes, the blocked IP will be automatically unbanned.
Note: This article aims to provide a basic guide, and you can configure it according to your needs. The article is not very detailed; if it were, it would be around 20 pages long.
[This article was submitted and published by the author www.heetian.com, please indicate it is from FreeBuf.COM when reprinting]


