

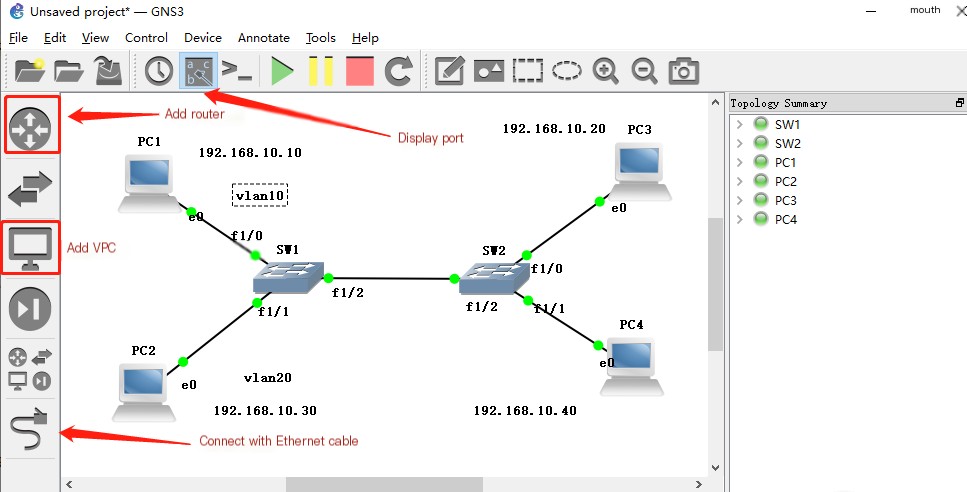
Experimental Environment Using Previously Used GNS3, Wireshark, and CRT Access the GNS3 page, click on the icon menu on the left, and drag 2 routers into the topology workspace. Click on the PC icon, select VPC, and drag it into the workspace. Set up the two routers by changing their names, altering the icons, adding a Layer 2 service card, and increasing the disk capacity to 128MB for the router setup.
—————-Configuration Environment————-
1. Next, connect the PC and the router with a network cable
Connect PC1 to SW1’s f1/0 Connect PC2 to SW1’s f1/1 Connect SW1 and SW2 to f1/2 Connect PC3 to SW2’s f1/0 Connect PC4 to SW2’s f1/1 After setting up, start and display all ports.
 />
/>
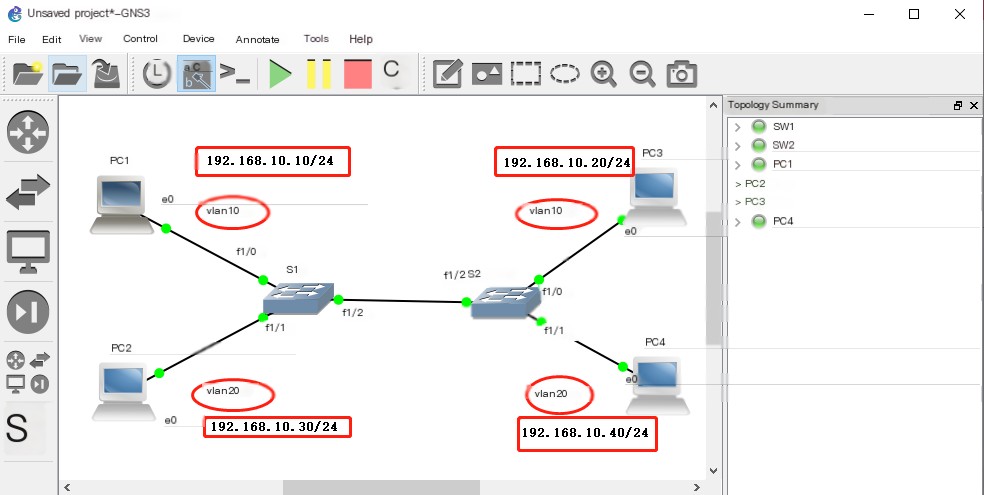
2. Assign PC1 and PC3 to vlan10 Assign PC2 and PC4 to vlan20 Set PC1 IP address to 192.168.10.10 Set PC2 IP address to 192.168.10.30 Configure PC3 IP address to 192.168.10.20 Configure PC4 IP address to 192.168.10.40
 />
/>
3. After configuring the IP, perform interoperability; PC1 can communicate with PC3, PC2 can communicate with PC4, but PC1 cannot communicate with PC2, and PC3 cannot communicate with PC4.
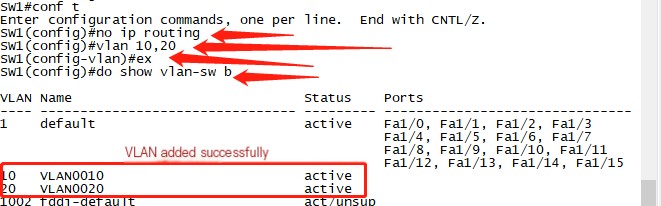
4. Double-click to open SW1 and SW2 to jump to the CRT interface for configuration: SW1 Enter conf t Enter no ip routing to disable routing Enter vlan10,20 to add routing Enter exit Enter do show vlan-sw b to view vlan
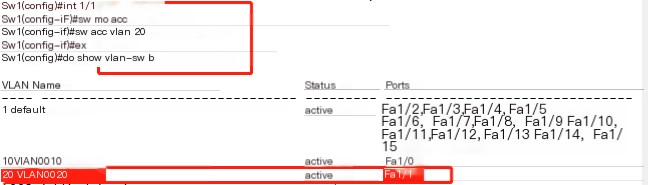
5. Configure the port SW1: Enter int f1/0 Enter sw mo acc Enter sw acc vlan 10 Enter exit Enter do show vlan-sw b
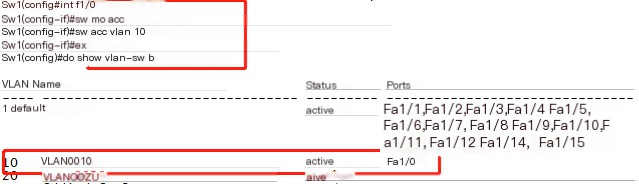
Enter int f1/1 Enter sw mo acc Enter sw acc vlan 20 Enter do show vlan-sw b
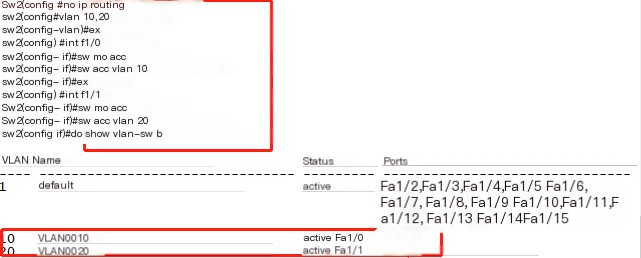
Enter conf t Enter no ip routing Enter vlan 10,20 Enter ex Enter int f1/0 Enter sw mo acc Enter sw acc vlan 10 Enter ex Enter int f1/1 Enter sw mo acc Enter sw acc vlan 20 Enter do show vlan-sw b
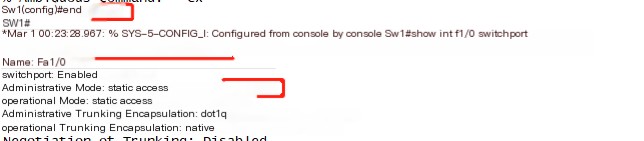
6. Configure the trunk link, initially active in vlan1. Enter ex Enter end to enter privileged mode Enter show int f1/0 switchport to check the port, which is in access state
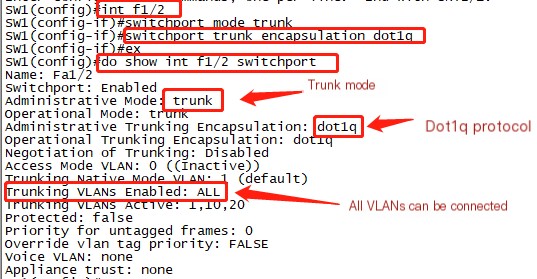
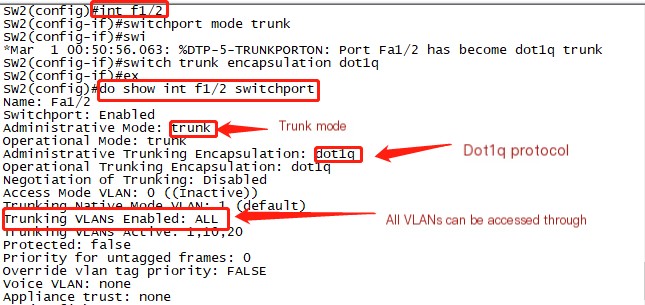
7. Next, configure SW1 and SW2 as trunk links. SW1 Enter conf t Enter switchport mode trunk to set to trunk mode Enter switchport trunk encapsulation dot1q for dot1q encapsulation Enter ex Enter do show int f1/2 switchport
SW2: Enter int f1/2 Enter switchport mode trunk to set to trunk mode Enter switchport trunk encapsulation dot1q mode Enter ex Enter do show int f1/2 switchport
———–Start Testing———
1. At this point, PC1 can ping PC3, and PC2 and PC4 can communicate with each other. On PC1, enter ping 192.168.10.20, which works.

2. Enter 192.168.10.40 on PC2, which also works.

This proves the experiment is successful.
At this point, we can use WireShark to capture and analyze the data of mutual communication 1. Right-click and choose an access link
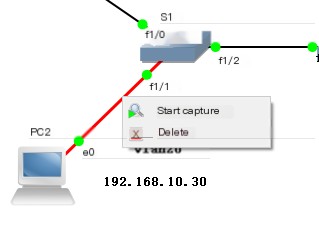
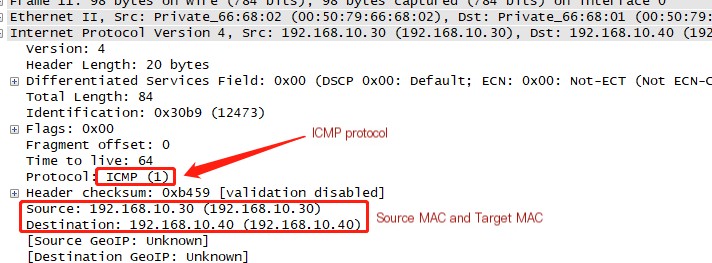
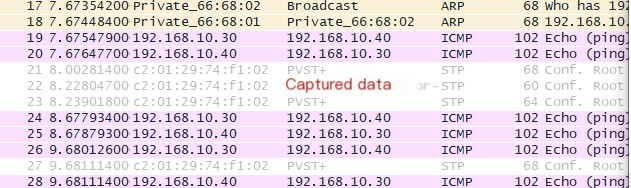
2. Data will be captured from SW1’s f1/1 port, enter ping 192.168.10.40, and the packet capture will retrieve data.


3. Double-click on the captured data to find many important data points.
4. Next, capture the trunk link and examine the vlan.
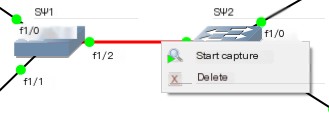
5. Then use PC2 to ping 192.168.10.40, capture a data packet from WireShark.

6. Examine the captured packet to see an 802.1q vlan 20.

7. Meanwhile, capture data between PC1 and PC3 and use the same method to examine it.

8. In this way, different links achieved interoperability.