

Pre-install “VMware Workstation Pro”, “SecureCRTPortable.exe”, “VNC”, “Wireshark” and other software;
Install “VNC”, “Wireshark”:
https://blog.csdn.net/HYD696/article/details/104324176
VMware Workstation Pro: EVE-NG Emulator Installation Tutorial
1. Download the EVE-NG image file
China’s exclusive official partner:
http://www.emulatedlab.com/
(A URL recommended by an enthusiastic netizen, thank you)
(Of course, there are many related resources on the Eve-NG Chinese website)

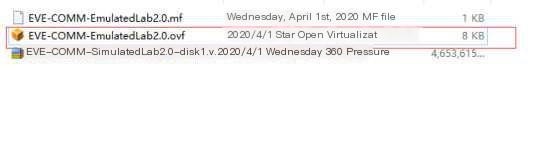
2. Download the EVE image file
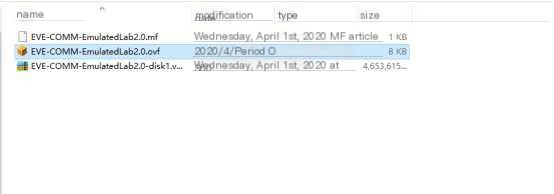
3. Select the second file (.ovf)
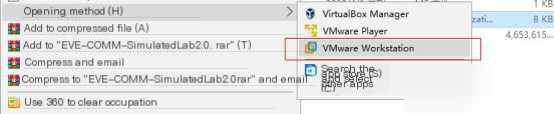
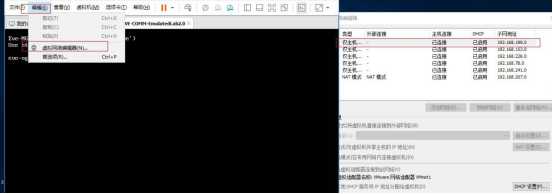
4. Right-click –> Select “VMware Workstation Pro”
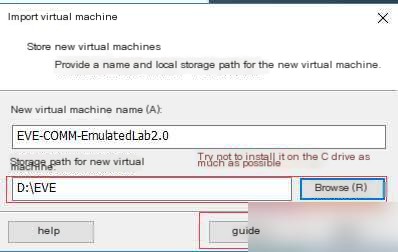
5. Name –> Select the installation path (non-Chinese path) –> Import
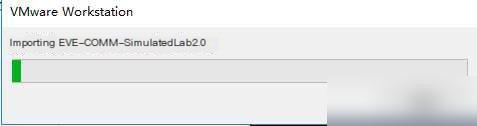
6. Importing
7. Import the image after EVE-COMM
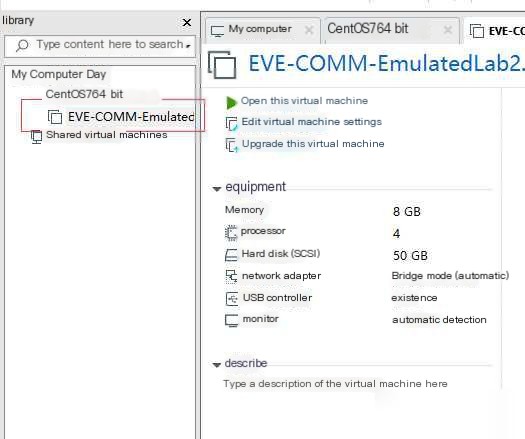
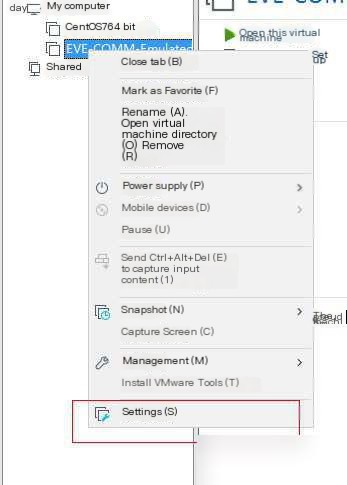
8. Select “EVE-COMM Image” –> Settings
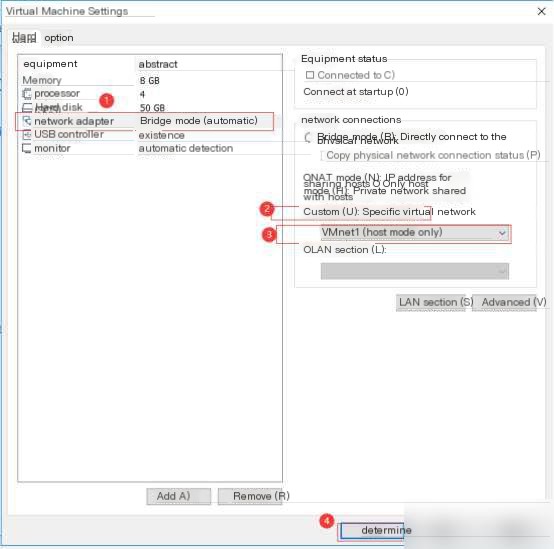
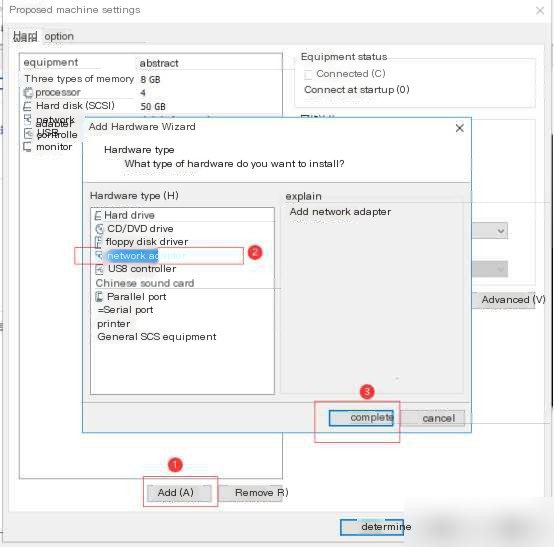
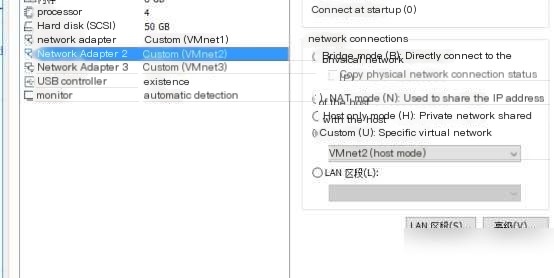
9. Network Adapter –> Custom (U): Specific Virtual Network –> Select “Virtual Network Card” –> OK
10. Add a virtual network card (recommended to be three)
Add –> Network Adapter –> Done –> Custom (U): Specific Virtual Network –> Select “Virtual Network Card” –> OK
11. Check if it is configured correctly
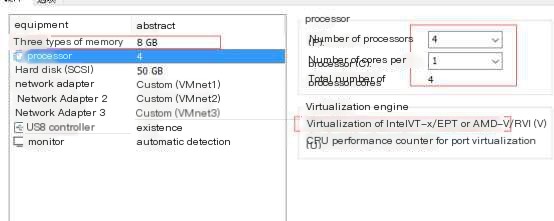
12. Memory recommended to be greater than 4096; Number of Processors (P): 4, Number of Cores per Processor (C): 1 –> Ensure “Virtualize Intel VT-x/EPT or AMD-V/RVI(V)”
13. Start this virtual machine

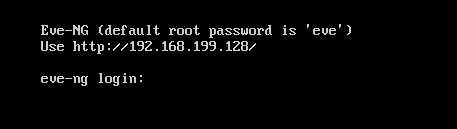
14. The obtained IP address is 192.168.199.128 (virtual network card IP)
15. You can also check the IP (Edit –> Virtual Network Editor –> …)
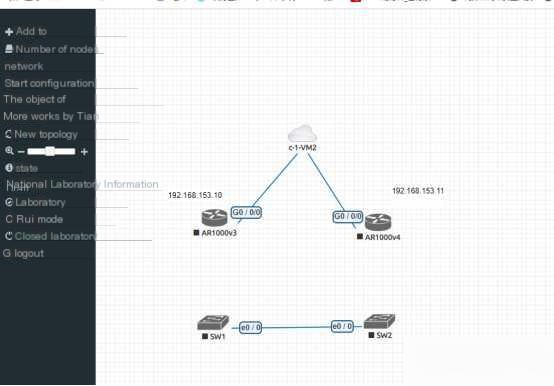
2. EVE-ng Emulator Usage Tutorial
1. Enter the IP address 192.168.199.128 in Google Chrome (Google Chrome is recommended)
Default account: admin
Default password: eve
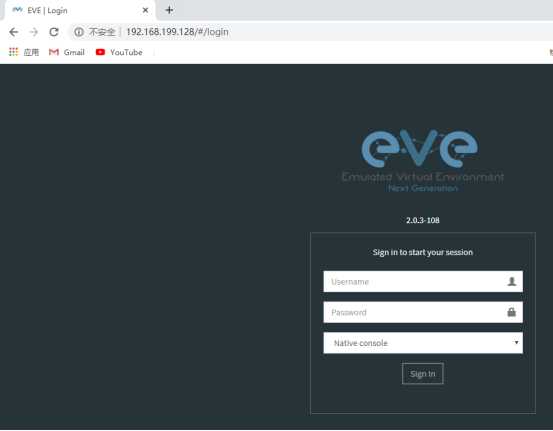
2. Successful login –> Enter eve

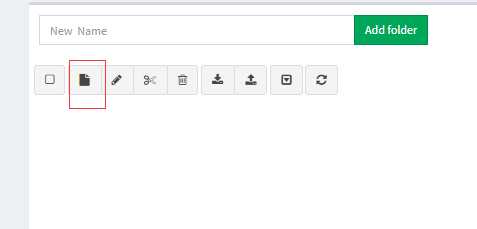
3. Add topology
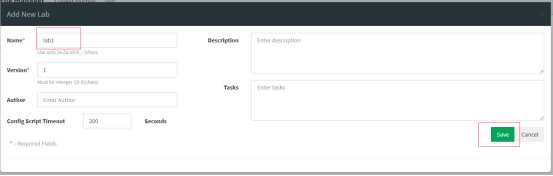
4. Name –> Save
5. Create a topology

6. Add device
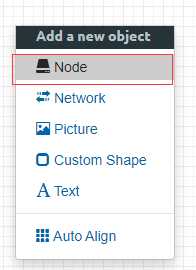
Right-click on the blank –> Node
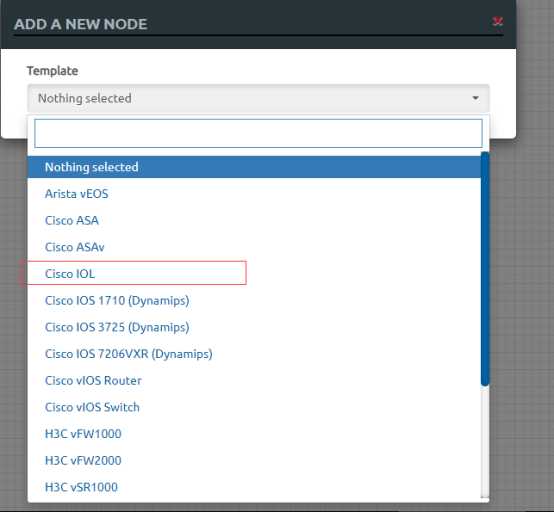
7. Cisco IOL
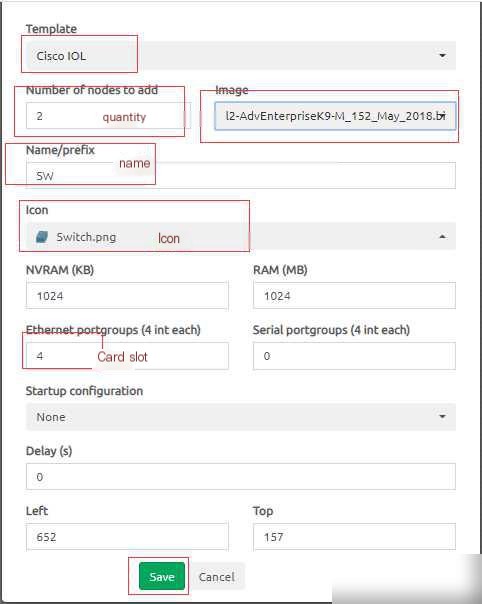
8. After finishing –> Save
9. OK
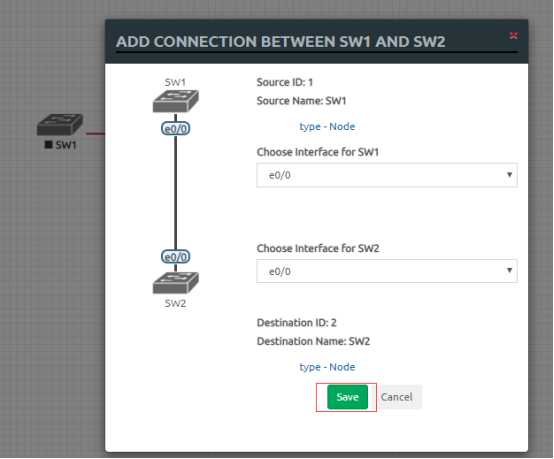
10. Connect –> Hold down the plug icon –> Click on the device to connect

11. Click on the device to connect –> Save
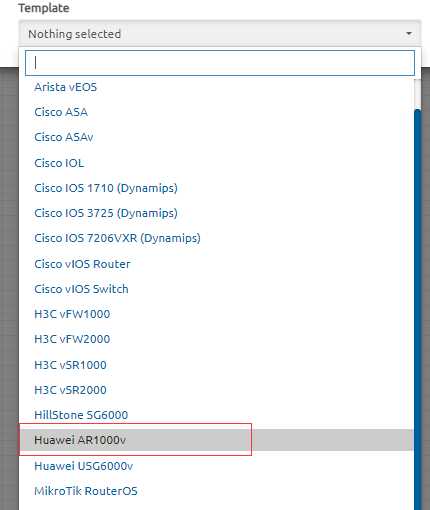
12. I chose “Huawei AR1000v”
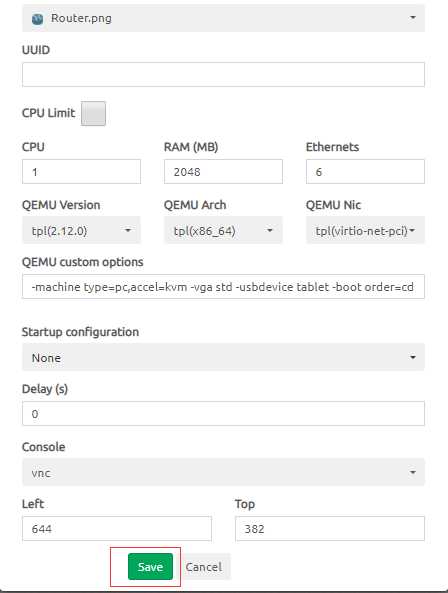
13. Save
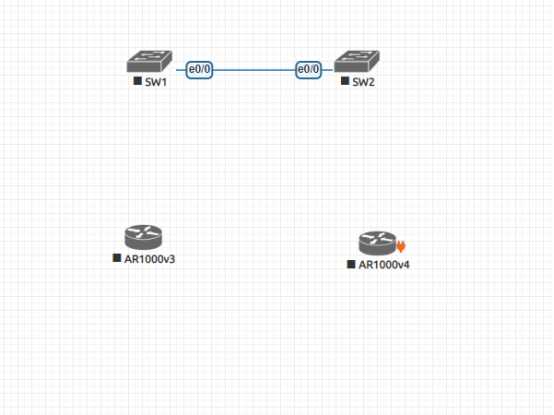
14. After saving
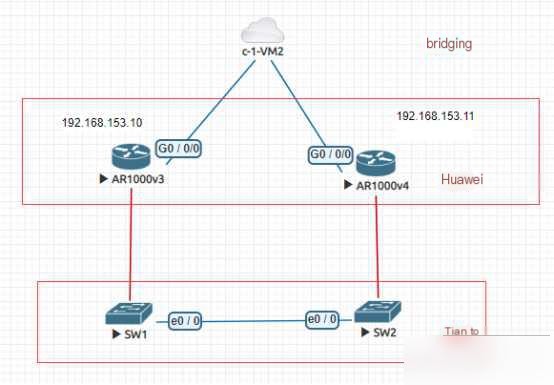
15. Bridging (Huawei device)
Networks
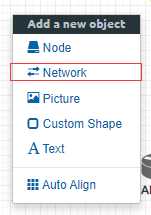
16. Add cloud (needed for bridging, Cisco and Huawei)
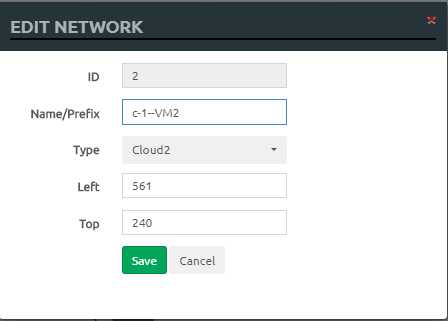
17. Connect
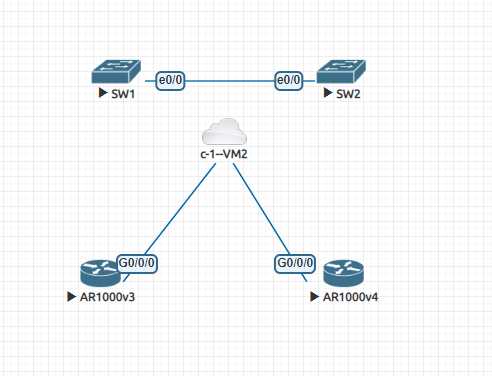
18. Start all
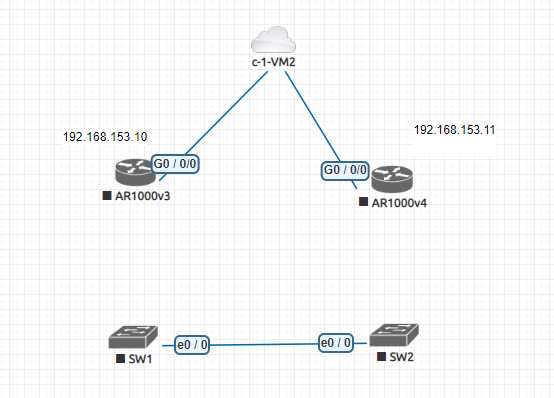
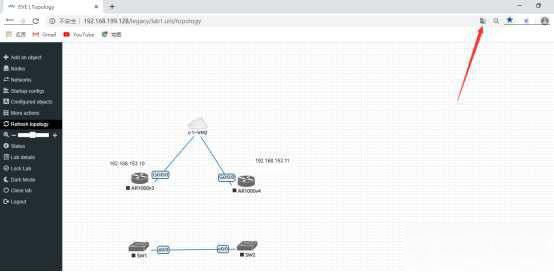
Now I want to log in to the AR1000v3 device (check the IP address)
The cloud uses the VM2 network card, check the VM2 network card IP,
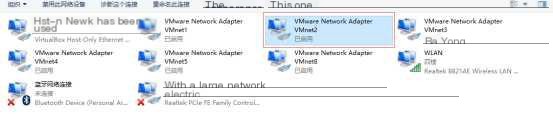
19. Status –> Details

20. 192.168.153.10
Cisco; double click SW1
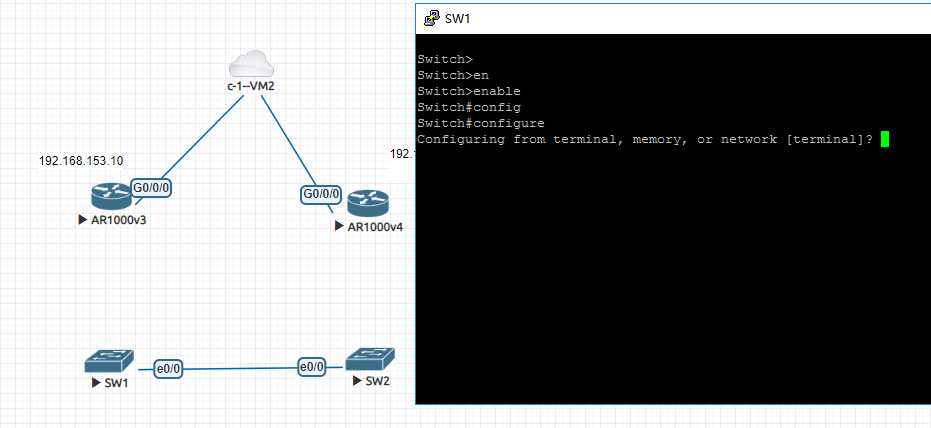
21. Double-click then –> Select “Open”
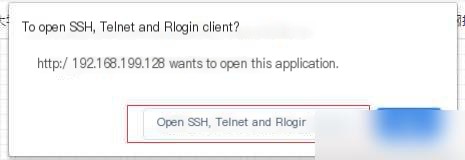
22. Enter the SW1 configuration interface
23. Huawei; double-click AR1000v3, open “ultravnc_arapper.bat”, click “ultravnc_arapper.bat”
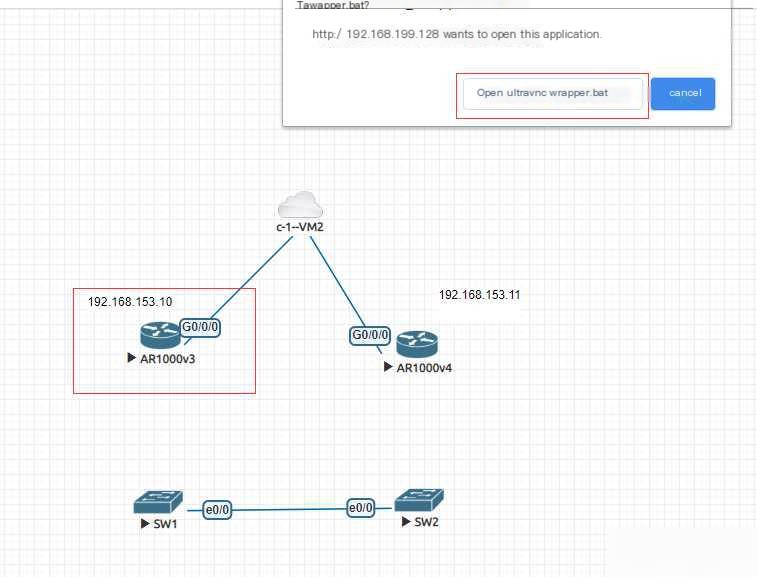
24. Enter the Huawei device configuration interface
Default
Username: admin
Password: Admin@huawei
25. Ensure “vncviewer.exe” is in this path (C:\Program Files\uvnc bvba\UltraVNC)
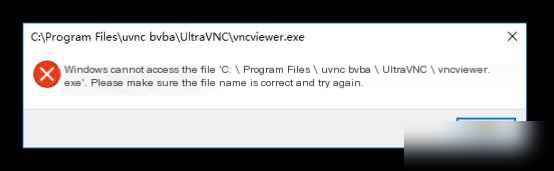
Note: Actual path
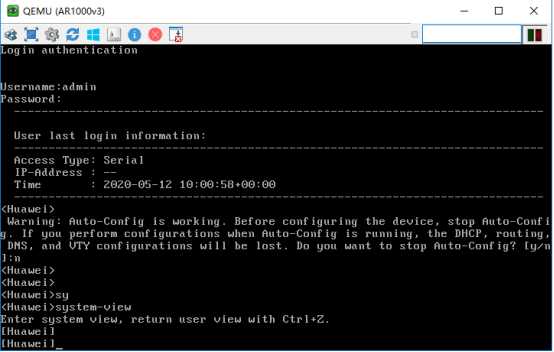
26. As I am prone to making command typing errors, but this software cannot delete commands; to solve this problem
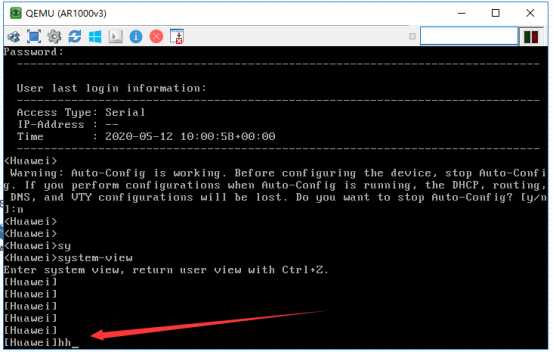
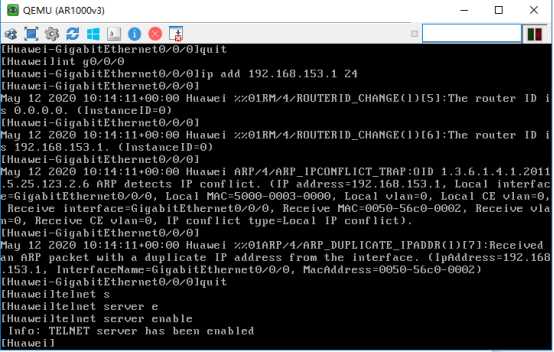
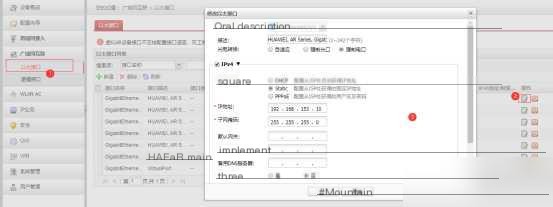
27. First configure the interface IP address, enable the telnet service
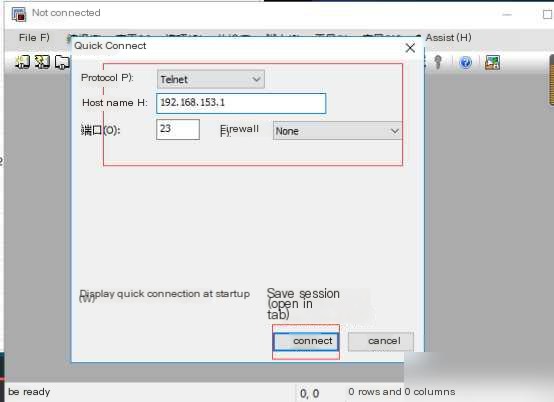
28. Use “SecureCRTPortable” to log in to the device

29. Quick Connect –> Protocol –> Host name –> Port number –> Connect
30. Use vnc to configure the following
Aaa
Local-user hcie password cipher hcie123456789 privilege level 15
Local-user hcie service-type telnet ssh http
31. Enter username hcie, password hcie123456789 Enter –> Enter the device configuration interface
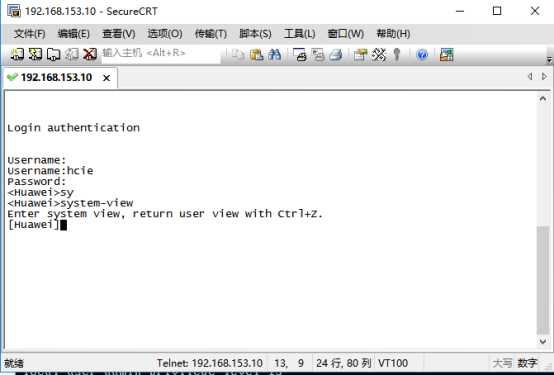
32. Configure no timeout
user-interface vty 0 4
Idle-timeout 0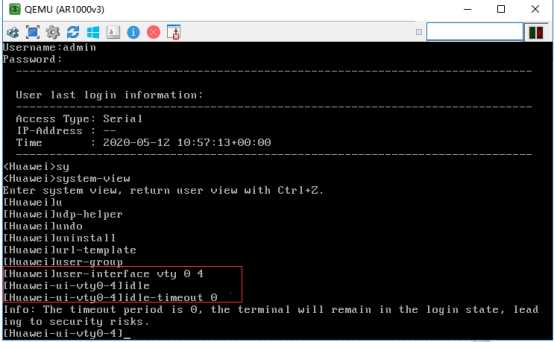
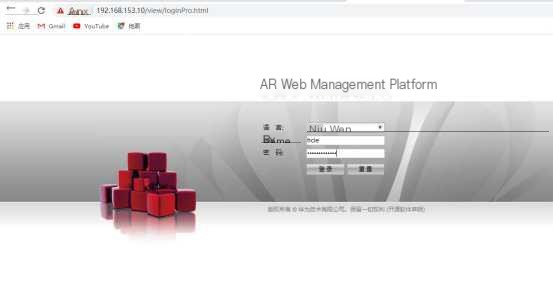
33. Use the web interface to log in, enter the IP address https://192.168.153.10/view/loginPro.html –> Login
Enter
Username: hcie
Password: hcie123456789
34. Enter the device
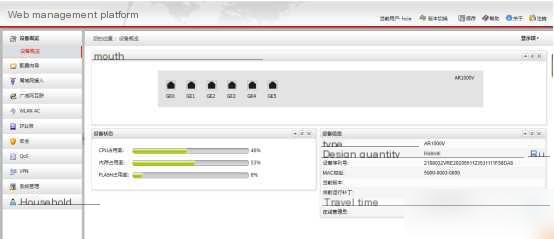
35. Save

36. Add super admin user
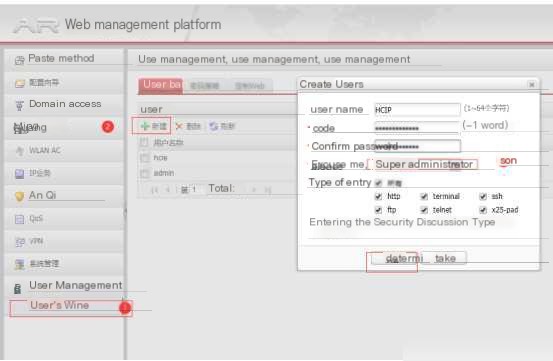
37. User

38. Manually configure the IP address
And other operations
39. OK
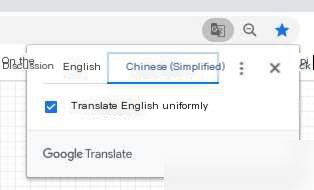
40. The web interface changes to Chinese
41. Choose Chinese (Simplified)
42. OK
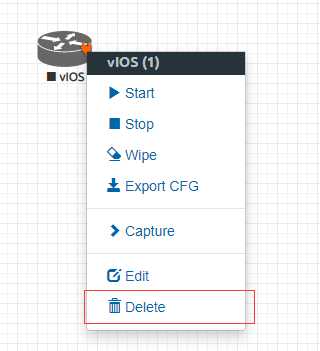
Additionally, how to delete a device? Select the device to be deleted –> First stop the device –> Right-click –> Delete –> Yes
All my articles are copyright protected, and the copyright belongs to Yibo Dong! Unauthorized reproduction is prohibited or link to the original link.
Publisher: Full Stack Programmer Stack Manager, please indicate the source for reprint: https://javaforall.cn/130315.html Original link: https://javaforall.cn