

Hello everyone, we meet again. I am your friend, Full Stack Lord. Today, let’s discuss FTP server configuration.
Experiment Step One: Configure FTP Server and Log in to FTP Server on the Tester Machine
In the local network environment, we use a small tool (Quick Easy FTP Server) to set up an FTP server.
Configure Quick Easy FTP Server software
Double-click on the Quick Easy FTP Server on the desktop, as shown below
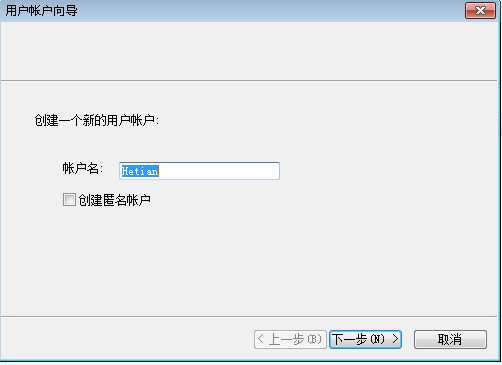
As shown above, you can create an anonymous account, but it will have no password. Here we create an account, next step
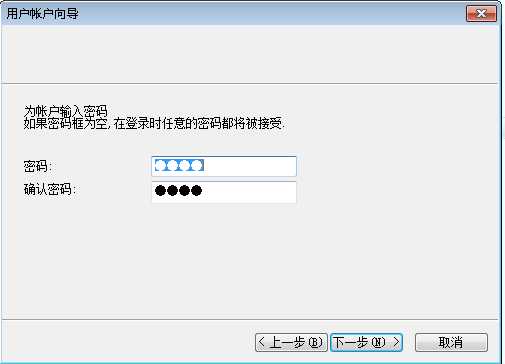
Enter a password, anything is fine. Just remember it as it will be used for client login later. Next step
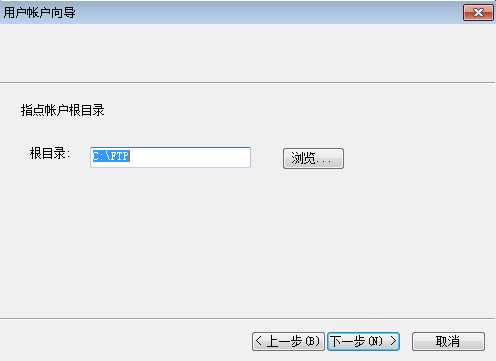
Select a directory for the FTP server, we choose the FTP directory under the C drive (insert some files into the folder). This directory must exist. Next step
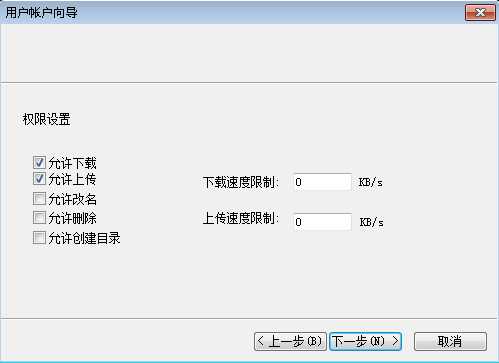
For permissions, we choose “Allow Download” and “Allow Upload”. These are the most common settings; other configurations are default. Click Next step
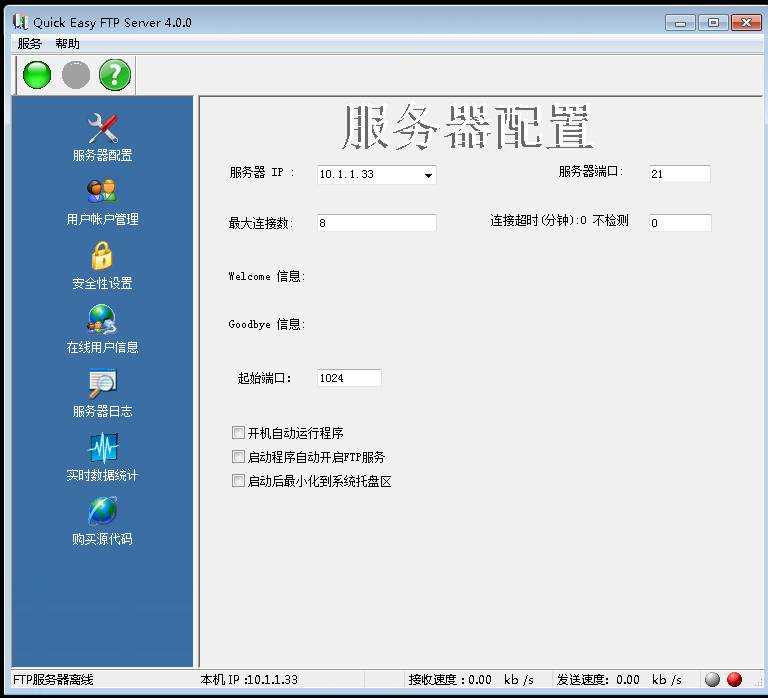
Now we have configured Quick Easy FTP Server. Next, click the start button (the green button on the top left, next to the green question mark) to start. The status will change as follows;

Now we have completed the configuration of Quick Easy FTP Server.
Here is a common pitfall: if you fail to start, it might be because the default port 21 is occupied. Here are two solutions:
1 Change the default port; change 21 to a larger number;
2 Use netstat –ano| findstr “21” to see which process is occupying port 21, then close the program occupying the port in Task Manager. Here, we recommend method 1.
Obtain FTP Control Link Data and Data Link Data
Now, on the tester machine, open Wireshark packet capture tool, and enter the filter condition ip.addr == 10.1.1.33. You can log into the FTP server via CMD or a browser. Here we use CMD to become familiar with FTP commands, as shown below:
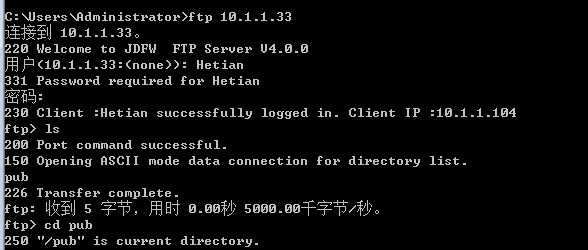
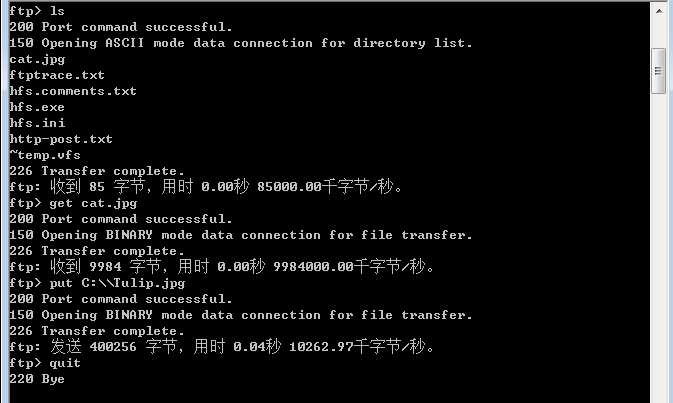
The above information shows the operations of uploading and downloading files upon logging in to the FTP server. Now, go back to the Wireshark interface to stop packet capture, save it, and take a screenshot as follows:

Next, we will analyze the above steps in detail.
Experiment Step Two: Analyze FTP Protocol Packets
FTP uses control links and data connections to transfer data. Let’s analyze the detailed information of these packets below.
Analyze Control Link Data
FTP’s control connection is used to transfer the username, password, and set transfer modes and other control information. Below, we take the saved ftp.pcapng capture file as an example to analyze the control connection packets of the FTP protocol.

The picture above shows the Info column of all packets. You can see all information transmitted through FTP, as FTP transmits packets in plaintext. In the Info column, the FTP server login name, password, and transmission files, etc., are visible. In the above picture, the FTP server’s login name is Hetian, the password is 123456, the file cat.jpg was downloaded, and the file Tulip.jpg was uploaded. All operations shown are successful; if there is an error during transmission, an appropriate response code will be returned.
Among the captured FTP packets, USER, PASS, CWD, RETR, and STOR, etc., are control commands used for control connections. These control commands are displayed in the same format in the packet’s detailed information. Here, we take the control user information command as an example to analyze the packet’s detailed information. In the ftp.pcapng capture file, the captured user information is as follows:

From this interface, you can see that the control commands used when logging into the FTP server are USER and PASS. Using these two commands, you can see Hetian is the login account, and 123456 is the password. Below are the packet details of these two commands:
Username Packet Details
File Transfer Protocol (FTP)
USERHetian\r\n
Request command: USER
Request argument: Hetian
From the above information, you can see this packet uses the FTP protocol, the entered username is Hetian, the command requested is USER, and the request parameter is Hetian.
Password Packet Details
File Transfer Protocol (FTP)
PASS123456\r\n
Request command: PASS
Request argument: 123456
From the above information, you can see the entered password is 123456, the command requested is PASS, and the request parameter is 123456.
For other CMD commands, learners should view them on their own.
Analyze Data Connection Data
Data connections are used to transfer file data, i.e., to upload and download files via the FTP server. Let’s take the captured files as examples to analyze the data connection data.

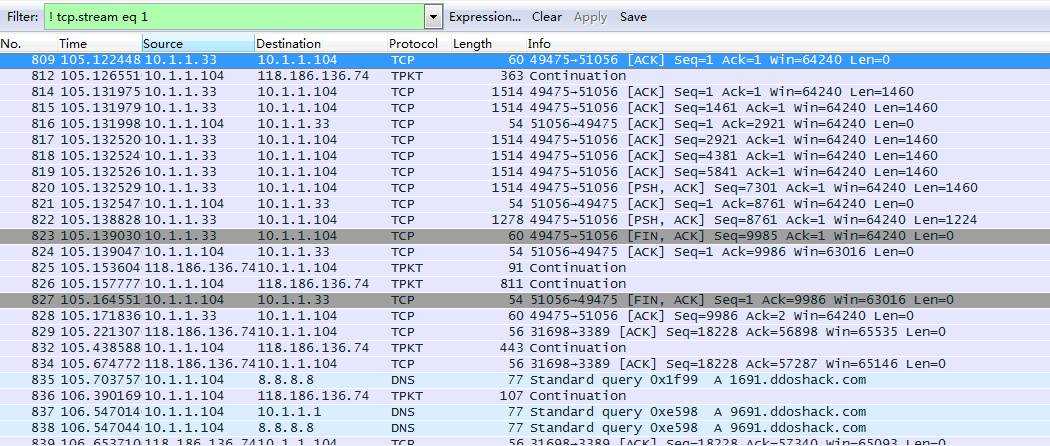
In the picture above, the control commands RETR and PORT data are the upload and download packets, respectively. Here, we take downloading a file as an example (the principle for uploading is the same), click on the 811th frame data above, right-click,

Choose Follow TCP Stream,

The above shows all FTP transmission information. If you want to view the transferred data, remove these pieces of information. Close the window above, and in Wireshark, you’ll notice the filter condition is modified as follows:

The simplest method is to add a “!” in front, which will achieve the effect of removing the display, as shown below:
Next, find our downloaded file. How can we quickly find the downloaded file? Here are two methods for your choice:
Analyze through protocol fields: You’ll see that the TCP protocol data is displayed once the FTP control connection data is removed. In the TCP protocol, the PUSH field indicates pushing data. We can find the PUSH field in Info and indirectly find the desired file.
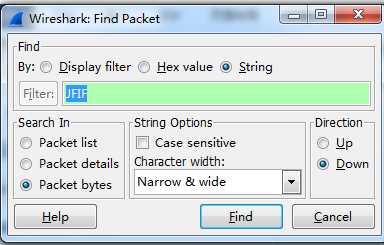
We know the downloaded file is in JPG format, so we also know its binary representation is JFIF (the principle is the same as opening an EXE format file with a binary analyzer, which shows MZ). Thus, using Wireshark’s built-in search feature, we can quickly find the frame number where the file is located. The shortcut key for search is Ctrl+F, as shown below:
In this way, you can find the corresponding frame information. After finding the frame information (814 frames or 820 both work), by right-clicking, Following the TCP Stream, one can see the data’s information. JFIF indicates the file format is JPG, as shown below:
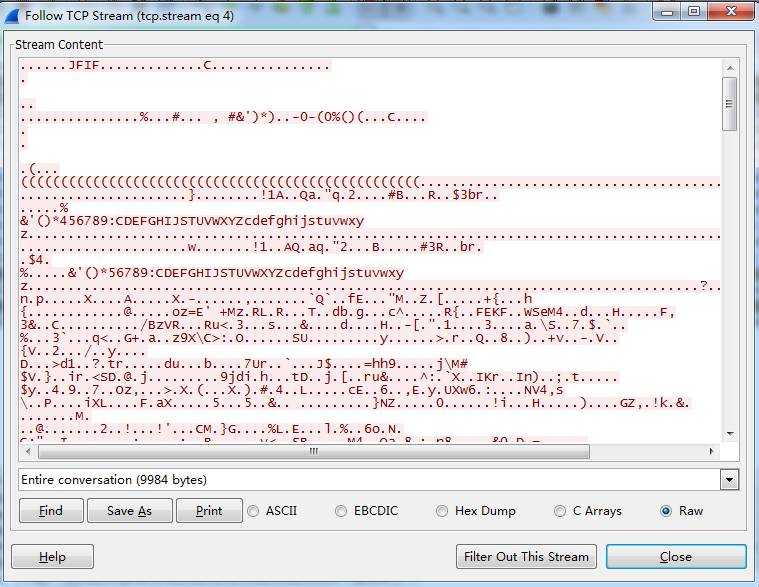
Click Save as in the image above, then name it cat.jpg.

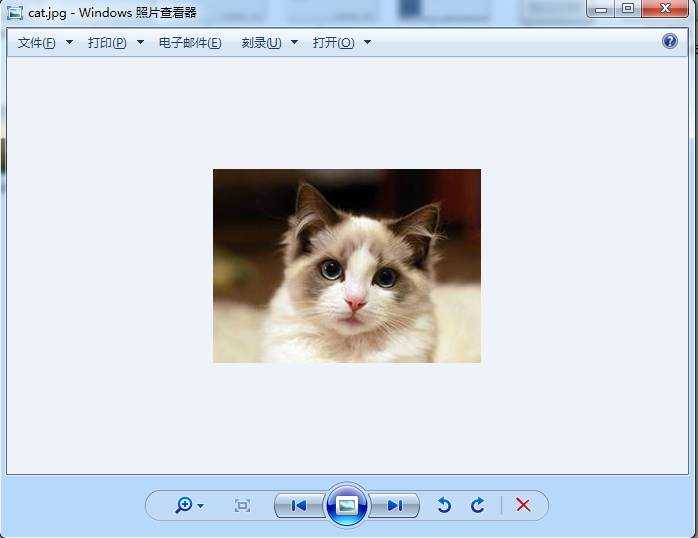
Open the saved file, which is our downloaded image
At this time, close the Follow TCP Stream pop-up window, and Wireshark displays the following information:
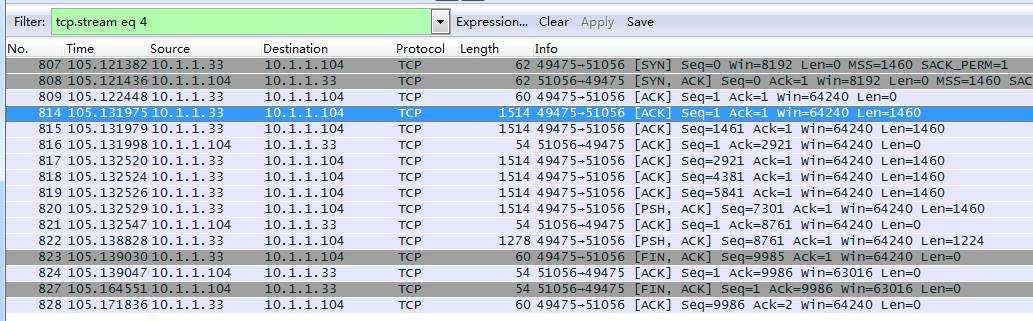
The above data packets show all non-FTP control data packets involved in transferring the cat.jpg file. During the process, you can clearly see, it involved a TCP three-way handshake and four-time connection closure. Learners should use the method above to find the information for the uploaded file.“